
Maintaining a properly tensioned garage door chain is crucial for ensuring smooth operation and avoiding safety hazards.
A well-adjusted chain allows the garage door to open and close seamlessly, reducing wear on both the door and the opener.
Conversely, a loose chain can lead to several issues, including noisy operation, uneven door movement, and potential damage to the door mechanism itself. Over time, these problems may escalate, resulting in costly repairs or, in worst-case scenarios, accidents.
This article will provide an in-depth guide on how to tighten garage door chain effectively, covering essential tools required for the task, detailed step-by-step instructions for adjusting the chain tension, and valuable preventive maintenance tips to keep your garage door functioning optimally.
Understanding the Garage Door Chain Mechanism
How the Chain Drive Works
The chain drive is an integral component of most garage door openers, serving as the mechanism that facilitates the movement of the garage door. When the opener is activated, the motor turns a sprocket, which in turn moves the attached chain along a rail.
This chain drives the trolley mechanism connected to the garage door, enabling it to rise and lower smoothly. Proper tension in the chain is essential as it ensures an efficient transfer of power from the motor to the door.
If the chain is too loose, it may result in slippage, leading to inconsistent door movement and increased strain on the opener’s motor, potentially causing premature wear or failure.
Identifying Symptoms of a Loose Chain
Recognizing the signs of a loose garage door chain early can save time and avoid further complications. Common indicators include noticeable slack in the chain itself, which can easily be observed when the garage door is closed.
Additionally, a loose chain often leads to noisy operation as it may rattle or vibrate against other components during movement.
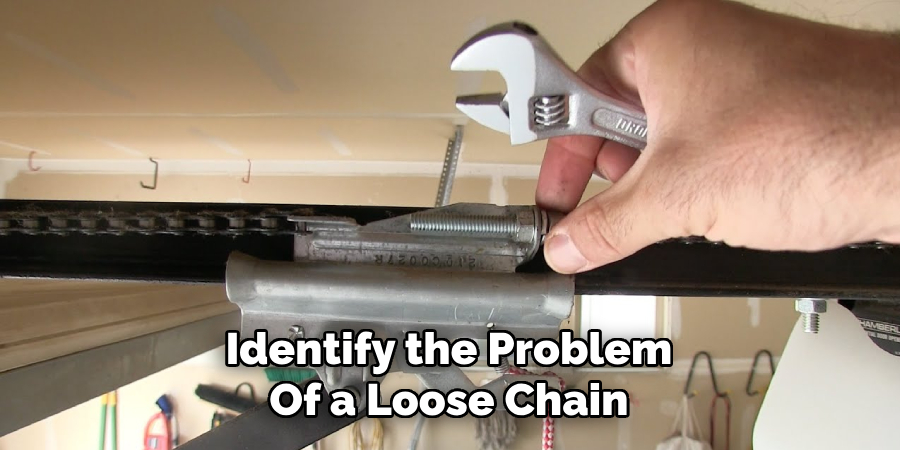
Uneven or jerky door movement is another telling sign; if your garage door hesitates or seems to struggle while opening or closing, it could result from an improperly tensioned chain. Addressing these symptoms promptly can help maintain the functionality of your garage door system and prolong its lifespan.
Safety Precautions Before Tightening the Chain
Disconnecting the Power
Before tightening your garage door chain, it is vital to disconnect the power to the opener. This precautionary step eliminates any risk of accidental activation while you are working on the mechanism.
Many garage door openers have a power switch or a plug that can be easily unplugged.
By ensuring that the opener is completely powered down, you protect yourself from potential injuries caused by unexpected door movement or electrical shock, allowing you to perform maintenance with confidence and safety.
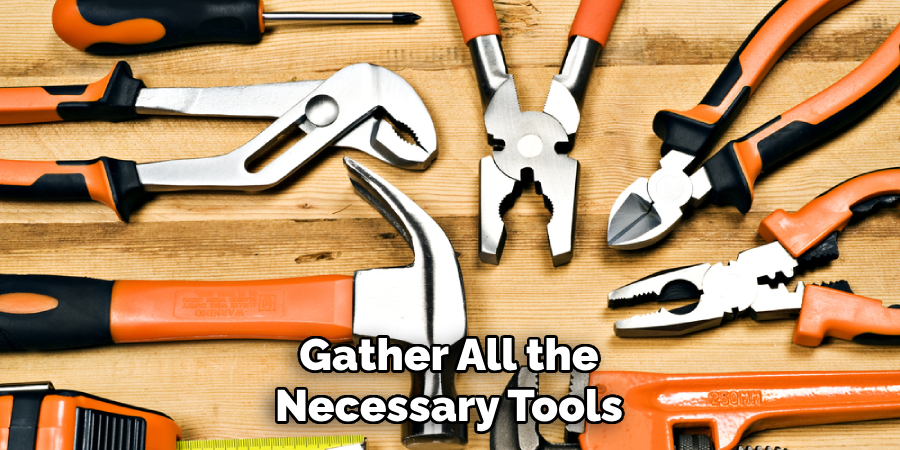
Gathering the Necessary Tools
Proper preparation is key to an efficient and effective chain-tightening process. Gather the essential tools you will need, typically a sturdy wrench for adjusting the chain tension, a ladder to access the garage door opener comfortably, and safety gear such as gloves and protective eyewear.
Wearing these safety items is crucial as they protect your hands and eyes from debris or accidental slips during maintenance. Having everything ready before you begin will streamline your efforts and enhance your safety.
Inspecting the Chain and Opener
Prior to tightening the chain, it’s recommended to perform a thorough visual inspection of the entire garage door system. Check the chain for any signs of wear or damage, such as fraying or rust.
The sprockets and other components should also be examined for any irregularities that might affect the chain’s tensioning. Identifying existing issues before they escalate can save you time and ensure that your garage door remains in optimal working condition.
Taking a few minutes to conduct this inspection lays a solid foundation for the subsequent tightening process.
How to Tighten Garage Door Chain: Step-by-Step Guide
Locating the Chain Adjustment Mechanism
The first step is to locate the chain adjustment mechanism to effectively tighten your garage door chain. This mechanism is generally found near the motor unit of your garage door opener or along the rail on which the chain travels.
Look for either a tension adjuster or a series of nuts securing the sprocket chain. Depending on your model, it may be necessary to refer to the manufacturer’s manual for specific guidance on identifying the adjustment mechanism.
Take your time to ensure you understand where the mechanism is located, as this will simplify the adjustment process and help you avoid any unnecessary complications.
Adjusting the Chain Tension
Once you have located the chain adjustment mechanism, you can proceed to tighten the chain. Begin by using your wrench to turn the adjustment nuts clockwise.This action will increase the tension on the chain.
It is essential to make incremental adjustments; turning the nuts just a quarter turn at a time is advisable to avoid over-tightening, which can lead to other issues.
After each adjustment, manually check the chain tension by lifting it slightly; there should be a small amount of give without excessive slack. Aim for about a half-inch of deflection when you pull down on the chain. If necessary, continue adjusting until you achieve the desired tension.

Keep an eye on the chain’s alignment during this process to ensure that it is running smoothly along the rail. This careful adjustment will help prolong the life of both the chain and the garage door opener.
Testing the Door Operation
After you have tightened the chain to your satisfaction, it’s time to reconnect the power to the garage door opener. Switch the power back on and test the garage door by opening and closing it a few times.
Pay close attention to the sound; an appropriately tightened chain should move smoothly without grinding or rattling noises. Observe the door’s movement as well—there should be no hesitation or jerky motions.
If you notice any problems, it may be necessary to readjust the tension. Conducting this operation test is crucial for ensuring that your garage door works efficiently and safely, providing you confidence in your maintenance efforts.
Troubleshooting Common Problems During Chain Adjustment
The Chain is Too Tight
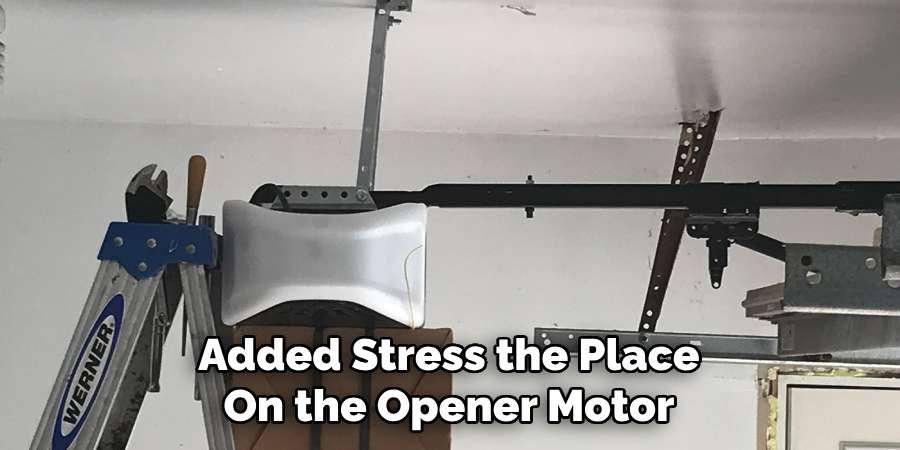
Over-tightening the garage door chain can create several issues, primarily due to the added stress it places on the opener’s motor. This excess tension can increase wear on the sprockets, resulting in expensive replacements over time.
A tightly secured chain can also hinder smooth door movement, causing it to strain underweight. If you suspect that the chain is too tight, you can easily remedy this by slightly loosening the adjustment nuts.
Use your wrench to turn the nuts counterclockwise, just a quarter turn, and check the tension again, ensuring there is a small amount of give when you pull down on the chain.
Chain is Still Loose After Adjustment
If the chain remains loose after you’ve made adjustments, there are a few potential culprits. Worn sprockets can fail to provide the necessary grip on the chain, leading to continued slack.
Alternatively, a stretched chain itself may not hold tension effectively. To address these issues, inspect the sprockets for signs of wear or damage and consider replacing them if needed.
If the chain is stretched, it may be time to replace it entirely. Sometimes, it may require additional adjustments to achieve the desired tension, so ensure that you carefully examine all components before concluding.
Unusual Noises After Adjustment
Post-adjustment, if you notice unusual noises like grinding or clicking, these sounds often indicate misalignment or improper tension.
Grinding noises can signal that the chain is rubbing against the opener’s housing or other components while clicking may result from components that are not meshing correctly.
To investigate, conduct a visual inspection to ensure that the chain and sprockets are aligned and securely fitted. If needed, re-adjust the tension or positioning of the chain and ensure that all parts are operating smoothly without obstruction.
Properly diagnosing and addressing these sounds is crucial for maintaining the efficient operation of your garage door system.
Conclusion
In summary, tightening your garage door chain involves a few essential steps: conducting a thorough visual inspection, locating the chain adjustment mechanism, carefully adjusting the chain tension, and testing the door’s operation.
Regularly maintaining your garage door system is crucial, as it prevents issues that could lead to costly repairs or safety hazards. By staying proactive and understanding how to tighten garage door chain correctly, you can ensure optimal performance and longevity of your garage door opener.
Remember, safety should always be a priority—if at any point you feel uncertain or encounter complications beyond your skill level, do not hesitate to seek professional assistance. Taking these precautions will help maintain a reliable and safe garage door system for years to come.