
Removing a pocket door can seem like a daunting task, but with the right tools and a systematic approach, it can be accomplished smoothly. Pocket doors are designed to slide into a compartment within the wall, making them a great space-saving solution. However, when they need to be repaired, replaced, or simply removed, their hidden nature presents unique challenges.
This guide on how to remove a pocket door will walk you through the necessary steps to safely and efficiently remove a pocket door, ensuring you have the knowledge and confidence to complete the task.
Why Remove a Pocket Door?
Before we dive into the steps for removing a pocket door, it’s important to understand why you may need to do so. Some common reasons for removing a pocket door include:
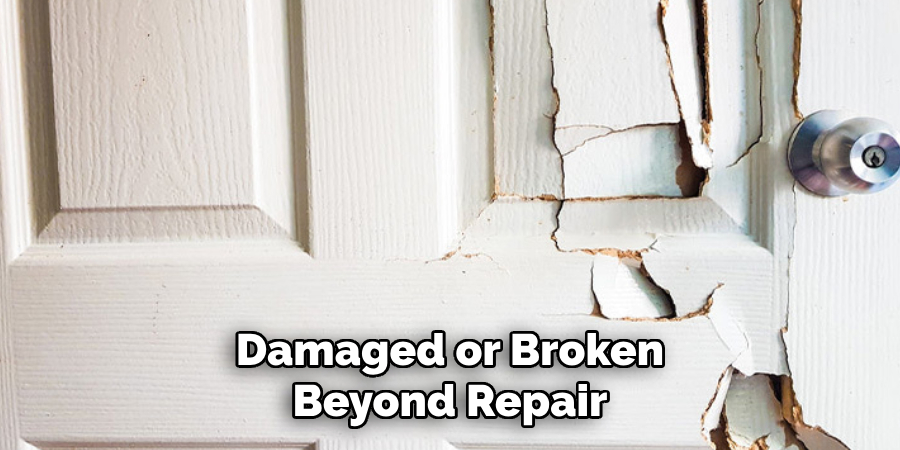
Damaged or Broken Door:
If your pocket door is damaged or broken beyond repair, it may be necessary to remove it and replace it with a new one. This is a common occurrence if the door has been in use for a long time or has experienced heavy wear and tear.
Renovation or Remodeling:
If you are renovating or remodeling your home, you may want to remove the pocket door to make room for other changes. This could include converting the space into an open concept layout or installing a different type of door.
Accessibility Needs:
In some cases, removing a pocket door may be necessary to accommodate accessibility needs. For example, if someone in your household uses a wheelchair, it may be necessary to remove the pocket door and widen the doorway for easier access.
Tools You Will Need
Before starting the process of removing a pocket door, make sure you have the necessary tools on hand. These may include:
Screwdriver:
You will need a screwdriver to remove any screws holding the door in place.
Pry Bar:
A pry bar can be useful for gently prying the door off its track and removing any trim pieces that may be securing it.
Utility Knife:
A utility knife can come in handy for cutting through caulk or paint around the door frame.
Hammer:
A hammer may be needed to remove any nails or staples holding the door frame in place.
8 Simple Step-by-step Guides on How to Remove a Pocket Door
Step 1: Gather Information and Prepare
Before diving into the physical task of removing the pocket door, it’s crucial to gather all the necessary information and prepare your workspace. Start by carefully examining the door and surrounding frame to identify how the door is installed and what types of fasteners (screws, nails, etc.) are used. Make sure you have a clear understanding of the door’s construction and the components you’ll need to dismantle. This step also includes assembling all your tools in a convenient location and ensuring you have adequate lighting in your workspace.
Additionally, it’s a good idea to have a plan for disposing of the removed door or safely storing it if you intend to reuse it in the future. Proper preparation will help make the entire process more efficient and minimize the risk of damage or injury.
Step 2: Remove Door Trim
Start by removing the trim around the door frame using a pry bar. Carefully insert the pry bar between the trim and wall, gently prying it off without causing any damage. If necessary, use a utility knife to cut through any caulk or paint that may be securing the trim in place. Once removed, set the trim pieces aside for later use.
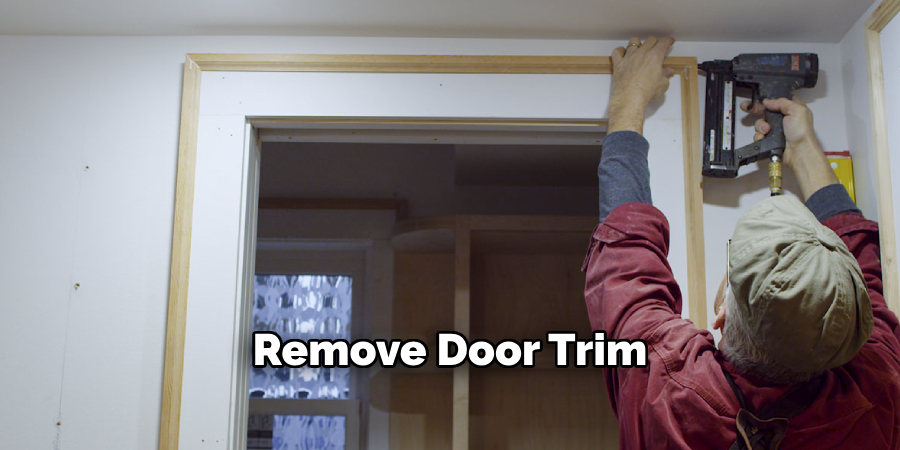
The trim removal process may vary depending on the type of trim you have. Some trims may be secured with screws or nails, while others may be glued in place. Make sure to take the necessary precautions when removing trim pieces to avoid any unnecessary damage.
Step 3: Remove Door Panels
With the trim out of the way, the next step is to remove the door panels from the track. Begin by locating the rollers or brackets that attach the door to the track at the top. You’ll likely need a screwdriver to loosen the screws or fasteners holding the rollers in place. Carefully support the door as you detach it from the track to prevent it from falling.
Once the door is free from the top track, gently angle it out from the bottom track. If the door is heavy, consider having a helper assist you in this step to safely manage the weight. After removing the door panels, set them aside in a safe, flat area to prevent warping or damage, especially if you plan to reuse them. Inspect the rollers and track for any wear or damage, as these components might also need repair or replacement.
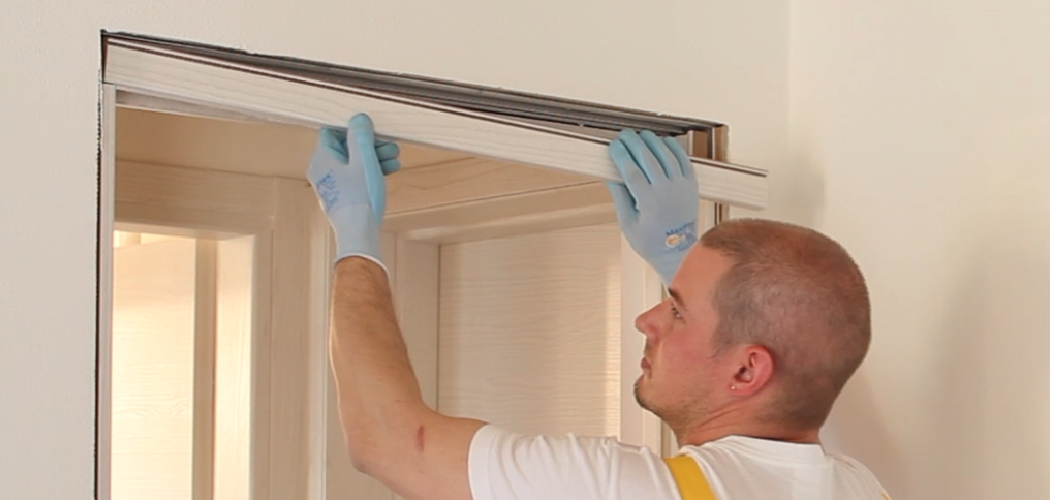
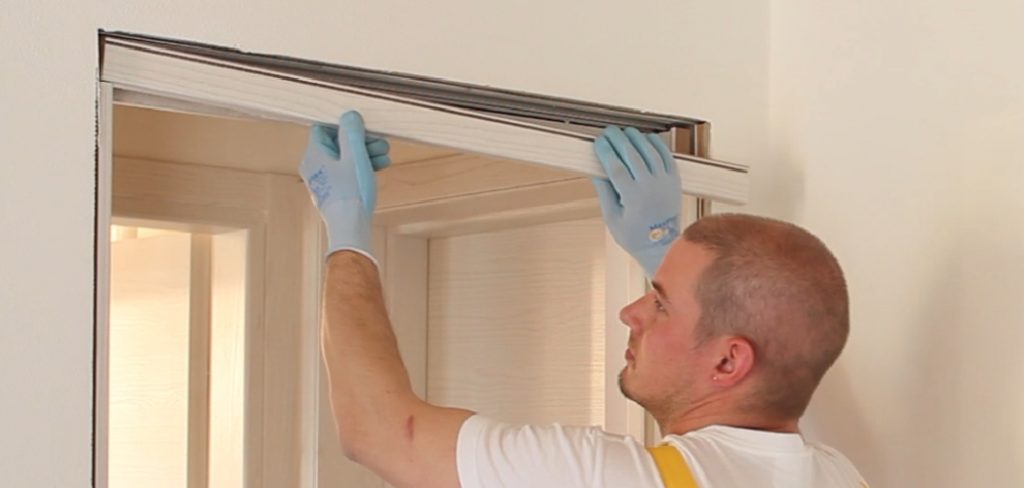
Step 4: Remove Door Frame
With the door panels removed, it’s time to tackle the frame. Start by removing any screws or fasteners holding the frame in place. These may be located on the sides, top, and bottom of the frame. If there are any nails or staples securing the frame, use a hammer to remove them carefully.
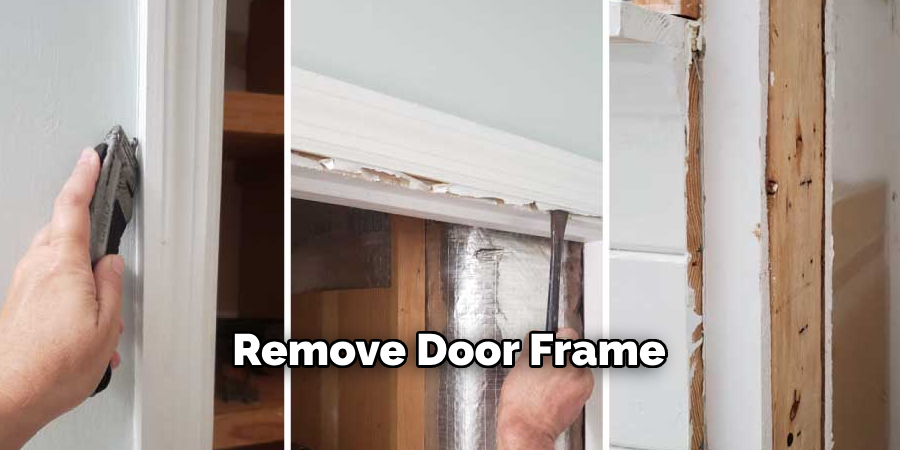
Once all fasteners have been loosened or removed, gently pull out the frame from its pocket in the wall. Be sure to support it as you do so to prevent any damage or injury.
Step 5: Patch Any Holes
Removing a pocket door often leaves behind holes that need to be patched up. Use spackling compound or putty to fill in any holes or gaps left by the door frame. Smooth out the surface and let it dry according to the product instructions.
You may also want to take this opportunity to repaint the area for a clean finish before reinstalling a new door or leaving it open.
Step 6: Install New Door or Leave Open
At this point, you have the option of installing a new door in place of the removed pocket door or leaving the space as an open doorway. If you are installing a new door, follow the manufacturer’s instructions for installation and use your prepared workspace and tools to complete the task.
If you choose to leave the space open, make sure to properly secure and seal any electrical wiring or pipes that may be exposed. You may also need to install drywall or add trim pieces around the opening for a finished look.
Step 7: Reinstall Trim
Once the door frame is removed and any necessary repairs or installations have been completed, it’s time to reinstall the trim pieces that were removed in the initial steps. Use a hammer and finishing nails to secure the trim in place, making sure everything lines up properly. If there are any gaps between the trim and wall, use caulk or putty to seal them for a clean finish.
It’s also a good idea to touch up the trim with paint or stain to match the rest of the room.

Step 8: Dispose of Old Door (If Applicable)
If you removed a pocket door because it was damaged or no longer needed, make sure to properly dispose of it. You may be able to recycle some materials or donate the door if it is still in good condition. Otherwise, check with your local waste management facility for proper disposal methods.
Following these steps on how to remove a pocket door will help you successfully remove a pocket door and prepare the space for your desired use. Remember to take caution and be patient, as this task may require some physical effort and time. If at any point you feel overwhelmed or unsure, it’s always best to seek professional assistance.
Frequently Asked Questions
Q1: Can I Remove a Pocket Door by Myself?
A: While it is possible to remove a pocket door on your own, it may be safer and more efficient to have a helper assist you. The weight and size of the door may make it difficult for one person to handle alone, and having a second set of hands can also help with stability and preventing damage.
Q2: Will Removing a Pocket Door Damage My Walls?
A: As long as proper precautions are taken, removing a pocket door should not cause any damage to your walls. Make sure to carefully remove trim pieces and support the door as you detach it from the track to prevent any accidents or mishaps.
Q3: How Do I Know if I Need to Replace My Pocket Door?
A: You may need to replace your pocket door if it is damaged beyond repair, or if you want to change the style or design of the door. It’s also a good idea to inspect and replace any worn or damaged rollers or track components during this process.
Q4: Can I Reuse My Old Door Panels After Removing a Pocket Door?
A: Yes, you can reuse your old door panels if they are still in good condition. However, it’s always a good idea to inspect them for any damage before reinstalling. You may also choose to install new panels for a fresh look.
Conclusion
Removing a pocket door can be a straightforward task when approached with the right tools and knowledge. By following the steps outlined in this guide on how to remove a pocket door, you can safely and efficiently remove the door, make necessary repairs or updates, and either install a new door or repurpose the space as needed.
Remember to take your time, use caution, and seek help if needed to ensure the project goes smoothly. With careful planning and execution, you’ll be able to achieve a clean and professional result that enhances the functionality and aesthetic of your living space.