Are you tired of constantly charging the batteries on your Ring Doorbell? Or you’ve recently moved and want to switch from battery power to wired power for your doorbell.

How to change power source on Ring Doorbell can optimize its performance and ensure continuous operation. Whether you’re transitioning from battery power to a hardwired connection for a consistent power supply or simply replacing an existing setup, this guide will walk you through each process step. By understanding the necessary tools, safety measures, and specific requirements of your Ring Doorbell model, you can easily switch power sources, enhancing both convenience and reliability.
Let’s delve into the essentials and details to effortlessly set up your Ring Doorbell with a new power source.
What Will You Need?
Before starting, you’ll need to gather the necessary tools and equipment. The specific supplies required may vary depending on your Ring Doorbell model and whether you’re switching from battery power or replacing an existing setup. Here are some essential items that you will likely need:
- Screwdriver (typically a Phillips head)
- Low-voltage wires of appropriate length (if installing a wired connection)
- Drill (if using low-voltage wires)
- Wire strippers/cutters (if installing a wired connection)
- Voltage tester (recommended for safety when working with electrical connections)
It’s always best to refer to the user manual or online resources provided by Ring for your specific model to ensure you have all the necessary tools and equipment.
10 Easy Steps on How to Change Power Source on Ring Doorbell
Step 1. Turn Off Power:
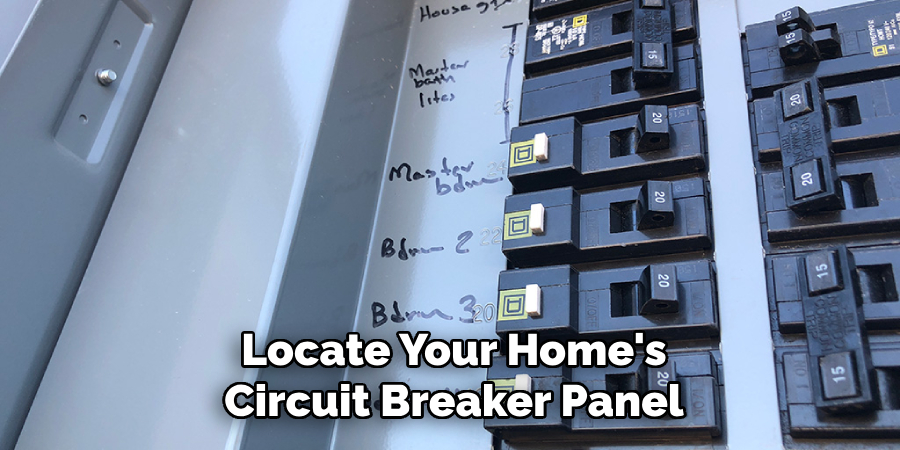
Before beginning any installation or maintenance on your Ring Doorbell, it’s crucial to ensure your safety by turning off the power supply to your existing doorbell system. This step prevents any risk of electrical shock during the process. To do this, locate your home’s circuit breaker panel and switch off the breaker connected to your doorbell circuit.

In case you are unsure which breaker controls the power to the doorbell, it’s advisable to turn off the main power to your home. Use a voltage tester to confirm that there is no electrical current at the doorbell wires or existing chime unit before proceeding to the next steps. These precautions will help protect you and your electrical system, allowing you to proceed confidently.
Step 2. Remove the Ring Doorbell from Its Mounting:
With the power safely turned off, the next step is to remove the Ring Doorbell from its current mounting. Using a screwdriver, typically a Phillips head, unscrew the security screws that hold the doorbell to the mounting bracket. Grip the doorbell firmly, then gently pull it away from the wall or mounting plate. Be cautious not to damage any wires connected to the back of the doorbell during this process. Keep the screws and any small parts in a safe place to avoid losing them. Once detached, you can see the wiring setup and assess how to change the power source.
Step 3. Disconnect the Existing Wiring:
With your Ring Doorbell safely removed from its mount, it’s time to disconnect any existing wiring. Carefully loosen the terminal screws connecting the wires to the back of the doorbell. If you’re switching from a battery setup, there may be no wires to remove. However, if your doorbell was previously wired, gently pull the cables away after loosening them, taking care to note their original configuration. This will help in the event you need to reconnect them.

Double-check that the wires are free from any current by using a voltage tester. Once disconnected, you are ready to prepare the new wiring or battery connection for your Ring Doorbell.
Step 4. Prepare the New Wiring or Battery Connection:
Now that the existing wiring is disconnected, it’s time to prepare the new wiring or battery connection based on your preferences. For a wired connection, begin by assessing the length and condition of the existing low-voltage wires. If needed, cut and strip the ends using wire strippers to ensure clean, conductive connections. If converting to a battery setup, ensure you have freshly charged batteries. Ring
Doorbell models compatible with both power sources will have designated connection points for each option, so refer to your user manual for specific instructions. This preparation is critical to ensure that the new power source functions efficiently without unnecessary interruptions.
Step 5. Connect the New Wiring or Install the Battery:
With your power source prepared, you can now connect the new wiring or install the battery. Attach the low-voltage wires to the appropriate terminals on the back of your Ring Doorbell for a wired setup. Ensure the connections are secure and the wires are snugly tightened under the terminal screws, as loose connections can cause interruptions in power supply. If you’re using a battery, insert it into the designated compartment and ensure it is fully seated.
For dual-power models, ensure that no unnecessary wires are left exposed to maintain a tidy and safe installation. Once the power source is effectively connected or installed, you can reattach your Ring Doorbell to its mounting.

Step 6. Reattach the Ring Doorbell to Its Mounting:
With your new power source connected, it’s time to reattach the Ring Doorbell to its mounting bracket. Carefully align the doorbell with the mounting bracket, ensuring any wires are neatly tucked behind it and not caught or pinched. Once aligned, use the security screws you previously removed to fasten the doorbell to the bracket securely.
Tighten the screws firmly, but avoid over-tightening, which could damage the doorbell housing or bracket. Ensuring a secure fit will help prevent the doorbell from loosening over time due to vibrations or environmental factors. After ensuring the doorbell is mounted correctly, you’re ready to move on to the following steps to complete the setup.
Step 7. Restore Power to the Doorbell Circuit:
Now that your Ring Doorbell is securely mounted and connected to its new power source, restoring power to the doorbell circuit is time. Return to your home’s circuit breaker panel and switch the breaker back to the “on” position for the doorbell circuit. If you have turned off the main power, ensure that all necessary breakers are properly reset to restore power to your home. Once the power is restored, give your Ring Doorbell a moment to power up and run through its initial setup.
You may notice the indicator light on the doorbell illuminating as it starts operating, signaling that the device is receiving power. After allowing your doorbell to initialize a few moments, proceed with testing and finalizing the setup.
Step 8. Test the Doorbell and Complete Setup:
With power restored, it’s essential to ensure your Ring Doorbell functions correctly. Press the doorbell button to confirm that the chime rings inside your home and that notifications are received on your connected devices, such as smartphones or tablets. Check the Ring app to verify the device is online and streaming video correctly. If you experience any issues, consult the troubleshooting section of your user manual for guidance.

Adjusting settings within the app or checking the physical connections may be necessary. Once you’ve confirmed the doorbell’s operation, customize any app settings to tailor the device to your preferences. Completing this step ensures your Ring Doorbell is fully operational and ready to provide security and convenience benefits.
Step 9. Maintain and Troubleshoot Your Ring Doorbell:
Regular maintenance and troubleshooting are vital for keeping your Ring Doorbell in optimal condition. Periodically check the device for any signs of wear, such as loose mounting screws or exposed wiring, and secure them as needed. Ensure your doorbell’s software is up-to-date by checking for updates through the Ring app, which often includes new features or security enhancements. If you encounter an issue, such as inconsistent power or connectivity problems, consult the troubleshooting section in your user manual.
Common troubleshooting steps may involve resetting the doorbell, inspecting the wiring, or reconfiguring Wi-Fi settings. Consistent maintenance will help prolong the device’s lifespan and ensure reliable performance.
Step 10. Secure the Area and Personal Information
After your Ring Doorbell installation and setup are complete, secure the area around the doorbell and protect your personal information. Ensure the doorbell is securely mounted to prevent theft or tampering. Consider installing additional security measures, such as motion sensor lights or security cameras, to enhance surveillance around the doorbell.
Furthermore, safeguard your data by enabling two-factor authentication on your Ring account and using a strong, unique password. Review your account settings regularly for any unauthorized access and update passwords periodically for added security. Keeping your device secure will help maintain the privacy and safety of your home environment.
By following these steps, you can successfully install and set up your Ring Doorbell to enjoy its security and convenience features.
Conclusion
How to change power source on Ring Doorbell can seem daunting, but with a systematic approach, it can be a straightforward process.
By carefully following each step—from preparing your power source and safely handling electrical connections to securely mounting the device and restoring its power—you can ensure optimal functionality and reliability of your doorbell. It’s essential to prioritize safety and ensure all connections are secure and properly insulated. Regular maintenance and being vigilant about software updates will ensure that your Ring Doorbell remains operating efficiently for years.
Taking these steps enhances your home’s security and increases your peace of mind, knowing that your entrance is under vigilant and reliable surveillance.
About
Safety Fic is a distinguished figure in the world of Diy design, with a decade of expertise creating innovative and sustainable Diy solutions. His professional focus lies in merging traditional craftsmanship with modern manufacturing techniques, fostering designs that are both practical and environmentally conscious. As the author of diy, Safety Fic delves into the art and science of Safety Fic-making, inspiring artisans and industry professionals alike.
Education RMIT University
(Melbourne, Australia) Associate Degree in Design (Safety Fic) Focus on sustainable design, industry-driven projects, and practical craftsmanship. Gained hands-on experience with traditional and digital manufacturing tools, such as CAD and CNC software.
Nottingham Trent University
(United Kingdom) Bachelor’s in diyfastly.com and Product Design (Honors) Specialized in product design with a focus on blending creativity with production techniques. Participated in industry projects, working with companies like John Lewis and Vitsoe to gain real-world insights.
Publications and Impact
In diy, Safety Fic his insights on indoor design processes, materials, and strategies for efficient production. His writing bridges the gap between artisan knowledge and modern industry needs, making it a must-read for both budding designers and seasoned professionals.
