

Tinting safety glass at home can be a rewarding and cost-effective way to improve both the functionality and aesthetics of your glass surfaces. Whether you’re looking to reduce glare, enhance privacy, or add a modern touch to your windows or doors, applying tint yourself allows for creative flexibility and customization.

While the process may seem daunting at first, with the right tools, materials, and step-by-step guidance on How to tint safety glass at home, it can be straightforward and manageable even for beginners. This guide will walk you through everything you need to know to successfully tint your safety glass at home.
Why Tint Safety Glass at Home?
Tinting safety glass at home has several benefits, including:
Reducing Glare:
Tinted safety glass can help reduce the amount of glare from sunlight or artificial light sources, making it easier to see and reducing eye strain. This is especially beneficial for rooms with a lot of natural light or screens, such as home offices or living rooms.
Enhancing Privacy:
Tinted safety glass can also increase privacy by making it more difficult for people to see inside your home. This can be particularly useful for windows facing busy streets or neighbors’ homes.
Protection from UV Rays:
Tinted safety glass provides protection against harmful ultraviolet (UV) rays, which can damage furniture, floors, and walls over time. Additionally, UV rays are known to cause skin cancer, so tinting your windows at home can add an extra layer of protection for you and your family.
Materials You Will Need
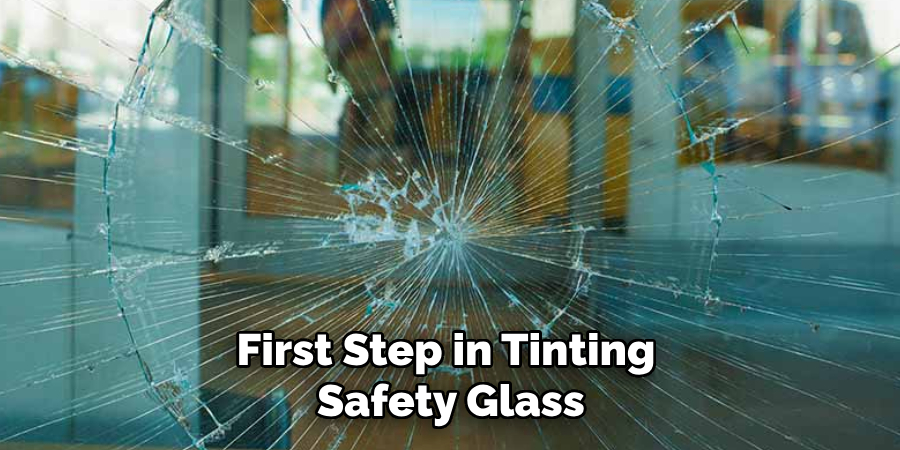
Safety Glass:
The first step in tinting safety glass at home is to make sure you have the right type of glass. Safety glass, also known as tempered or laminated glass, is specifically designed to be more durable and shatter-resistant than regular glass. This makes it a safer option for tinting.
Tint Film:
There are several types of tint film available, including dyed, metallic, and ceramic options. Each type has its own benefits and drawbacks, so it’s important to research and choose the best option for your needs. Make sure to purchase enough film to cover all the desired surfaces, with some extra just in case.
Window Cleaner:
Before applying the tint film, it’s crucial to thoroughly clean the surface of the glass. Use a window cleaner and a lint-free cloth to remove any dirt, dust, or debris from the glass.
Spray Bottle:
A spray bottle filled with water will be used to wet the glass before applying the tint film. This helps prevent air bubbles and allows for easier placement of the film.
Squeegee:
A squeegee is an essential tool for smoothing out and removing excess water or air from between the tint film and the glass.
Utility Knife:
A utility knife will be needed to cut the tint film to fit your specific glass surfaces.
7 Step-by-step Guidelines on How to Tint Safety Glass at Home
Step 1: Measure and Cut Film
Begin by carefully measuring the dimensions of the safety glass you plan to tint. Use a measuring tape to determine both the height and width of the glass surface and record these measurements accurately. Once you have the measurements, unroll the tint film on a clean, flat surface and use a straightedge or ruler to mark the appropriate dimensions.
Allow for a little extra film around the edges to ensure full coverage and to account for any slight misalignments. Using a utility knife, carefully cut along the marked lines to create a piece of film that matches the size of your glass surface. Be precise to avoid uneven edges or wasted material, as this will make the application process smoother in the following steps.

Step 2: Clean the Glass Thoroughly
Properly cleaning the glass is a crucial step to ensure a smooth and professional-looking tint application. Begin by spraying the entire surface of the safety glass with a high-quality window cleaner. Use a lint-free cloth or microfiber towel to wipe away dirt, dust, fingerprints, and smudges. Pay extra attention to the edges and corners, as these areas are often prone to buildup.
After cleaning, inspect the glass under light to ensure no residue or streaks remain, as any impurities may cause bubbles or imperfections in the tint film. If needed, repeat this process until the glass is spotless. Once clean, avoid touching the glass directly with your hands to prevent transferring oils or debris.
Step 3: Prepare the Tint Film
Once the glass is clean and ready, lay the pre-cut tint film on a clean, flat surface with the clear protective backing facing up. Carefully peel away a small section of the protective backing layer to expose the adhesive side of the film. To prevent the adhesive from collecting dust or debris, avoid touching it with your hands and work in a clean, dust-free environment.
As you peel, use a spray bottle filled with water to mist the adhesive side of the film. This step is essential, as the water helps prevent the adhesive from sticking too quickly and allows you to adjust the position of the film during application. Continue peeling back the protective layer gradually, spraying the adhesive side with water as you go until the entire backing is removed and the adhesive is evenly misted. Be gentle during this process to avoid creasing or damaging the film.
Step 4: Apply the Tint Film
Carefully align the tint film with one edge of the glass surface, making sure to leave a slight overlap around all sides to ensure full coverage. Once aligned, use your hands or a squeegee to begin pressing the film onto the glass from top to bottom. As you do this, take care not to let any air bubbles form between the film and the glass. If necessary, lift and reposition the film while it is still wet with water to eliminate any bubbles or wrinkles.
Once you have evenly pressed out any air bubbles and smoothed out all wrinkles, use a sharp utility knife to trim off any excess overhang around the edges of the glass.
Step 5: Use a Squeegee to Remove Excess Water
After aligning and applying the film, use a squeegee to gently press out any remaining air bubbles or water pockets between the film and the glass. Begin at one edge of the glass and sweep the squeegee in a vertical motion from top to bottom, pressing as you go to remove all excess air and liquid. Be sure not to apply too much pressure, as this may damage or crease the film.
The water will help the squeegee glide smoothly over the surface of the film, leaving a clean and even finish. If you notice any air bubbles or wrinkles forming while using the squeegee, gently lift and reposition the film before continuing to press out the excess water. Work carefully and patiently during this step to avoid any imperfections in your final product.
Step 6: Let it Dry
Once the tint film is securely applied and all excess water has been removed, allow the film to dry completely. This drying process typically takes 24 to 48 hours, depending on the temperature and humidity in your environment. During this time, avoid touching or disturbing the film to ensure that it adheres properly to the glass surface.
Keep the area around the glass free from dust and debris to prevent contamination while the film sets. If possible, place the tinted glass in a well-ventilated area with a stable temperature to expedite the drying process. Be patient during this step, as allowing the film to fully cure will result in a more polished and professional finish.
Step 7: Clean and Inspect the Finished Tint
Once the tint has dried completely, carefully clean any remaining residue or streaks from the surface of the glass with a lint-free cloth. Using a light source, inspect your finished product for any air bubbles, wrinkles, or imperfections that may have occurred during application. If necessary, gently lift and reposition the film to correct these issues before allowing it to dry again.
It is essential to properly maintain and care for your tinted glass to ensure its longevity. Avoid using abrasive materials or harsh chemicals when cleaning, as these may damage the film. Instead, use a gentle window cleaner and a soft cloth to remove any dirt or smudges from the surface of the tint. With proper care and maintenance, your tinted glass will provide you with privacy and protection for many years to come.
Frequently Asked Questions
Q: How Long Does It Take for the Tint to Fully Dry?
A: The drying process usually takes 24 to 48 hours, depending on the temperature and humidity in your environment. The film will be fully cured and ready for use once it is completely dry.
Q: Can I Tint Over the Existing Tint?
A: Yes, but it may affect the overall appearance and effectiveness of the tint. It is recommended that any old tint be removed before applying a new layer to achieve the best results.
Q: How Do I Remove Air Bubbles from the Film?
A: Using a squeegee and plenty of water, gently press out any air bubbles as you go during application. If necessary, lift and reposition the film while it is still wet to eliminate any bubbles or wrinkles.
Q: Can I Apply Tint on Curved Windows or Surfaces?
A: Yes, tint can be applied to curved surfaces, but it may require more skill and experience to achieve a smooth and even application. It is recommended to practice on flat surfaces first before attempting to apply tint on curved windows or surfaces.
With these steps on How to tint safety glass at home, you can now confidently upgrade your windows with added privacy and protection. Remember to take your time and work carefully to achieve the best results.
Conclusion
Tinting safety glass is a simple process that can add style and functionality to any space. By following these steps on How to tint safety glass at home and using high-quality materials, you can achieve professional-looking results at home or in a commercial setting. Remember to take your time, work carefully, and maintain a clean environment throughout the application process.
With patience and attention to detail, you can enjoy all the benefits of tinted safety glass in no time! So go ahead and let the light shine through while maintaining your desired level of privacy with professionally applied tinted safety glass. Happy tinting!