

Installing safety glass for your garage windows is an essential step in enhancing the security and durability of your space. Safety glass not only provides added protection against break-ins but also ensures the windows can withstand accidents or harsh weather conditions.

This guide on How to install safety glass for garage windows will walk you through the process of selecting and installing safety glass in a straightforward manner, ensuring your garage remains secure and functional.
Why Choose Safety Glass?
Before diving into the installation process, it’s crucial to understand why safety glass is the preferred option for garage windows. Safety glass refers to a type of glass that has been specially treated or manufactured to be stronger and more durable than standard glass. This makes it resistant to shattering and breaking, providing an added layer of protection for your garage windows.
Safety glass is also designed to minimize the risk of injury if it does break. Unlike regular glass that can shatter into sharp, dangerous pieces, safety glass is designed to break into small, rounded pieces that are less likely to cause harm.
Additionally, safety glass offers better insulation and energy efficiency compared to standard glass. This can help keep your garage cooler in the summer and warmer in the winter, ultimately saving you money on heating and cooling costs.
Types of Safety Glass
There are two main types of safety glass: tempered and laminated. Tempered safety glass is created by heating and then rapidly cooling standard glass, making it up to five times stronger than regular glass. When broken, it shatters into small pieces instead of sharp fragments.
Laminated safety glass is made by fusing two or more layers of standard glass with a durable interlayer in between. This results in a strong, resilient glass that will hold its shape even if it cracks.
Both tempered and laminated safety glass are suitable options for garage windows, so the choice ultimately comes down to personal preference and budget.
9 Steps on How to Install Safety Glass for Garage Windows
Now that you understand the importance of safety glass and the types available let’s dive into the steps for installing it on your garage windows:
Step 1: Measure Your Windows
The first step in installing safety glass for your garage windows is to take accurate measurements of the window openings. Use a tape measure to determine the height and width of each window frame, measuring from edge to edge. Make sure to take measurements at multiple points, such as the top, middle, and bottom, to ensure the frame is consistent in size.

Note down the smallest measurement in each dimension to account for any irregularities in the frame. These precise measurements will help you order safety glass that fits perfectly, ensuring a snug and secure installation.
Step 2: Choose Your Safety Glass
Based on your measurements, you can now determine the type and size of safety glass needed for each window. As mentioned earlier, both tempered and laminated safety glass are suitable options for garage windows. Consider your budget, personal preferences, and any specific needs when making your selection.
You can also opt for tinted or frosted safety glass for added privacy and aesthetic appeal. Just make sure to order the appropriate size and type based on your measurements.
Step 3: Prepare Your Workspace
Before starting the installation process, clear out any objects or debris from around the window area. This will give you ample space to work and reduce the risk of accidents during the installation process.
It’s also important to wear appropriate protective gear, such as gloves and safety glasses when handling the glass. Safety gloves will protect your hands from sharp edges, while safety glasses will shield your eyes from any small pieces of glass that may break off during installation.
Step 4: Remove Old Glass
To remove the old glass from the window frame, begin by carefully inspecting the frame for any screws, nails, or glazing that may be holding the glass in place. Use a screwdriver or a putty knife to loosen and remove these fasteners. If there is old glazing or sealant around the edges of the frame, gently scrape it away using the putty knife to expose the edges of the glass.
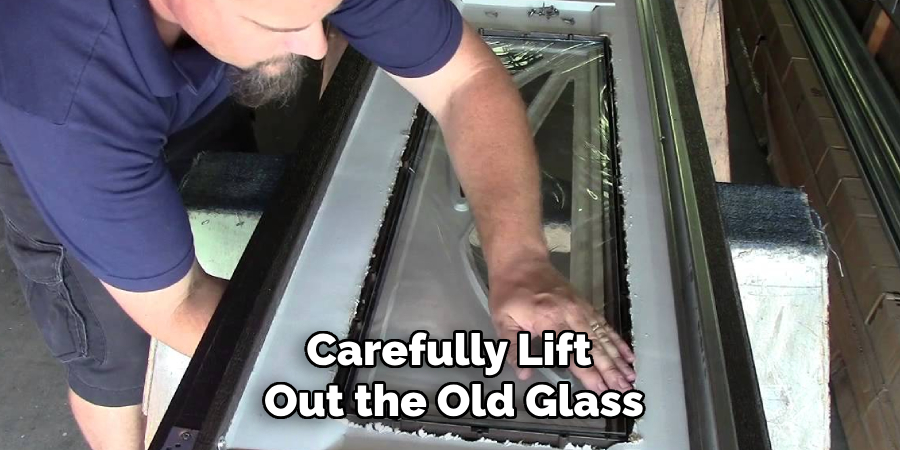
Once the fasteners and sealant are removed, carefully lift out the old glass. If the glass is broken, use caution and remove the shards piece by piece while wearing safety gloves and glasses for protection. Place the removed glass in a safe location for proper disposal. Ensure the window frame is completely cleared of all debris and remnants of old glass before moving on to the next step.
Step 5: Prep the Window Frame
With the old glass removed, it’s time to prep the window frame for the installation of the safety glass. Start by cleaning the inside of the frame with a mild soap and water solution, ensuring all dirt and debris are removed. Wipe down the frame with a dry cloth or let it air dry completely before proceeding.
Next, apply a thin layer of silicone sealant around the edges of the window frame. This will help create a waterproof seal and prevent any moisture from seeping in between the glass and frame.
Step 6: Install Your Safety Glass
Carefully place your chosen safety glass into the prepared window frame, ensuring that it fits snugly. If the glass is too big, you can use a glass cutter to trim off any excess edges until it fits perfectly.
Once the glass is in place, press down gently around the edges to ensure that it adheres to the silicone sealant and creates a tight seal. Wipe away any excess sealant that may have oozed out from between the frame and glass.
Step 7: Secure with Glass Clips
For added security, you can use glass clips or storm window hangers to secure your safety glass in place. These clips are typically placed at regular intervals along the edges of the window frame and help hold the glass firmly in place.
Follow manufacturer instructions for proper placement and installation of the clips. Make sure they are not too tight as this can cause stress on the glass, leading to potential breakage.
Step 8: Caulk the Edges
To further reinforce the seal around your safety glass, apply a bead of silicone caulk along all edges of the window frame where it meets the glass. Use a caulking gun for precise application and smooth out any excess with a putty knife or gloved finger.
Allow the caulk to dry completely before moving on to the final step.
Step 9: Clean and Inspect
Once everything is securely in place, wipe down your newly installed safety glass with a clean cloth to remove any smudges or fingerprints. Take a step back and inspect the window to ensure that everything looks aligned, secure, and watertight.

Congratulations, you have successfully installed safety glass for your garage windows! Now, you can enjoy peace of mind knowing that your family and belongings are protected by strong and resilient glass. Remember to properly dispose of any remaining materials and tools used during the installation process.
Following these steps on How to install safety glass for garage windows and taking the necessary safety precautions will ensure a successful and safe installation of your garage window safety glass. Now, you can enjoy natural light, increased security, and improved energy efficiency in your garage space. Don’t hesitate to consult a professional for assistance if needed, as safety should always be a top priority when working with glass. Stay safe and happy installing!
Frequently Asked Questions
Q1: What is the Difference Between Tempered and Laminated Safety Glass?
Tempered safety glass goes through a heating and cooling process that makes it stronger and more resistant to breakage. Laminated safety glass consists of two or more layers of glass with a layer of plastic in between, providing extra strength and durability. Both types of safety glass are suitable for garage windows, but laminated safety glass may be a better option for areas prone to severe weather or impact.
Q2: Can I Install Safety Glass Myself?
It is possible to install safety glasses yourself, but it is recommended to consult a professional for assistance. Handling and installing glass can be dangerous and requires the right tools and skills. It’s always best to prioritize your safety and seek help if needed.
Q3: How Often Should Garage Window Safety Glass be Replaced?
Safety glass should not need frequent replacement as it is designed to withstand impact and harsh weather conditions. However, it’s important to regularly inspect the glass for any cracks or damage and replace it if necessary. Also, if there are any changes or renovations made to the garage that may affect the structural integrity of the window, it’s best to inspect and possibly replace the safety glass as a precaution.
Q4: How Can I Improve Energy Efficiency with Safety Glass?
Safety glass can help improve energy efficiency in your garage by reducing heat and cold transfer. To further optimize its effectiveness, you can also install weatherstripping around the edges of the window frame to prevent drafts and seal any gaps. Additionally, consider choosing low-E (low-emissivity) safety glass, which has a special coating that reflects heat and reduces UV rays entering your garage space. This can also help save on energy costs in the long run.

Conclusion
Installing safety glass for your garage windows is an important step in ensuring the safety and security of your home. By following these 9 steps on How to install safety glass for garage windows, you can confidently install tempered or laminated safety glass on your own without having to hire a professional. Remember to always prioritize safety by wearing protective gear, properly disposing of old materials, and following manufacturer instructions. Enjoy your newly installed safety glass windows and the added benefits of privacy, energy efficiency, and improved aesthetics.