
Sliding glass doors are a stylish and functional feature in many homes, offering ease of access to outdoor spaces and allowing natural light to illuminate your living areas. However, ensuring the security of these doors is vital, as they can be an entry point for potential intruders. Sliding glass door locks play a crucial role in protecting your home and belongings, making it essential to maintain them in good condition.
You might need to replace the lock for several reasons, such as damage due to wear and tear, losing keys, or upgrading to a more robust lock for enhanced security. This article will provide a comprehensive, step-by-step guide on how to change a lock on a sliding glass door, helping you complete the task efficiently and effectively to keep your home safe.
Tools and Materials Needed
Before starting the lock replacement process, gather all the necessary tools and materials to ensure a smooth and efficient workflow. Below is a list of essential items you will need:
Essential Tools:
- Screwdriver (Phillips and flathead): For removing and securing screws.
- Drill (optional): Useful for dealing with stubborn or stripped screws.
- Measuring Tape: To accurately measure the dimensions of the current and replacement lock.
- Lubricant (like WD-40): To loosen jammed screws or parts and ensure smooth functionality.
Materials:
- Replacement Lock: Make sure it is compatible with your sliding glass door model.
- Screws: These are typically included with the replacement lock.
- Cleaning Cloth: To clean the door track or lock area before installation.
Safety Gear:
- Gloves: To protect your hands during the process.
- Safety Glasses: To shield your eyes, especially when using a drill.
Preparation Tips:
- Carefully check the manufacturer’s instructions for the new lock for specific details and compatibility requirements.
- Use the measuring tape to verify that the replacement lock matches the dimensions of the existing lock, ensuring a proper fit.
By assembling all the required tools and materials ahead of time, you’ll be well-prepared to handle the replacement process with ease and precision.
How to Change a Lock on A Sliding Glass Door: Removing the Old Lock
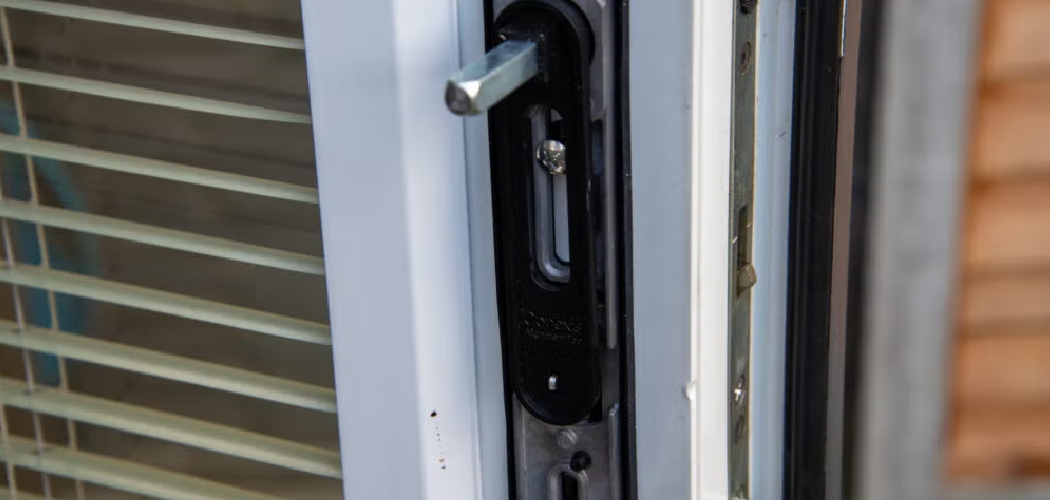
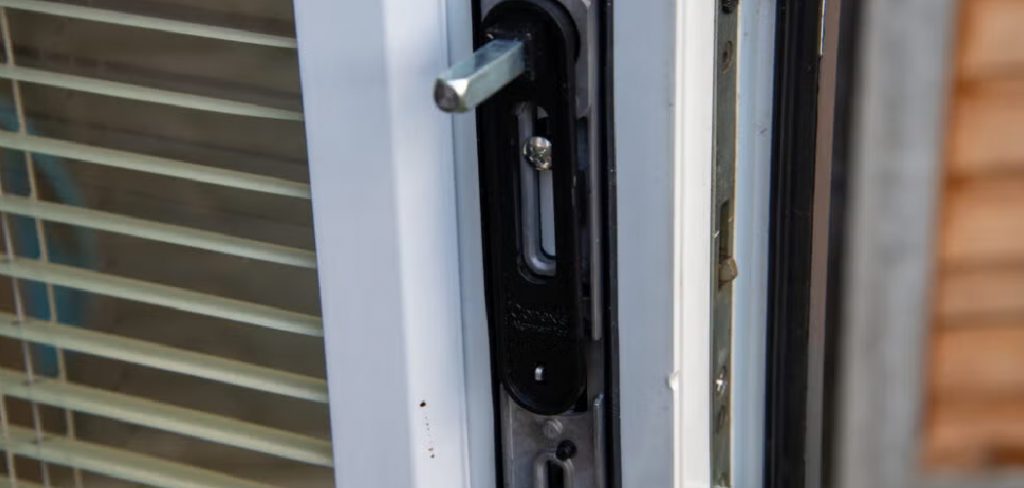
Step 1: Locate the Lock Mechanism

Find the screws securing the lock on the interior handle. These screws are usually located on or around the handle or embedded within the door frame. Carefully inspect the lock’s placement to identify the points where it is attached to ensure a smooth removal process.
Step 2: Unscrew and Detach the Lock
Using a screwdriver, remove the mounting screws that hold the lock in place. Work steadily to avoid stripping the screws and gently pull the lock assembly away from the door. Be cautious during this process to prevent damage to the door, especially if it includes fragile elements like glass.
Step 3: Clean the Area
Once the old lock has been successfully removed, take a moment to clean the area thoroughly. Use a cloth to wipe down the surface and remove any dust, dirt, or debris. Ensuring the clean surface will help the new lock fit securely and function properly.
Step 4: Inspect the Lock Area

Carefully inspect the area where the lock was mounted. Check for signs of wear, damage, or weak spots in the material surrounding the mounting area. If any issues are identified, take the time to repair or reinforce the area before installing the new lock. This step ensures a stable and durable fit for the replacement lock.
Installing the New Lock
Step 1: Align the New Lock
Place the new lock in the same position as the old one. Ensure the latch aligns perfectly with the strike plate on the door frame. Proper alignment is crucial for the lock to function correctly and to prevent any issues during use. Double-check the positioning before moving on to the next step.
Step 2: Secure the Lock
Using the screws provided with the lock, carefully attach it to the door. Insert and tighten the screws firmly to secure the lock in place, but take care not to over-tighten, as this can damage the hardware or affect the lock’s alignment. Confirm that all screws are fastened adequately for a solid fit.
Step 3: Test the Locking Mechanism
Before finishing, slide the door back and forth to test the new lock’s functionality. Engage the lock several times to ensure smooth operation without any unnecessary resistance. Check that the latch clicks securely into the strike plate when locked and disengages effortlessly when unlocked.
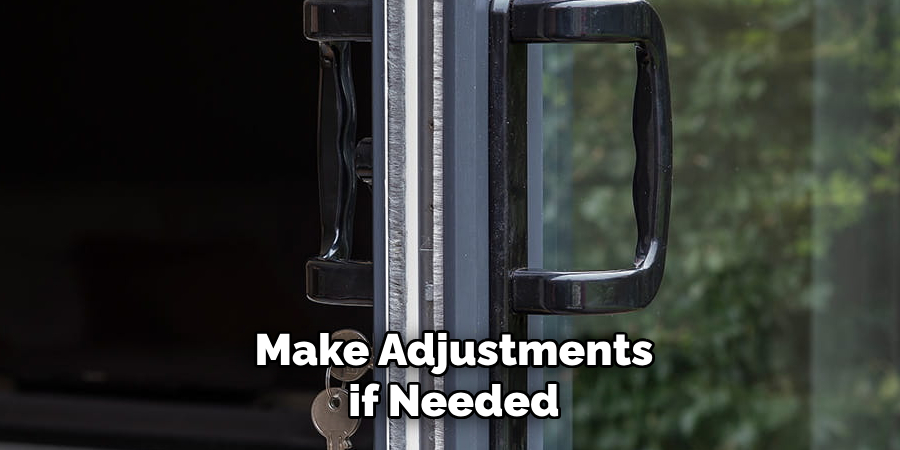
Step 4: Make Adjustments if Needed
Adjustments may be required if the latch does not align correctly with the strike plate. Loosen the screws slightly and reposition the lock or strike plate for proper alignment. Once realigned, retighten the screws and repeat the functionality check to confirm the adjustments resolved the issue effectively.
By carefully following these steps, you can ensure your new lock is securely installed and operates smoothly.
Reattaching the Door Handle
Step 1: Position the Handle
Align the handle with the new lock mechanism, ensuring it fits snugly into the designated slots. This step is crucial for ensuring the handle operates in tandem with the lock assembly.
Step 2: Fasten the Handle
Use the original screws from the previous handle or the screws provided with the new lock. Securely fasten the handle into place using a screwdriver, taking care not to overtighten. Once secured, check for any wobbling and adjust to ensure a firm connection.
Step 3: Test the Handle and Lock Together
Open and close the door multiple times, carefully observing the handle’s movement and the lock’s engagement. Ensure that the handle operates smoothly without any resistance or looseness. Confirm that the lock mechanism fully engages and disengages as intended with each test. If any issues arise, revisit the fastening and alignment steps to make the necessary adjustments for proper functionality.
Testing and Final Adjustments
Step 1: Conduct Functional Tests
Begin by locking and unlocking the door multiple times to ensure that the mechanism operates consistently without any hesitation or sticking. Pay close attention to the smoothness of the turning motion and confirm that the lock fully engages and disengages with ease.
Step 2: Test from Both Sides
If the lock is designed for use from both sides of the door, test its functionality from both the inside and outside. Make sure that the key or locking mechanism works seamlessly in both directions. Any inconsistencies may indicate a need for further alignment or adjustment.
Step 3: Adjust Strike Plate if Necessary
If the lock does not engage smoothly, check the alignment of the strike plate. Loosen the screws holding the strike plate and adjust its position as needed to ensure proper alignment with the latch. Once aligned, retighten the screws to secure the plate in place.
Step 4: Lubricate the Lock

To maintain optimal performance, apply a light coat of lubricant to the lock mechanism. Use a lubricant specifically designed for locks to avoid damage or buildup. This step will help reduce friction and ensure smooth operation over time.
Tips for Maintaining Your Sliding Door Lock
Proper maintenance can significantly extend the lifespan of your sliding door lock and ensure its reliable performance.
- Regular Cleaning: Frequently wipe down the lock and handle using a soft cloth to remove dirt, dust, and grime that can accumulate over time. This helps prevent clogging and keeps the lock in optimal condition.
- Routine Lubrication: Apply a silicone-based spray lubricant to the lock mechanism every few months. This reduces friction and wear, ensuring smooth operation and preventing sticking.
- Inspect for Wear: Periodically examine the lock and handle for signs of wear, such as rust, cracks, or loose components. Catching these issues early can prevent more extensive damage.
- Replace as Needed: If the lock is consistently sticking, shows signs of severe rust, or does not function properly despite maintenance, consider replacing it promptly to maintain security and ease of use.
With these simple tips, you can enhance the longevity and performance of your sliding door lock.
Safety Considerations
Always use caution when working with glass doors to prevent accidental breakage or injuries. Glass can be fragile, and improper handling may lead to dangerous situations. Wear appropriate safety gear, such as gloves to protect your hands and goggles to shield your eyes, especially when using tools near the glass components.
Ensure the workspace is clean and free of clutter to avoid accidents. If you are unsure about the repair or maintenance process, it is highly recommended to consult a professional locksmith to ensure safe and effective handling of your sliding door lock.
Conclusion
Changing a sliding glass door lock requires careful preparation and attention to detail. Start by removing the old lock, ensuring you have the right tools and replacement parts. Selecting a compatible lock is critical for proper functionality and security.
As you install the new lock, securely fasten all components and double-check alignment to guarantee smooth operation. Remember, regular maintenance can extend the lifespan of your lock and maintain reliable security. For homeowners seeking guidance on how to change a lock on a sliding glass door, following these key steps ensures a safe and effective repair process.