

Are you having trouble with your vehicle’s knock sensor? Do you need to bypass the sensor for some reason but don’t know how? Don’t worry; we’ve got you covered.
The knock sensor is critical in monitoring engine vibrations and detecting detonation or knocking, which can lead to engine damage over time. However, there are situations where bypassing the knock sensor might be necessary, such as troubleshooting issues, working with aftermarket engine setups, or adapting modifications for performance tuning. While circumventing the knock sensor can temporarily resolve specific challenges, it is essential to proceed cautiously, as disabling this sensor may leave the engine vulnerable to damage caused by unchecked knocking.
This guide on how to bypass knock sensor will provide an overview of the steps needed to bypass a knock sensor effectively and safely.
What Are the Benefits of Bypassing a Knock Sensor?
Bypassing a knock sensor can offer various benefits, including:
- Improved Engine Performance: The knock sensor may sometimes be overly sensitive and cause incorrect readings. Bypassing it can allow for more accurate tuning and better engine performance.
- Simplified Troubleshooting: If you are experiencing issues with your engine that may be related to the knock sensor, bypassing it can help narrow down the problem. This can save time and effort when diagnosing and fixing issues.
- Compatibility with Aftermarket Setups: Some aftermarket engine setups may not work well with factory-installed knock sensors. Bypassing the sensor allows for easier compatibility with these modifications.
- Cost Savings: Replacing a faulty knock sensor can be expensive, especially if it requires professional installation. Bypassing the sensor can save on these costs.
What Will You Need?
To bypass a knock sensor, you will need:
- A new or used engine control module (ECM) that does not have the knock sensor circuit
- Wiring diagrams for your vehicle’s ECM and engine
- Basic knowledge of electrical wiring and how to use a multimeter
- Electrical tape or heat shrink tubing
Once you have all of these items, you will be ready to bypass your knock sensor.
8 Easy Steps on How to Bypass Knock Sensor
Step 1. Locate the Knock Sensor:
The knock sensor is typically located on the engine block, cylinder head, or intake manifold, depending on your vehicle’s make and model. It is designed to detect unusual vibrations or “knocking” sounds that indicate pre-ignition or detonation within the engine. To locate it, consult your vehicle’s service manual or wiring diagram for its exact position.
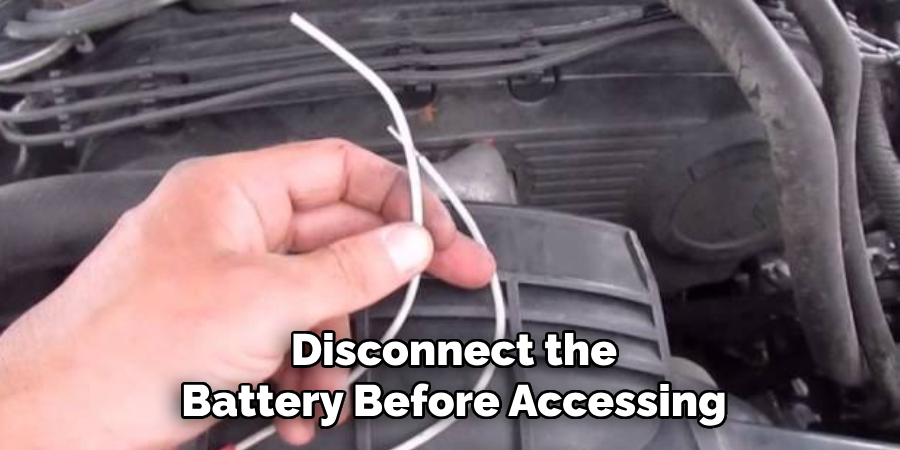
Look for a small, round sensor connected to the engine with a single or dual wiring harness. It’s often secured with a bolt and may be positioned near the engine’s base or hidden behind other components. Be sure to disconnect the battery before accessing or working on the knock sensor to avoid any accidental electrical issues. Once located, carefully inspect the area for any damage or wear to the sensor and its surrounding wiring.
Step 2: Remove the Knock Sensor
To remove the knock sensor, disconnect the wiring harness attached to it. Use a small flathead screwdriver or release tool if the connector seems stuck, ensuring you do not damage the wires. Next, use a socket wrench to unscrew the bolt securing the sensor to the engine. Carefully pull the sensor away once it’s loose and check for any residue or debris in the mounting area. Keep the sensor and bolt safe in case you need to reference them during reinstallation or replacement.
Step 3: Inspect the Knock Sensor
With the knock sensor removed, carefully inspect it for any signs of damage or wear. Look for cracks, corrosion, or other visible issues on the sensor’s body and connector. If the sensor appears in good condition, gently clean it with a soft cloth to remove any grime or residue. If damage is apparent, replacing the sensor is recommended to ensure proper engine performance. Additionally, examine the mounting area and surrounding components for debris or buildup that might affect the new sensor’s installation or functionality.
Step 4: Install the New Sensor
Carefully align the new sensor with the mounting area, ensuring it matches the original sensor’s orientation. Secure the sensor in place using the appropriate screws or fasteners, tightening them according to the manufacturer’s recommended torque specifications. Be cautious not to overtighten, as this could damage the sensor or its mounting. Once installed, reconnect the sensor’s electrical connector, ensuring it clicks firmly into place. Double-check the connection and mounting to confirm everything is securely fitted before proceeding.
Step 5: Test the Sensor
After the sensor is securely installed and connected, testing its functionality is important. Start by turning on the system or vehicle and ensure that no warning lights or error codes are related to the sensor. If applicable, use a diagnostic tool to check for proper sensor readings and confirm that it functions as expected. Take the system through its usual operations to verify performance. If any issues arise, revisit the installation steps to address potential problems.
Step 6: Maintenance and Calibration
Regular maintenance and calibration of sensors are crucial for accurate and reliable data readings. It’s important to refer to the manufacturer’s guidelines for recommended maintenance schedules as well as any specific calibration procedures for the sensor.
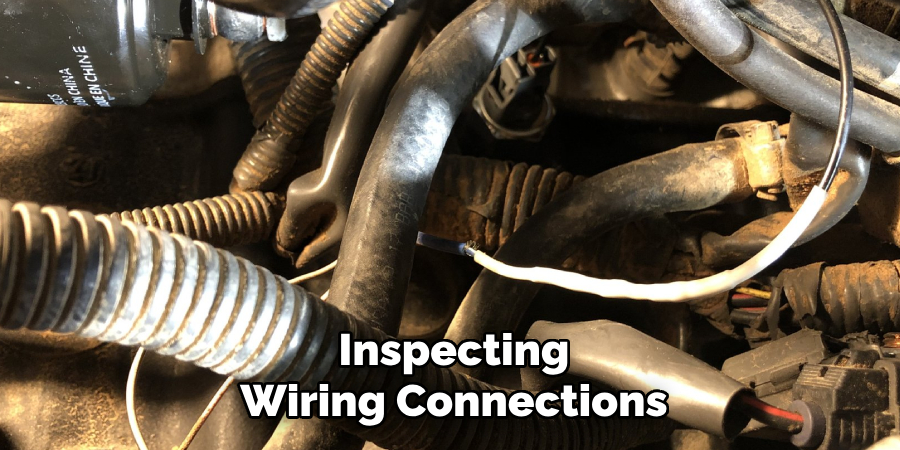
Maintenance may include cleaning the sensor, inspecting wiring connections, and replacing any damaged or worn components. It’s also essential to monitor and replace any consumable parts, such as batteries or filters.
Calibration ensures that the sensor is accurately measuring and reporting data. This process involves comparing the sensor readings with a known standard value and making necessary adjustments. Depending on the type of sensor, this may need to be done periodically or after certain events such as extreme temperature changes.
Step 7: Check for Accuracy and Precision
After calibration, it’s important to check the accuracy and precision of the sensor. This involves comparing the readings from the sensor with another reliable source or using statistical analysis to determine if there are any inconsistencies or errors.
As sensors are used over time, their accuracy and precision can degrade due to factors such as wear and tear or environmental conditions. Regularly checking for accuracy and precision can help identify when a sensor may need to be recalibrated.
Step 8: Keep Track of Sensor Performance
In addition to checking for accuracy and precision, keeping track of a sensor’s overall performance is important. This includes monitoring its response time, sensitivity, and stability.
Response time refers to how quickly a sensor detects and responds to environmental changes. A fast response time is crucial for sensors in real-time applications where quick reactions are necessary.

Sensitivity measures how well a sensor can detect changes in its surroundings. It’s essential to regularly test a sensor’s sensitivity to ensure it can still detect changes accurately within its designated range.
Sensors can maintain their sensitivity and stability over time by following proper maintenance and calibration procedures. This is essential for ensuring the reliability of sensor data.
5 Things You Should Avoid
- Tampering with Sensor Wiring
Altering or disconnecting the wiring of the knock sensor can compromise engine performance and lead to inaccurate diagnostic readings. This can cause long-term damage to the engine system.
- Using Non-Compatible Parts
Installing incompatible or low-quality components to bypass the knock sensor can lead to inefficiencies, increased fuel consumption, and potential engine misfires.
- Ignoring Manufacturer Guidelines
Overlooking the manufacturer’s specifications and recommendations for the knock sensor can result in improper functionality and void any existing warranties.
- Disabling the Knock Sensor Through Software
Modifying or disabling the sensor from the vehicle’s ECU (Engine Control Unit) can lead to uncontrolled detonation, which may severely damage the engine over time.
- Failing to Monitor Engine Performance
Neglecting to monitor engine performance after bypassing the sensor can result in undetected issues, such as knocking or pinging, which can escalate into significant mechanical failures.
Can a Knock Sensor Be Cleaned?
Yes, a knock sensor can sometimes be cleaned if it has accumulated dirt, grime, or deposits that might impact its functionality.
Cleaning the sensor involves carefully removing it from the engine and gently wiping down the surface with an appropriate cleaning agent, ensuring not to damage the sensor’s sensitive components. Inspecting the wiring and connectors for signs of wear, corrosion, or damage as part of the cleaning process is vital. However, cleaning a knock sensor is only effective if the problem is related to external contaminants. If the sensor itself is malfunctioning internally, cleaning will not resolve the issue, and replacing the sensor becomes necessary.

Always refer to the vehicle’s service manual and follow the manufacturer’s recommendations to avoid causing further damage.
Conclusion
How to bypass knock sensor is generally not recommended, as it plays a vital role in ensuring optimal engine performance and preventing potential damage.
However, if bypassing the knock sensor is deemed necessary for specific troubleshooting or temporary purposes, it should be approached with caution. This process typically involves modifying the sensor’s wiring or utilizing resistors to simulate a constant signal to the engine control unit (ECU). It is crucial to understand that bypassing the knock sensor may lead to reduced engine efficiency, increased emissions, or possible long-term engine damage.
Always consult with a professional mechanic and consider the potential consequences before proceeding with this action.
About
Safety Fic is a distinguished figure in the world of Diy design, with a decade of expertise creating innovative and sustainable Diy solutions. His professional focus lies in merging traditional craftsmanship with modern manufacturing techniques, fostering designs that are both practical and environmentally conscious. As the author of diy, Safety Fic delves into the art and science of Safety Fic-making, inspiring artisans and industry professionals alike.
Education RMIT University
(Melbourne, Australia) Associate Degree in Design (Safety Fic) Focus on sustainable design, industry-driven projects, and practical craftsmanship. Gained hands-on experience with traditional and digital manufacturing tools, such as CAD and CNC software.
Nottingham Trent University
(United Kingdom) Bachelor’s in diyfastly.com and Product Design (Honors) Specialized in product design with a focus on blending creativity with production techniques. Participated in industry projects, working with companies like John Lewis and Vitsoe to gain real-world insights.
Publications and Impact
In diy, Safety Fic his insights on indoor design processes, materials, and strategies for efficient production. His writing bridges the gap between artisan knowledge and modern industry needs, making it a must-read for both budding designers and seasoned professionals.