

Installing garage door sensors is an essential step in enhancing the safety and functionality of your garage door system. These sensors help prevent accidents by detecting obstacles in the door’s path, ensuring the door stops or reverses when necessary. Whether you’re upgrading your existing setup or installing sensors for the first time, this guide will walk you through the process of how to install garage door sensors with simple, easy-to-follow steps. With the right tools and some basic knowledge, you can efficiently complete the installation and enjoy a safer garage environment.
Common Reasons for Installing New Sensors
There are several reasons why you might need to install new garage door sensors. One of the most common issues is malfunctioning or outdated sensors that no longer provide reliable safety features, posing a risk to both people and property. Additionally, new sensors may be needed if the existing ones are physically damaged due to impact or exposure to harsh environmental conditions. Upgrading to modern sensors can also enhance the overall functionality of your garage door system, with improved sensitivity and compatibility with newer technologies. Finally, installing new sensors might be necessary when setting up a completely new garage door system, ensuring compliance with current safety standards.
Tools and Materials You’ll Need
To successfully replace or install garage door sensors, you’ll require the following tools and materials:
- Screwdriver Set: A variety of screwdrivers to tighten or loosen screws during installation.
- Measuring Tape: For accurate placement and alignment of the sensors.
- Drill and Drill Bits: To create necessary holes for mounting brackets, if needed.
- Level Tool: Ensures proper alignment of sensors to avoid malfunctions.
- Wire Strippers and Electrical Tape: For safely handling and securing the wiring connections.
- Replacement Sensors: Ensure the sensors are compatible with your garage door system.
- Mounting Brackets and Screws: These are often included with the sensor kit but may need to be purchased separately.
- Ladder: Helps you safely reach higher areas during the installation process.
- Protective Gloves: To protect your hands while working with tools and wires.
Having all these items prepared beforehand will make the installation process smoother and more efficient.
10 Methods How to Install Garage Door Sensors
1. Begin with Safety First and Power Disconnection
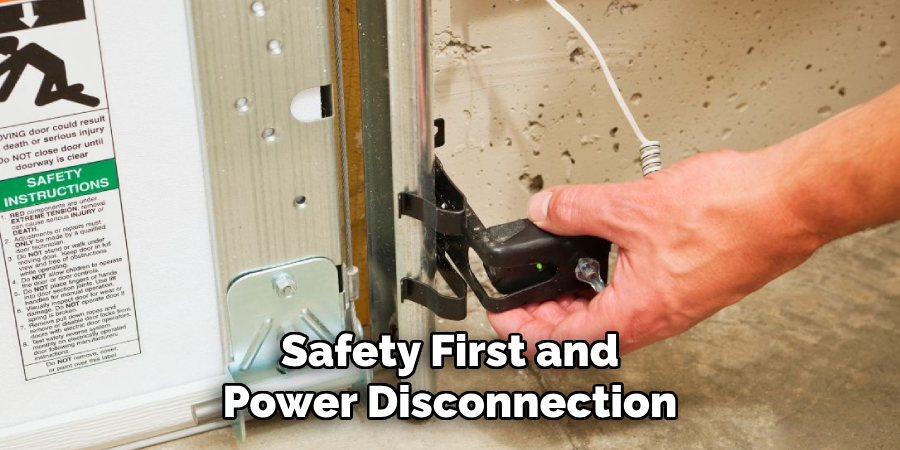
Before diving into any installation involving electrical components, prioritize safety. Start by disconnecting the power to your garage door opener. This can be done by either unplugging the opener from the ceiling outlet or shutting off the circuit breaker dedicated to the garage. Turning off power helps prevent accidental activation of the door while you work, reducing the risk of injury. Gather safety gear such as gloves, safety glasses, and a headlamp or portable light if the area is dimly lit. Having your tools organized and your workspace clear of obstacles is also a smart start to the project.
2. Identify Sensor Types and Review Manufacturer’s Instructions
Garage door sensors typically come as a pair—one sender and one receiver. These are photoelectric sensors that must face each other across the base of the garage door opening to detect obstructions. Different brands may have variations in installation, so reviewing the user manual is essential. Understand the sensor orientation and identify which side is transmitting and which side is receiving. Reading the instructions helps you avoid mistakes that might require you to uninstall and reposition components later.
3. Mark the Sensor Mounting Height for Accurate Alignment
Using a tape measure, mark a consistent height on both sides of the garage door track—generally about 4 to 6 inches off the ground. Use a pencil or masking tape to indicate the correct mounting points. Maintaining equal height on both sides ensures that the sensors will align correctly and function properly. A laser level or string line stretched across the garage opening can help confirm that your marks are even, giving you visual confirmation that the sensors will have an unobstructed line of sight.
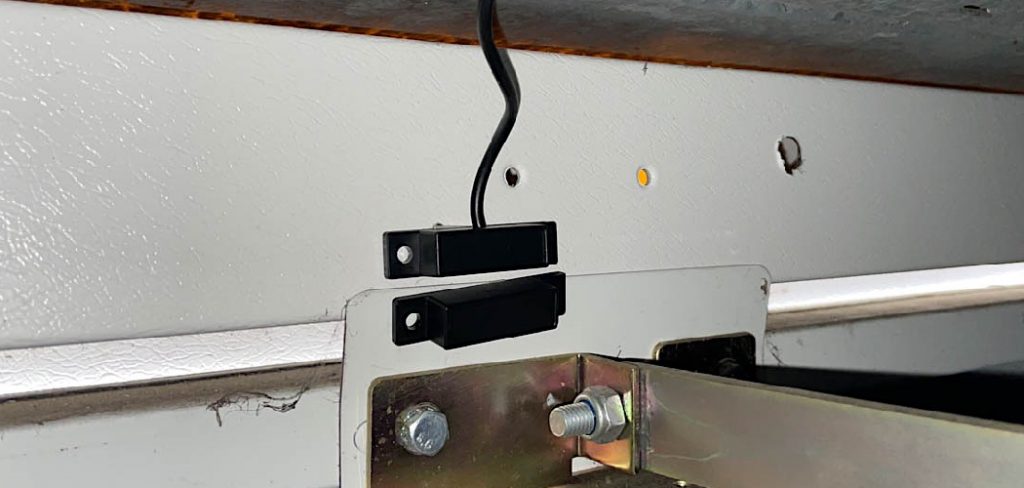
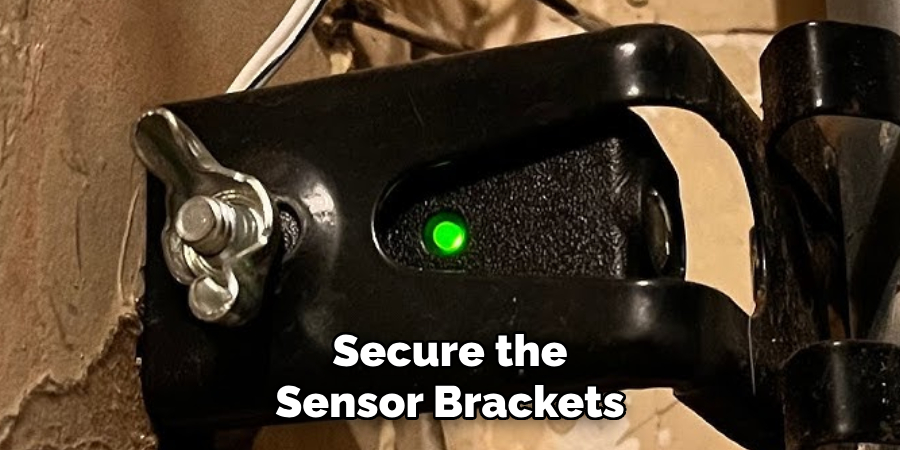
4. Secure the Sensor Brackets to the Door Rails
Most modern garage doors have holes pre-drilled or slots designed for sensor brackets. Use these slots to mount the brackets on both sides. If your door doesn’t have such slots, you may need to drill pilot holes or use clamps that come with the sensor kit. Fasten the brackets tightly using the provided screws, ensuring that they are level and snug. Avoid over-tightening, which could strip the hardware or bend the bracket. Check that each bracket is facing the opposite one cleanly across the span of the garage door.
5. Attach the Sensors to the Mounted Brackets
Once the brackets are in place, it’s time to snap or screw the sensors into their respective mounts. The sensors often clip into the brackets and can pivot slightly for final adjustments. Be sure that the lenses of both the transmitter and receiver are facing each other directly. Some sensor models have a small LED light that indicates proper alignment, which can be helpful during installation. Check that the sensors are securely held in place and won’t move with vibration from the garage door operation.
6. Run the Sensor Wires Neatly Along the Wall
Using the wire provided with your sensor kit, run the wiring from each sensor to the garage door opener. Secure the wires neatly along the garage wall using cable clips or adhesive-backed wire staples. Make sure the wires are positioned in a way that avoids high-traffic areas or potential snag points. If drilling is required to route the wires through the wall or ceiling, measure carefully and wear protective gear. Keeping the wires tidy not only looks better but also reduces the risk of damage over time.
7. Connect Sensor Wires to the Opener Unit Correctly
With the wires routed to the opener, identify the sensor input terminals—usually marked or color-coded on the opener’s back panel. Strip a small section of insulation from the end of each wire and insert them into the appropriate terminals. Typically, one terminal is for the white wire (neutral) and the other for the colored wire (usually black or red). Use a screwdriver to tighten the terminal screws snugly. Make sure the wires are firmly seated and that no exposed copper is touching any metal surfaces or other terminals.
8. Restore Power and Test the Alignment
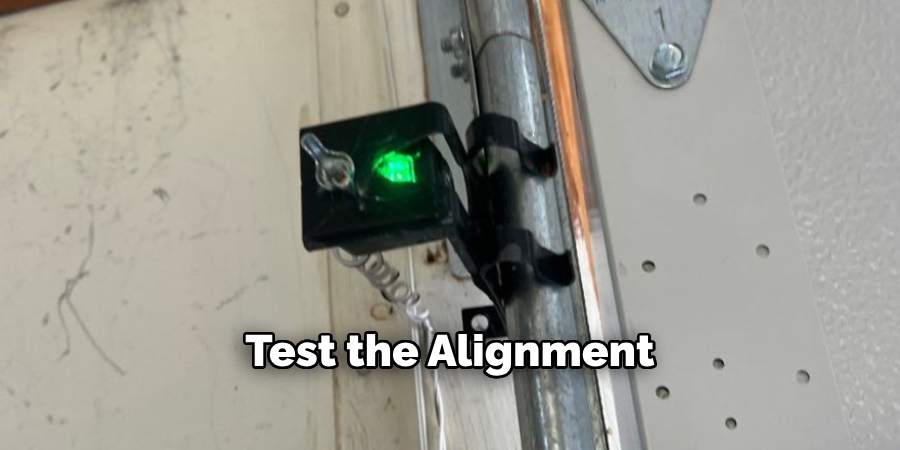
Once the wiring is complete and double-checked, restore power to the garage door opener. Check for LED lights on the sensors—both should light up if aligned properly. One light typically stays solid, while the other might blink during alignment. If one light is off or blinking, adjust the sensor slightly until both lights are steady. If the lights don’t come on at all, double-check your wiring connections and ensure the power supply to the opener is active. Proper alignment is key to functionality and safety.
9. Test Door Operation and Sensor Safety Function
With alignment confirmed, test the system by pressing the garage door opener button. The door should close normally when nothing is blocking the sensors. To test the safety function, wave a long object—like a broomstick—in front of the sensors while the door is closing. The door should immediately stop and reverse. This confirms that the obstruction detection system is working as intended. If the door continues to close, recheck the alignment or consult the manual for sensor calibration tips.
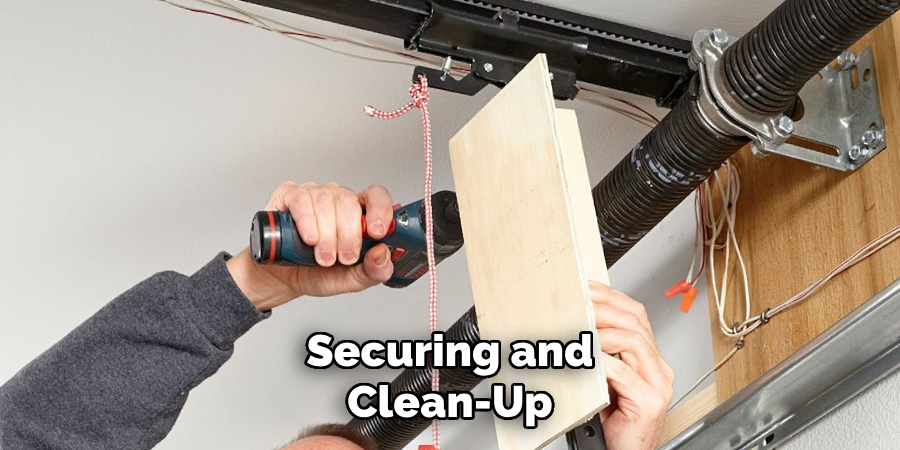
10. Finalize Installation with Securing and Clean-Up
Once everything is working correctly, go back and secure any loose wires with additional cable clips. Recheck the brackets and tighten any screws if necessary. Clean the sensor lenses with a soft cloth to remove fingerprints or dust, as dirty lenses can interfere with operation. Remove tools, packaging, and leftover materials from the workspace to avoid tripping hazards. Take a moment to explain the new sensor setup to other household members, especially children, so they understand its function and won’t accidentally tamper with it.
Things to Consider When Installing Motion Sensors
Placement Matters
Ensure you install the motion sensors in areas with optimal coverage, such as entry points, hallways, or high-traffic zones. Avoid placing them near heat sources or vents, as sudden temperature changes can trigger false alarms.
Type of Sensor
Different sensors, such as passive infrared (PIR), microwave, or dual-technology, suit different needs. Choose the type that aligns best with your environment and security requirements.
Sensitivity Settings
Adjust the sensitivity settings appropriately to minimize false triggers caused by pets, small animals, or environmental movements like curtains blowing in the wind.
Power Source
Decide whether you will use wired or battery-operated motion sensors. Wired options require planning for cable management, while battery-powered ones need periodic battery replacement.
Testing the Setup
After installation, thoroughly test the motion sensors at different times of the day to ensure they function consistently and effectively in various lighting conditions.
Conclusion
Installing garage door sensors is an achievable task for most DIYers, and it significantly enhances safety by preventing accidental closure on objects, pets, or people. Each step, from turning off the power to fine-tuning the alignment, plays a critical role in ensuring proper function. By following these ten detailed methods, you’ll be able to install your garage door sensors with confidence and care, improving both safety and peace of mind every time the door operates. Thanks for reading our blog post on how to install garage door sensors! We hope you found it helpful and informative.
About
Safety Fic is a distinguished figure in the world of Diy design, with a decade of expertise creating innovative and sustainable Diy solutions. His professional focus lies in merging traditional craftsmanship with modern manufacturing techniques, fostering designs that are both practical and environmentally conscious. As the author of diy, Safety Fic delves into the art and science of Safety Fic-making, inspiring artisans and industry professionals alike.
Education RMIT University
(Melbourne, Australia) Associate Degree in Design (Safety Fic) Focus on sustainable design, industry-driven projects, and practical craftsmanship. Gained hands-on experience with traditional and digital manufacturing tools, such as CAD and CNC software.
Nottingham Trent University
(United Kingdom) Bachelor’s in diyfastly.com and Product Design (Honors) Specialized in product design with a focus on blending creativity with production techniques. Participated in industry projects, working with companies like John Lewis and Vitsoe to gain real-world insights.
Publications and Impact
In diy, Safety Fic his insights on indoor design processes, materials, and strategies for efficient production. His writing bridges the gap between artisan knowledge and modern industry needs, making it a must-read for both budding designers and seasoned professionals.