

Are you tired of fumbling with a sticky or broken gas fireplace key valve? A faulty gas fireplace key valve can be frustrating and inconvenient, especially during the colder months.
How to replace gas fireplace key valve is an essential maintenance task that ensures the safety and proper functioning of your fireplace. Over time, key valves can wear out, become damaged, or develop leaks, requiring replacement to avoid potential hazards. While the process might seem intimidating at first, it can be manageable with the right tools, precautions, and knowledge. This guide will walk you through the steps needed to safely and efficiently replace a gas fireplace key valve, restoring your fireplace’s functionality and allowing you to enjoy a cozy, warm atmosphere in your home.
Always prioritize safety by turning off the gas supply and consulting a professional if you’re unsure about any part of the process.
What Are the Causes of a Faulty Gas Fireplace Key Valve?
There are various reasons why a gas fireplace key valve might become faulty. Some common causes include:
- Wear and Tear: Over time, the internal components of the key valve can wear out and malfunction.
- Dirt and Debris Buildup: Dust, dirt, and other debris can accumulate inside the key valve, making it difficult to turn or causing it to stick.
- Corrosion: Exposure to moisture or harsh chemicals can cause the metal parts of the key valve to corrode, leading to malfunctions.
- Improper Use: Misusing or incorrectly installing the key valve can also result in faults and malfunctions. It is essential to follow the manufacturer’s instructions and guidelines when using and installing key valves.
- Lack of Maintenance: Failure to regularly clean and maintain key valves can lead to problems with their functionality. It is recommended to have a professional inspect and service key valves regularly.
What Will You Need?
To ensure proper usage and maintenance of key valves, you will need the following:
- Manufacturer’s instructions and guidelines for installation and use
- Proper tools and equipment for installation and maintenance
- Regular cleaning supplies, such as lubricants or solvents
- Professional services for inspections and servicing
It’s important to have these resources readily available to prevent any potential issues with your key valve. By taking the necessary precautions and ensuring proper care, you can extend the lifespan of your key valve and avoid costly repairs or replacements.
8 Easy Steps on How to Replace Gas Fireplace Key Valve
Step 1: Turn Off the Gas Supply
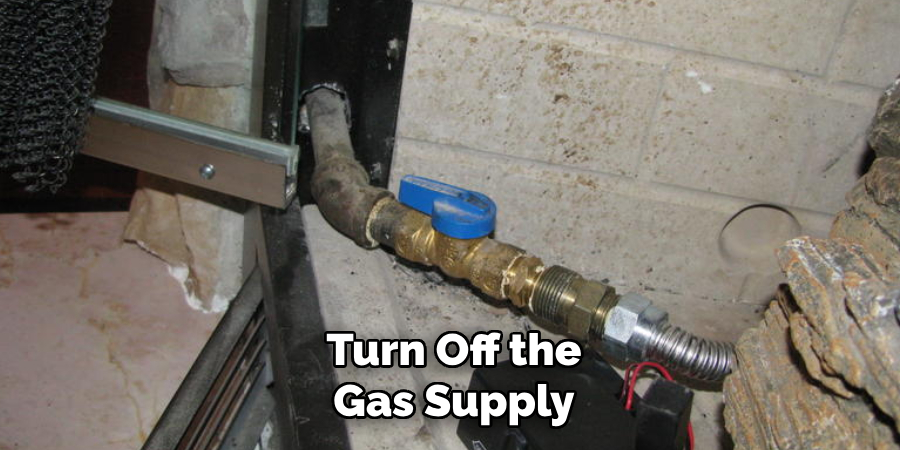
Before beginning any work on your gas fireplace key valve, safety should be your top priority. Locate the main gas supply valve connected to your fireplace system, which is often found near the fireplace or in a utility area. Turn the valve clockwise to ensure the gas supply is completely shut off. It’s crucial to double-check that no gas is flowing to prevent any potential leaks or hazards during the replacement process. For added precaution, you may want to ventilate the area and use a gas leak detector to confirm that the environment is safe to proceed.
Step 2: Remove the Existing Fireplace Log Set
Once the gas supply is securely shut off, carefully remove the existing fireplace log set. Begin by ensuring the components have thoroughly cooled down if the fireplace was recently in use. Gently lift the logs out of the fireplace, taking care not to damage any surrounding parts or surfaces. If your log set is connected to a burner or any other hardware, loosen and detach these connections based on the manufacturer’s instructions. Keep all screws or fittings in a safe place in case they are needed for the new installation. After removing the log set, inspect the burner and surrounding area for any debris or buildup, and clean the space as necessary to prepare for the new setup.
Step 3: Inspect the Gas Line
Before proceeding with the installation of a new log set, it is essential to thoroughly inspect the gas line to ensure safety and functionality thoroughly. Start by checking the gas line for any visible signs of damage, such as cracks, corrosion, or leaks. If you suspect a gas leak, turn off the gas supply immediately and consult a licensed professional to test and address the issue. Additionally, ensure the gas line valve operates smoothly without sticking and is free of obstruction.
Confirm that the connections are secure and not loose or worn, as faulty connections could lead to dangerous gas leaks. It may also be helpful to use a gas leak detector or a soapy water test to identify any pinpoint leaks that are not easily noticeable. Taking the time to inspect carefully and, if necessary, repair or replace the gas line will provide peace of mind and create a safer environment for your new log set installation.
Step 4: Install the New Key Valve
The key valve is an essential component for controlling the flow of gas to your log set, ensuring safe and efficient operation. Begin by identifying the correct position for the valve installation, typically located near the fireplace for easy access. Securely attach the valve to the gas line following the manufacturer’s guidelines, using a pipe sealant or thread tape designed for gas applications to ensure a tight seal and prevent leaks.
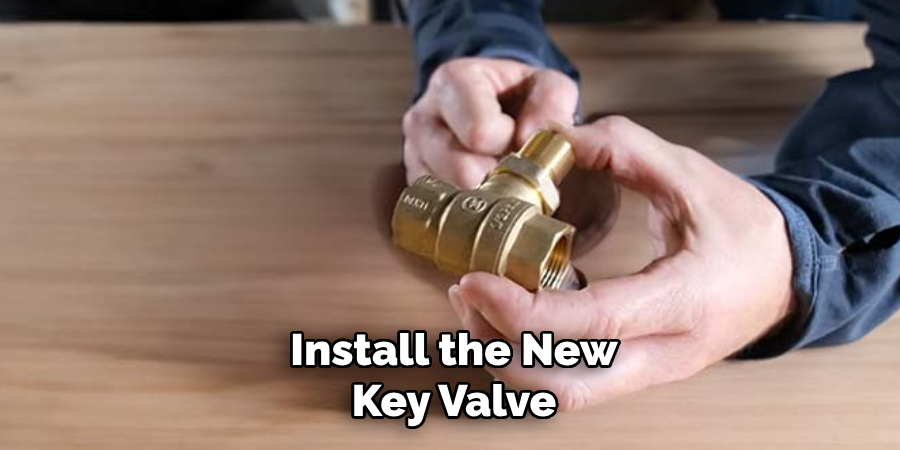
It’s essential to double-check the valve’s alignment to ensure it operates smoothly and allows for precise control. After installation, test the valve by turning it on and off to verify functionality and check for any potential leaks using a soapy water solution or a gas leak detector. Ensuring the valve is installed and operating properly is a crucial step in maintaining safety and reliability throughout the use of your new log set.
Step 5: Test for Leaks
After installing the valve and ensuring everything is securely in place, testing for leaks becomes an essential safety measure. Begin by preparing a soapy water solution—mixing a small amount of dish soap with water will suffice. Apply this solution generously over the connections and joints of the valve where leakage might occur. Slowly turn on the gas supply and watch closely for any bubbles forming in the soapy water. These bubbles indicate escaping gas and must be addressed immediately by tightening the connections or resealing the joint.
If you’re using a gas leak detector, follow the device’s instructions carefully for accurate results. Hold the detector close to the suspected areas, and if a leak is detected, shut off the gas supply immediately and correct the issue. It’s always better to over-inspect than overlook potential hazards.
Step 6: Reinstall the Key
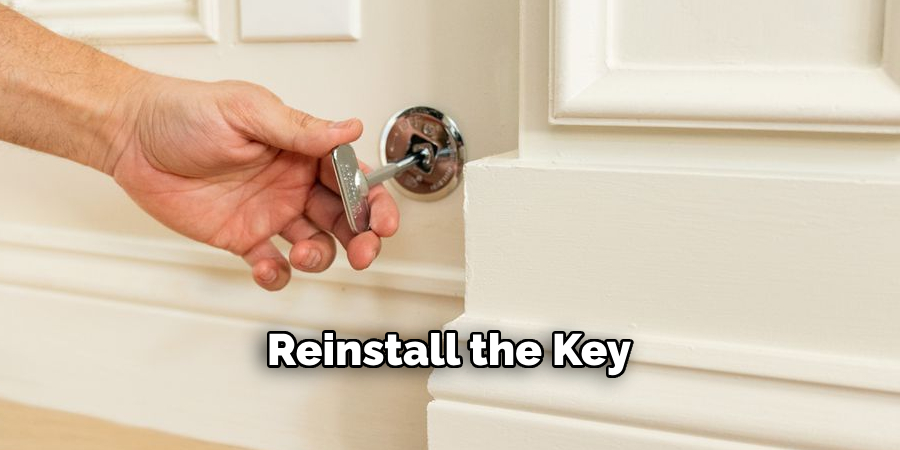
Once you have inspected the connections and confirmed there are no leaks, it is time to reinstall the key securely. Ensure the key aligns properly with the corresponding slot, as improper alignment can lead to operational difficulties or compromise the system’s safety. Gently slide or push the key into place, avoiding excessive force that could damage the mechanism. After reinstalling the key, test its functionality by turning it slightly to verify it moves smoothly. A properly installed key should feel firm but operationally fluid. If any resistance or looseness is detected, double-check the placement and secure it further if needed.
Step 7: Secure and Finish
Once the key has been tested for functionality, the final step is to ensure that all components are securely in place. If the key mechanism is part of a larger assembly, inspect the surrounding parts to ensure they are properly aligned and connected. Tighten any screws or fasteners that may have been loosened during the reinstallation process, taking care not to overtighten and risk damaging the threads or components.
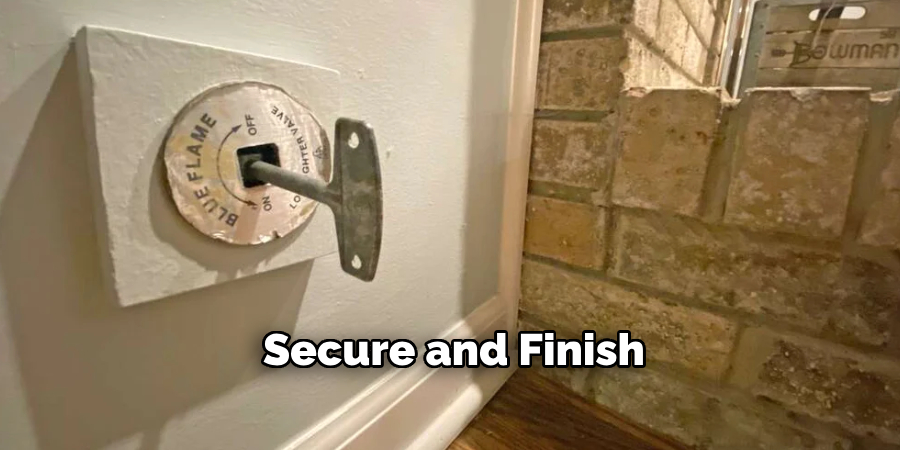
Next, clean the area around the key mechanism to remove any debris or residues that could interfere with its operation over time. Depending on the type of system, applying a small amount of lubricant to the key mechanism may enhance its performance and longevity. Be sure to use a lubricant that is compatible with the materials of the system and avoid overapplication, as excess lubricant might attract dust or grime.
Step 8 . Reassemble:
Begin by carefully aligning all components in their correct positions as per the system’s design. Double-check that all parts are clean and free of debris before assembly to ensure smooth operation and to prevent long-term wear. Insert and secure each piece in the order they were disassembled. If screws, bolts, or clips are involved, tighten them gently to avoid overtightening, which could cause thread damage or affect the performance of the system.
For more complex mechanisms, consulting a diagram or manual during reassembly can help ensure accuracy and prevent errors. After re-assembly, test the system’s functionality to confirm that all parts are properly secured and operating as intended. Address any unusual noises, resistance, or misalignments immediately by disassembling and rechecking those parts. Taking your time and ensuring each step is done meticulously will promote the durability and efficiency of the system.
By following these steps, you can successfully dismantle and reassemble any mechanical system.
Conclusion
How to replace gas fireplace key valve may seem like a daunting task, but with the right tools, careful preparation, and adherence to safety guidelines, it can be completed effectively. Always begin by turning off the gas supply to prevent any potential hazards.
Follow the step-by-step process to remove the old valve and install the replacement, ensuring all connections are secure and leak-free. After completing the replacement, inspect the system thoroughly and test it to confirm proper functionality. If you ever feel uncertain or encounter complications, don’t hesitate to consult a professional.
Taking the time to do the job correctly will ensure the safe and efficient operation of your gas fireplace for years to come.
About
Safety Fic is a distinguished figure in the world of Diy design, with a decade of expertise creating innovative and sustainable Diy solutions. His professional focus lies in merging traditional craftsmanship with modern manufacturing techniques, fostering designs that are both practical and environmentally conscious. As the author of diy, Safety Fic delves into the art and science of Safety Fic-making, inspiring artisans and industry professionals alike.
Education RMIT University
(Melbourne, Australia) Associate Degree in Design (Safety Fic) Focus on sustainable design, industry-driven projects, and practical craftsmanship. Gained hands-on experience with traditional and digital manufacturing tools, such as CAD and CNC software.
Nottingham Trent University
(United Kingdom) Bachelor’s in diyfastly.com and Product Design (Honors) Specialized in product design with a focus on blending creativity with production techniques. Participated in industry projects, working with companies like John Lewis and Vitsoe to gain real-world insights.
Publications and Impact
In diy, Safety Fic his insights on indoor design processes, materials, and strategies for efficient production. His writing bridges the gap between artisan knowledge and modern industry needs, making it a must-read for both budding designers and seasoned professionals.