
Travelers, renters, and anyone who values portable security will find installing Addalock an essential skill. This innovative device offers an easy way to add an extra layer of protection to almost any door without any permanent modifications. If you’re new to it, don’t worry—it’s designed to be user-friendly, making you feel safe in just a few minutes.
Whether you’re staying at a hotel, living in a dorm, or simply adding extra security to your home, Addalock provides peace of mind. This versatile and affordable device can work on most hinged doors, offering a great defense against unwanted intrusions.
This guide will help you understand how to install Addalock step-by-step, ensuring you can maximize its benefits. By the end, even beginners will feel like pros, all while enhancing their personal security with minimal effort.
Why Learning to Install Addalock is Important
Addalock serves as a portable yet effective solution for door security where traditional locks might be inadequate. But why is mastering its installation essential?
Many people find themselves in situations where they cannot modify door locks. Renters often cannot drill into doors, while travelers and students need something temporary but sturdy. Understanding how to quickly and properly install Addalock ensures that you can protect your space without relying on anyone else.
Furthermore, most intrusion attempts target easily accessible spaces—hotel rooms, dorms, or apartments with basic locks. An Addalock adds that extra hurdle for potential intruders, increasing the security level instantly. Knowing how to install it empowers you to feel at ease in unfamiliar environments.
By learning this skill, you enable yourself to take charge of your safety, whenever and wherever it’s needed, with an affordable and portable tool.
Step-by-Step Guide on How to Install Addalock
Step 1: Unpack Your Addalock
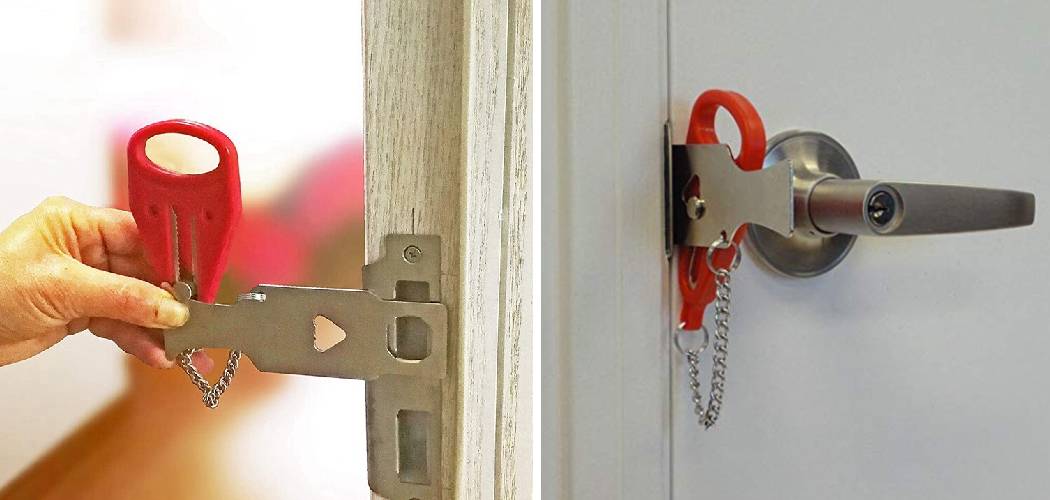
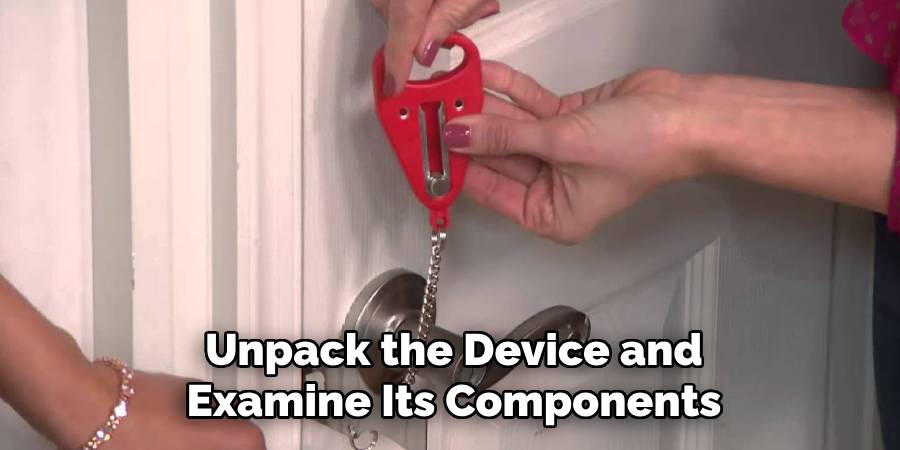
After purchasing an Addalock, unpack the device and examine its components. Typically, it includes the lock unit and a metal plate. Both play a key role in securing the door, so be sure to inspect them before beginning installation to ensure everything is in working order.
Step 2: Verify Door Compatibility
Before you begin installing the Addalock, check whether your door is compatible with the device. Addalock works on most hinged doors that swing inward. Make sure the space between your door and its frame allows the insertion of the device’s metal plate without any obstructions.
Step 3: Open the Door
To install the Addalock properly, you’ll need to start with the door in an open position. This allows easier access to the door latch, which is where the device’s metal plate will be secured. Starting with the door fully open ensures hassle-free alignment during the process.
Step 4: Slide the Metal Plate into Place
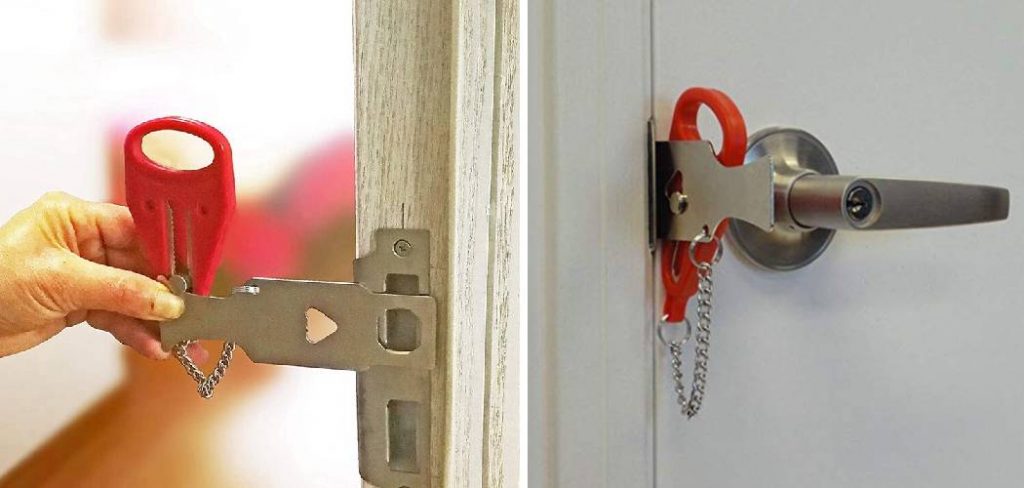
Take the metal plate and slide it into the latch opening on the door frame. This is the part of the frame where the latch bolt fits when the door is closed. Ensure the plate is inserted fully and securely, with no parts sticking out. Proper alignment at this stage is crucial for the device to function correctly.
Step 5: Close the Door
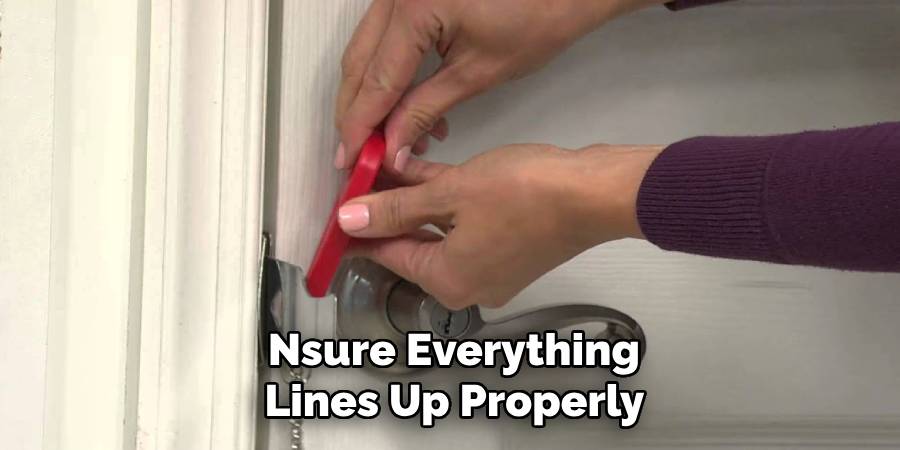
Once the metal plate is in place, close the door gently to ensure everything lines up properly. The door should latch snugly without any gaps or disruptions caused by the inserted plate. If the door doesn’t close smoothly, adjust the plate before proceeding further.
Step 6: Connect the Locking Unit
Now it’s time to attach the Addalock unit itself. Align the lock with the metal plate you inserted earlier, making sure the locking pin fits securely into the hole of the plate. This connection is what prevents the door from opening, so take care to ensure it’s tightly engaged.
Step 7: Test the Lock
After securing the unit, gently pull on the door handle to test the lock’s effectiveness. The Addalock should hold firmly in place, preventing the door from opening. If the door moves even slightly, revisit the steps to ensure proper alignment and secure attachment.
Step 8: Adjust for Usage
Depending on the layout and size of your door, you may need to make minor adjustments for the Addalock to fit perfectly. This might involve repositioning the metal plate or re-aligning the lock until it operates without issues. Take your time during this step to achieve a flawless installation.
Step 9: Practice Installation
Get comfortable with the process by practicing removal and reinstallation. This ensures that you can quickly and efficiently set up your Addalock in emergency situations or unfamiliar environments. It’s always a good idea to master the steps ahead of time.
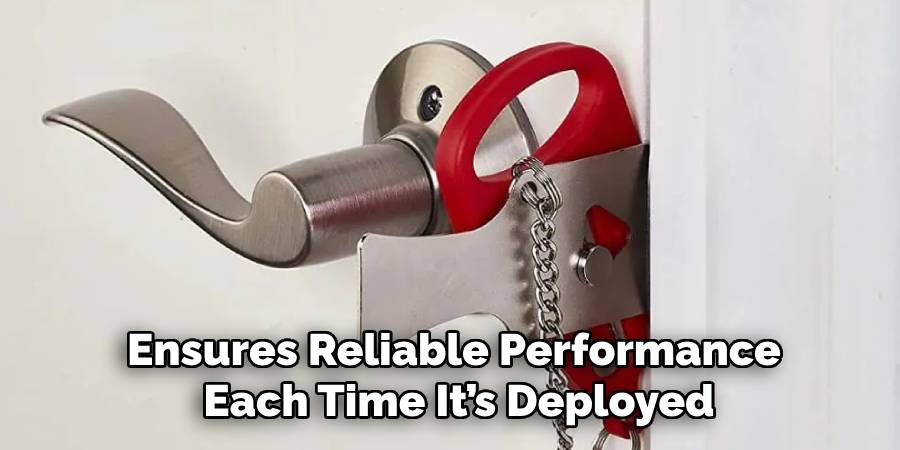
Step 10: Maintain Your Addalock
Once installed, proper maintenance will keep your Addalock functional for years. Clean the components regularly and store them appropriately when not in use. Keeping it in good condition ensures reliable performance each time it’s deployed.
Troubleshooting Tips for Your Addalock
Even with proper installation and maintenance, you might encounter occasional challenges with your Addalock. Here are some common troubleshooting tips to help resolve issues efficiently:
Difficulty Fitting in the Doorframe
Ensure the latch plate is correctly aligned and that the doorframe is compatible with the Addalock. Check for any obstructions or irregularities in the door or frame that could prevent a snug fit.
Lock Slipping or Not Holding Securely
Verify that the door latch is fully engaged with the Addalock’s mechanism. If the lock feels loose, double-check that the unit is installed tightly and that the latch plate is not worn or damaged.
Stuck or Jammed Addalock
If the Addalock becomes stuck, gently wiggle it while applying steady pressure to dislodge it. Avoid using excessive force, as this could damage the unit. Ensure the locking mechanism is free from debris that may be causing the issue.
Door Not Closing Properly After Installation
Make sure the Addalock is installed correctly and isn’t causing interference with the door’s natural movement. Adjust the positioning of the unit to prevent it from obstructing the door.
General Wear and Tear
Regularly inspect your Addalock for signs of wear, such as loose components or bent parts. Replace any damaged pieces to ensure the device maintains its effectiveness.
By addressing these potential issues, you can keep your Addalock functioning optimally and enjoy peace of mind when securing your space.
Frequently Asked Questions
How do I know if my door is compatible with an Addalock?
Addalock is designed for hinged doors that swing inward. This means the latch mechanism must be accessible from the door frame. Check the gap between the door and frame to confirm that the metal plate can slide into the latch opening. If your door swings outward or lacks a latch, the Addalock may not be suitable.
Can an Addalock damage my door or door frame?
No. When used properly, Addalock does not cause damage to doors or frames. The metal plate is slim enough to fit into the latch without altering its structure. Unlike permanent installations, it requires no drilling or physical modifications, making it entirely safe for rented properties or hotel rooms.
Is Addalock effective against forced entry?
Addalock significantly increases the resistance of a door to forced entry. It provides an additional layer of security by anchoring the door shut. However, as with any security device, it is not invincible against extreme force or professional intruders. Therefore, it’s ideal for deterring casual attempts and providing peace of mind.
Can Addalock be used for other types of doors?
While Addalock is designed for inward-swinging hinged doors, some users have found creative ways to use it on sliding doors or gates. However, the manufacturer recommends adhering to its intended purpose for maximum efficiency and safety.
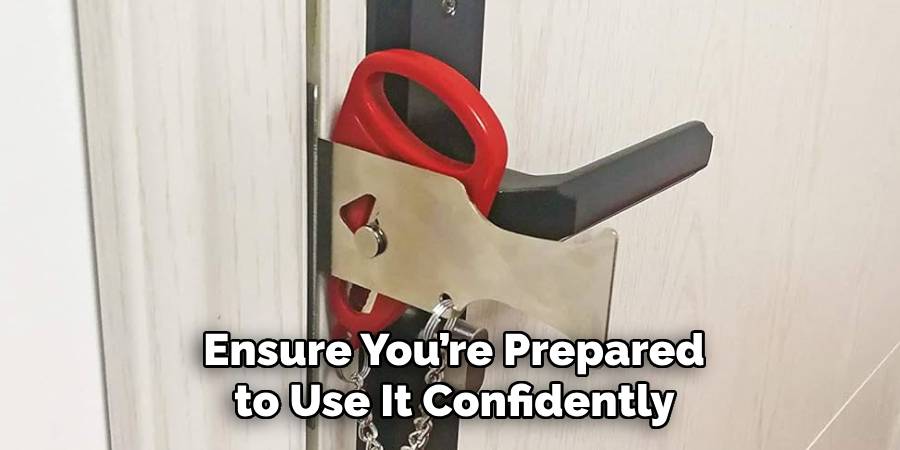
Is Addalock easy for beginners to install?
Yes! Addalock is specifically designed with simplicity in mind. The straightforward installation steps make it accessible for people of all skill levels, including those with no prior experience using security devices. Practicing the process a couple of times will ensure you’re prepared to use it confidently.
Conclusion
Installing Addalock is an easy and effective way to enhance your security, whether you’re at home, in a dorm, or traveling. By following the step-by-step instructions, you’ll feel confident in using this innovative tool to protect your space. Its compatibility with most hinged doors, combined with its portability, makes it an invaluable asset for anyone seeking convenience and peace of mind.
Its durable construction and user-friendly design ensure that Addalock stands out as a reliable security solution. Whether you’re safeguarding your personal space or seeking extra protection during your travels, this device offers a reassuring layer of security. By incorporating Addalock into your daily routine, you can enjoy greater peace of mind knowing your surroundings are secure.
Now that you know how to install Addalock, why wait? Equip yourself with the knowledge to secure your space quickly and effectively. With your Addalock in place, you can enjoy the peace of mind that comes from knowing you’ve taken proactive steps to protect yourself and your loved ones.