

Changing the battery in your LiftMaster keypad is a simple process that ensures your garage door opener continues to function reliably. Over time, the battery in your keypad can deplete, leading to reduced performance or a complete inability to operate your garage door. Thankfully, with a few basic tools and straightforward steps, you can replace the battery quickly and keep your keypad working efficiently.
This guide on how to change battery in liftmaster keypad will walk you through the process to make it hassle-free.
Understanding the Kwikset Deadbolt Structure
To effectively maintain or troubleshoot your Kwikset deadbolt, it’s essential to understand its structure and components. The Kwikset deadbolt consists of the exterior and interior assemblies, the latch mechanism, and the strike plate. The exterior assembly houses the keyway and provides the locking interface from outside the door. Inside, the interior assembly often includes a thumb turn for manual locking and unlocking.
The latch mechanism extends or retracts the bolt into the door frame, while the strike plate reinforces the frame to secure the door. Each element is designed to work seamlessly together, offering durability and enhanced security. Familiarizing yourself with these components ensures smooth operation and simplifies installation or repairs.
Tools and Materials Needed
- List of Basic Tools (E.g., Screwdriver, Flashlight, Allen Wrench, Optional Power Drill).
- Optional Items: Safety Gloves, a Tray for Screws, Kwikset Installation Manual (if Reusing Parts).
6 Simple Step-by-step Guidelines on How to Change Battery in Liftmaster Keypad
Step 1: Inspect the Keypad
Begin by closely examining the keypad to locate any visible screws or latches securing the battery compartment. Take note of the keypad model and ensure you have the correct replacement battery type ready.
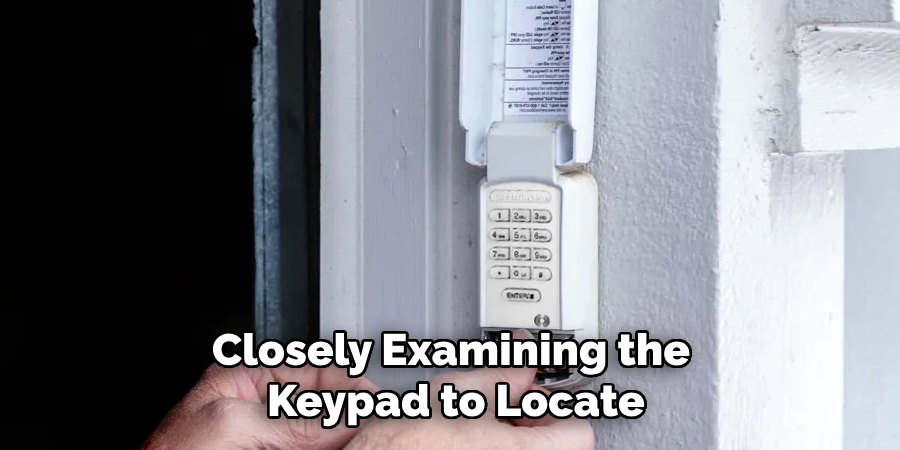
Look for signs of wear, damage, or buildup of dirt around the edges, as this may require cleaning before proceeding. Confirm that the unit is powered off to prevent accidental inputs during the process.
Step 2: Remove Old Batteries
Locate the battery compartment, usually found at the back or underneath the keypad. Depending on the model, you may need to unscrew a panel or unlatch a cover to access it. Once the compartment is open, carefully remove the old batteries, making note of their orientation to install the new ones correctly later.
Use caution to avoid damaging any internal components, and dispose of the used batteries responsibly following local recycling guidelines.
Step 3: Clean Battery Contacts (Optional)
Before inserting new batteries, inspect the battery contacts inside the compartment for any dirt, corrosion, or residue that might interfere with a proper connection. If necessary, gently clean the contacts using a cotton swab dipped in isopropyl alcohol.
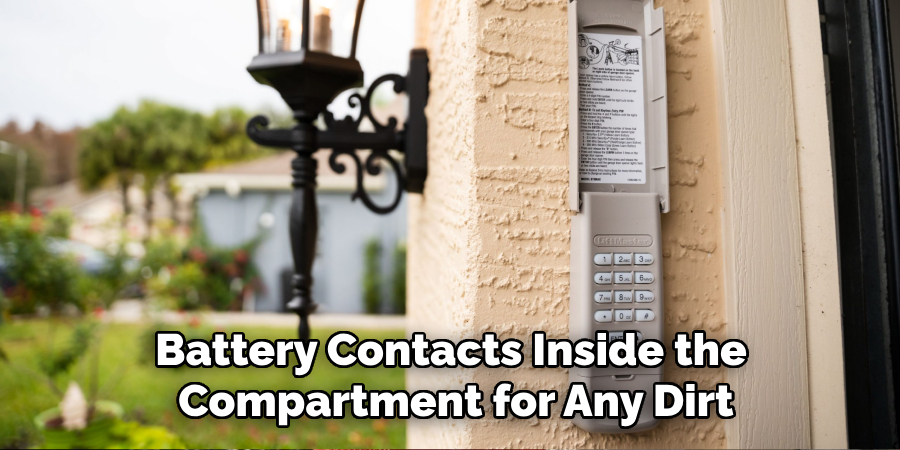
Allow the area to dry completely before proceeding. This step ensures optimal performance and helps prevent potential issues caused by poor electrical connections.
Step 4: Insert New Batteries
Take the new batteries and ensure they match the type specified for the device. Pay close attention to the polarity markings (+ and -) inside the battery compartment, and insert each battery accordingly.
Incorrect placement can prevent the device from functioning or potentially damage it. Once all batteries are properly inserted, close the battery compartment securely to maintain a good connection and protect the batteries.
Step 5: Test Keypad
After inserting the new batteries and securing the battery compartment, test the keypad to ensure proper functionality. Start by pressing a few keys to verify if they respond as expected. If the keypad lights up or produces the desired output, the device is functioning correctly.
Should the keypad remain unresponsive, double-check the battery placement, ensure the compartment is fully closed, and inspect for any potential issues such as dirt or debris interfering with the keys. Repeat the testing process once adjustments are made.
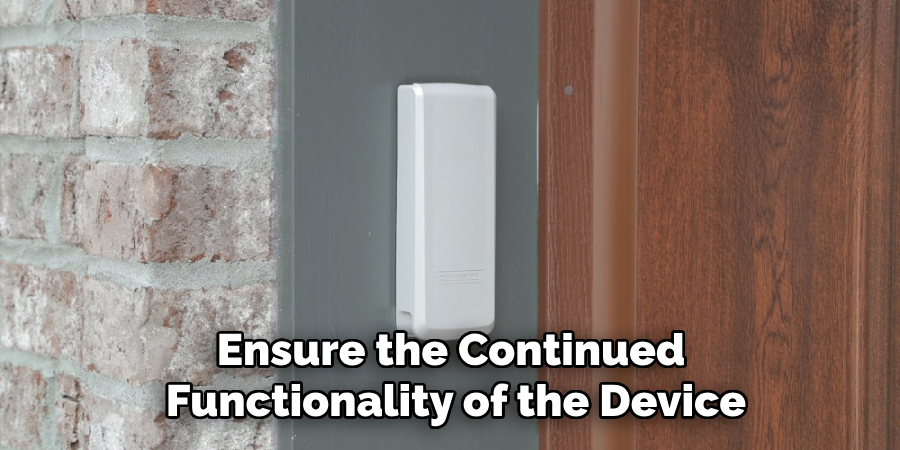
Step 6: Change Batteries Regularly
To ensure the continued functionality of the device, it is important to change the batteries on a regular basis. Over time, batteries can lose their charge, which may result in reduced performance or a completely unresponsive keypad. Monitor the device’s usage patterns to determine an appropriate replacement schedule, typically every 6 to 12 months, depending on usage frequency. Always use high-quality, compatible batteries and dispose of used ones responsibly according to local recycling guidelines on how to change battery in liftmaster keypad.
Remember, having a functional keypad is crucial for keeping your home safe and secure. By following these simple steps, you can easily replace the batteries and maintain proper functionality for your wireless keypad system.
Tips and Warnings
Tips
- Always check the user manual for specific instructions related to your Liftmaster keypad model. This ensures proper handling and avoids damage.
- Keep spare batteries on hand to avoid unnecessary downtime if the keypad suddenly stops functioning.
- Clean the battery compartment gently with a dry cloth to remove any dirt or corrosion before inserting new batteries.
- Test the keypad after replacing the batteries to confirm it is working correctly.
Warnings
- Do not mix old and new batteries, as this can lead to uneven performance or leakage.
- Avoid using incompatible or low-quality batteries, as they may damage the keypad or reduce its lifespan.
- Never force the battery compartment shut, as improper closing could lead to malfunctions or breakage.
- Dispose of used batteries properly, as improper disposal can harm the environment. Refer to local recycling regulations for guidance.
Common Issues and Troubleshooting
Keypad Not Responding
- Possible Cause: Dead or improperly installed batteries.
- Solution: Replace the batteries with new ones, ensuring they are correctly aligned with the polarity indicators.
Intermittent Performance
- Possible Cause: Mixed batteries or low-quality batteries.
- Solution: Always use high-quality, identical batteries and replace all of them at the same time.
Buttons Stuck or Hard to Press
- Possible Cause: Dirt or debris lodged in the keypad.
- Solution: Clean the keypad gently with a soft, dry cloth or compressed air. Avoid using liquids or abrasive materials.
Keypad Malfunctioning After Battery Replacement
- Possible Cause: Improper battery installation or residual power from old batteries.
- Solution: Verify battery placement matches the polarity guidelines and perform a reset by removing the batteries for a few minutes before reinstalling.
Unexpected Beeping or Error Signals
- Possible Cause: Low battery warning or a system error.
- Solution: Consult the user manual for specific error codes and replace batteries if necessary.
For persistent issues, please contact customer support or refer to the product manual for additional troubleshooting steps.
Do You Need to Get Help From Professionals?
If the troubleshooting steps provided do not resolve the issue, it may be time to seek professional assistance. Persistent problems could indicate a deeper technical fault or a component that requires repair or replacement.
Contact the manufacturer’s customer support for guidance, or consult a qualified technician with experience in similar devices. Professional help ensures the problem is addressed correctly and prevents potential damage from improper handling. Always prioritize safety and follow the manufacturer’s recommendations when deciding to involve professionals.
If the device is still under warranty, be sure to check its terms and conditions before seeking third-party assistance. Some warranties may become void if unauthorized personnel attempt to fix or modify the product. Also, consider contacting your insurance provider in case the issue is covered by your policy.
Frequently Asked Questions
Q: My Alarm System is Beeping Randomly. What Could Be the Cause?
A: This could be due to a low battery warning or a system error. Refer to the user manual for specific error codes and replace batteries if needed.
Q: How Often Should I Test My Alarm System?
A: It is recommended to test your alarm system at least once a month to ensure it is functioning properly. You can also schedule regular tests with your security provider.
Q: Can I Add Additional Sensors to My Alarm System?
A: Yes, most alarm systems are expandable and allow for additional sensors to be added. However, it is important to check with your security provider before purchasing any new sensors to ensure compatibility with your system.
Q: How Do I Arm and Disarm My Alarm System?
A: This will vary depending on the type of alarm system you have. Some may have a keypad or key fob that you can use to arm and disarm, while others may have a mobile app or allow for remote arming/disarming through a phone call. Refer to your user manual or contact your security provider for specific instructions on how to arm and disarm your particular alarm system. It is important to always arm your system when leaving your home, and remember to disarm it upon returning to avoid triggering a false alarm.
Conclusion
Properly understanding and operating your alarm system is essential for maintaining the security of your home. By following the manufacturer’s instructions on how to change battery in liftmaster keypad and ensuring your system is armed when needed, you can help protect your property and loved ones.
Regularly testing and maintaining your alarm system will ensure it functions correctly when you need it most. If you have any questions or concerns, don’t hesitate to reach out to your security provider for support. A well-managed alarm system is a key tool in creating a safer and more secure environment.
About
Safety Fic is a distinguished figure in the world of Diy design, with a decade of expertise creating innovative and sustainable Diy solutions. His professional focus lies in merging traditional craftsmanship with modern manufacturing techniques, fostering designs that are both practical and environmentally conscious. As the author of diy, Safety Fic delves into the art and science of Safety Fic-making, inspiring artisans and industry professionals alike.
Education RMIT University
(Melbourne, Australia) Associate Degree in Design (Safety Fic) Focus on sustainable design, industry-driven projects, and practical craftsmanship. Gained hands-on experience with traditional and digital manufacturing tools, such as CAD and CNC software.
Nottingham Trent University
(United Kingdom) Bachelor’s in diyfastly.com and Product Design (Honors) Specialized in product design with a focus on blending creativity with production techniques. Participated in industry projects, working with companies like John Lewis and Vitsoe to gain real-world insights.
Publications and Impact
In diy, Safety Fic his insights on indoor design processes, materials, and strategies for efficient production. His writing bridges the gap between artisan knowledge and modern industry needs, making it a must-read for both budding designers and seasoned professionals.