
To pair your Merkury camera, start by ensuring the device is properly powered on and that you have downloaded the Merkury app on your smartphone or tablet. Open the app and create an account if you don’t already have one, or log in to your existing account. Follow the on-screen instructions to put the camera into pairing mode, usually indicated by a blinking LED light. Ensure your phone is connected to a 2.4 GHz Wi-Fi network, as the camera may not support 5 GHz. Once the camera is in pairing mode, use the app to scan the QR code displayed on your screen or enter the camera’s unique code to complete the setup process.

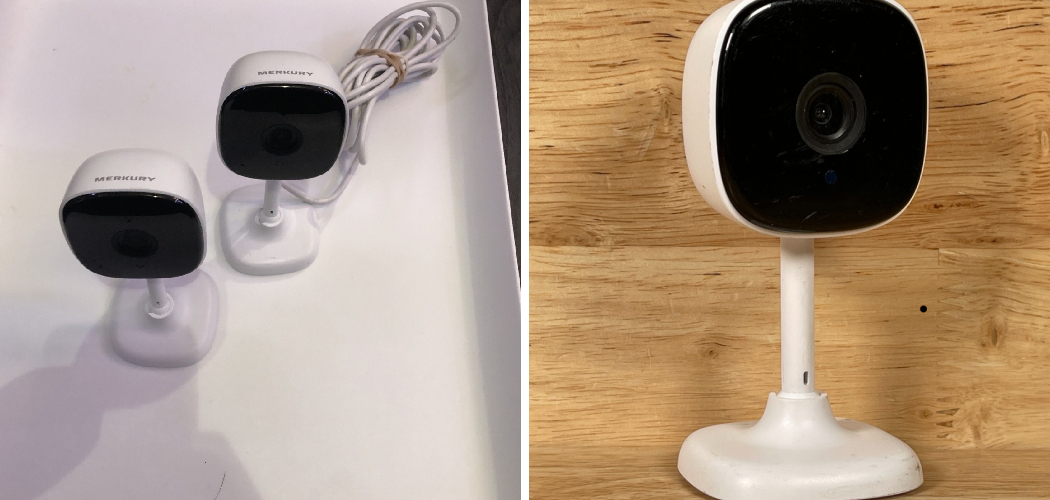
Learning how to pair Merkury camera is the first step to creating a secure and connected smart home environment. Merkury cameras are designed to integrate seamlessly with your home’s Wi-Fi network, offering remote access and monitoring through a companion mobile app. Whether you are securing your property or keeping an eye on your pets while you’re at work, the versatility of Merkury smart cameras makes them an excellent choice for modern households.
The good news is that the pairing process is simple and beginner-friendly, requiring only a few tools like your smartphone and Wi-Fi credentials. This guide is tailored to help you successfully connect your Merkury camera to your network, ensuring that you can access its full range of features with confidence. From downloading the app to fine-tuning your settings, we’ll guide you through each step to make sure your smart camera is up and running in no time.
Why Pairing Your Merkury Camera Is Important
Successfully pairing your Merkury camera is essential for harnessing its full potential. By connecting the device to your home’s Wi-Fi network, you gain access to a range of smart features, from real-time video streaming to motion detection alerts. This connectivity enables you to monitor your home remotely, no matter where you are, through the app on your smartphone.
Additionally, pairing your camera allows you to integrate it with other smart home devices. This could include synchronizing it with your virtual assistant, such as Alexa or Google Assistant, for voice control and automation. This brings convenience to your fingertips while enhancing security around your property.
Proper pairing ensures the camera functions as a reliable tool for keeping your family and property safe. By doing so, you avoid common frustrations like connectivity issues, lagging video feeds, or incomplete setup that could limit its effectiveness. Whether used for home security or just peace of mind, pairing your Merkury camera is a simple yet vital task that unlocks its complete capabilities.
Step-by-Step Guide: How to Pair Merkury Camera
Step 1: Download the Merkury Smart App
The first step to pairing your Merkury camera is downloading the Merkury Smart app, which acts as the control hub for setting up and managing the device. Start by searching for the app on your device’s app store. It’s available for both iOS and Android devices, ensuring compatibility with most smartphones and tablets.
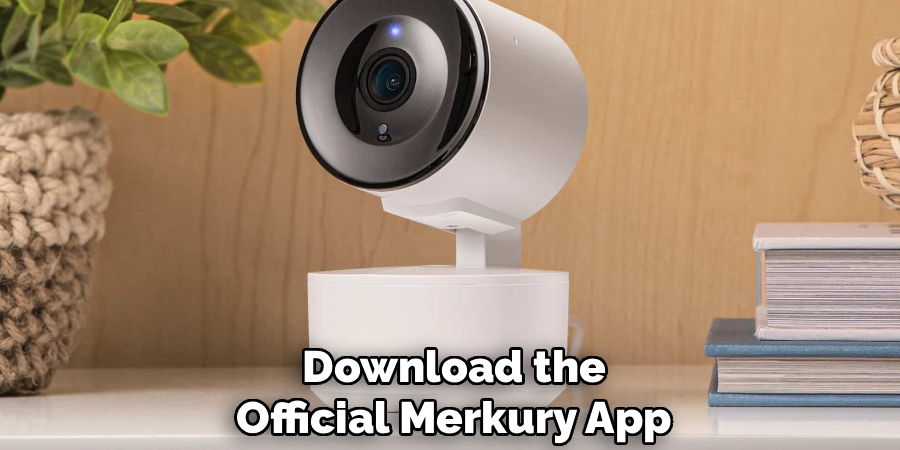
Once downloaded, install and open the app to create an account if you don’t already have one. The app will prompt you to enter basic details like your email address and a secure password. Be sure to verify your email to activate the account fully. The app’s intuitive design simplifies the setup process, ensuring that even first-time users can navigate the pairing steps effortlessly. It also serves as the primary tool for customizing notifications, live streaming, and more.
Step 2: Power On the Merkury Camera
Before proceeding, make sure the camera is adequately powered. Connect it to a nearby power outlet using the provided adapter and USB cable. Once plugged in, look for the camera’s indicator light to confirm that it has powered on. This light, often located near the lens or base, will typically flash to indicate it’s ready for pairing.
Allow the device a few moments to initialize. If the indicator light doesn’t appear or stops flashing, refer to the user manual to ensure the camera’s power connection is secure. A properly powered device ensures the subsequent pairing process proceeds without interruptions, making this step critical to your success.
Step 3: Connect to a Wi-Fi Network
Next, ensure your smartphone is connected to a stable 2.4 GHz Wi-Fi network rather than a 5 GHz one, as Merkury cameras generally require this frequency for compatibility. Open the Merkury Smart app, and it will prompt you to select the network you wish to pair the camera with.
Enter your network’s password when prompted. Double-check the credentials to avoid errors during the connection process. The app will guide the camera to join your Wi-Fi network, linking the two securely. A successful connection creates the backbone of your smart camera system, allowing data to flow seamlessly between the app and device.
Step 4: Position the Camera for Setup
Now that the Wi-Fi network is set, position your Merkury camera in an ideal location before finalizing the pairing process. Choose a spot that provides clear visibility of the area you want to monitor, such as an entryway, living room, or backyard. Ensure that the camera is within range of your router to maintain a strong Wi-Fi signal.

Using a table or temporary mounting hardware during the initial setup minimizes disruptions and ensures good connectivity before you mount the camera permanently. Proper placement enhances both the quality of your footage and the efficiency of your security coverage.
Step 5: Pair the Camera with the App
With the camera powered on and positioned, open the Merkury Smart app and select the option to add a new device. Identify the type of camera you’re setting up, typically listed as “Smart Camera” in the device menu. Follow the on-screen instructions, which may include scanning a QR code or manually linking the camera through its device ID.
The app will communicate directly with the camera during this step, integrating it into your smart home system. Confirm the pairing by checking for a notification or status update in the app that shows your camera is online. By completing this phase, you establish the connection that enables remote management of your device.
Step 6: Test the Live Feed
Once your Merkury camera is paired, test the live feed within the app to confirm that the device is broadcasting video correctly. Navigate to the live stream section of the app to view the camera’s current footage. Ensure that the video quality meets your expectations and that the frame rate is smooth.
Audio functionality, if available, can also be tested by enabling the microphone or speaker features within the app. Observing the live feed helps you identify and troubleshoot any issues, such as weak signals or obstructed views, early in the setup. This step ensures that your camera operates smoothly once mounted permanently.
Step 7: Customize Your Settings
The Merkury Smart app offers various customization options to optimize your camera’s performance. Explore the settings menu to adjust features like resolution, notification preferences, and motion detection sensitivity. Configuring these settings based on your needs allows you to fine-tune security protocols and minimize false alarms.
You can also link additional devices, such as smart lights or other cameras, to create a cohesive smart home system. Customizing the settings ensures that your Merkury camera functions effectively within your unique environment, providing tailored protection and convenience.

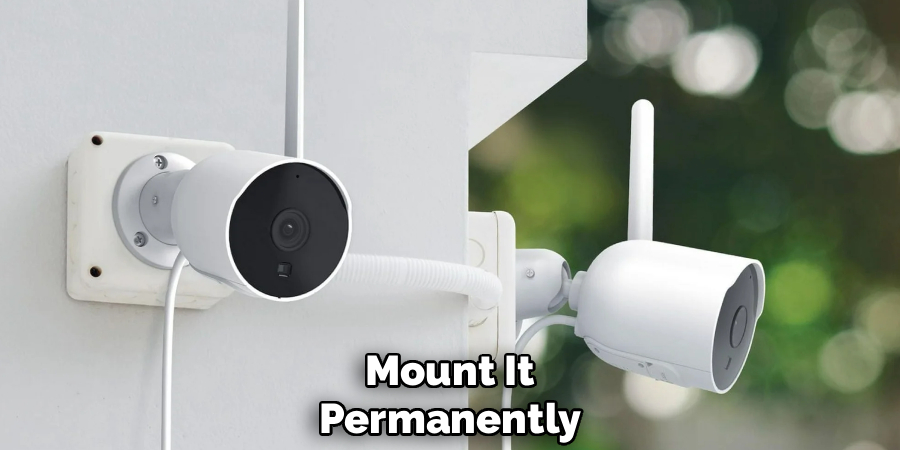
Step 8: Mount the Camera
After confirming the camera’s functionality, mount it permanently in its desired location. Use the included mounting brackets or screws to secure the device. Test its positioning one final time by accessing the live feed to ensure the camera covers the intended area without obstruction.
Angle adjustments may be necessary to capture the optimal view. Once mounted securely, your camera is ready to provide long-term service. Proper installation guarantees consistent performance and establishes a reliable foundation for your smart security system.
Frequently Asked Questions
Why Isn’t My Merkury Camera Connecting to Wi-fi?
The camera may fail to connect if it’s placed too far from the router or if the network password is entered incorrectly. Use a 2.4 GHz network and ensure the signal strength is strong. Consider restarting both the camera and router to resolve connection issues.
Can I Pair My Merkury Camera With a Different Wi-fi Network Later?
Yes, you can reconfigure the camera to a new network through the app. Reset the camera to its default settings, then follow the pairing steps again with the new network information.
Is the Merkury Smart App Required for the Camera to Work?
Yes, the app is necessary to pair the camera, access live feeds, and adjust settings. It serves as the control center for managing all Merkury smart devices.
What Do I Do if the Camera’s Indicator Light Isn’t Flashing?
If the light isn’t flashing, the camera may not be ready for pairing. Verify that it’s properly powered and try resetting it to factory settings following the user manual instructions.
How Many Devices Can View the Live Feed Simultaneously?
The Merkury Smart app supports multiple user logins, allowing multiple devices to view the live feed. However, performance may vary depending on your Wi-Fi network’s capacity.
Conclusion
Understanding how to pair Merkury camera is essential for unlocking its full potential and creating a connected smart home. By following these simple steps, you can set up your camera and enjoy real-time monitoring, motion detection, and customizable settings for enhanced security.
From downloading the app to fine-tuning your device settings, every step ensures seamless integration into your environment. Start pairing your Merkury camera today to experience the comfort and safety of a modern, connected home!