

Learning how to install Arlo Video Doorbell is a smart step toward enhancing the security and convenience of your home. The Arlo Video Doorbell is a feature-rich device that provides a clear view of your doorstep with advanced video quality and motion detection. It even integrates seamlessly with other smart home devices, ensuring an effortless connection to your existing setup.
Installing the Arlo Video Doorbell may seem daunting at first, but it’s actually a straightforward process when you follow the right steps. With the proper tools, a stable Wi-Fi connection, and the required materials, you can have your doorbell up and running quickly.
Whether you’re a seasoned DIY enthusiast or a first-time installer, this guide will lead you through every step needed to successfully install your Arlo Video Doorbell, giving your home the safety upgrade it deserves.
Why Proper Installation Matters
Installing the Arlo Video Doorbell accurately ensures that you enjoy all its features to the fullest. A proper setup guarantees that your device can capture clear video footage, detect motion accurately, and function seamlessly within your smart home system. Incorrect installation, on the other hand, can lead to performance issues such as poor video quality or signal interruptions.
Additionally, precise installation helps protect the device against harsh weather conditions and external tampering. By securing the doorbell to the mounting bracket tightly and ensuring the wiring is correctly connected, you minimize the risk of malfunctions and extend the device’s lifespan. Investing time in learning how to install Arlo Video Doorbell properly improves the doorbell’s effectiveness, ensuring peace of mind and top-tier security for your home.
Finally, installing the video doorbell correctly not only enhances function but also boosts its aesthetic appeal. A well-positioned device blends seamlessly into your home’s exterior, providing both form and function to your entryway. With accurate placement and setup, your Arlo Video Doorbell transforms into the perfect combination of security and sophistication.
Step-by-Step Guide: How to Install Arlo Video Doorbell
Step 1: Gather the Necessary Tools
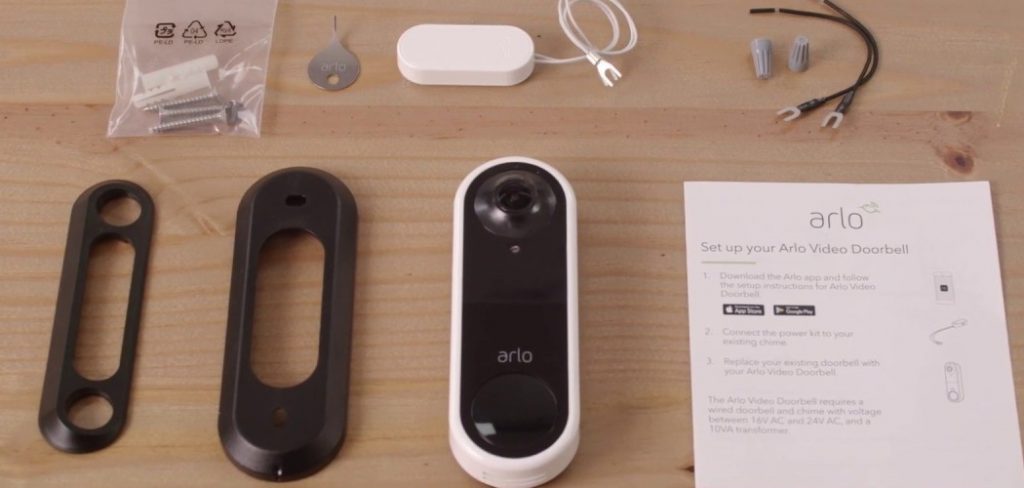
Before beginning, equip yourself with the required tools for a smooth installation process. Most of what you need comes included with the Arlo Video Doorbell package, such as the mounting bracket and screws. However, you’ll also need a drill, screwdriver, and possibly a voltage meter to check your existing doorbell wiring.
Start by locating your current doorbell or deciding where you’d like to install the Arlo Video Doorbell. If there are already connected wires, you’ll need to test them to ensure they provide sufficient power for the device. Having every tool ready saves you time and prevents unnecessary interruptions during the installation process. Mastering this preparatory step sets the groundwork for a seamless how-to on installing Arlo Video Doorbell.
Step 2: Turn Off Power to Your Doorbell
Safety is paramount when dealing with electrical components, so begin by turning off the power supply to your existing doorbell. Locate the appropriate circuit breaker that controls the doorbell wiring and switch it off. Use a voltage meter to confirm there is no power running to the wires before proceeding.
With the power securely off, you can safely work on removing the old doorbell if one is present. Detaching it from the wall allows you to access the wiring necessary for connecting your new Arlo Video Doorbell. This step ensures your safety and reduces the risk of accidental electrical hazards during installation.
Step 3: Remove the Existing Doorbell
If you’re replacing an old doorbell, carefully detach it from the mounting screws and disconnect the wires. Mark the wires with small labels or take a photo for future reference, so you know where to reconnect them later.
After removing the doorbell, assess the condition of the wall or door frame where the new device will be installed. If there are uneven spots or damaged areas, take a moment to patch and smooth them out. This creates a proper surface for the mounting bracket, ensuring that your Arlo Video Doorbell is stable and securely attached.
Step 4: Mount the Arlo Doorbell Bracket
Now it’s time to attach the mounting bracket for your Arlo Video Doorbell. Use the provided template or mark drill holes onto your wall or door frame, ensuring the bracket aligns with the desired placement of the doorbell. Drill the appropriate holes and secure the bracket using the screws from the kit.

Once the bracket is positioned securely, double-check that it’s level to avoid uneven installation. Ensuring the mounting bracket is firmly installed provides a solid foundation for attaching the video doorbell, which is key to its stability and effectiveness.
Step 5: Connect the Doorbell Wires
With the mounting bracket installed, reconnect the wiring to power your new Arlo Video Doorbell. Attach the wires to their corresponding terminals on the back of the device, matching them to the labels or photo you took earlier.
Keep the wires tight and neatly placed to ensure a secure connection and avoid interference with the mounting process. Once connected, carefully tuck the wiring into the wall cavity. Proper wiring ensures strong power flow to the doorbell, enabling it to function without interruptions and deliver stellar video quality.
Step 6: Attach the Doorbell to the Bracket
Align the Arlo Video Doorbell with the mounting bracket and snap it into place. This will lock the device securely onto the wall or doorframe. Apply gentle pressure to ensure the doorbell is tightly fitted and does not wobble or shift with touch.
Test the physical stability of the doorbell by lightly pressing against it from different angles. A firmly attached doorbell not only improves security but also ensures the video feed stays steady and usable over time.
Step 7: Restore Power and Perform Initial Setup
Turn the power back on by flipping the circuit breaker and confirming that the doorbell is receiving power. You should see a light or hear a sound indicating that the device is active. Download the Arlo app to complete the installation process by setting up the doorbell’s Wi-Fi connection and customizing the settings.
Follow the on-screen instructions within the app to synchronize the doorbell with your Arlo account and connect it to your home network. The initial setup configures the video doorbell’s functionality, preparing it for day-to-day use and smart home integration.
Step 8: Test Video and Audio Features
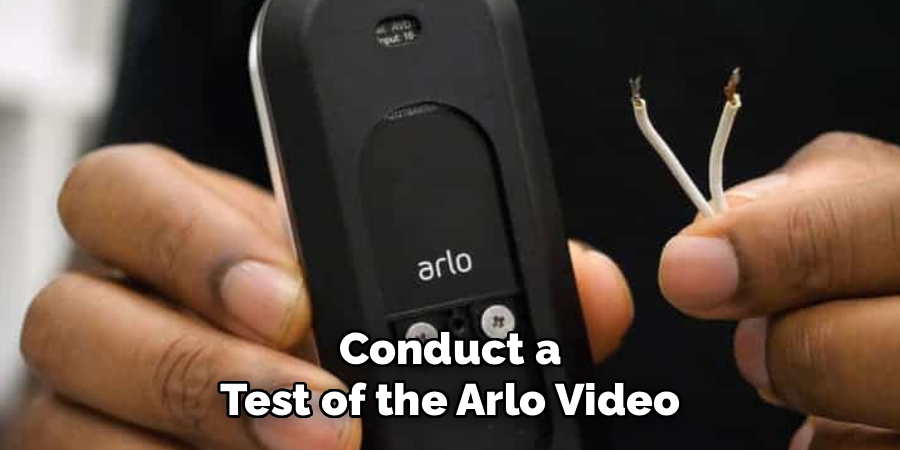
After setup, conduct a test of the Arlo Video Doorbell’s primary features. Use the app to view live footage, test two-way communication, and check motion detection coverage. Ensure the video is clear, and make angle adjustments if necessary so that the camera captures your desired range.
Run through different lighting scenarios to see how the device performs during the day and night. Testing the features guarantees that the Arlo Video Doorbell meets your security needs and is ready for reliable use.
Step 9: Optimize Device Placement
Finally, optimize the placement of your doorbell to refine its functionality. Check for potential obstacles like overhanging decorations or sharp angles that may block parts of the camera’s field of view. Adjust as needed by repositioning the mounting bracket or minor angle corrections.
Refining placement improves video performance, helping you make the most of the Arlo Video Doorbell’s range and detection capabilities. Optimized placement offers you the full security and convenience the device is designed to provide.
Troubleshooting Common Issues
Even with optimal placement and installation, you may encounter occasional issues with your Arlo Video Doorbell. Here are some common problems and their solutions:
Poor Video Quality
If you notice blurry or pixelated video, check your Wi-Fi connection. A weak signal can impact video performance. Ensure the doorbell is within range of your router or consider using a Wi-Fi extender. Additionally, clean the camera lens to remove any dirt or smudges that could hinder clarity.
Delayed Notifications
If you’re experiencing delayed alerts, verify that your app permissions allow Arlo to send push notifications without restriction. Also, ensure your phone’s battery optimization settings aren’t limiting background app activity.
Motion Detection Not Working
Double-check the motion sensitivity settings in the Arlo app. Adjusting to a higher sensitivity level can improve motion detection performance. Additionally, ensure there are no objects obstructing the camera’s field of view.
Camera Not Connecting
If the doorbell isn’t connecting to your network, restart the device and your router. If the issue persists, try resetting the doorbell and reinstalling it through the app.
Audio Issues
For poor audio quality or problems with two-way communication, inspect the microphone and speaker openings for any obstructions like dirt or debris. Also, confirm your internet speed supports clear audio transmission.
By addressing these common issues with the solutions provided, you can ensure your doorbell operates smoothly and delivers the reliable performance you expect.
Frequently Asked Questions
Do I need any special tools to install the Arlo Video Doorbell?
The tools needed include a drill, screwdriver, and voltage meter. Most components, like the mounting bracket and screws, come with the Arlo Video Doorbell package.
Is professional installation required?
Professional installation isn’t necessary, as the process is beginner-friendly. With the proper tools and guide, most homeowners can complete the installation in under an hour.
Can I install the Arlo Video Doorbell without existing wiring?
Yes, Arlo offers a wireless version powered by a rechargeable battery. However, this requires periodic recharging as opposed to a constant wired power supply.
How do I connect the Arlo Video Doorbell to Wi-Fi?
Use the Arlo app to connect the doorbell to your home Wi-Fi network during the initial setup phase. Follow the app’s on-screen instructions for an easy, seamless process.
What are the benefits of using an Arlo Video Doorbell?
The video doorbell provides high-resolution footage, motion detection, two-way audio communication, and compatibility with other smart home devices, enhancing both security and convenience.
Conclusion
Knowing how to install Arlo Video Doorbell ensures that you can enjoy all of its smart security features with minimal hassle. By following these steps, you can confidently set up this versatile device to enhance your home’s safety and connectivity.
Additionally, regular maintenance of your Arlo Video Doorbell is essential to ensure it continues functioning optimally. This includes cleaning the camera lens, checking the wiring connections, and updating the firmware when notified. Staying proactive with these steps will help extend the lifespan of your device and maintain its reliability in safeguarding your home.
From mounting the bracket to testing its performance, every part of the process contributes to making your security system effective and reliable. Take the first step today, and enjoy the peace of mind that comes with owning and using the Arlo Video Doorbell!
About
Safety Fic is a distinguished figure in the world of Diy design, with a decade of expertise creating innovative and sustainable Diy solutions. His professional focus lies in merging traditional craftsmanship with modern manufacturing techniques, fostering designs that are both practical and environmentally conscious. As the author of diy, Safety Fic delves into the art and science of Safety Fic-making, inspiring artisans and industry professionals alike.
Education RMIT University
(Melbourne, Australia) Associate Degree in Design (Safety Fic) Focus on sustainable design, industry-driven projects, and practical craftsmanship. Gained hands-on experience with traditional and digital manufacturing tools, such as CAD and CNC software.
Nottingham Trent University
(United Kingdom) Bachelor’s in diyfastly.com and Product Design (Honors) Specialized in product design with a focus on blending creativity with production techniques. Participated in industry projects, working with companies like John Lewis and Vitsoe to gain real-world insights.
Publications and Impact
In diy, Safety Fic his insights on indoor design processes, materials, and strategies for efficient production. His writing bridges the gap between artisan knowledge and modern industry needs, making it a must-read for both budding designers and seasoned professionals.