

If you’re experiencing issues with uneven air temperatures in your vehicle, it could very likely be due to a misaligned or malfunctioning blend door actuator. Understanding how to calibrate blend door actuator is essential for maintaining optimal functionality of your car’s HVAC system, ensuring consistent airflow and temperature control. Though the process might sound technical, it’s beginner-friendly and manageable with a little guidance. By recalibrating this small yet vital component, you can save money on repairs and avoid the frustration of uneven heating or cooling.
To begin the calibration process, start by locating the blend door actuator, which is typically found behind the dashboard near the HVAC system. Disconnect the vehicle’s battery to ensure safety while working on the electrical components. Once located, remove the actuator using the appropriate tools, usually a screwdriver or socket wrench. Before reinstalling, inspect the actuator for any signs of damage or wear. If it appears intact, reconnect the actuator and restart the vehicle’s HVAC system to initiate the calibration procedure. This step may vary slightly depending on your car’s make and model, so consulting your vehicle’s manual is highly recommended.
This guide will walk you through why blend door actuator calibration is crucial, how to perform it step by step, and answer common questions to help you troubleshoot with confidence.
Why Calibrating the Blend Door Actuator is Important
The blend door actuator is part of your vehicle’s HVAC system, responsible for regulating airflow and blending hot and cold air. When this actuator is out of sync with the vehicle’s control module, it can cause a variety of issues such as inconsistent temperature, strange clicking noises, or improper airflow direction.
Calibration essentially allows the actuator and control module to “relearn” the correct positions for delivering balanced temperatures. Whether you’re replacing a faulty actuator or your system needs recalibration after a battery replacement, knowing how to calibrate the blend door actuator ensures your HVAC system operates accurately and efficiently. Proper calibration doesn’t just solve current problems—it also prevents long-term wear due to unnecessary strain on the actuator and other parts of the HVAC system.
10 Step-by-Step Guide on How to Calibrate Blend Door Actuator
Ensuring your blend door actuator is calibrated correctly can be done in a series of straightforward steps. Here’s exactly how to calibrate the blend door actuator for a consistent and problem-free HVAC system.
Step 1: Understand the System’s Design
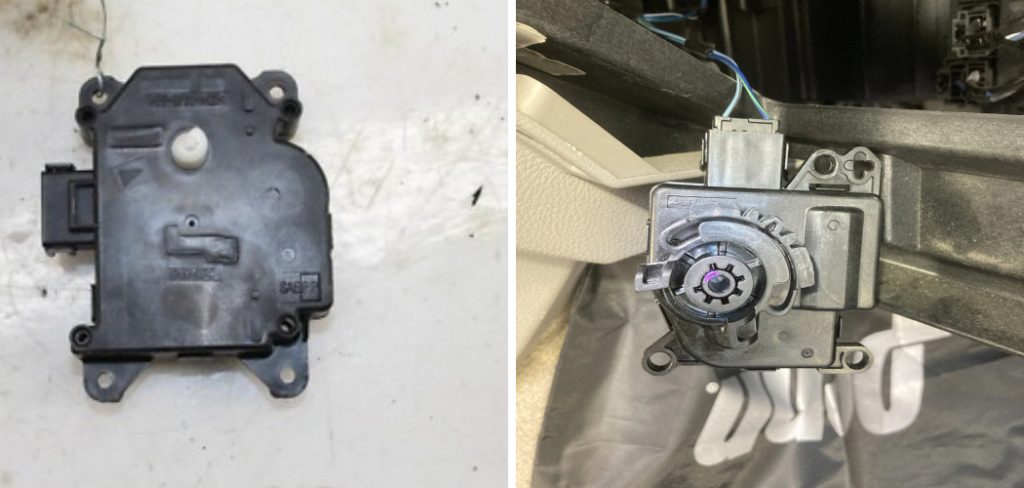
Before beginning the calibration process, familiarize yourself with the location and function of the actuator within your vehicle. Typically, the blend door actuator is located beneath the dashboard on the passenger side. It controls the movement of the blend door, which mixes hot and cold air to maintain the cabin temperature you set. Studying your vehicle’s manual can give you insight into specific connections and components.
Step 2: Diagnose the Issue
Verify that the actuator is indeed the source of your problem. Unusual knocking or clicking noises, inconsistent cabin temperatures, or changes in airflow direction are major symptoms of a blend door actuator issue. Test the functionality by adjusting the air temperature and observing if there are delays or irregular responses.
Step 3: Access the Blend Door Actuator
Once you’re sure the problem lies with the actuator, you’ll need to physically access it to proceed. Most vehicles require the removal of glove compartments or lower dashboard panels to expose the actuator. Use basic tools like a screwdriver for panel removal. Take note of how the actuator is connected to the HVAC system for easier reassembly later.
Step 4: Disconnect and Inspect
Before initiating any calibration, disconnect the battery to avoid accidental electrical surges during the process. Once disconnected, inspect the actuator for physical damages or debris that might hinder its operation. Sometimes, cleaning and reattaching the part may improve function without requiring additional calibration or replacement.
Step 5: Reset the Control Module
Reconnect the vehicle’s battery to perform a basic system reset. Many vehicle control modules automatically recalibrate the blend door actuator after a battery reconnect. Turn your ignition to the ‘on’ position without starting the engine, allowing the system to engage its default positions. This step often addresses minor calibration mismatches.

Step 6: Perform a Manual Calibration
If the reset doesn’t fully resolve the issue, you may need to perform a manual calibration. Start by setting the HVAC controls to their default state—turn the air conditioner and fan off, and set the air temperature to the middle setting. With the ignition in the ‘on’ position, direct the control module through all temperature and airflow settings a couple of times. This process helps the actuator relearn the positions of the blend door.
Step 7: Use Diagnostic Tools
For more advanced calibration, certain vehicle models may require the use of a scan tool or OBD2 diagnostic device. Such tools can access the HVAC module and initiate a full system recalibration. Follow the specific steps provided by your vehicle’s manufacturer to ensure you’re executing the proper commands.
Step 8: Test the System
After recalibrating, put the HVAC system through all its settings—hot, cold, and different airflow options—to confirm proper functionality. Pay attention to the air temperature, flow direction, and any noises that could indicate further issues. If everything runs smoothly, the calibration process is complete.
Step 9: Reassemble and Inspect
Reattach any dashboard panels or components that were removed earlier. Make sure all screws and wiring are secured in their original configurations. Perform a brief inspection to ensure nothing was damaged or left loose during the process.
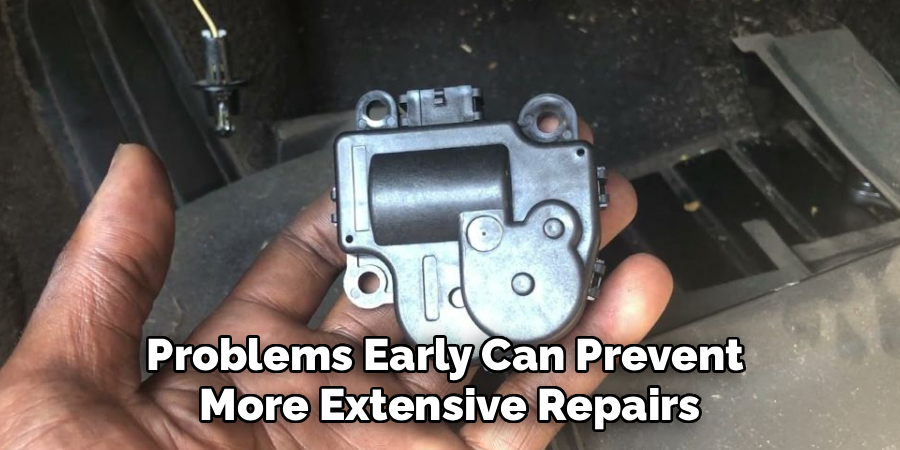
Step 10: Monitor Performance Over Time
Lastly, keep an eye on the HVAC system after calibration. Regularly check for clicking noises, slow responses, or performance inconsistencies. Catching minor problems early can prevent more extensive repairs in the future.
Common Actuator Issues
Actuators in HVAC systems can encounter a variety of issues over time, which may impact system performance. One common problem is actuator failure due to wear and tear, especially in systems with constant use. Signs of failure include unresponsive movement or irregular operation. Another frequent issue is improper calibration, which can lead to imprecise control over airflow or temperature settings. Electrical problems, such as loose wiring or damaged connections, can also disrupt actuator functionality. Additionally, dirt and debris can accumulate within actuator components, leading to mechanical blockages or reduced efficiency. Regular maintenance and inspection can help identify these issues early and ensure reliable actuator performance.
Frequently Asked Question
1. How do I know if my blend door actuator needs calibration?
Symptoms of a misaligned blend door actuator typically include uneven cabin temperatures, clicking noises when adjusting the HVAC settings, or air being directed to the wrong vents. Additionally, if you’ve recently replaced the actuator or reset the vehicle’s battery, calibration is often necessary to restore normal function.
2. Can I calibrate the blend door actuator without a diagnostic tool?
Yes, in most cases you can manually recalibrate the blend door actuator by performing a system reset and cycling through all HVAC settings. However, if manual methods don’t work, using a diagnostic tool for recalibration might be required for advanced systems. Consult your vehicle’s manual or a local mechanic for specific guidance.
3. How long does it take to calibrate a blend door actuator?
The calibration process typically takes 30–60 minutes, depending on the complexity of your vehicle’s HVAC system and whether diagnostic tools are needed. Accessibility to the actuator and familiarity with the process can also impact the timeframe.
4. What tools do I need for blend door actuator calibration?
Before starting, gather basic tools such as screwdrivers for panel removal and possibly a socket wrench for actuator detachment. For advanced calibration, an OBD2 diagnostic scanner may be necessary to interact with the HVAC control module. Most manual recalibrations, however, require no specialized tools.
5. Can a miscalibrated blend door actuator cause permanent damage?
If left unchecked, a misaligned actuator can strain the HVAC system and lead to long-term problems. Constant clicking noises may indicate internal damage, which could worsen if not resolved promptly. Regular maintenance and timely calibration can prevent these issues and extend the life of your actuator and associated components.

Conclusion
Calibrating the blend door actuator is an essential part of maintaining your vehicle’s HVAC system. By following the steps outlined above, you can ensure your system delivers consistent airflow and temperature without unnecessary strain or wear. Remember, learning how to calibrate blend door actuator not only solves immediate temperature control issues but also keeps your system in top shape over time.
Proper maintenance and timely calibration can prevent costly repairs down the line. Always be attentive to signs of malfunction, such as unusual noises or inconsistent airflow, as these can indicate the need for recalibration or mechanical inspection. Staying proactive with your vehicle’s upkeep ensures long-term reliability and comfort.
Take the time to diagnose, recalibrate, and maintain your blend door actuator, and enjoy the comfort of a properly functioning HVAC system on every drive!
About
Safety Fic is a distinguished figure in the world of Diy design, with a decade of expertise creating innovative and sustainable Diy solutions. His professional focus lies in merging traditional craftsmanship with modern manufacturing techniques, fostering designs that are both practical and environmentally conscious. As the author of diy, Safety Fic delves into the art and science of Safety Fic-making, inspiring artisans and industry professionals alike.
Education RMIT University
(Melbourne, Australia) Associate Degree in Design (Safety Fic) Focus on sustainable design, industry-driven projects, and practical craftsmanship. Gained hands-on experience with traditional and digital manufacturing tools, such as CAD and CNC software.
Nottingham Trent University
(United Kingdom) Bachelor’s in diyfastly.com and Product Design (Honors) Specialized in product design with a focus on blending creativity with production techniques. Participated in industry projects, working with companies like John Lewis and Vitsoe to gain real-world insights.
Publications and Impact
In diy, Safety Fic his insights on indoor design processes, materials, and strategies for efficient production. His writing bridges the gap between artisan knowledge and modern industry needs, making it a must-read for both budding designers and seasoned professionals.