

Removing tint from safety glass can be a challenging yet necessary task in certain situations.
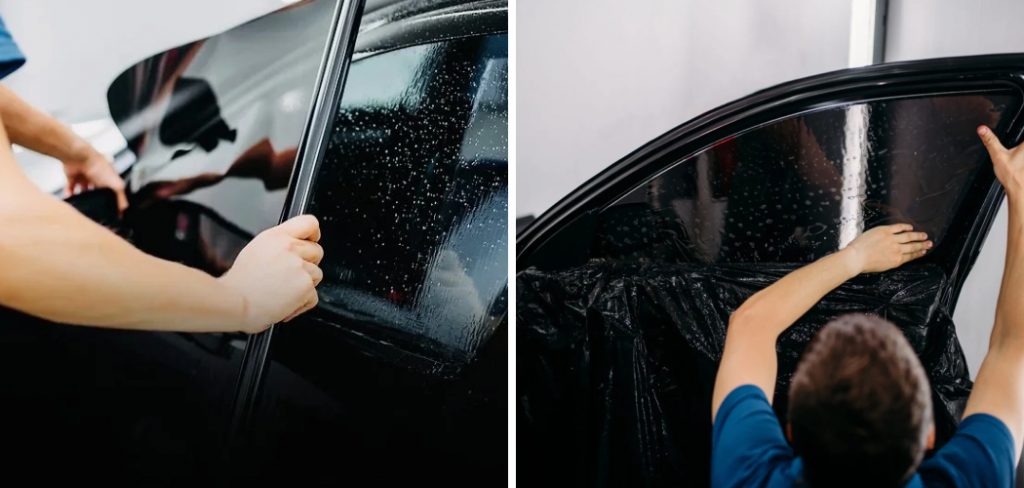
Whether it’s to enhance visibility, meet regulatory requirements, or update the appearance, understanding the proper methods and tools is crucial to ensure the glass remains intact and undamaged. This guide will walk you through the process of how to remove tint from safety glass.
What is Safety Glass?
Safety glass is a type of glass specifically designed to reduce the risk of injury in the event of breakage. It is commonly used in vehicles, windows, and other applications where enhanced durability and safety are essential.
Unlike regular glass, safety glass is manufactured through processes like tempering or lamination, which make it stronger and ensure it breaks into small, less dangerous fragments or stays bound together if shattered. This unique design not only minimizes the risk of injury but also provides better protection in demanding conditions.
Tools and Materials Needed
To work with safety glass effectively, you will need the right tools and materials to ensure precision and safety. Below is a list of commonly required items:
- Glass Cutter – For cutting safety glass to the desired size and shape.
- Measuring Tape – To ensure accurate measurements before cutting or installation.
- Straight Edge or Ruler – Aiding in precise, clean cuts.
- Protective Gear – Including gloves, safety goggles, and a dust mask to protect against shards and glass dust.
- Heat Gun – Useful for working with laminated safety glass by softening the interlayer if needed.
- Adhesive and Sealant – To secure and seal the glass during installation.
- Vacuum Suction Cups – For safely handling and positioning large glass panels without direct contact.
Having these tools and materials on hand will help streamline the process of working with safety glass while maintaining safety and accuracy.
10 Methods How to Remove Tint from Safety Glass
Method 1: Gather the Necessary Tools and Materials
Before beginning, gather all tools and materials to ensure a smooth and safe removal process. Essential items include a heat gun or hairdryer, a razor blade or plastic scraper, spray bottle with water and dish soap, lint-free cloths, adhesive remover or ammonia solution, gloves, and protective eyewear.
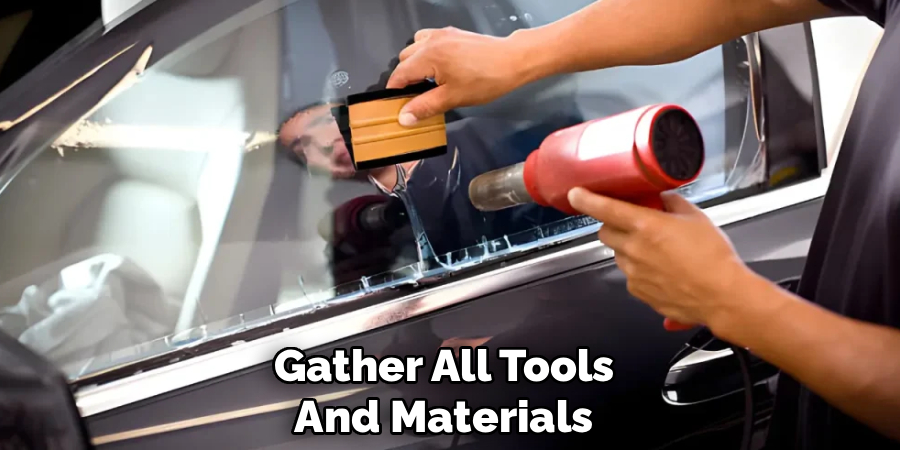
Having all tools ready reduces interruptions and ensures precision during removal. Using high-quality, non-abrasive tools prevents damage to the glass while effectively removing the tint and adhesive residue.
Method 2: Protect Surrounding Areas
Before applying heat or chemical solutions, protect the surrounding areas of the glass. For vehicle windows, use painter’s tape to cover rubber seals, trim, and interior surfaces. In buildings or homes, lay down towels or protective sheets to prevent dripping solutions from affecting walls, flooring, or furnishings. Protecting adjacent surfaces prevents accidental damage and makes the cleanup process easier after tint removal.
Method 3: Heat the Tint Film
Heating the tint film softens the adhesive, making it easier to peel off. Use a heat gun or hairdryer on a medium setting and move it evenly across the window surface. Avoid holding heat in one spot too long, as excessive heat can warp surrounding seals or, in rare cases, damage the glass surface. Applying controlled heat loosens the adhesive and allows for smoother removal of the film, minimizing the risk of tearing or leaving fragments behind.
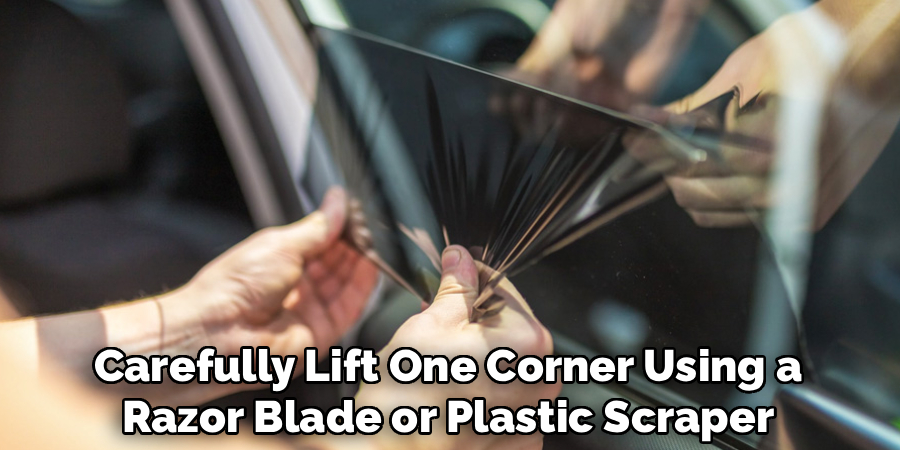
Method 4: Peel Off the Tint Slowly
Once the tint is heated, carefully lift one corner using a razor blade or plastic scraper. Gradually peel the film off the glass at a steady angle. Pull slowly to prevent tearing and leaving small adhesive fragments.
For large windows, it may be helpful to peel in sections, reheating areas as needed to maintain adhesive softness. Slow, deliberate peeling ensures that most of the tint comes off in larger pieces, reducing cleanup and minimizing residue.
Method 5: Apply Soapy Water for Stubborn Sections
If certain areas of the tint resist peeling, spray a mixture of water and mild dish soap on the glass surface. Let it sit for a few minutes to penetrate and loosen the adhesive. Use a plastic scraper to lift the softened film carefully.
The soapy water lubricates the surface, allowing stubborn pieces to slide off more easily without scratching the glass. This method is particularly effective for corners and edges where adhesive tends to be strongest.
Method 6: Use an Adhesive Remover
After removing the main film, adhesive residue often remains on the glass. Apply a commercial adhesive remover or a solution containing ammonia (for vehicles, ensure proper ventilation). Let it sit for a few minutes to break down the adhesive. Then, wipe the area with a lint-free cloth or use a plastic scraper to remove the softened residue. Using an adhesive remover ensures that the glass is completely clean and smooth, restoring transparency and preventing future dirt accumulation.
Method 7: Scrape Residual Glue Carefully
For remaining adhesive that resists chemical treatment, use a razor blade or plastic scraper at a low angle to gently scrape it off. Keep the blade nearly parallel to the glass to avoid scratches. Work slowly in small sections, reapplying adhesive remover or soapy water as needed. Careful scraping ensures a completely clean surface without damaging the safety glass or leaving permanent marks.
Method 8: Clean the Glass Thoroughly
After removing the tint and adhesive, clean the glass thoroughly with a glass cleaner or a solution of water and vinegar. Wipe in circular motions using a lint-free cloth to remove streaks, fingerprints, or leftover cleaning solution. Clean windows not only look clear and polished but also allow for easier inspection for any remaining adhesive fragments. A final cleaning step ensures a pristine finish and restores the full transparency of the safety glass.
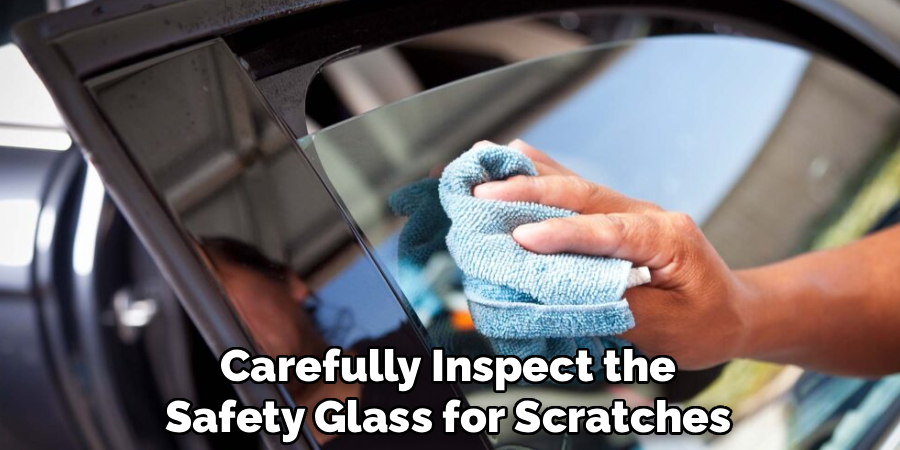
Method 9: Inspect for Damage or Scratches
After tint removal, carefully inspect the safety glass for scratches, chips, or cracks. While proper technique minimizes the risk of damage, repeated scraping or aggressive handling can leave minor imperfections.
If scratches are detected, consider using a glass polishing compound or professional repair service to restore clarity. Inspecting the glass ensures that the surface is safe, smooth, and ready for new applications or treatments.
Method 10: Optional Installation of New Tint or Protective Film
Once the glass is clean and free of residue, you can choose to install new tint, safety film, or UV protection. Measure and cut the new film accurately, clean the surface again, and follow installation procedures similar to original tint application.
Reapplying protective film enhances security, blocks glare, and improves energy efficiency. Preparing the surface carefully before new installation ensures proper adhesion and longevity of the replacement film.
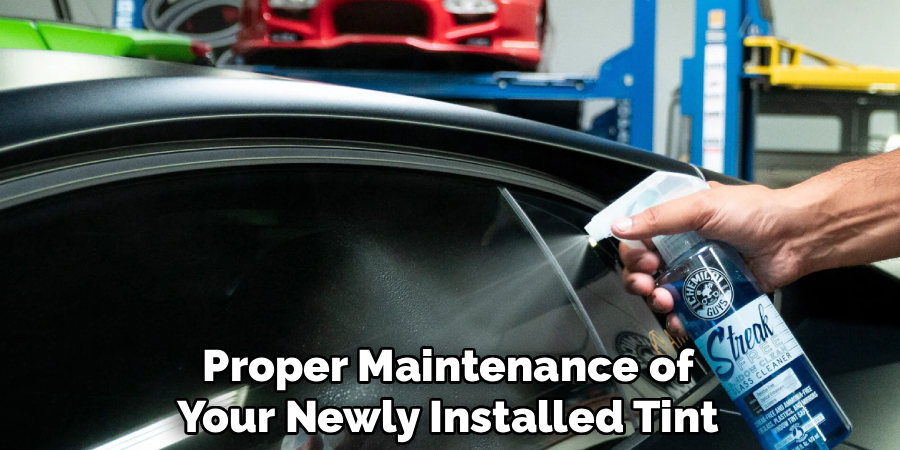
Maintenance and Upkeep
Proper maintenance of your newly installed tint or protective film is essential to ensure its effectiveness and longevity. Avoid cleaning the surface for at least a week after installation to allow the film to cure fully. When cleaning, use a soft, non-abrasive cloth or sponge and a mild, ammonia-free cleaner.
Harsh chemicals or abrasive materials can damage the film and reduce its clarity or effectiveness. Regularly inspect the film for any bubbles, peeling, or scratches and address issues promptly to prevent further damage. By following these practices, you can extend the lifespan of the film and maintain its aesthetic and functional benefits.
Troubleshooting Common Issues
Despite proper care, you may encounter some common issues with the film. Below are troubleshooting tips for resolving them effectively:
- Bubbles Under the Film
- Small bubbles may appear shortly after installation. These often resolve on their own as the film cures. If bubbles persist beyond the curing period, use a squeegee or soft edge to gently push the air toward the edges. For larger, stubborn bubbles, you may need to carefully lift the film and reapply it, ensuring the surface is clean and free of debris.
- Peeling Edges
- If the edges of the film begin to peel, this could indicate poor adhesion due to dirt or improper installation. Clean the affected area and reapply the edge with a soft adhesive, following the manufacturer’s guidelines. Avoid using excess adhesive as it may seep out and affect the film’s appearance.
- Scratches or Scuffs
- Minor scratches can sometimes be buffed out with a soft, damp cloth. For larger scuffs or scratches, consider replacing the damaged section of the film. Always handle the film gently during cleaning and maintenance to prevent new damage.
- Hazy or Cloudy Appearance
- A hazy appearance may be due to moisture trapped beneath the film. This often resolves itself during the curing process. If the haziness persists, check for tiny leaks allowing moisture to enter, and reseal the edges as needed.
By addressing these issues promptly and with care, you can restore the film’s look and performance while prolonging its lifespan.
Conclusion
Removing tint from safety glass requires careful preparation, patience, and precise technique to avoid damaging the glass surface. By following these ten methods—from gathering tools and heating the film to peeling, removing adhesive, cleaning, and inspecting the glass—you can safely and effectively restore your windows to a clean, clear state.
Follow these simple instructions outlined in this blog post about how to remove tint from safety glass, and you’ll be able to get the job done with ease.
About
Safety Fic is a distinguished figure in the world of Diy design, with a decade of expertise creating innovative and sustainable Diy solutions. His professional focus lies in merging traditional craftsmanship with modern manufacturing techniques, fostering designs that are both practical and environmentally conscious. As the author of diy, Safety Fic delves into the art and science of Safety Fic-making, inspiring artisans and industry professionals alike.
Education RMIT University
(Melbourne, Australia) Associate Degree in Design (Safety Fic) Focus on sustainable design, industry-driven projects, and practical craftsmanship. Gained hands-on experience with traditional and digital manufacturing tools, such as CAD and CNC software.
Nottingham Trent University
(United Kingdom) Bachelor’s in diyfastly.com and Product Design (Honors) Specialized in product design with a focus on blending creativity with production techniques. Participated in industry projects, working with companies like John Lewis and Vitsoe to gain real-world insights.
Publications and Impact
In diy, Safety Fic his insights on indoor design processes, materials, and strategies for efficient production. His writing bridges the gap between artisan knowledge and modern industry needs, making it a must-read for both budding designers and seasoned professionals.