

Antique locks hold a certain charm and historical value, but losing or lacking a key for one can be frustrating. Whether you’re a collector of vintage items or simply trying to access an old family heirloom, you may wonder how to make a key for an antique lock. The process can seem intimidating, but with careful attention and the right tools, it’s a task anyone can take on.
The first step is to examine the lock closely to understand its structure and mechanism. Look for any identifying marks or numbers that might indicate the type of lock or manufacturer, as this information can be valuable in finding an appropriate key.
If possible, disassemble the lock carefully to observe the internal components like the pins or levers. Be sure to document the process, perhaps through photos or notes, to ensure that reassembly is straightforward. Understanding the internal workings of the lock is essential for creating a key that fits and operates smoothly.
This guide will walk you through the steps to create a functional key for your antique lock, highlighting the importance of understanding lock mechanisms and using appropriate materials. By the end, you’ll feel empowered to undertake this rewarding project yourself.
Why Unlocking the Mystery of Antique Keys Matters
Understanding how to make a key for an antique lock goes beyond practicality—it’s also about preserving history. Antique locks are complex mechanical marvels, showcasing the craftsmanship of bygone eras. By recreating a key, you’re not only enabling access but also breathing life into a piece of history.
These locks often come with sentimental value, such as being attached to a family heirloom. Learning how to unlock their secrets allows you to keep their stories alive while making sure they can continue to serve a purpose. Furthermore, making your own key saves you the potentially costly process of replacing the lock or hiring a professional locksmith who specializes in antiques.
Taking the time to create a key for an aged lock transforms a potentially frustrating challenge into a rewarding endeavor, where craftsmanship, problem-solving, and historical appreciation come together.
Step-by-Step Guide on How to Make a Key for an Antique Lock
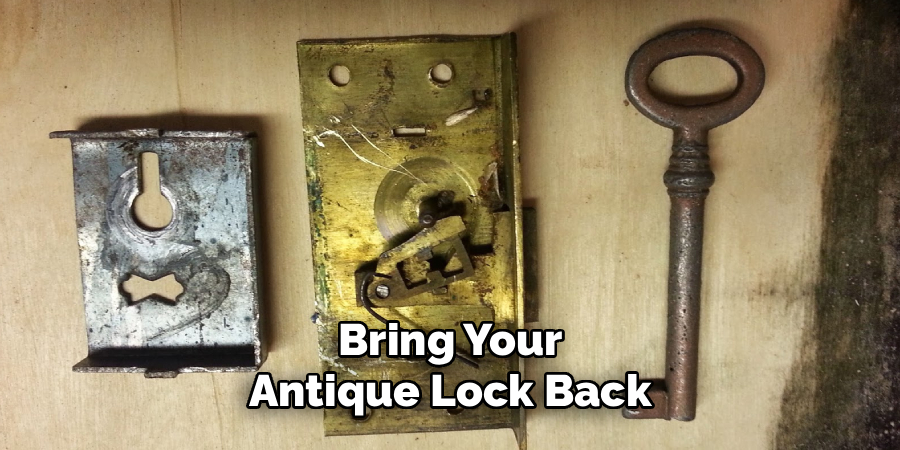
If you’re ready to bring your antique lock back to life, here’s a detailed guide to help you make a key. With patience and precision, you’ll be able to recreate a key that works seamlessly with your lock.
Step 1: Examine the Lock
Before you can begin, familiarize yourself with the lock. Carefully inspect its mechanism to understand how it works. Antique locks typically differ from modern ones, relying on intricate internal components like wards and levers.
Gently open the lock, if possible, to view its inner design. If you can’t open it, use diagrams or instructional videos to get an idea of its likely structure. Be sure to document any measurements or observations to guide you in the key-making process later.
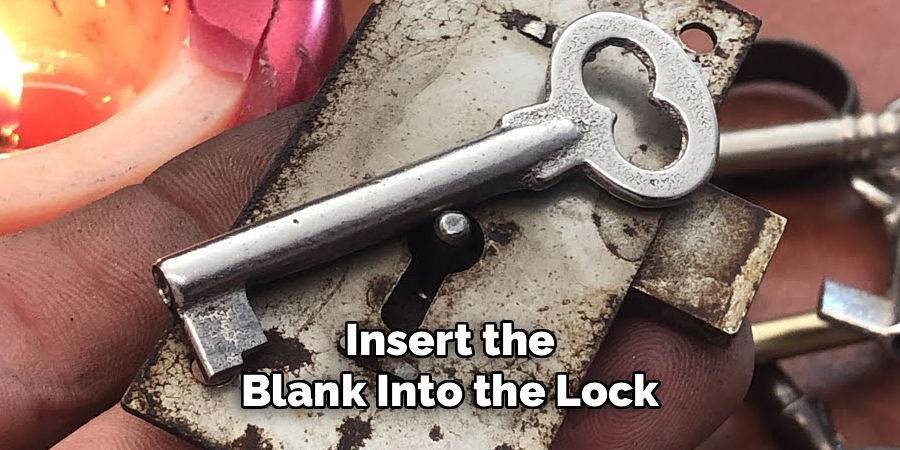
Step 2: Determine the Type of Blank Key Needed
A blank key serves as the foundation for creating a custom key. For antique locks, you’ll often need a skeleton key blank, which can be found in hardware stores or online.
The blank you choose should closely match the size and thickness of the lock’s keyway. Insert the blank into the lock to check if it fits snugly. If it doesn’t slide in smoothly, you might need to file it down to ensure a proper fit.
Step 3: Gather Necessary Tools
To craft a key, you’ll need tools such as a needle file set, sandpaper, and a vice to hold the blank key steady while you work. Additionally, having graphite powder or oil on hand can help lubricate the lock and key, ensuring smoother testing as you progress.
Antique locks often have delicate parts, so opt for small, precise tools to mimic the intricate design of the internal components. Prioritize a steady workspace with good lighting to avoid errors.
Step 4: Impressioning the Blank Key
Impressioning involves creating a pattern on the blank that mirrors the inside of the lock. Insert the blank into the lock and turn it gently while applying pressure. This will leave small marks or grooves on the blank, indicating the point where the key engages the locking mechanism.
Repeat the process multiple times to accurately map the necessary cuts. Don’t rush—each mark brings you closer to crafting a functional key.
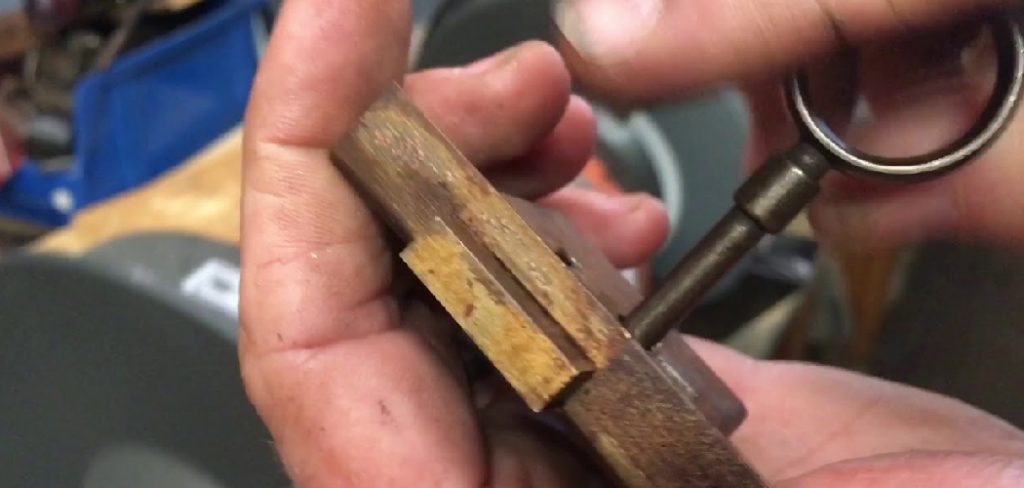
Step 5: Shaping the Key
Using a fine needle file, carefully remove material from the blank, guided by the impressions you’ve made. File slowly and test the key in the lock frequently to avoid over-filing. If the key doesn’t engage the lock yet, continue shaping gradually.
Focus on fitting the wards and levers within the lock to avoid errors that could render the key nonfunctional. Keep checking for smooth insertion and turning.
Step 6: Create a Handle
While shaping the key, ensure the handle provides enough grip for easy turning. If the blank key’s handle isn’t ideal, modify it by adding tape or wrapping it with a sturdy material.
Although the aesthetic may not be your first priority, sculpting a practical handle grants the key usability, even if it’s only a placeholder until a better solution is found.
Step 7: Test and Refine
Once you’ve shaped the key to fit the lock, test it by fully inserting it and turning it. If the lock doesn’t open, examine the mechanism for possible sticking points. Repeat the filing and refining process as necessary, but proceed cautiously to avoid irreversible mistakes.
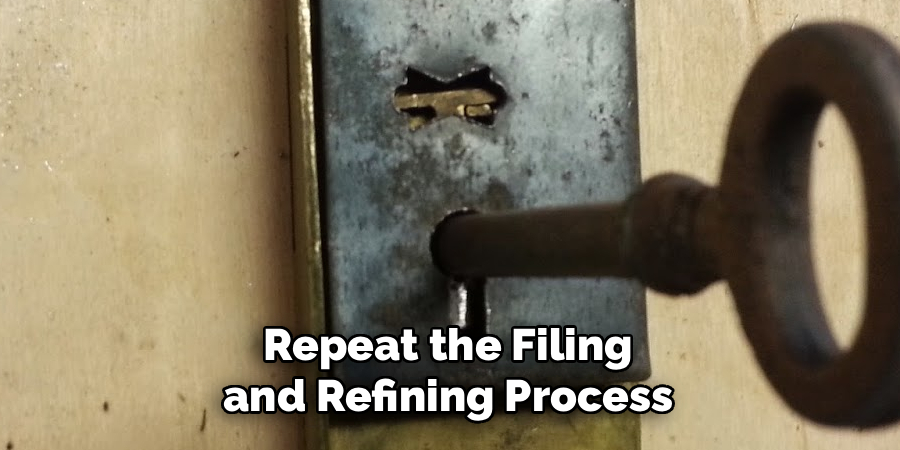
Lubricate the lock and key with graphite powder for smoother operation during these tests.
Step 8: Finish and Polish
When your key successfully opens the lock, go over it with sandpaper to smooth rough edges. Polishing the key not only improves its appearance but also ensures it won’t damage the lock over time.
At this stage, you may opt to duplicate the handmade key for future use, in case the original wears down.
Common Challenges Faced
Creating a handmade key comes with its share of challenges, even for the most meticulous individuals. One frequent issue is achieving the precise alignment of the key’s cuts with the lock’s internal mechanisms. Even a minor deviation can render the key unusable. Additionally, working with metal tools requires steady hands and patience, as excessive force might damage the material or cause accidental injuries.
Another challenge is ensuring the key’s durability; if the metal used is too soft, the key might wear out quickly or bend under pressure. Finally, without the right tools or materials, shaping the key efficiently becomes more time-consuming and less accurate, increasing the chances of error. Addressing these challenges requires careful planning, a methodical approach, and access to proper resources.

Frequently Asked Questions
1. Can all antique locks be opened with a handmade key?
Most antique locks can be opened with a well-made key, provided the lock isn’t severely damaged or rusted. However, some designs may have unique features requiring specialized blanks or techniques. A severely corroded lock might require professional restoration before a key can be crafted.
2. Where can I find blank keys for antique locks?
Blank keys for antique locks are available through specialized locksmith suppliers, antiques dealers, and online marketplaces. Bring measurements of your lock’s keyway to ensure the blank will fit its dimensions.
3. What if the lock is stuck or rusted shut?
A stuck lock should be carefully treated with a rust remover or lubricant. Gently clean the internal mechanism using a soft tool or compressed air. Avoid forcing the lock, as this could cause permanent damage.
4. How do I identify my antique lock’s style?
Antique locks come in various types, such as warded locks, lever locks, or barrel locks. Inspecting the mechanism or consulting a locksmith familiar with vintage designs will help you identify its style. Knowing the type is crucial in selecting the right key blank and crafting an appropriate key.
5. Is it worth making a key myself or hiring a professional?
Making a key yourself can save money and provide a personal sense of accomplishment. However, if the lock is exceptionally rare or complex, a professional locksmith can ensure accuracy and preserve the integrity of the lock. Opt for professional help if you’re unsure about the process or lack the necessary tools.
Conclusion
Creating a key for an antique lock is a fulfilling process that combines craftsmanship and problem-solving. By following the steps outlined in this guide, you’ll be equipped to uncover the secrets of your vintage lock and produce a functional key.
If you encounter challenges during the process, patience and attention to detail are crucial. Each antique lock has its own unique characteristics, and taking the time to understand its mechanisms can lead to better results. Remember that preserving the lock’s condition is just as important as crafting the key, so handle all components with care.
Once you know how to make a key for an antique lock, you not only solve a practical problem but also connect with the history behind these intricate mechanisms. Whether it’s for a family heirloom, a personal collection, or a decorative piece, the experience of making a key is as rewarding as the result itself. Get started today and rediscover the timeless charm hidden within your antique lock!