
Parallel parking and navigating tight spaces can be a source of anxiety for even the most experienced drivers. The fear of a minor bump or scratch can make simple maneuvers stressful. Aftermarket parking sensors offer a modern solution, providing audible or visual alerts to help you gauge the distance to obstacles, significantly improving your confidence and safety. While many newer cars come with this feature pre-installed, adding them to an older vehicle is a surprisingly achievable DIY project.

Learning how to install parking sensors can save you hundreds of dollars compared to a professional installation. With a quality aftermarket kit and a few basic tools, you can add this valuable safety feature to your car in an afternoon. This guide will provide a clear, step-by-step walkthrough of the entire process, from selecting the right kit to wiring the system and testing its functionality.
Why Installing Parking Sensors Is a Smart Upgrade
Upgrading your vehicle with parking sensors is a practical investment in both safety and peace of mind. These systems dramatically reduce the risk of low-speed collisions with objects like posts, low walls, or other vehicles that may be in your blind spots. This added layer of vehicle safety not only helps prevent costly cosmetic damage to your bumper but also protects pedestrians who might unexpectedly walk behind your car. For drivers of larger vehicles or those with limited rear visibility, parking sensors transform stressful parking situations into simple, guided maneuvers, making daily driving more enjoyable.
8 Step-by-Step Guide: How to Install Parking Sensors
Step 1: Choose the Right Parking Sensor Kit
The first step is selecting a kit that suits your needs and vehicle. Most aftermarket kits come with four sensors, a control module, a display unit or buzzer, and all the necessary wiring.
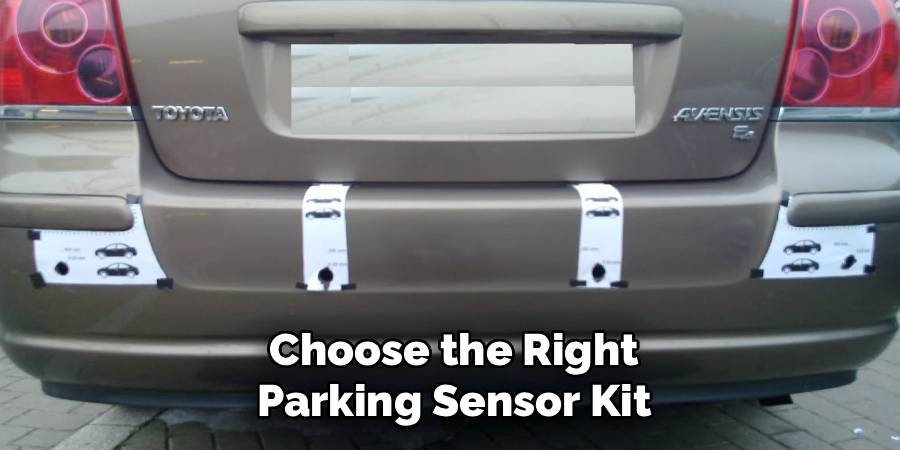
Consider whether you want a simple audible alert system (a beeping sound that gets faster as you get closer) or one with a visual display that shows the distance to an obstacle. You can also choose between sensors that mount flush with the bumper or those that stick on. Ensure the kit includes a hole saw drill bit that is the exact size required for the sensors to ensure a snug, professional-looking fit.
Step 2: Determine the Optimal Sensor Placement
Proper placement is crucial for accurate detection and a clean installation. Refer to the kit’s instructions for recommended height and spacing guidelines. Generally, sensors should be mounted on the rear bumper, between 18 and 30 inches from the ground. Use a measuring tape and a erasable marker to plan the locations, ensuring they are spaced evenly across the bumper. Check behind the bumper to make sure there are no obstructions like reinforcement bars or foam that will interfere with the drilling or the back of the sensors. Proper planning here prevents drilling holes in the wrong place.
Step 3: Drill the Holes for the Sensors
This step requires precision and a steady hand. Use the hole saw drill bit that came with your kit to begin drilling holes at the locations you marked. It’s best to start by drilling a small pilot hole first to guide the larger hole saw. Apply steady, even pressure and let the drill do the work. Drilling in reverse can sometimes help create a cleaner cut on plastic bumpers. Once the holes are drilled, use a small file or sandpaper to smooth any rough edges. This careful preparation ensures the sensors will fit securely and look like a factory installation.
Step 4: Install the Sensors into the Bumper
With the holes prepared, it’s time to fit the sensors. Most sensors are labeled with an orientation mark (like an arrow pointing up) to ensure they are installed correctly. Feed the wire of each sensor through its corresponding hole from the outside of the bumper.
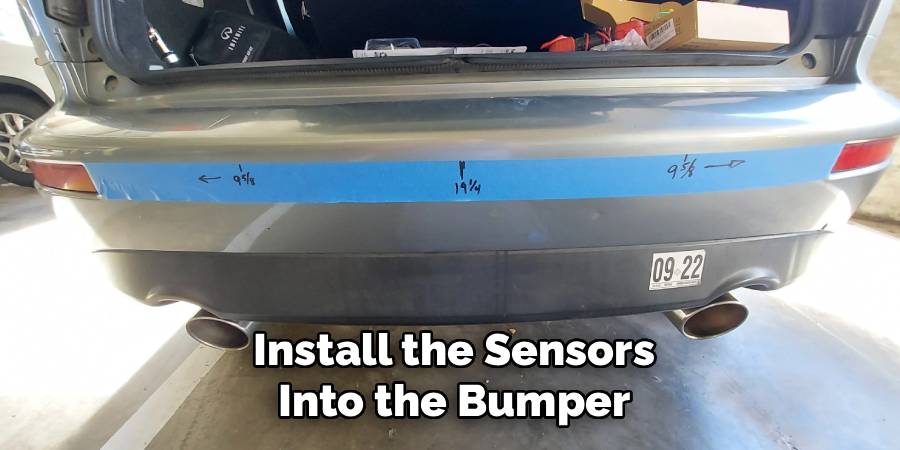
Gently push the sensor into place until it clicks or sits flush against the bumper’s surface. Some kits may use a locking ring on the back to secure them. Make sure each sensor is firmly seated and oriented correctly for the system to function as intended.
Step 5: Route the Wiring Harness to the Control Module
Now you need to run the wires from each sensor to the location where you will mount the control module, which is typically in the trunk. Gather the four sensor cables and route them neatly along the inside of the bumper, using zip ties to secure them away from any hot exhaust components or moving parts. You will need to find a way to pass the wiring harness into the trunk. Look for an existing rubber grommet in the trunk floor or firewall that you can pass the wires through. This part of learning how to install parking sensors requires patience to ensure wiring is safe and secure.
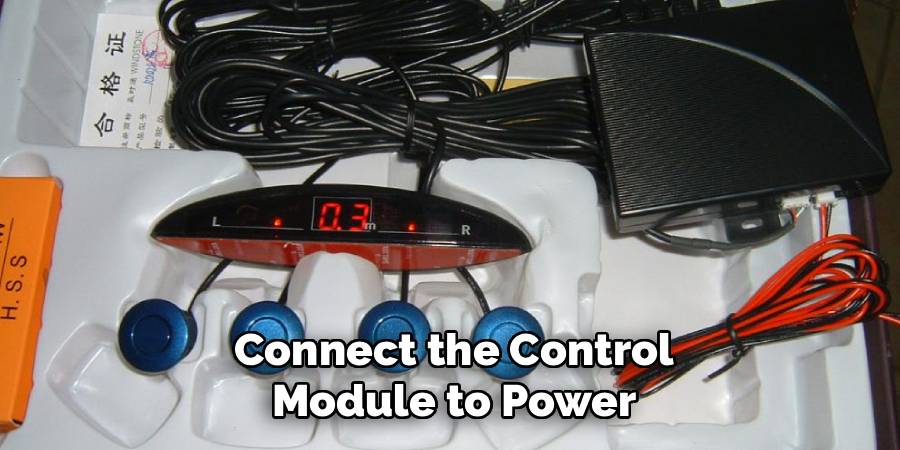
Step 6: Connect the Control Module to Power
The control module needs a power source that is only active when the car is in reverse. The easiest way to achieve this is by tapping into the power wire of one of your vehicle’s reverse lights. Use a multimeter or a test light to identify the positive wire that gets power when you put the car into reverse gear. Use a wire tap connector or solder to connect the control module’s power wire to this reverse light wire. Connect the module’s ground wire to a bare metal point on the car’s chassis for a solid ground connection.
Step 7: Mount the Display or Buzzer Unit
The final component to install is the alert unit. If your kit came with an audible buzzer, you can mount it in a discreet location in the rear of the vehicle, such as behind a trim panel in the trunk, as long as it’s loud enough to be heard from the driver’s seat. If your kit includes a visual display unit, you will need to run its wire from the control module in the trunk to the front of the car. Mount the display on your dashboard or near your rearview mirror where it is easily visible without obstructing your view of the road.
Step 8: Test the System and Perform Sensor Calibration
Before you put all the trim panels back on, it’s essential to test the system. With the car’s ignition on, engage the parking brake and shift the car into reverse gear. The system should power on. Have a friend walk behind the car, or use a large object like a cardboard box, to test each sensor’s detection range. The audible alert should get faster, and the visual display should show the distance decreasing as the object gets closer. Some systems may have a simple sensor calibration process described in the manual to fine-tune their accuracy.
Potential Sensor Limitations
While parking sensors are highly useful, they do come with certain limitations that users should be aware of. For instance, the sensors may struggle to detect smaller or low-lying objects, such as curbs or thin poles, which can fall outside the detection range or angle. Additionally, adverse weather conditions like heavy rain, snow, or mud can impact the sensors’ accuracy, leading to inconsistent performance. Another potential issue is interference from other electronic devices or reflective surfaces, which can cause false readings. Regular maintenance, including cleaning the sensor heads and following the manufacturer’s guidelines, can help mitigate some of these issues and ensure optimal functionality.
Frequently Asked Questions (FAQs)
Can I Install Parking Sensors on Any Car?
Yes, aftermarket parking sensor kits can be installed on almost any car, truck, or SUV, regardless of its age. The primary requirement is having a plastic bumper that can be drilled into. For vehicles with metal bumpers, the installation is more challenging and may require professional tools. Always choose a kit that is appropriate for your vehicle type and follow the installation instructions carefully.
Do I Need to Paint the Sensors to Match My Car?
Many parking sensor kits come with sensors in a standard black or silver finish. However, most are designed to be paintable. To paint them, lightly sand the surface, apply a plastic primer, and then use a matching automotive touch-up paint. Apply several thin coats for the best result. Painting the sensors ensures they blend in seamlessly with your bumper for a factory-like appearance.
Where Is the Best Place to Mount the Control Module?
The control module should be mounted in a dry, protected location inside the vehicle, typically in the trunk. Look for a spot behind a side trim panel or near the spare tire well. This keeps the unit safe from moisture and physical damage. Use double-sided tape or screws to secure the module so it doesn’t move around while you are driving.
What Tools Are Required for Installation?
The basic tools needed for this project include:
- A drill with the correct size hole saw (often included in the kit)
- A measuring tape and marker
- A wire stripper and crimper
- A set of screwdrivers and trim removal tools
- A multimeter or test light for identifying wires
- Zip ties and electrical tape for securing wiring
How Accurate Are Aftermarket Parking Sensors?
The accuracy of aftermarket parking sensors is generally very good, often comparable to factory-installed systems. Accuracy depends on the quality of the kit, proper sensor installation, and calibration. They are most effective at detecting large, solid objects. However, they may struggle to detect very thin objects like poles, or objects that are very low to the ground. They should always be used as an aid, not a replacement for careful driving.
Conclusion
Successfully learning how to install parking sensors is a rewarding DIY project that enhances your vehicle’s safety and your own driving confidence. While it may seem daunting to drill into your bumper and work with your car’s wiring, this guide shows that with careful planning and a methodical approach, it is a very manageable task. The result is a professional-grade upgrade that makes parking in tight spots significantly less stressful.
This project not only saves you money but also gives you a deeper understanding of your vehicle. The added safety and convenience you’ll gain every time you park make the effort well worth it. With your newfound skills, you can approach tight parking spaces not with anxiety, but with the assurance that your new sensors are there to guide you.