

Getting locked out of a room can be a frustrating experience, especially if the door handle just won’t budge. Whether you’ve misplaced the keys, the mechanism is jammed, or you simply need to replace an old door handle, knowing how to safely take off a locked handle is an invaluable skill for any homeowner or renter.
In the sections below, we’ll outline a step-by-step guide on how to take a door handle off a locked door to help you tackle this problem with confidence. You don’t have to be a professional handyman to complete the job—just follow these easy instructions, and you’ll be able to get the door open with minimal hassle. Remember, safety always comes first!
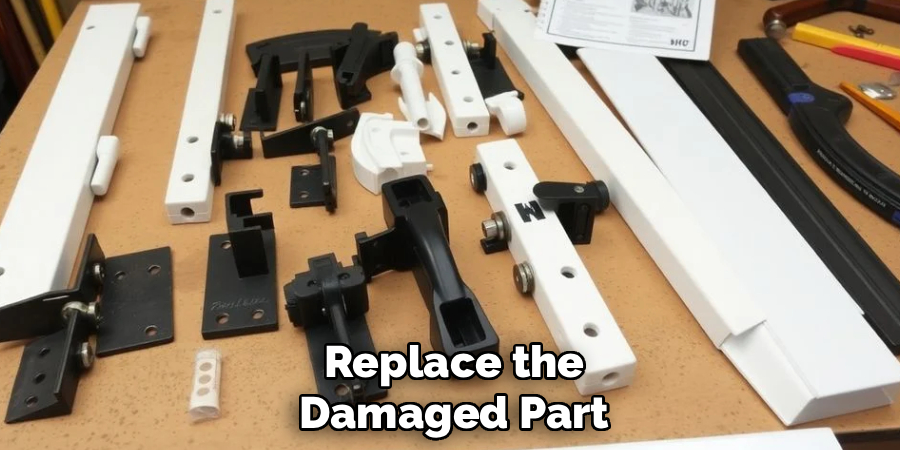
Tools and Materials You’ll Need
- A flathead screwdriver
- A Phillips head screwdriver
- Thin wire or a paperclip (for pinhole-style locks)
- Needle-nose pliers
- Small flashlight or work light
- Replacement hardware (if switching to a new handle)
- Lubricating spray (optional, for jammed mechanisms)
- Safety gloves (to protect your hands)
Having these tools on hand will make the process smoother and safer. If you’re missing any items, consider borrowing them or making a quick trip to your local hardware store before you begin.
8 Step-by-step Guides on How to Take a Door Handle Off a Locked Door
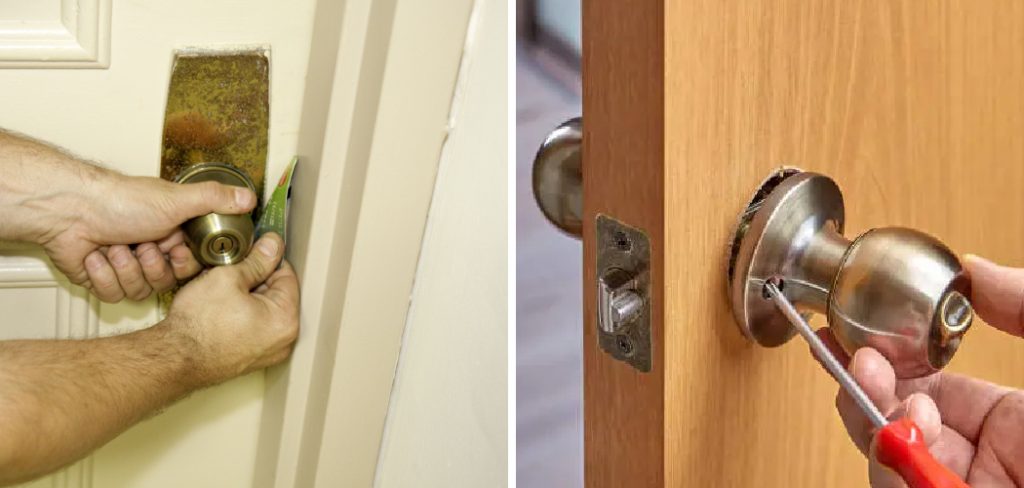
Step 1: Assess The Door Handle Type
First, identify the specific type of door handle and lock you’re dealing with. Some handles have visible screws, while others use concealed fittings or pinholes for access. The type will influence the approach you take throughout the process.
Take a few moments to inspect the front and back of the handle. Look for tiny holes, seams, or screw heads. Understanding what you’re up against will help prevent accidental damage and save you time in the long run.
Step 2: Locate Screws Or Release Mechanism
Examine the handle closely for screws or a release slot, which is sometimes found on the base plate or along the shank. These are essential to access, as removing them allows the handle to be taken apart.
Use your screwdriver or a flashlight if needed. Sometimes, decorative covers or escutcheons hide the screws. Gently pry these off with your flathead screwdriver if necessary, taking care not to scratch the finish.
Step 3: Remove The Screws Carefully
With the correct screwdriver, loosen and remove all visible screws on both sides of the handle. Place the screws in a small container or tray to avoid losing them during the process.
Take your time and don’t force anything. If a screw feels stuck, a small squirt of lubricating spray can help. This prevents stripping the head or damaging the hardware, which can make reinstallation difficult.
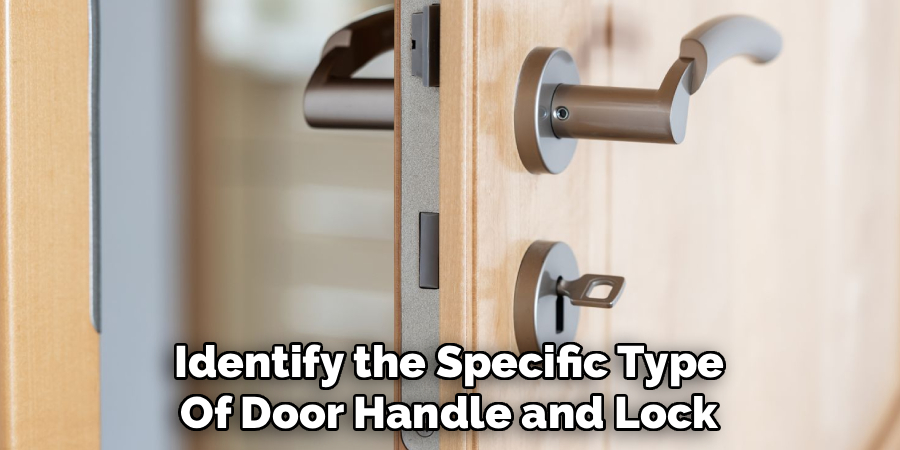
Step 4: Release Handle Or Knob
Some handles have a clip or small tab inside a pinhole or slot. Insert a thin wire, paperclip, or the tip of your screwdriver into the opening and apply gentle pressure to release the mechanism.
As the clip releases, you should be able to pull the handle or knob off the spindle. If it doesn’t come off easily, double-check that all screws and fasteners have been removed, and try again with gentle wiggling.
Step 5: Remove The Faceplate Or Rosette
After the handle or knob is off, you may find a faceplate or rosette covering the locking mechanism. Use your screwdriver to carefully remove it, paying attention to any hidden screws or clips.
Take note of how the faceplate was attached since you’ll need to replicate this setup if you’re reinstalling later. Keep the removed parts organized for reassembly or replacement.
Step 6: Access The Latch Mechanism
With the faceplate removed, you can now see the latch mechanism and locking components. Inspect the setup and determine if there are additional screws or retention clips securing the latch in place.
Gently remove any remaining hardware to fully expose the latch. Be mindful of spring-loaded parts; they can pop out unexpectedly and be difficult to locate afterward.
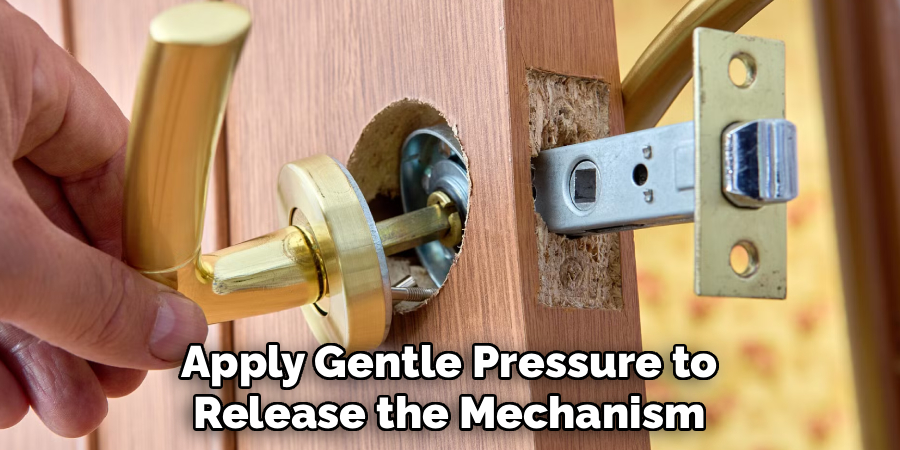
Step 7: Extract The Latch And Unlock The Door
Use needle-nose pliers or your screwdriver to pull the latch mechanism out of the door. In some cases, manipulating the latch directly may unlock the door even if you couldn’t open it from the outside.
Work slowly and methodically, especially if the mechanism feels stuck. Patience will help prevent damage to the door or frame and may allow you to reuse the parts if desired.
Step 8: Check, Clean, Or Replace The Hardware
Now that the door is open, inspect the removed handle and internal mechanisms for any signs of damage or wear. You can clean the parts, lubricate moving pieces, or install a brand new handle if needed.
Use this opportunity to upgrade to a more secure or modern handle design. If you’re reinstalling, just reverse the steps above, ensuring that all screws and components are replaced tightly and accurately.
Following these steps on how to take a door handle off a locked door will save you time, money, and stress. Remember to always take caution and wear appropriate safety gear when dealing with any locked doors or hardware. And if you encounter any difficulties or complications, don’t hesitate to seek professional help.
Additional Tips
Always wear safety gloves while working with tools to protect your hands from scratches or sharp components. Take photos during disassembly to help you remember where each part belongs.
If you encounter a particularly stubborn screw or handle, don’t rush—instead, use additional lubricant or a different screwdriver for more torque. Keep small parts and screws in a container to prevent loss. If your door handle uses a unique locking mechanism, search for model-specific instructions online.
It can also be helpful to label each piece as you remove it, especially with older or more complex locks. Having good lighting is crucial for spotting hidden fasteners or damage.
Do You Need To Use Professionals?
While most standard door handles can be removed by following the steps above, there are times when hiring a professional locksmith might be the best choice. If your lock is antique, high-security, or electronically controlled, attempting to remove it yourself could cause damage or void warranties. Professionals have specialized tools and knowledge to handle tricky mechanisms safely.
Choosing to call an expert can also save time and reduce frustration, especially when dealing with stubborn or malfunctioning hardware. If at any point you feel uncertain about the process or worry about damaging the door, don’t hesitate to seek professional help.
How Much Will It Cost?
Removing a locked door handle yourself can cost very little if you already have the necessary tools. The price of replacement handles varies, typically starting around $10 for basic models and going much higher for specialty or smart locks. If you need to buy tools, budget an additional $10 to $30.
Hiring a professional may cost between $50 and $150, depending on your location, the complexity of the lock, and emergency call-out fees. If parts or new hardware are needed, factor in those costs as well. Always request a detailed quote before committing to services.
Frequently Asked Questions
Q1: Can I Take Off A Door Handle Without Any Tools?
Most door handles do require at least a basic screwdriver for removal. Some models with pinhole releases can be opened with improvised tools like a paperclip, but for most, proper tools are necessary for safety and to avoid damage. Consider borrowing tools if you don’t have them.
Q2: Will Removing The Handle Damage My Door?
If done carefully and following the steps outlined above, you should not damage your door. Use gentle force, the right tools, and take your time during each step. Avoid prying aggressively or using power tools that could slip and scratch the surface.
Q3: What If My Door Handle Still Won’t Come Off?
If the handle remains stuck after removing all screws and releasing, it may be corroded or jammed internally. Apply a little lubricating spray and wait a few minutes. If it’s still difficult, consider gently tapping with the butt of your screwdriver or seeking professional help to prevent further damage.
Q4: Is It Safe To Reuse The Old Handle And Lock Mechanism?
You can usually reuse old handles and locking mechanisms if they’re still in good condition. Inspect each part for rust, wear, or damage before reinstalling. If components are worn or broken, replacement is the safest option to maintain your door’s security and functionality.
Conclusion
Taking a door handle off a locked door may seem daunting, but with the right tools, patience, and step-by-step guidance, it’s an achievable DIY task for most people. Always prioritize safety, organization, and gentle handling of parts during the process.
By following these instructions on how to take a door handle off a locked door, you’ll save money on professional fees and gain confidence in handling future hardware challenges. Should you encounter any issues or specialty locks, don’t hesitate to reach out to a professional to ensure the job is done right.
About
Safety Fic is a distinguished figure in the world of Diy design, with a decade of expertise creating innovative and sustainable Diy solutions. His professional focus lies in merging traditional craftsmanship with modern manufacturing techniques, fostering designs that are both practical and environmentally conscious. As the author of diy, Safety Fic delves into the art and science of Safety Fic-making, inspiring artisans and industry professionals alike.
Education RMIT University
(Melbourne, Australia) Associate Degree in Design (Safety Fic) Focus on sustainable design, industry-driven projects, and practical craftsmanship. Gained hands-on experience with traditional and digital manufacturing tools, such as CAD and CNC software.
Nottingham Trent University
(United Kingdom) Bachelor’s in diyfastly.com and Product Design (Honors) Specialized in product design with a focus on blending creativity with production techniques. Participated in industry projects, working with companies like John Lewis and Vitsoe to gain real-world insights.
Publications and Impact
In diy, Safety Fic his insights on indoor design processes, materials, and strategies for efficient production. His writing bridges the gap between artisan knowledge and modern industry needs, making it a must-read for both budding designers and seasoned professionals.