

Whether you’re upgrading your home security system, moving to a new property, or switching to a different smart lock brand, knowing how to properly remove your Vivint door lock is essential. Vivint smart locks are designed for security and durability, which means removal requires the right approach to avoid damaging your door or the lock mechanism itself.
This comprehensive guide will walk you through how to remove vivint door lock, from basic techniques that most homeowners can handle to more advanced approaches for stubborn installations. By the end of this article, you’ll have the knowledge and confidence to tackle this project safely and effectively.
Why Remove a Vivint Lock?
There are several reasons why you might need to remove a Vivint door lock. One common reason is upgrading to a newer lock model with advanced features, ensuring your home remains equipped with the latest in smart security technology.
Another reason could involve moving to a new home and wanting to take your existing lock with you, especially if it’s an investment you wish to reuse. Occasionally, a lock may require removal for maintenance, repair, or battery replacement, ensuring it continues functioning correctly.
Additionally, if the lock malfunctions or becomes damaged, removal may be necessary to replace it entirely. Understanding these scenarios helps you determine when and why removing a Vivint lock is the right step for your security needs.
10 Methods How to Remove Vivint Door Lock
1. Standard Screw Removal Method
The most straightforward approach involves removing the visible screws that secure your Vivint lock to the door. Most Vivint models use standard Phillips head or flathead screws that are easily accessible from the interior side of the door.
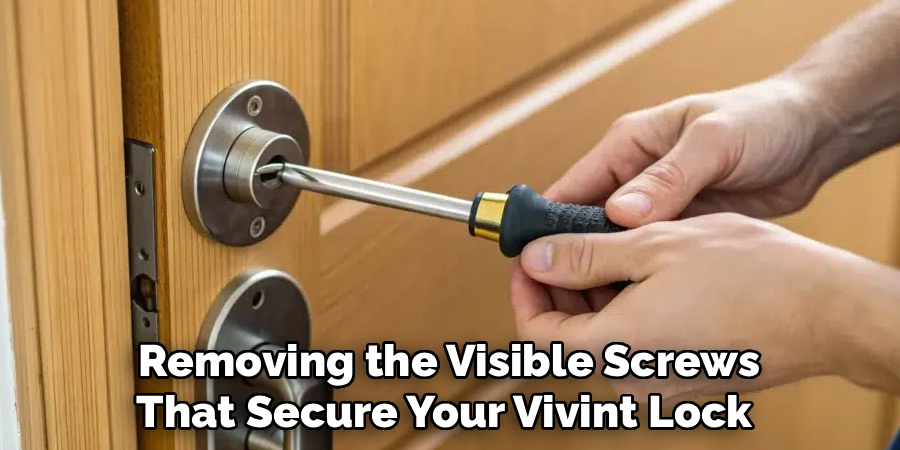
Start by locating the screws on the interior mounting plate—typically there are two to four screws holding the lock in place. Use the appropriate screwdriver to carefully remove these screws, keeping them in a safe place for potential future use.
Once the screws are removed, the interior portion of the lock should separate from the exterior portion, allowing you to pull both pieces away from the door. This method works for approximately 80% of standard Vivint installations and requires no special tools beyond basic screwdrivers.
2. Battery Removal and Reset Technique
Some Vivint locks have security features that make removal more challenging when the device is still powered and connected to your system. Removing the batteries first can disable these features and make physical removal easier.
Locate the battery compartment on your Vivint lock—this is usually on the interior side with a sliding or hinged cover. Remove all batteries and wait approximately 30 seconds for any residual power to dissipate. This process resets the lock’s electronic components and often releases any electronic locking mechanisms that might be preventing easy removal.
After the reset, proceed with the standard screw removal method. This technique is particularly effective for newer Vivint models that have tamper-resistant features built into their design.
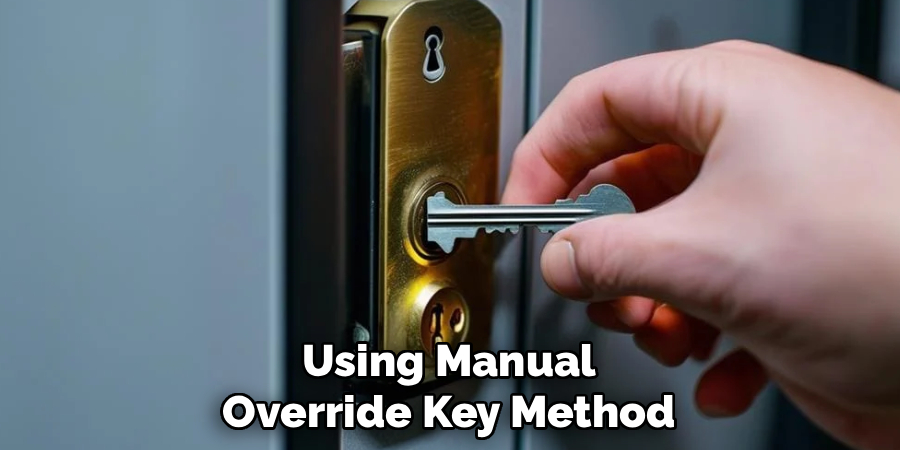
3. Manual Override Key Method
If your Vivint lock includes a manual key override feature, this can be your gateway to easier removal. The manual key can help disengage internal mechanisms that might be preventing the lock from being disassembled.
Insert the manual override key and turn it to the unlocked position, then hold it in place while attempting to remove the interior screws. Some Vivint models have mechanical interlocks that only release when the lock is in a specific position.
The manual key ensures these interlocks are properly aligned for removal. This method is especially useful if the electronic components have failed or if you’ve forgotten the digital access codes that might be required for normal operation.
4. Manufacturer App Disconnection
Before physically removing your Vivint lock, it’s crucial to properly disconnect it from your Vivint system through the official app. This prevents potential system errors and ensures you won’t receive false security alerts during the removal process.
Open your Vivint app and navigate to the device management section. Locate your door lock in the device list and select the option to remove or disconnect the device. This process typically takes 2-3 minutes and will send a confirmation message once complete.
After disconnecting the device digitally, the physical removal becomes much simpler as the lock is no longer trying to maintain communication with the security system. This step also prevents your Vivint monitoring service from registering the removal as a potential security breach.
5. Heat Application Method
Sometimes, adhesive components or thermal expansion can make Vivint locks difficult to remove. Applying controlled heat can help loosen stubborn components without damaging the door or lock mechanism.
Use a hair dryer on medium heat setting and apply warm air to the mounting hardware for 2-3 minutes. Focus on the areas around the mounting plate and screw locations. The heat helps expand metal components slightly and can soften any thread-locking compounds that may have been used during installation.
Allow the hardware to cool for about 30 seconds before attempting removal—the metal will contract slightly, often breaking the seal that was preventing easy removal. This method has proven effective in removing locks that have been in place for several years.
6. Penetrating Oil Treatment
For locks that have been installed for extended periods, corrosion or thread-locking compounds might make screw removal challenging. Penetrating oil can help dissolve these barriers and make removal significantly easier.
Apply a small amount of penetrating oil (such as WD-40 or similar products) to each screw head and around the mounting hardware. Allow the oil to penetrate for 10-15 minutes before attempting removal. The oil works by seeping into microscopic gaps and dissolving rust, corrosion, or thread-locking compounds.
After the waiting period, use firm, steady pressure with your screwdriver—avoid jerky motions that might strip the screw heads. This method is particularly effective for exterior installations where weather exposure may have caused corrosion issues.
7. Professional Tool Assistance
Some Vivint installations may require specialized tools for safe removal, particularly if security screws or proprietary fasteners were used during installation. These tools ensure you can remove the lock without damaging your door or the lock components.
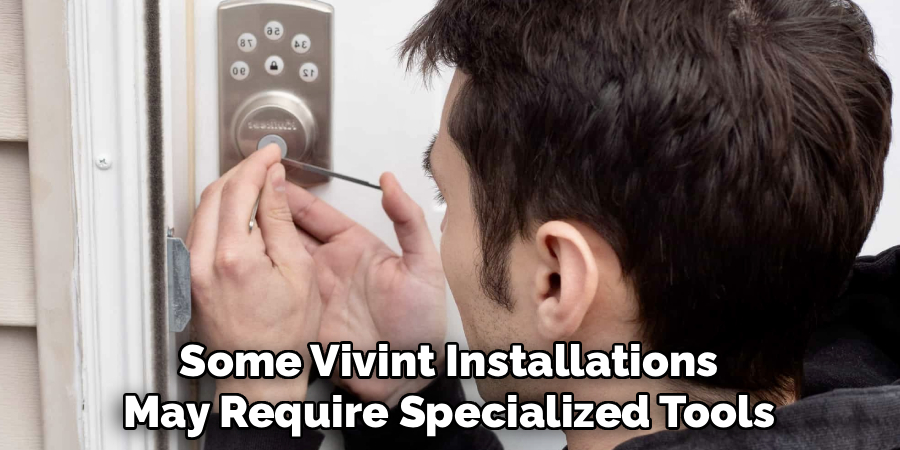
Security bits, screw extractors, and specialized Vivint removal tools can often be purchased or rented from hardware stores. If your lock uses Torx, hex, or other specialty screws, having the correct bit size is crucial for successful removal.
Screw extractors are particularly useful if previous removal attempts have damaged the screw heads. Professional-grade tools typically cost between $15-40 but can save hundreds of dollars in door repair costs if the removal goes wrong.
8. Door Frame Modification Approach
In rare cases, the door frame itself may need minor modification to allow proper lock removal. This typically occurs when the original installation was done incorrectly or when the door has shifted over time.
Carefully examine the relationship between the lock components and the door frame. Sometimes, minor filing or sanding of the door frame edges can provide the clearance needed for lock removal. Use fine-grit sandpaper (220 grit or higher) and work slowly to avoid removing too much material.
This approach requires patience and precision, but it can resolve situations where the lock appears to be “trapped” by frame interference. Always test-fit frequently during this process to avoid over-modification.
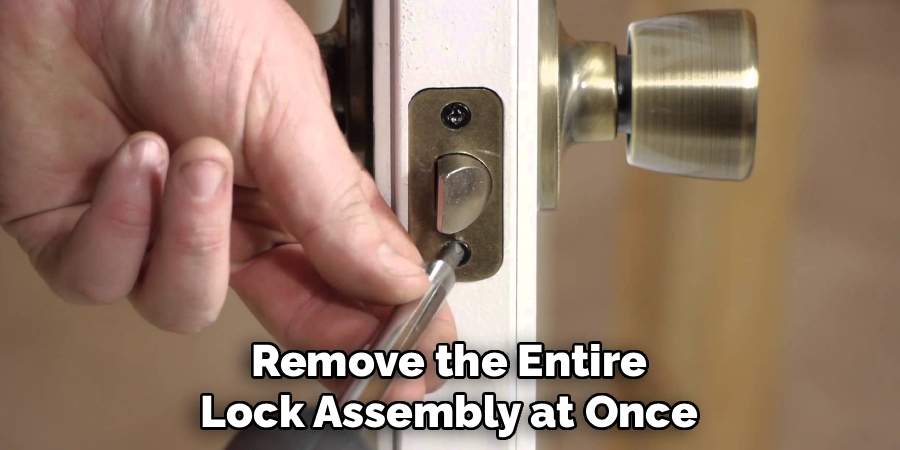
9. Sequential Component Removal
Rather than trying to remove the entire lock assembly at once, breaking down the removal into sequential steps can often solve difficult situations. This method involves removing components in a specific order to reduce binding and interference.
Start by removing any decorative covers or faceplates, then proceed to the handle or lever components, followed by the main lock body, and finally the strike plate and frame components. Each Vivint model has an optimal disassembly sequence—consult your original installation manual if available.
This methodical approach prevents components from binding against each other and reduces the risk of damage during removal. Take photos at each step to document the process in case you need to reference the original configuration later.
10. Professional Service Contact
When all else fails, or if you’re uncomfortable with any aspect of the removal process, contacting professional services ensures safe and complete lock removal without damage to your property.
Vivint customer service can provide specific guidance for your lock model and may even offer professional removal services in some areas. Local locksmiths also have extensive experience with smart lock removal and typically charge $75-150 for this service.
Professional removal is particularly recommended if your lock is integrated with other security system components or if previous DIY attempts have created complications. The cost of professional service is often less than the potential expense of repairing door damage caused by improper removal techniques.
Conclusion
Removing your Vivint door lock doesn’t have to be a frustrating experience. With these 10 proven methods, you now have multiple approaches to tackle even the most stubborn installations. Start with the simplest methods like standard screw removal and battery disconnection before progressing to more advanced techniques.
Remember that patience and the right tools are your best allies in this process. If you’re planning to install a new smart lock system, consider consulting with a professional installer who can ensure proper removal of your current system and optimal installation of your new security solution. Thanks for reading this blog post on how to remove vivint door lock! We hope you found it helpful and informative.
About
Safety Fic is a distinguished figure in the world of Diy design, with a decade of expertise creating innovative and sustainable Diy solutions. His professional focus lies in merging traditional craftsmanship with modern manufacturing techniques, fostering designs that are both practical and environmentally conscious. As the author of diy, Safety Fic delves into the art and science of Safety Fic-making, inspiring artisans and industry professionals alike.
Education RMIT University
(Melbourne, Australia) Associate Degree in Design (Safety Fic) Focus on sustainable design, industry-driven projects, and practical craftsmanship. Gained hands-on experience with traditional and digital manufacturing tools, such as CAD and CNC software.
Nottingham Trent University
(United Kingdom) Bachelor’s in diyfastly.com and Product Design (Honors) Specialized in product design with a focus on blending creativity with production techniques. Participated in industry projects, working with companies like John Lewis and Vitsoe to gain real-world insights.
Publications and Impact
In diy, Safety Fic his insights on indoor design processes, materials, and strategies for efficient production. His writing bridges the gap between artisan knowledge and modern industry needs, making it a must-read for both budding designers and seasoned professionals.