

Creating a taser using batteries is a topic that requires careful consideration of safety and legality. A taser, which is an electroshock weapon, uses electrical energy to temporarily incapacitate a target.
While the concept might seem straightforward, constructing such a device can be hazardous without proper knowledge and precautions. Additionally, it is crucial to ensure compliance with local laws and regulations regarding the possession or creation of such devices. In this blog post, we’ll walk you through the steps on how to make a taser with batteries so that you can get back to using it in no time! So grab your tools, and let’s get started!
What a Taser Is
A taser is a non-lethal self-defense tool designed to deliver an electric shock to temporarily incapacitate a person. It operates by transmitting electrical energy through electrodes or wires to disrupt the target’s neuromuscular system. Tasers are commonly used by law enforcement and civilians for personal protection, as they can immobilize an attacker without causing permanent harm. They typically function by using a battery-powered mechanism to generate the required electrical charge. While effective, tasers should be used responsibly and in accordance with safety guidelines and legal regulations.
Safety Features in Modern Tasers
Modern tasers are equipped with a range of safety features designed to minimize risks and ensure responsible use. One key feature is the built-in safety switch, which prevents accidental discharge when the device is not actively in use. Many tasers also include a laser sight or LED light to improve targeting accuracy, reducing the likelihood of unintended harm.
Additionally, some models incorporate shot timers that limit the duration of the electrical charge, ensuring it does not exceed a safe threshold. Advanced tasers can be equipped with data recording capabilities, tracking the time and date of use, which promotes accountability. Together, these safety features enhance the effectiveness of tasers while prioritizing user and public safety.
Safe Handling and Storage
Proper handling and storage of tasers are essential to ensure safety and prevent unauthorized access. Always keep the device deactivated when not in use and store it in a secure location, such as a locked cabinet or safe, away from children and untrained individuals. Regularly inspect the taser for any signs of wear or damage, and ensure that the battery is charged according to the manufacturer’s instructions to maintain functionality.
When carrying a taser, use a protective holster that covers the trigger to prevent accidental discharge. Additionally, familiarize yourself with local laws and regulations regarding taser ownership and usage to ensure compliance. Responsible handling and storage practices are crucial to maintaining the safety and integrity of the device.
10 Methods How to Make a Taser with Batteries
1. Simple LED Circuit
Creating a basic LED circuit is one of the most fundamental ways to understand how electricity flows. Using a small battery, a resistor, and an LED, you can see firsthand how current passes through components.
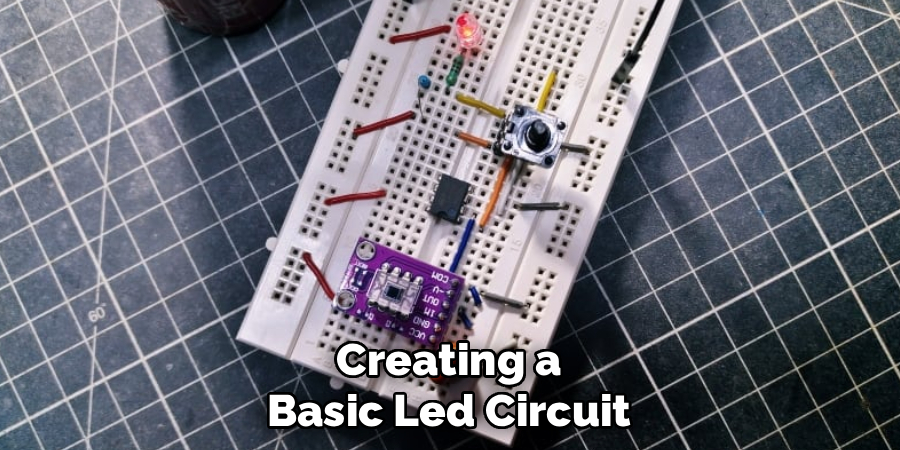
The resistor prevents too much current from reaching the LED, protecting it from burning out. This experiment demonstrates basic circuit principles, including polarity, resistance, and voltage. With just a few components, you’ll gain a solid foundation for more advanced circuits later.
2. Buzzing Buzzer Alarm
A small battery-powered buzzer can be set up to make a noise whenever the circuit is completed. This simple project introduces the concept of electronic signaling. By connecting the buzzer to a switch or a pressure sensor, you can simulate a basic alarm system. It’s safe, satisfying, and immediately interactive, showing how energy is converted from electrical form into sound. Kids and beginners often find this project exciting because the audible feedback reinforces learning.
3. Battery-Powered Motor
Connecting a small DC motor to a battery is an excellent way to explore how electrical energy converts to mechanical motion. You can attach propellers, wheels, or other lightweight materials to observe movement. This experiment demonstrates energy conversion, current, and resistance in action. It’s also the basis for understanding electric vehicles and robotics, making it a perfect stepping stone into more complex electronics and engineering projects.
4. Static Electricity Balloon Experiment
While technically not a circuit, static electricity experiments using a balloon can teach about charge and electric forces. Rubbing a balloon on your hair or fabric generates static charge, allowing you to attract small paper pieces or even make hair stand up. This visually demonstrates invisible electric forces and shows how energy can move without wires, creating a safe and memorable learning experience.
5. Capacitor Charge and Discharge Demonstration
Capacitors store electrical energy, and small battery-powered projects can safely demonstrate this concept. By charging a capacitor with a battery and then connecting it to a small LED or buzzer, you can observe energy release. Watching the LED glow momentarily or the buzzer sound briefly shows energy storage and controlled release in a safe, measurable way. This builds understanding for electronics design and circuit timing applications.

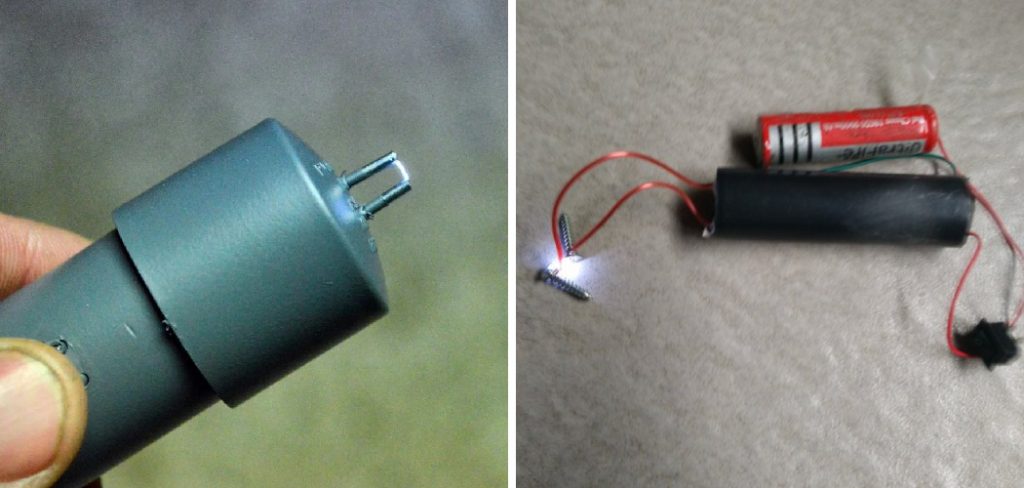
6. Simple Flashlight Circuit
Constructing a small flashlight using a battery, switch, and LED teaches practical applications of electricity. You learn about circuit continuity, switches, and voltage regulation in a tangible project. Making a flashlight from scratch encourages problem-solving skills, as you have to ensure connections are secure and components are correctly oriented. Plus, it results in a useful tool you can take anywhere.
7. Conductivity Tester
A battery-powered conductivity tester is a fun experiment to explore how different materials allow electricity to pass. By connecting a battery, LED, and two probes, you can test objects like metal, wood, or liquids. If the LED lights up, the material conducts electricity; if not, it’s an insulator. This teaches about material properties and current flow in a highly interactive way, encouraging curiosity and observation.
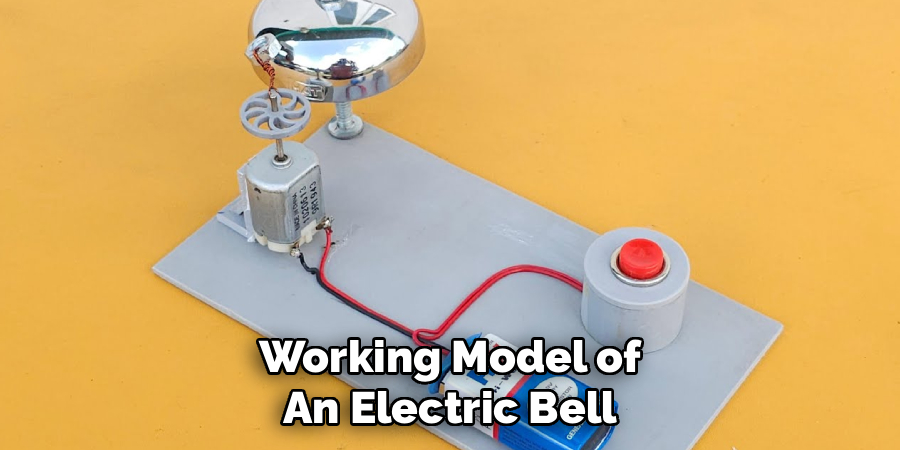
8. Simple Electric Bell
Using a small battery, wire, and electromagnet, you can create a safe, working model of an electric bell. When the circuit closes, the electromagnet pulls a small metal strip, which hits a bell or metal surface to produce sound. This demonstrates electromagnetism and mechanical motion, providing a hands-on understanding of principles used in alarms, buzzers, and doorbells. It’s a step up from basic circuits but still entirely safe.
9. Snap Circuit Learning Kits
Snap circuit kits are pre-packaged sets that allow beginners to explore electricity safely. Batteries power multiple projects, from lights and buzzers to small motors. These kits provide guided experiments, showing how series and parallel circuits work, and introduce sensors and switches in a structured way. They’re especially helpful for young learners or anyone who wants a risk-free introduction to electronics.
10. Mini Solar-Battery Hybrid Project
Combining a small solar panel with a battery to power LEDs or motors demonstrates renewable energy principles. During the day, the solar panel can charge the battery, which then powers a small device at night. This project is excellent for learning about energy storage, solar energy, and circuit management. It provides a practical context for sustainability while still being completely safe and battery-powered.
Maintenance and Upkeep
Proper maintenance and upkeep of your electronics projects are essential to ensure longevity and consistent performance. Start by regularly inspecting connections, solder joints, and wires to identify any signs of wear, corrosion, or loosening. Keep all components clean and free of dust or debris, as buildup can interfere with functionality.
For projects involving batteries, monitor their charge levels and replace them if they show signs of leakage or reduced capacity to avoid damaging the circuit. If your project includes parts like solar panels, occasionally wipe them with a soft, dry cloth to maintain optimal efficiency. Routine checks and minor adjustments can go a long way in preserving the safety and effectiveness of your projects over time.

Safety Considerations
When working on electronics projects, safety should always be a top priority. Ensure that all power sources are disconnected before handling or modifying circuits to avoid the risk of electric shock. Wear protective gear such as safety goggles and insulated gloves, particularly when soldering or working with high-voltage components. Be mindful of proper ventilation, as soldering fumes can be harmful if inhaled over extended periods.
Label and organize wires and components to reduce the risk of accidental short circuits. Additionally, always use the correct tools and verify that they are in good condition. Taking these precautions helps minimize hazards and promotes a safe working environment for successful project completion.
Conclusion
Exploring electronics through beginner-friendly projects opens the door to endless possibilities for learning, creativity, and innovation. These hands-on activities not only develop technical skills but also foster problem-solving abilities and an understanding of foundational scientific concepts.
From simple circuits to renewable energy applications, each project is a stepping stone toward mastering more advanced technologies. By starting small and building confidence, anyone can cultivate a passion for electronics and discover the profound impact it can have on everyday life and future innovations. Thanks for reading this blog post on how to make a taser with batteries! We hope you found it helpful and informative.
About
Safety Fic is a distinguished figure in the world of Diy design, with a decade of expertise creating innovative and sustainable Diy solutions. His professional focus lies in merging traditional craftsmanship with modern manufacturing techniques, fostering designs that are both practical and environmentally conscious. As the author of diy, Safety Fic delves into the art and science of Safety Fic-making, inspiring artisans and industry professionals alike.
Education RMIT University
(Melbourne, Australia) Associate Degree in Design (Safety Fic) Focus on sustainable design, industry-driven projects, and practical craftsmanship. Gained hands-on experience with traditional and digital manufacturing tools, such as CAD and CNC software.
Nottingham Trent University
(United Kingdom) Bachelor’s in diyfastly.com and Product Design (Honors) Specialized in product design with a focus on blending creativity with production techniques. Participated in industry projects, working with companies like John Lewis and Vitsoe to gain real-world insights.
Publications and Impact
In diy, Safety Fic his insights on indoor design processes, materials, and strategies for efficient production. His writing bridges the gap between artisan knowledge and modern industry needs, making it a must-read for both budding designers and seasoned professionals.