

It is important to check your Yale lock battery on a regular basis, as it is essential for maintaining the security of your home. A dead battery can leave you vulnerable to burglary, and in some cases, may even cause damage to the lock itself. Therefore, it is important that you know how to check the condition of your Yale lock battery so that you can replace it at the first sign of trouble.
Using a Yale lock battery checker is a great way to make sure your locks are working properly. It allows you to quickly and easily check the voltage of the batteries, ensuring that they are not drained and can power the locks properly.
This ensures that your home or office remains secure even if the batteries begin to run low, allowing you peace of mind. You can find step-by-step instructions on how to check yale lock battery in this blog article.
Tools You Will Need
- Screwdriver
- Battery tester or multimeter
- Replacement batteries
- New screws (if needed)
- Cloth (optional)
- Pen and paper (optional)
- Cotton swabs (optional)
- Wire brush (optional)
- Rust remover (optional)
- Lock lubricant.
Step-by-step Instructions for How to Check Yale Lock Battery
Step 1: Inspect the Battery
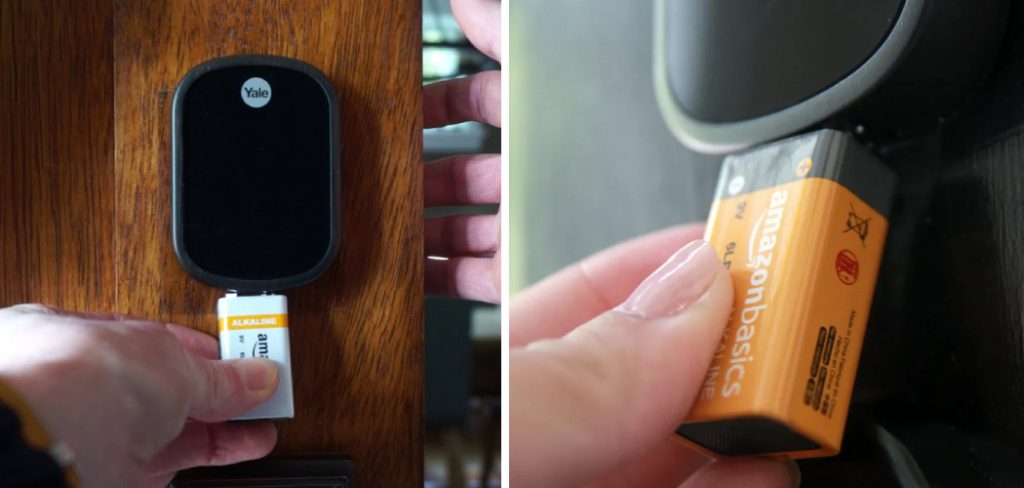
At first, you need to take out the battery of your Yale lock and inspect its condition. Make sure that the terminals are intact, not corroded, and there is no physical damage to the housing itself.
Step 2: Test Voltage with a Multimeter

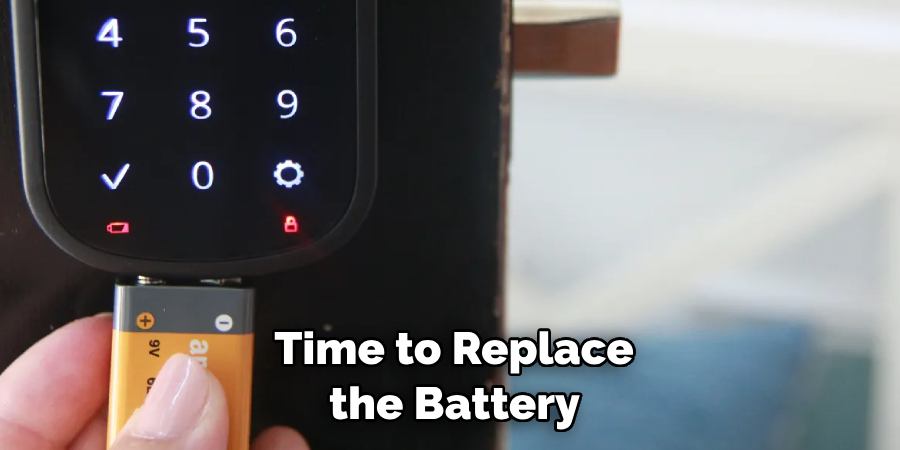
Using a multimeter, you can measure the voltage of your battery. The ideal measurement should be close to 4.8 volts. If the voltage is lower, then it’s time to replace your battery and put in a new one.
It is possible that corrosion might build up on the contacts of the battery causing it not to make contact with the terminals of the lock. You should check for this by inspecting both contacts of the battery and cleaning them with a cotton swab if necessary.
Step 3: Clean Battery Terminals of Lock
If there is any debris or corrosion on the terminals of your lock, you should clean it away using a soft cloth or cotton swab. Make sure that there is no residue left behind as this could interfere with the electrical connection between the lock and the battery.
Once the terminals of both the battery and the lock are clean, you can place the battery back into its slot in your Yale lock. Make sure that it is placed correctly and that there is a secure connection between it and the terminals of your lock.
Step 4: Test Lock with Keypad
After you have replaced the battery, it’s time to test out your lock. Insert your keypad code and wait for the LED light on the mechanism to turn green. If this doesn’t happen, then check if there is a secure connection between the battery and terminals of your lock.
If testing with the keypad is successful, you should then test your lock with a physical key. Insert the key into the mechanism and turn it clockwise until you feel a slight click. This indicates that the lock has been successfully engaged.
Step 5: Listen for Motor Movement
When testing with the key, you should also listen out for any motor movement from within the mechanism. If you hear a faint buzzing sound, this indicates that the motor is running correctly and powering the lock.
The status LEDs on your Yale lock should also indicate when it has been successfully engaged. These lights will usually be green or blue depending on the type of lock and its settings.
Step 6: Reset Battery Life Monitor
If all of the tests above are successful, then you can reset the battery life monitor on your Yale lock. This will allow you to keep track of when it’s time to replace the battery and ensure that your lock is always in peak condition.
It is important to make sure that the battery in your Yale lock is working correctly as this can have a huge impact on its security. By checking it regularly, you can rest assured that you are keeping your property protected. Additionally, it is also beneficial to replace the batteries in your Yale lock every 6 months for optimum performance.
Safety Tips for How to Check Yale Lock Battery
- When checking Yale lock battery, always make sure the batteries are properly and securely installed before use.
- Do not forget to turn off the power supply when removing or replacing the batteries.
- Use only approved batteries that are compatible with your Yale lock system for optimal performance and safety purposes.
- Make sure to replace all batteries at the same time to maintain consistent power levels and optimal performance.
- Always dispose of used batteries in a safe manner, such as recycling them or taking them to an appropriate disposal center.
- Make sure you have a spare set of batteries ready for use if needed.
- If possible, check the battery level regularly using a digital multimeter or other appropriate device. This will help you stay ahead of any potential issues with battery power levels.
By following these safety tips and taking the necessary precautions when checking Yale lock battery, you can ensure that your locks continue to function properly and securely.
How Often Should You Check the Battery of Your Yale Lock?
It is important to check the battery of your Yale lock on a regular basis to keep it in optimal condition. Depending on the environment and usage, you may need to check it more or less often. In general, you should be checking your battery at least once per month.

If you live in an area with extreme temperatures, such as in a hot desert climate, you should check your battery more often. High temperatures can drain the battery faster and could cause it to malfunction. Additionally, if you use your Yale lock frequently, or if multiple family members are using the lock on a regular basis, you should be checking the battery even more often.
To check your Yale lock battery, you will need to open up the keypad. This will allow you to access the battery compartment, where the batteries are located. You can then check the condition of the batteries and replace them if necessary. Be sure to use the correct type and size of battery for your lock – using a different type or size could cause damage or may not provide enough power for your lock to function properly.
Is There a Danger of Damage if You Do Not Properly Check the Battery?
Yes, if the battery is not checked and replaced in a timely manner, it could be a safety hazard. If the lock is left without power for too long, it can be easily broken into. Additionally, if the battery is overused or worn out, there is a risk of electrical shock or damage to the internal components of the lock. To ensure that your Yale lock is secure and working properly, it is important to check the battery regularly.
To check the battery on your Yale lock, start by opening the back panel of the lock. Inside you will find a small door that can be opened to access the internal components. Examine all connections and make sure everything is in good condition. Once inside the unit, look for the battery. It should be a small rectangular device with two leads attached to it.
Carefully remove the battery and examine it for any signs of corrosion or damage. If you notice any, replace it immediately as this could hamper the performance of your Yale lock. Once you have done that, put the new battery in place and close up the back panel again.
Are There Any Special Instructions for Safely Replacing a Yale Lock’s Battery?
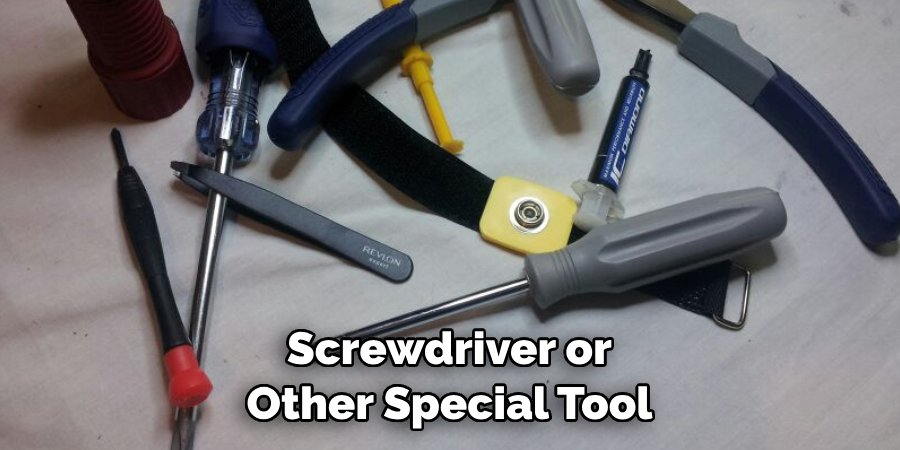
When replacing the battery in a Yale lock, it is important to take some safety precautions. First of all, make sure you have the proper tools available for removing and replacing the battery. This may include a screwdriver or other special tool that fits your specific model of lock.
Additionally, before handling the battery, be sure to unplug your device from any power sources to avoid any chance of a short circuit or other electric shock. Once the old battery is removed, switch in the new one and reattach all connections. Finally, plug the device back into power and test your lock to ensure it is working properly.
Conclusion
Even though many Yale Locks are designed to alert you when the battery is running low, the process of manually checking your lock’s battery can be time-consuming and inconvenient. It will require you to open the lock itself and check the internal parts for visible signs of wear or damage that would suggest it has gone weak. If there is no clear indication of a critically low battery, then you will need to change the batteries as a precaution.
In conclusion, checking the battery of a Yale Lock is an important part of ensuring that it will always work properly. It’s also a good idea to check periodically for any signs of wear or damage, and replace the batteries as needed.
As long as you follow these instructions, your Yale Lock should continue to provide reliable security for years to come. I hope this article has been beneficial for learning how to check yale lock battery. Make Sure the precautionary measures are followed chronologically.
About
Safety Fic is a distinguished figure in the world of Diy design, with a decade of expertise creating innovative and sustainable Diy solutions. His professional focus lies in merging traditional craftsmanship with modern manufacturing techniques, fostering designs that are both practical and environmentally conscious. As the author of diy, Safety Fic delves into the art and science of Safety Fic-making, inspiring artisans and industry professionals alike.
Education RMIT University
(Melbourne, Australia) Associate Degree in Design (Safety Fic) Focus on sustainable design, industry-driven projects, and practical craftsmanship. Gained hands-on experience with traditional and digital manufacturing tools, such as CAD and CNC software.
Nottingham Trent University
(United Kingdom) Bachelor’s in diyfastly.com and Product Design (Honors) Specialized in product design with a focus on blending creativity with production techniques. Participated in industry projects, working with companies like John Lewis and Vitsoe to gain real-world insights.
Publications and Impact
In diy, Safety Fic his insights on indoor design processes, materials, and strategies for efficient production. His writing bridges the gap between artisan knowledge and modern industry needs, making it a must-read for both budding designers and seasoned professionals.