

Are you trying to set up your new Wyze camera but having trouble connecting it to your Wi-Fi network? We feel your frustration! Connecting devices to a home network is not always easy, so we understand if this task seems daunting. But fear not — the process of connecting a Wyze camera to a new wifi can be relatively straightforward with a few simple steps and some patience.
In this post on how to connect wyze camera to new wifi, we’ll provide an in-depth guide on how you can connect your Wyze Camera successfully so that you can start keeping an eye on what matters most.
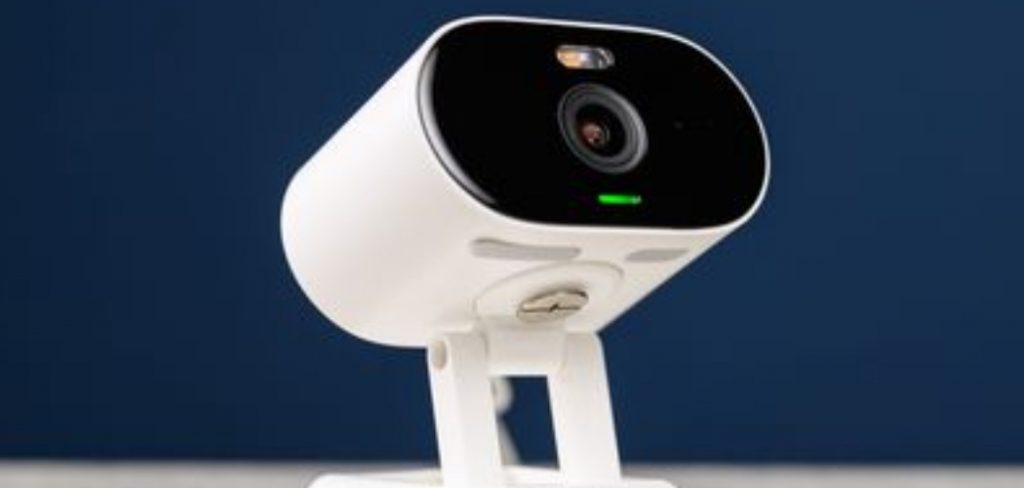
What is a Wyze Camera?
Before we dive into the connection process, let’s briefly discuss what a Wyze Camera is. A Wyze camera is a smart home security camera that offers high-quality video and audio storming, motion detection, and two-way communication capabilities. It can be used both indoors and outdoors, making it a versatile choice for monitoring your home or business. You can access the camera’s live feed and settings through the Wyze app on your smartphone or tablet.
Benefits of Using a Wyze Camera
- Easy Setup Process: As we’ll Outline in This Guide, the Wyze Camera is Easy to Connect to Wi-Fi and Set Up for Use.
- Affordable: Compared to Other Home Security Cameras on the Market, the Wyze Camera is Relatively Affordable, Making It Accessible for Many Households.
- Accessible From Anywhere: With the Wyze App, You Can Access Your Camera’s Live Feed From Anywhere With an Internet Connection, Giving You Peace of Mind and Control Over Your Home’s Security.
- Customizable Settings: You Can Adjust the Camera’s Settings, Such as Motion Detection Sensitivity and Recording Length, to Suit Your Specific Needs.
Now that you understand the benefits and capabilities of a Wyze camera let’s get into the steps on how to connect it to a new wifi network.
10 Step-by-step Guidelines on How to Connect Wyze Camera to New Wifi
Step 1: Install the Wyze App
If you haven’t already, install the free Wyze app from your phone’s app store. The app is available for both iOS and Android devices. It’s essential to have the app installed before attempting to connect your camera to wifi. But don’t worry, the app is user-friendly and easy to navigate. It’ll guide you through the connection process.
Step 2: Connect Your Camera to Power
Before attempting to connect your Wyze camera to wifi, ensure that it is properly connected to a power source. You can use either the included USB cable and power adapter or a compatible power bank. It’s essential to have a stable power source because the camera will need to be connected for the entire process.
Step 3: Open the Wyze App
Open the Wyze app and log in or create an account if you don’t already have one. Make sure your phone is connected to the Wi-Fi network you want your camera to connect to. This step is crucial because the camera will automatically connect to the same network that your phone is using. It’s also essential to have a stable Wi-Fi connection for the entire process.
Step 4: Add a New Device
On the home screen of the Wyze app, tap on the “+” icon in the top left corner. Then select “Add a product” and choose “Wyze Cam.” The app will prompt you to plug in your camera if you haven’t already. You can also choose to scan the QR code on the camera if it’s available. But if not, you can still add the camera manually by entering the MAC address.
Step 5: Connect Camera to Wifi
Once you’ve selected your camera, the app will guide you through the connection process. It’ll prompt you to make sure your camera is plugged in and connected to a power source, and then it’ll ask for permission to connect it to wifi. Make sure to select the correct network and enter the password correctly.
Step 6: Wait for Connection
Once you’ve entered all the necessary information, click “Next” and wait for the app to establish a connection between your phone, camera, and Wi-Fi network. This step can take a few minutes, so be patient.
However, If you receive an error message, double-check that you’ve entered the correct Wi-Fi information and try again. It’s also essential to make sure your Wi-Fi router is not blocking the camera’s connection. But if all else fails, you can try restarting the camera and phone and starting over.
Step 7: Rename Camera
After a successful connection, the app will prompt you to give your camera a name. This step is optional, but it can help you identify your camera if you have multiple Wyze cameras in your home.
This name will also appear as the device’s name in your app. It’s also essential to choose a unique name so that you can easily distinguish it from other devices on your network. You can also skip this step and click “Next” to move on.
Step 8: Update Firmware
After naming your camera, the app may prompt you to update the firmware. It’s crucial to ensure that your camera has the latest firmware for optimal performance and security. If an update is available, click “Update Now” and wait for it to complete. The process can take a few minutes, so be patient. It’s also essential to keep your camera up-to-date with the latest firmware updates as they become available.
Step 9: Wait for Connection
Once the update is complete, click “Next” and wait for the app to establish a connection between your phone and camera. Again, this step may take a few minutes, so be patient. If you receive an error message at this stage, check your phone’s Wi-Fi connection and try again. But if everything is in order, the app will confirm a successful connection.
Step 10: Start Monitoring
Congratulations, you’ve successfully connected your Wyze camera to wifi! You can now access the live feed and settings through the Wyze app. Explore the various features and options available to customize your camera’s functionality to your specific needs. You can also connect multiple cameras to one account for comprehensive home monitoring. Remember, it’s crucial to have a stable power source and Wi-Fi connection throughout this entire process for optimal performance.
Following these steps on how to connect wyze camera to new wifi, you can easily connect your Wyze camera to a new wifi network and enjoy the benefits of accessible and customizable home security. So go ahead and try it out for yourself!
Frequently Asked Questions
Q1: Can I Use a Different Wi-fi Network for My Wyze Camera Than the One My Phone is Connected to?
A1: No, your Wyze camera will automatically connect to the same Wi-Fi network that your phone is using during the setup process. However, after the initial connection, you can change the Wi-Fi network for your camera through the app’s settings.
Q2: Can I Connect My Wyze Camera to a 5GHz Network?
A2: No, currently, Wyze cameras only support connection to 2.4GHz Wi-Fi networks. If your router broadcasts both 2.4GHz and 5GHz networks with the same name, make sure to connect your phone and camera to the 2.4GHz network before starting the setup process.
Q3: What Happens if I Lose Connection During Setup?
A3: If you lose connection during the initial setup process, try restarting the camera and app before attempting again. It’s also essential to check your Wi-Fi router settings and make sure it’s not blocking the camera’s connection. If all else fails, you can contact Wyze customer support for further assistance.
Q4: Can I Connect Multiple Wyze Cameras to One Account?
A4: Yes, you can connect multiple cameras to one account for comprehensive home monitoring. Simply follow the same setup process for each new camera and add them to your existing Wyze account. You can access all connected cameras through the app’s home screen.
Conclusion
In conclusion on how to connect wyze camera to new wifi, configuring a new Wi-Fi connection to your Wyze Camera can be intimidating, but with a few steps and since of patience, it is achievable.
Follow the detailed instructions described in this blog post for changing all the Wi-Fi configurations in the app settings. Just make sure your camera has an active internet connection to get started. Additionally, you can always contact Wyze support if you need assistance with any questions that arise during the process.
Now that you have successfully changed all the Wi-Fi settings on your Wyze Camera, it’s time to explore more of what your camera has to offer! Take advantage of all these features to enjoy firsthand what makes Wyze cameras one of the best home security options. Start surveying the security of your home today and stay connected like never before!
About
Safety Fic is a distinguished figure in the world of Diy design, with a decade of expertise creating innovative and sustainable Diy solutions. His professional focus lies in merging traditional craftsmanship with modern manufacturing techniques, fostering designs that are both practical and environmentally conscious. As the author of diy, Safety Fic delves into the art and science of Safety Fic-making, inspiring artisans and industry professionals alike.
Education RMIT University
(Melbourne, Australia) Associate Degree in Design (Safety Fic) Focus on sustainable design, industry-driven projects, and practical craftsmanship. Gained hands-on experience with traditional and digital manufacturing tools, such as CAD and CNC software.
Nottingham Trent University
(United Kingdom) Bachelor’s in diyfastly.com and Product Design (Honors) Specialized in product design with a focus on blending creativity with production techniques. Participated in industry projects, working with companies like John Lewis and Vitsoe to gain real-world insights.
Publications and Impact
In diy, Safety Fic his insights on indoor design processes, materials, and strategies for efficient production. His writing bridges the gap between artisan knowledge and modern industry needs, making it a must-read for both budding designers and seasoned professionals.