
Are you looking for a way to get more out of your Blink camera? If so, then activating the motion sensor is the answer. With its smart technology, your Blink camera can detect and alert you to movement within a given area in order to give you increased security, convenience, and control.
In this blog post on how to activate motion sensor on blink camera, we’ll show you step-by-step how you can activate the motion sensor on your Blink camera – giving you complete peace of mind when it comes to monitoring any part of your home or office space. So if you’re ready to up the ante on home security with Blink’s motion sensor feature – keep reading!
What is Blink Camera?
Before we dive into the specifics of how to activate motion sensor on blink camera, let’s take a quick look at what the Blink camera is all about.
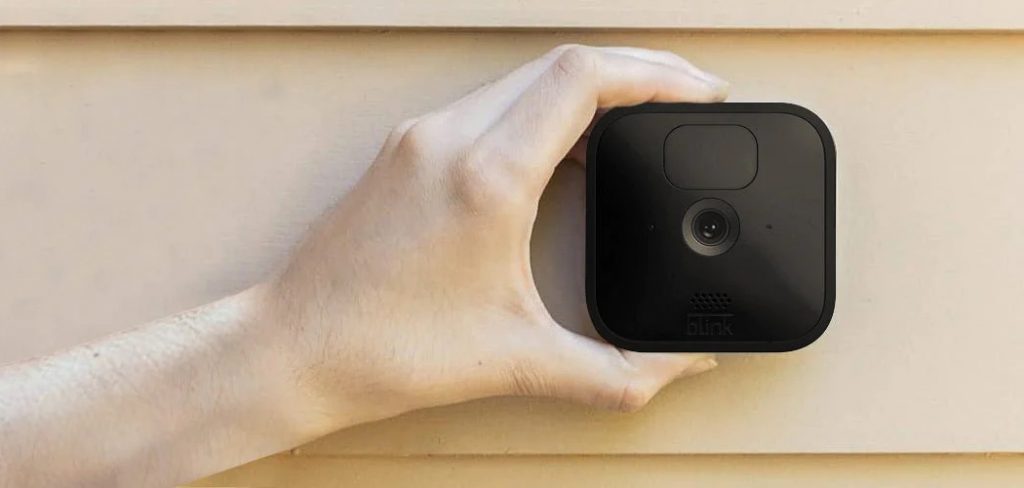
Blink is a smart home security system that allows you to monitor your home or office space through the use of wireless cameras, which are connected to an internet-connected hub. These cameras come in various shapes and sizes and can be placed both indoors and outdoors, making them versatile for any type of property.
How Does the Motion Sensor Work?
The motion sensor on your Blink camera works by using infrared technology to detect changes in heat patterns within its field of view. When it senses movement, it sends an alert to your phone or other connected device, allowing you to view the live footage of what is happening in real time. This allows you to take action immediately if needed, giving you a sense of security and control over your environment.
Needed Materials
- A Blink Camera
- The Blink App (Installable on Google Play and the App Store)
- A Smartphone or Tablet That Can Run the Blink App and Connect to Bluetooth
- A Steady Internet Connection
11 Step-by-step Guidelines on How to Activate Motion Sensor on Blink Camera
Step 1: Input and Install the Blink App
The first step to activating the motion sensor on your Blink camera is to install and install the Blink app from either Google Play or the App Store. Make sure you have a smartphone or tablet that can run the app.
It’s also important to note that the Blink app is free and can be used with any type of mobile device. You can also use a computer to access the Blink app through the web browser. You will need to create an account with Blink to use the app.

Step 2: Log In or Create an Account
Once you have installed the Blink app, log in using your existing account or create a new one if it is your first time using the app. It’s important to note that you can only have one Blink account per email address. You can also log in using your Amazon account if you have one. But if you choose to create a new account, make sure you enter your email address and password correctly. Once logged in, you can access all the features of the app.
Step 3: Connect Your Blink Camera to Wi-Fi
Next, you will need to connect your Blink camera to Wi-Fi. To do this, go to the settings menu on your phone or tablet and navigate to ‘Wi-Fi’. Look for the network name that corresponds with your Blink camera and select it. Follow the instructions on the screen to complete the connection process. It’s important to note that you will need a strong Wi-Fi signal for the Blink camera to function properly.
Step 4: Add Your Blink Camera
Once your Blink camera is connected to Wi-Fi, you can add it to your account on the Blink app. To do this, go to the ‘Home’ tab on the app and tap ‘Add Device’. Follow the instructions on the screen to complete the process. You will need to scan the QR code on the back of your camera and give it a name. This will help you identify the camera if you have more than one.
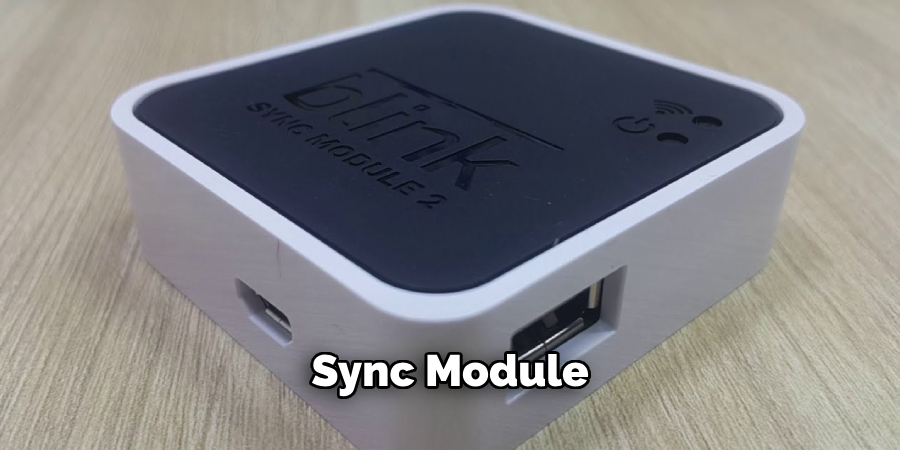
Step 5: Create a Sync Module
A sync module is needed for your Blink camera to function properly. To create one, go to the ‘Settings’ menu on the app and tap ‘Add Sync Module’. Follow the instructions on the screen and make sure it is connected to Wi-Fi. It’s important to note that you can have more than one sync module if needed. But for now, one will suffice.
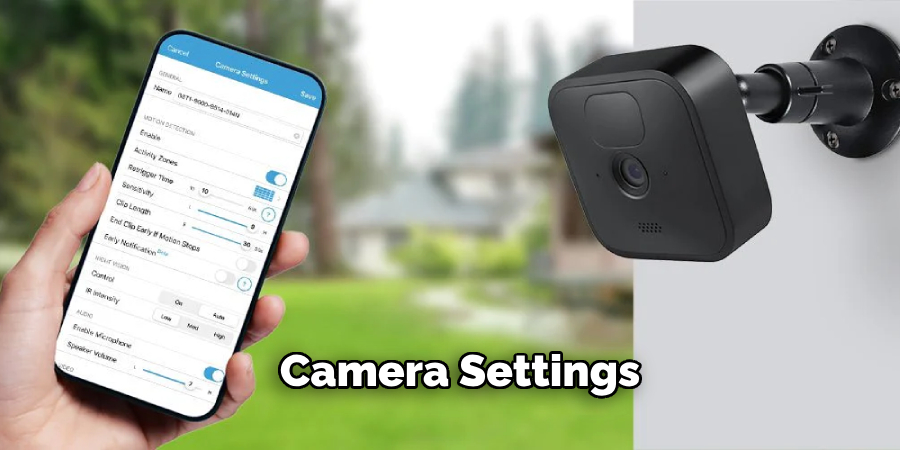
Step 6: Enable Motion Detection
Once the sync module is set up, you can enable motion detection on your Blink camera. To do this, go to the ‘Camera Settings’ menu and select your camera from the list. Tap on ‘Motion Detection’ and toggle it on. You can also customize the sensitivity of the motion sensor by changing its level. If you have multiple cameras, make sure to repeat this step for each one.
Step 7: Set Up Motion Zones
Another great feature of the Blink camera is that you can set up specific motion zones. This means you can select the area in which you want your camera’s motion sensor to detect movement. To do this, go to ‘Camera Settings’ and tap on ‘Motion Zones’. Follow the instructions on the screen and use your finger to draw the desired zones. When finished, click save.
Step 8: Test Your Motion Sensor
To ensure that your motion sensor is working properly, it’s a good idea to test it out. You can do this by simply walking in front of your camera within its designated motion zone. If everything is working correctly, you should receive an alert on your phone and see live footage of the movement. However, if you do not receive an alert, make sure to check your settings and try again.
Step 9: Customize Your Alerts
You can also customize the alerts you receive when the motion sensor is activated. To do this, go to ‘Camera Settings’ and select ‘Notifications’. From here, you can enable or disable different types of notifications such as email, push notifications, or text messages. You can also choose which days and times you want to receive these alerts.
Step 10: Activate Privacy Zones
To further customize your Blink camera’s settings, you can activate privacy zones. This allows you to block out certain areas in the camera’s field of view that you don’t want recorded or viewed. To see this, go to ‘Camera Settings’ and select ‘Privacy Zones’. Follow the instructions on the screen to set them up.
Step 11: Enjoy Your New Motion Sensor!
Congratulations! You have successfully activated the motion sensor on your Blink camera. Now you can sit back and relax knowing that your property is being monitored and protected by your new wireless camera. Make sure to regularly check and adjust your settings for optimal use. Happy monitoring! Otherwise, we hope this article has been helpful in teaching you how to activate motion sensor on Blink Camera.
Now go out and enjoy the peace of mind that comes with having a reliable motion sensor camera. Remember, safety first! So, sit back and relax knowing your property is being monitored and protected by your new wireless camera. Make sure to regularly check and adjust your settings for optimal use. Happy monitoring! Safety first!
Frequently Asked Questions
Q1: Can I Use the Blink App on Multiple Devices?
A: Yes, you can log in to the same account on multiple devices as long as they are compatible with the Blink app. It’s important to note that only one device can be used to access the app at a time.
Q2: Can I Use My Blink Camera Without Wi-Fi?
A: No, a strong Wi-Fi signal is necessary for the Blink camera to function properly. If you do not have a stable internet connection, the footage may not be recorded or transmitted in real time.
Q3: How Many Motion Zones Can I Set Up?
A: You can set up as many motion zones as you want on your Blink camera, but it’s recommended to limit them to 10 or less for optimal performance.

Q4: Are There Any Subscription Fees for Using the Blink App?
A: No, there are no subscription fees associated with using the Blink app. It is completely free to use and access all of its features. It’s important to note that additional services, such as cloud storage for recorded footage, may require a subscription fee.
Conclusion
In conclusion, it is important to learn how to correctly activate the motion sensor on the Blink Camera in order to best utilize this incredible technology and ensure the safety of your property. Now that you have read our guide, you can be confident that you know the correct steps and processes involved in activating the motion sensor on your Blink Camera.
With regular checks and general maintenance, you can guarantee that your camera continues to work properly and provides the security you desire for various locations, near or far.
We hope this information was useful and gave you a better understanding of how to use the Blink Camera for maximum security. Don’t hesitate to contact us if you ever need further assistance. With our help, you can keep a watchful eye over your home and business with ease. Activating the motion sensor on your camera today and secure what matters most: peace of mind. Thanks for reading this article on how to activate motion sensor on blink camera.