

Home security is an important aspect of every household. For this reason, various home security devices are available in the market. One such popular device is the Blink camera. True to the name,
Blink cameras have a blinking LED light as a deterrent to would-be burglars. They are easy to install, simple to operate, and work seamlessly with your home Wi-Fi network. We have prepared a complete guide on how to setup blink camera and enhance your home security.
Can You Set the Blink Camera?
If you want to secure your home, a Blink camera is a great choice. Its easy setup and convenient wireless design make it perfect for homeowners and renters alike. The first step is to choose where you want to place the camera. Once you have done that, simply install the Blink app and follow the on-screen instructions. The setup is straightforward and intuitive, so you can get your camera up and running quickly.
Plus, with features like customizable motion detection and instant alerts, you can rest assured that your home is safe and secure. Whether you’re worried about burglar’s pets, or just want to keep an eye on your home while you’re away, a Blink camera is the perfect solution.
Why Should You Setup Blink Camera?
Setting up Blink Camera provides significant advantages for home security. With its advanced motion detection technology and HD video quality, you can always have a clear view of what’s happening around your property. It sends real-time alerts right to your phone when it detects any movement, ensuring that you are always aware of any potential threats.
Additionally, the wireless nature of Blink Camera makes it extremely easy to install and move around. Its long battery life means you won’t have to constantly replace batteries. With Blink Camera, you can know that your home is always safe and secure.
How to Setup Blink Camera – A Complete Guide
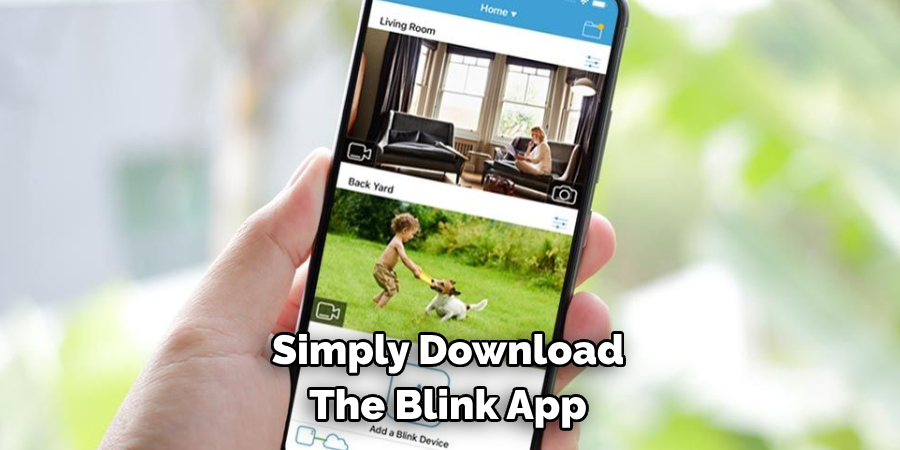
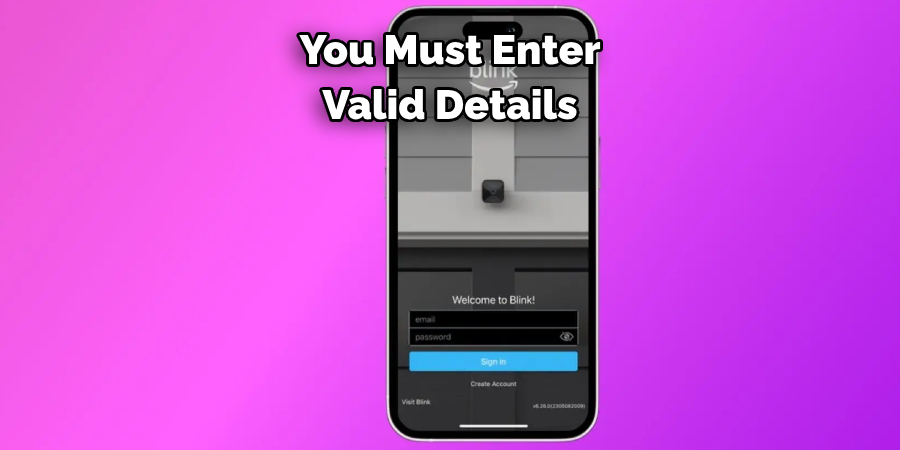
Step 1: Install the Blink App
The first step to setting up the Blink camera is to install the Blink app on your smartphone. This app is available on both the App Store and Google Play Store. Once you have installed the app, sign in with your Blink account or create a new one if you don’t have it already. You must enter valid details such as email ID, mobile number, and password. After signing in, tap the “Add a System” button to set up the camera system.
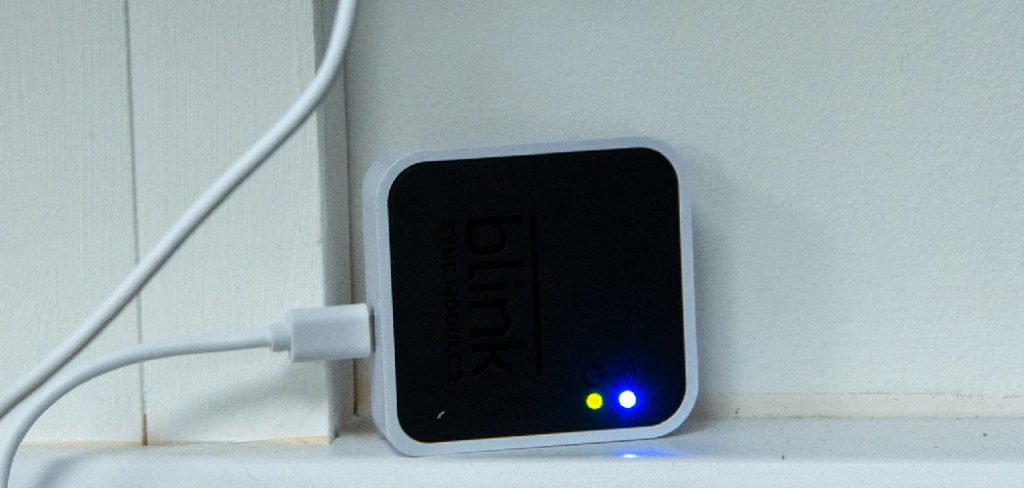
Step 2: Create a New Sync Module
The sync module is the hub that controls your Blink cameras. It allows each camera to connect to Wi-Fi and sync recordings to the cloud. To create a new sync module, tap on the “Add a System” button and then select the “Sync Module” option. Once you’ve followed the on-screen instructions, your Blink system is ready to be set up.
Step 3: Add a Camera
To add a camera, tap the “Add a System” button and select the “Add a Camera” option. Follow the on-screen prompts to connect your Blink camera to Wi-Fi. You’ll need to connect your camera to your sync module by scanning the module’s QR code with your camera. Once that’s done, you’ll be asked to give your camera a name and location. Ensure the camera is placed strategically to get the best view of the area you want to monitor.
Step 4: Test Your Blink Camera
After successfully setting up your Blink camera, it’s time to test it. You can do this through the Blink app. Check the video feed to ensure the camera is recording and you can hear the audio. Adjust the camera’s position if necessary and check the motion detection settings. Once you have tested it, feel confident that your Blink camera is ready to protect you and your family.
Step 5: Customize Your Blink Camera Settings
You can change various settings in the Blink app, such as video quality, motion detection sensitivity, and Wi-Fi connectivity. The app also allows you to set custom alerts, notifying you via your smartphone whenever the camera detects motion. You can also enable the scheduling feature in the Blink app that lets you control camera activity during certain times of the day.
You can customize these settings anytime, depending on your needs.
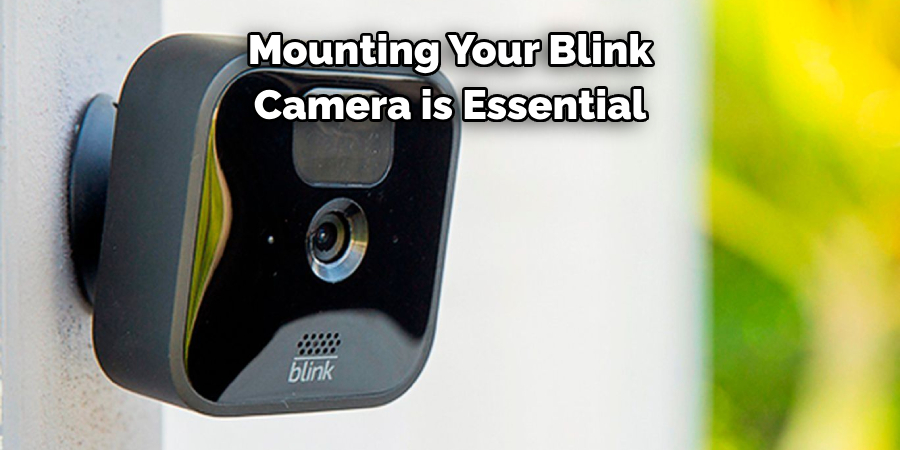
Step 6: Mount Your Blink Camera
Mounting your Blink camera is essential to get the best coverage of the area you want to monitor. The camera comes with a mounting bracket that can be easily attached to walls or ceilings using screws. Once mounted, ensure that the camera is angled correctly and make any necessary adjustments to optimize the camera’s view. This step is crucial to get the most out of your Blink camera.
Step 7: Connect Your Blink Camera to Other Smart Devices
Blink cameras can be connected to smart home devices like Amazon Alexa and IFTTT. This enables you to control your cameras with voice commands or set up automated routines for when motion is detected. It’s a great way to integrate your Blink camera into your smart home setup for added convenience and control.
Following these seven simple steps, you can easily set up your Blink camera system and monitor your home or property. Remember to always keep the app updated and regularly check on your cameras’ performance to ensure they are functioning properly. With Blink cameras, you can have peace of mind knowing that your home is always protected. So, follow these steps and enjoy the benefits of a reliable and easy-to-use security system.
5 Considerations Things When You Need to Setup Blink Camera
1. Location
When setting up a Blink camera, the first thing you need to consider is where you’ll be placing it. You’ll want to choose a spot that is out of reach for children and pets but still in an area with good coverage. If you’re using the camera indoors, ensure no obstructions like furniture or curtains block its view. Additionally, if you’re setting up multiple cameras, make sure they are spaced out enough so that each one has its own field of view.
2. Power Source
The power source is the next thing to consider when setting up a Blink camera. You can use batteries or plug the camera into a wall outlet for continuous power. If you opt for batteries, check them regularly and replace them as needed so your camera won’t run out of juice unexpectedly.
3. Wi-Fi Connection
Another important consideration when setting up a Blink camera is making sure it has access to your home Wi-Fi network. This will allow you to monitor your video feed remotely via the Blink app on your smartphone or tablet. To set this up, simply follow the instructions included with your camera and enter your home Wi-Fi information when prompted by the app.
4. Motion Detection Settings
Once your Blink camera is connected to Wi-Fi and powered on, it’s time to adjust the motion detection settings to only record footage when something moves in front of it. This way, you won’t have to worry about sifting through hours of useless footage just to find what you’re looking for – all of the important stuff will already be recorded for you! You can also set up notifications so that you get alerted whenever motion is detected by your camera(s).
5. Video Storage
Finally, make sure to set up a secure cloud storage system for all of your recorded videos from your Blink cameras. This way, if something happens and someone manages to steal or damage one of your cameras, all of the video data will still be safe and sound in the cloud! Additionally, having cloud storage makes accessing recordings easier since they can be accessed anywhere with an internet connection – no need for external hard drives or other bulky storage devices!

Benefits of Setup Blink Camera
Security cameras have become increasingly popular in recent years, and the Blink camera is no exception. There are many benefits to setting up these cameras in your home or office. For starters, Blink cameras offer a high-quality view of your surroundings both day and night, thanks to their advanced night vision capabilities.
Additionally, they are easy to set up and operate, making them a great option for those who may not be tech-savvy. This system can also be accessed remotely, allowing you to view live footage from anywhere using your smartphone, tablet, or computer. With a Blink camera setup, you can have peace of mind knowing that your safety and security are always being monitored.
Conclusion
Setting up a Blink camera is easy, and it provides peace of mind knowing that your home is safe and secure. In this blog post, we have provided you with a detailed guide on how to set up a Blink camera.
Remember to place the camera strategically for the best view of the area you want to monitor, and always test the settings to ensure that it functions correctly. With just a few simple steps, you can set up a Blink camera and improve the security of your home. Thanks for reading our post about how to setup blink camera.
About
Safety Fic is a distinguished figure in the world of Diy design, with a decade of expertise creating innovative and sustainable Diy solutions. His professional focus lies in merging traditional craftsmanship with modern manufacturing techniques, fostering designs that are both practical and environmentally conscious. As the author of diy, Safety Fic delves into the art and science of Safety Fic-making, inspiring artisans and industry professionals alike.
Education RMIT University
(Melbourne, Australia) Associate Degree in Design (Safety Fic) Focus on sustainable design, industry-driven projects, and practical craftsmanship. Gained hands-on experience with traditional and digital manufacturing tools, such as CAD and CNC software.
Nottingham Trent University
(United Kingdom) Bachelor’s in diyfastly.com and Product Design (Honors) Specialized in product design with a focus on blending creativity with production techniques. Participated in industry projects, working with companies like John Lewis and Vitsoe to gain real-world insights.
Publications and Impact
In diy, Safety Fic his insights on indoor design processes, materials, and strategies for efficient production. His writing bridges the gap between artisan knowledge and modern industry needs, making it a must-read for both budding designers and seasoned professionals.