

Have you ever accidentally come across a Blink video that someone had deleted? If so, you may be wondering how to restore the precious memories contained within. But fear not! Whether it’s pictures of your kid’s soccer game or recordings from significant life events, recovering lost videos can be easier than you think.

Not only can video recovery save time and effort for future memory harvesting projects, but with some cheap – and occasionally free software options – you can quickly learn how to recover deleted blink video in no time! In today’s post, we will cover why data loss occurs, different methods of video recovery possible specifically for Blink Videos, and (of course) precisely how to recover any deleted footage successfully.
So let’s get started on our journey to help regain those long-lost memories!
What Will You Need?
Before we dive into the nitty-gritty, you will need some essential tools to recover deleted blink videos successfully. These include:
- A computer or device that can connect to the internet and install software.
- A USB flash drive, external hard drive, or cloud storage account to store recovered files.
- The name of the video file you want to recover if you know it (optional).
- Patience – depending on your situation, recovery can take some time.
If you have all of the above, keep reading to learn more!
Reasons for Data Loss
Before we get into how to recover deleted blink videos, it’s essential to know why data loss occurs. This way, you can avoid these situations in the future and save yourself time and stress. Here are a few common reasons for data loss:
- Accidental deletion of files.
- Hardware or software malfunctions.
- System crashes or errors.
- Virus or malware attacks.
- Physical damage to storage devices.
Knowing the potential causes of data loss can help you be more aware and careful when handling your videos and other important files. But if the damage is already done, don’t worry! There are ways to recover deleted blink videos and regain your precious memories.
9 Easy Steps on How to Recover Deleted Blink Video
Step 1. Install Recovery Software:
The first step to recover your deleted blink video is to install reliable data recovery software. Many options are available online, but it’s essential to choose one that is safe, reliable, and recommended by professionals. Some popular options include EaseUS Data Recovery Wizard, Disk Drill, or Recuva. After you’ve chosen, install and install the software on your computer.

Step 2. Select the Target Location:
Once the software is installed, open it and select where the blink video was stored before it was deleted. This could be an internal hard drive, external storage device, or a specific folder on your computer. After selecting the proper location, click on the ‘Scan’ or ‘Start’ button (the exact wording may vary depending on the software). The software will then start scanning the selected location for any recoverable files.
Step 3. Scan for Deleted Files:
The recovery software will begin a thorough scan of the selected location. This process could take some time, depending on the size of your hard drive or storage device. During this scan, the software looks for deleted files, including your missing blink video. Exercise patience during this step; a rushed scan might miss some recoverable files.
Step 4. Preview and Select the Deleted Files:
After the scan is complete, the software will display a list of all the recoverable files. It should allow you to preview these files. Navigate through them until you find your deleted Blink videos. Once you locate them, select the checkbox next to the files.
This step is crucial as it determines which files the software will attempt to recover in the next step. Always double-check your selections before moving on.
Step 5. Recover the Selected Files:
With your desired Blink videos selected, it’s time to recover them. Look for the ‘Recover’ or ‘Restore’ button in the software interface (again, the exact wording may vary). Click on this button to start the recovery process. Depending on the size and number of files you’re restoring, this could take a few minutes to an hour. Ensure your computer remains powered on and connected to the internet throughout this process.
Once the recovery is complete, the software should provide a confirmation message. Now, you can navigate to your selected destination for the restored files and confirm that your deleted Blink videos have been successfully recovered. Congratulations, you’ve just learned to recover deleted Blink videos!
Step 6. Verify the Recovered Files:
After the recovery is complete, verifying the recovered Blink videos is critical. Navigate to the location where the recovery software saved the restored files. Open your videos and check if they play without any issues. Ensure that the video and audio quality is intact.
If there are any issues with the recovered files, you may need to repeat the recovery process, ensuring you follow the steps properly. If the problem persists, consider seeking professional help or using a different recovery software.
Step 7. Backup Your Files:
After you’ve successfully recovered your Blink videos, taking measures to avoid future data loss incidents is essential. The easiest way to do this is by regularly backing up your files. You could use cloud storage services like Google Drive or Dropbox. Alternatively, you could invest in an external hard drive or NAS device for local backups.

Remember, it’s always better to have multiple backups in different locations. That way, even if one backup fails, you’ll have other copies to fall back on. Implementing a robust backup strategy now can save you the stress and hassle of data recovery in the future.
Step 8. Regularly Update Your Software:
Keeping your software updated, including your operating system and the applications you use, can also help prevent data loss. Software updates often include patches for security vulnerabilities that could result in data loss. Therefore, regularly updating your software can keep your files safe.
Furthermore, it’s crucial to keep your recovery software updated as well. The latest versions usually have improved recovery capabilities and can handle more recent file types and systems. To update your software, visit the respective software’s official website or use the built-in update feature found in most software.
Step 9. Use Anti-virus Software:
Another preventive measure you can adopt is using good quality anti-virus software. As mentioned, one of the reasons for data loss could be virus or malware attacks. Ensuring your device is protected from such threats can significantly reduce the chances of losing your files.
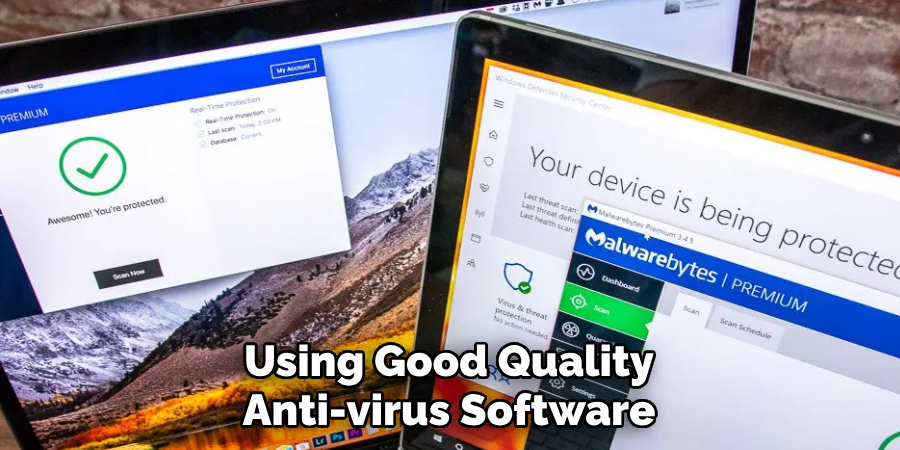
Install a reliable anti-virus program, update it, and regularly scan your device to safeguard against potential threats. Remember, prevention is always better than cure, especially when protecting your precious Blink videos.
With these steps in mind, you now have the knowledge and tools to recover your deleted Blink videos efficiently. As long as you follow these steps carefully, you can retrieve your lost files successfully.
5 Additional Tips and Tricks
- Regular Backups: Make it a habit to regularly backup your Blink videos to another device or cloud storage. This way, even if you accidentally delete a video, you can easily retrieve it from your backup.
- Check the Trash Bin: If you’ve recently deleted a Blink video, it’s still in your device’s trash bin. Always check there first when trying to recover deleted Blink videos.
- Use a Video Recovery Tool: Several reliable video recovery tools are available online. These tools can help you recover deleted videos by scanning your device for the lost data.
- Contact Customer Support: It might be worth contacting Blink’s customer support team if you cannot recover a deleted Blink video. They can assist you in the recovery process.
- Avoid Overwriting: If you’ve deleted a Blink video, avoid recording new videos on the same device until you’ve attempted recovery. Overwriting could make it more complicated, if not impossible, to recover the deleted video.
Following these additional tips and tricks can increase your chances of successfully recovering a deleted Blink video.
5 Things You Should Avoid
- Deleting Videos Hastily: Always double-check before deleting any Blink videos. Accidental deletion is a common reason for losing valuable footage.
- Ignoring Regular Backups: Neglecting to backup your videos is a risky move. With a backup, recovery may be more accessible and more manageable.
- Overusing Device Storage: Continuous recording without deleting unnecessary videos can fill up your storage. Once the storage is full, new videos may overwrite the existing ones, including the ones you want to keep.
- Ignoring Updates: Regularly update your Blink app and devices. Updates often come with improved features and bug fixes, which can prevent potential data loss.
- Avoid Unauthorized Third-party Apps: Be cautious when using third-party apps for video recovery. Unauthorized or unreliable apps can lead to loss of data or might compromise your privacy and security. Always use trusted and recommended apps for video recovery.

By avoiding these actions, you can minimize the risk of losing your Blink videos and enhance the chances of successful recovery in case of accidental deletion.
Conclusion
In conclusion, with a few simple steps, you can now confidently recover your deleted Blink video and keep your footage safe no matter what unfortunate event happens! There’s no need to feel embarrassed or embarrassed by data loss. Let these procedures be your guide, and hit that delete button.
All the steps mentioned above will help you recover your deleted Blink videos and ensure you never lose any valuable footage. So, next time you accidentally delete a Blink video, remember these tips and tricks to retrieve it quickly and easily!
We hope this blog found today gave you the insight and tools you need to become a master at how to recover deleted blink video. Now, go out there and keep those precious memories alive! After all, it’s about capturing life moments and making meaningful stories. Let Blink help you do just that!
You Can Check It Out to Turn Off Clicking Noise on Blink Mini Camera