

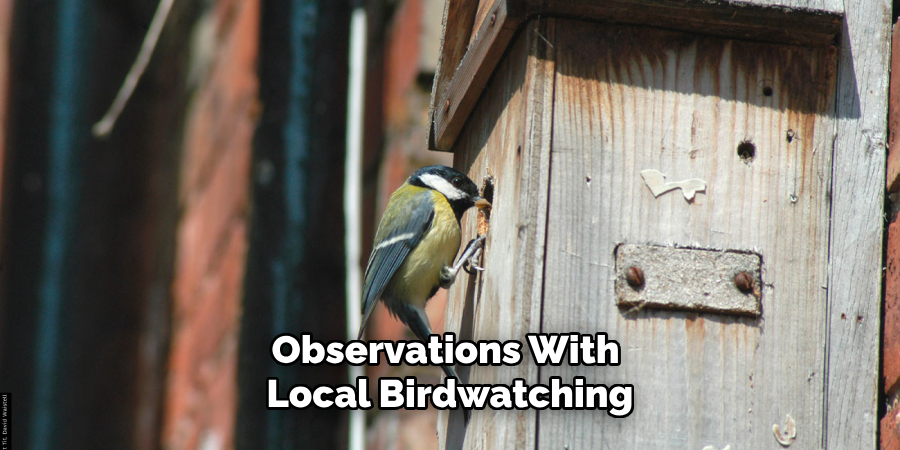
Are you curious about the secret life of birds in your backyard? If so, a nest box camera could just give you an up-close look at these feathered friends. Setting up a nest box camera is not as complicated as it may seem—all you need are basic supplies and easy-to-follow instructions. Once your camera is all set, get ready for hours of birdwatching entertainment!
Nest box cameras are designed to provide a convenient and safe way to observe nesting birds without disturbing them. They typically consist of a small camera mounted inside a nest box, connected to a monitor or computer for viewing the footage.
Keep reading to learn more about how to set up a nest box camera and start being amazed by the avian world right outside your door.
What are the Benefits of Using a Nest Box Camera?
There are many benefits to using a nest box camera. For one, it allows you to see the intimate moments of birds’ lives that typically go unnoticed. You can witness the hatching of eggs, feeding of chicks, and fledging (when the young birds leave the nest). This is especially exciting if you have children who love animals and nature.
Another benefit is that you can learn about the different species of birds that visit your backyard. By observing their nesting habits, you can identify which bird types live nearby. This is great for bird enthusiasts or anyone interested in learning more about local wildlife.
Lastly, using a nest box camera also provides important information for conservation efforts. By recording data on breeding success, you can contribute to scientific research and help protect vulnerable bird species.
What Will You Need?
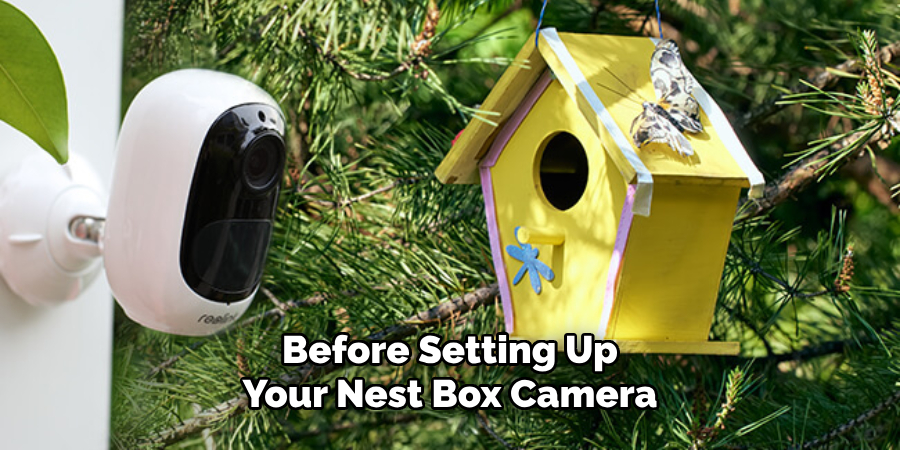
Before setting up your nest box camera, make sure you have the following supplies:
- A nest box with a secure lid (preferably made of wood)
- A small camera with built-in LED lights (to capture footage in low light)
- Cables to connect the camera to a monitor or computer
- A monitor or computer (depending on where you want to view the footage)
- Power source for the camera and monitor/computer (e.g., extension cord, batteries)
Now that you have all your supplies, it’s time to set up your nest box camera!
10 Easy Steps on How to Set Up a Nest Box Camera
Step 1. Choose a Location for the Nest Box:
Start by deciding where to put the nest box. It should be in a quiet, sheltered spot, away from predation and extreme weather conditions. Placing it out of direct sunlight and at least 1.5 meters off the ground is also best to keep the birds safe.
Step 2. Install the Nest Box:
You can install the nest box once you’ve identified the perfect location. Use secure brackets or straps to attach it to a tree or post, ensuring it’s stable and won’t sway in the wind. Ensure the nest box entrance is facing away from prevailing winds and rain for the comfort and safety of the birds.
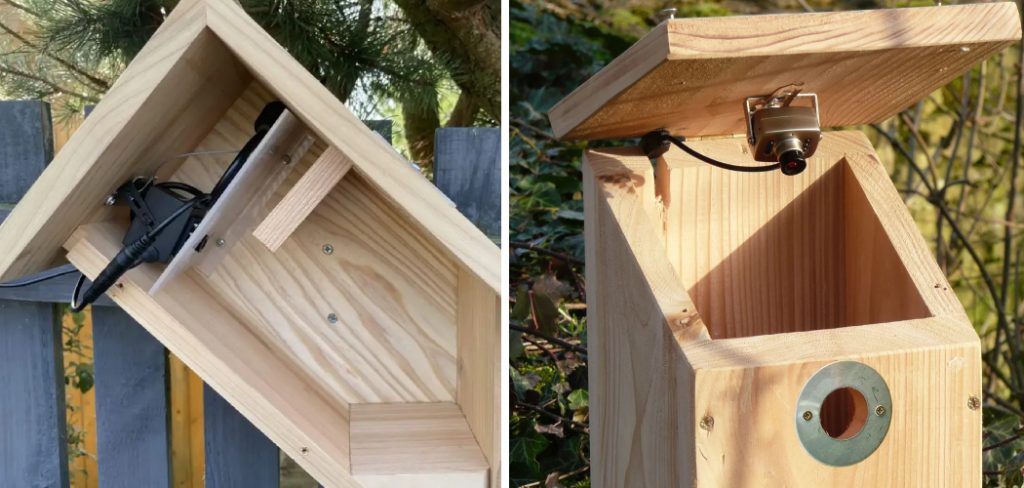
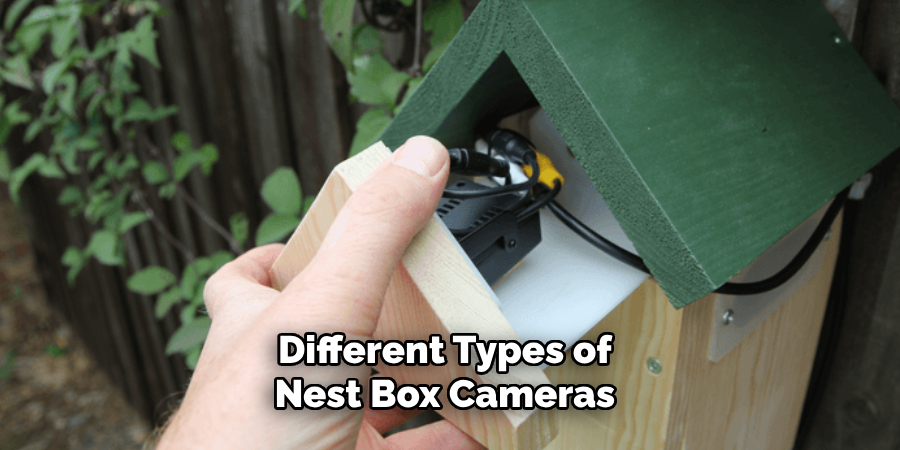
Step 3. Install the Camera:
After the nest box is securely installed, it’s time to set up the camera. Place the camera inside the nest box, ensuring it’s positioned to get a clear view of the entire inside area and the entrance.
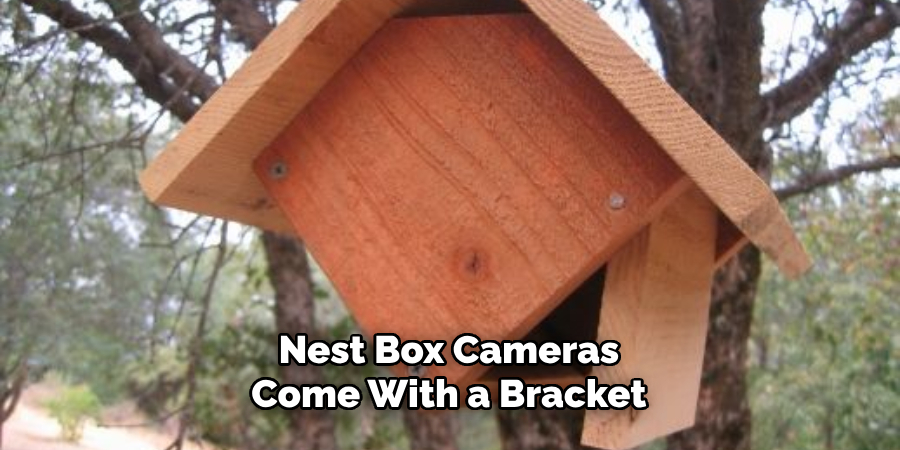
Most nest box cameras come with a bracket or adhesive for mounting. Once mounted, adjust the camera angle as needed. Ensure the LED lights do not obstruct the lens view, and remember to be gentle to avoid disturbing the potential nest site.
Step 4. Connect the Camera to the Monitor/Computer:
This step involves running cables from the nest box camera to your monitor or computer. Depending on your camera model, you might have a power and video cable. The power cable connects the camera to an electrical source, while the video cable transmits the footage to the monitor or computer. Some models have a combined power and video cable.
Ensure you follow the manufacturer’s instructions to avoid any setup mistakes. After you’ve connected the wires, place them securely and discreetly to avoid any potential tripping hazards. Remember to keep them out of reach of pets or children.
Step 5. Power On the System:
Now that everything is connected, it’s time to power the system. Plug the power supply into a nearby socket or battery pack and switch it on. Make sure the camera and monitor or computer are both receiving power. If your nest box camera is wireless, ensure it’s connected to your Wi-Fi network.
You should start seeing the video feed on your monitor or computer screen. Double-check your connections and the camera placement within the nest box if you do not see any footage.
Step 6. Test the System:
After powering on the system, testing it to ensure everything is working as expected is crucial. Check the quality of the image on your monitor or computer screen. Adjust the camera angle or position to get the best possible view of the nest box interior.
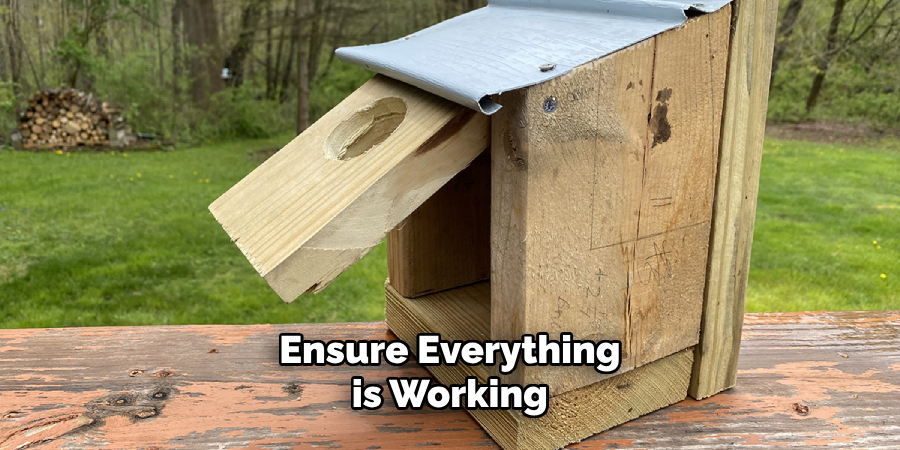
Test the LED lights to ensure they function correctly and provide enough light for clear images without disturbing the birds. Finally, try recording a clip or taking a snapshot to ensure the camera’s recording function works properly. Make any necessary adjustments before the nesting season begins to avoid disturbing the birds once they move in.
Step 7. Monitor and Adjust:
After successfully setting up and testing your system, the next step is to monitor the nest box camera regularly. Keep an eye on the footage to observe any bird activity. If you notice common issues like poor lighting or blockages in the camera’s field of view, you may need to adjust the camera or the LED light settings.
Ensuring the system functions optimally is crucial for the best birdwatching experience and collecting valuable data for conservation efforts. Remember, any significant adjustments should be made outside of the breeding season to prevent bird disturbance.
Step 8. Maintain the Nest Box:
Maintenance is essential to keeping a healthy environment for the birds and ensuring the longevity of your nest box camera setup. Regularly check the nest box for any signs of damage or wear and tear, particularly after adverse weather.
Clean the nest box at least once a year, preferably at the end of the breeding season, to eliminate any parasites or debris. However, always ensure no eggs, chicks, or birds are in the box before cleaning. Also, keep the lens of your camera clean for clear images.
Step 9. Share and Contribute Data:
Once your nest box camera is running, consider sharing your observations with local birdwatching or ornithology groups. Your footage can contribute significantly to bird conservation efforts, and you might even make exciting discoveries!
Additionally, you can use the data recorded from your camera for citizen science projects or as educational material for schools. Always make sure to share responsibly, prioritizing the safety and privacy of the birds.
Step 10. Enjoy the Experience:
Finally, take the time to enjoy this unique birdwatching experience. Having a nest box camera provides you with a privileged view into the private lives of birds, from the building of the nest to the hatching of the eggs and the growth of the young birds.
Remember that observing wildlife comes with a responsibility to respect and protect it. Avoid sharing sensitive information that could potentially put the birds at risk, and consider turning off the camera during the night or at stressful events like hatching to minimize disturbance. Most importantly, have fun and enjoy the fascinating world of bird behavior!
By following these steps, you can easily set up a nest box camera and have the opportunity to observe and learn from birds in their natural habitat. Remember that patience is key when it comes to birdwatching, but with your trusty nest box camera, you’ll be able to witness some incredible moments from the comfort of your home.
5 Additional Tips and Tricks
- Choose the Right Camera: Different cameras come with different features. Some have night vision, while others may be equipped for HD recording or live streaking. Choose a camera that suits your requirements and budget.
- Consider Weatherproofing: Nest box cameras need to endure various weather conditions. Be sure to choose a camera that is waterproof or comes with a protective casing. Additionally, consider the positioning of your nest box; sheltered locations can provide added protection against harsh weather.
- Optimal Positioning: Careful positioning of the nest box can increase the likelihood of it being used by birds. Typically, nest boxes should face between north and east to avoid strong sunlight and the wettest winds. Moreover, try to have a clear flight path for the birds to the box entrance.
- Use of Technology: Some nest box cameras have apps that allow you to monitor the bird activities from your smartphone or tablet. These apps can also send you alerts when activity is in the nest box, ensuring you don’t miss any exciting moments.
- Respect Wildlife Laws: In many countries, disturbing nesting birds’s against the law. Make sure to familiarize yourself with local wildlife laws. For instance, in the UK, disturbing any bird’s nest while it’s in use or being built is illegal. Respect the birds’ privacy and limit interference as much as possible.

With these additional tips and tricks, you’ll be well on your way to having a successful nest box camera setup.
5 Things You Should Avoid
- Disturbing the Nest: Avoid checking the nest box frequently or at inappropriate times, like during the night or the breeding season. This can cause unnecessary stress for the birds and may even lead to abandonment of the nest.
- Ignoring Maintenance: Pay attention to your nest box and camera maintenance. Regular checks for signs of wear and tear or damage and necessary repairs or replacements ensure a healthy environment for the birds and the longevity of your setup.
- Inadequate Weatherproofing: Failing to weatherproof your nest box adequately and camera can lead to damage and malfunction. Ensure your camera is waterproof and that your nest box is placed in a sheltered location.
- Poor Camera Positioning: Avoid placing the camera in a position that disrupts the birds or doesn’t provide a clear view of the nest. The camera should be positioned strategically to monitor the birds without interfering with their activities.
- Violating Wildlife Laws: Don’t violate wildlife laws or regulations. Check the local laws of your country concerning birdwatching and nest monitoring. Disturbing a nest during use or construction can be illegal in some places, so always ensure you comply with local guidelines.
By avoiding these common mistakes, you’ll be able to have a successful and responsible nest box camera setup.
5 Different Design Ideas for Nest Box Cameras
- Live Streaking Camera: A live Streaking camera allows you to watch the birds in real-time from anywhere, giving you an immersive experience.
- Infrared Night Vision Camera: An infrared night vision camera captures clear footage even in low light conditions, allowing you to observe the nocturnal activities of birds.
- Wireless Camera: A wireless camera uses a Wi-Fi connection to transfer footage, eliminating the need for messy wires and allowing greater flexibility in camera placement.
- Pan-Tilt-Zoom Camera: This type of camera allows you to remotely control its movements, giving you a more comprehensive range of viewing angles and more control over what you see.
- Motion-Activated Camera: A motion-activated camera will only start recording when it detects movement, saving storage space and making it easier to review footage.
These are just a few ideas for different types of nest box cameras you can use, but there are endless possibilities. Choose a design that suits your needs and budget, and get ready to witness some fantastic bird behavior.
How Do I Connect My Nest Camera to Wi-fi?
- Choose a Compatible Camera: Make sure your nest box camera is Wi-Fi enabled and can connect to your home network.
- Prepare Your Network: Ensure your network is ready for the connection by checking if it’s within range, has a strong signal, and isn’t overloaded with devices.
- Install the App: Install the app for your specific camera model on your smartphone or tablet. This app will guide you through the setup process.
- Connect Camera to Power Source: Plug in your nest box camera to a power source using the included adapter and cable.
- Follow App Instructions: Follow the instructions on the app to connect your camera to Wi-Fi. You may need to enter your network name and password for the camera to connect.
- Test Connection: Once the setup is complete, test the connection by viewing a live feed from your camera on the app. If it’s working correctly, you’re all set!
Connecting your nest box camera to Wi-Fi allows you to remotely access footage and receive alerts, making monitoring bird activity easier without disturbing it.
Conclusion
In summary, how to set up a nest box camera is a great way to make a fun educational project for the whole family. With a few simple supplies and basic steps, you’ll capture sweet memories of birds and other wildlife in no time! It’s amazing what you can learn and enjoy when you take the time to observe nature up close.
Plus, remember that your photos and videos will make great additions to your scrapbook or photobook collection. Take some time today to set up your nest box camera – you won’t regret it! Who knows? You may develop an interest in bird-watching as well.
Go ahead, take the plunge – have fun with it and discover something new – even if it’s just outside your window!
About
Safety Fic is a distinguished figure in the world of Diy design, with a decade of expertise creating innovative and sustainable Diy solutions. His professional focus lies in merging traditional craftsmanship with modern manufacturing techniques, fostering designs that are both practical and environmentally conscious. As the author of diy, Safety Fic delves into the art and science of Safety Fic-making, inspiring artisans and industry professionals alike.
Education RMIT University
(Melbourne, Australia) Associate Degree in Design (Safety Fic) Focus on sustainable design, industry-driven projects, and practical craftsmanship. Gained hands-on experience with traditional and digital manufacturing tools, such as CAD and CNC software.
Nottingham Trent University
(United Kingdom) Bachelor’s in diyfastly.com and Product Design (Honors) Specialized in product design with a focus on blending creativity with production techniques. Participated in industry projects, working with companies like John Lewis and Vitsoe to gain real-world insights.
Publications and Impact
In diy, Safety Fic his insights on indoor design processes, materials, and strategies for efficient production. His writing bridges the gap between artisan knowledge and modern industry needs, making it a must-read for both budding designers and seasoned professionals.