

Setting up an Arlo base station is a pivotal step in creating a comprehensive home security system that offers peace of mind and protection for your property. Arlo, a leading provider of smart home security solutions, offers users an intuitive and straightforward process to establish their base station, allowing seamless integration with Arlo cameras and other devices.
Whether you’re a first-time user or upgrading your existing setup, understanding how to set up arlo base station correctly is essential for maximizing its functionality and ensuring reliable performance.
In this guide, we’ll delve into the step-by-step process of setting up an Arlo base station, covering everything from initial setup and connection to configuring settings and optimizing performance. With these instructions, users can confidently embark on the journey of enhancing their home security with Arlo’s cutting-edge technology.
Importance of Setting Up the Base Station Correctly
Setting up the Arlo base station correctly is not just a preliminary step; it’s the foundation of ensuring your home security system works optimally. A properly configured base station is crucial for maintaining a stable and secure connection between your Arlo cameras and the internet, allowing for uninterrupted surveillance and real-time alerts.
Furthermore, correct installation ensures you can leverage the full range of features offered by Arlo, including cloud storage, smart home integration, and advanced detection capabilities.
An inaccurately set up base station might result in connectivity issues, limited functionality, or even security vulnerabilities. Therefore, taking the time to carefully follow setup instructions guarantees your Arlo system functions seamlessly, providing you with peace of mind and robust home security.
Understanding Arlo Base Station
The Arlo Base Station serves as the central hub for your Arlo home security system, connecting your Arlo cameras and other compatible devices directly to your home network and the Internet. It’s engineered to extend the battery life of your Arlo cameras by providing a more stable, low-energy connection compared to direct Wi-Fi access.
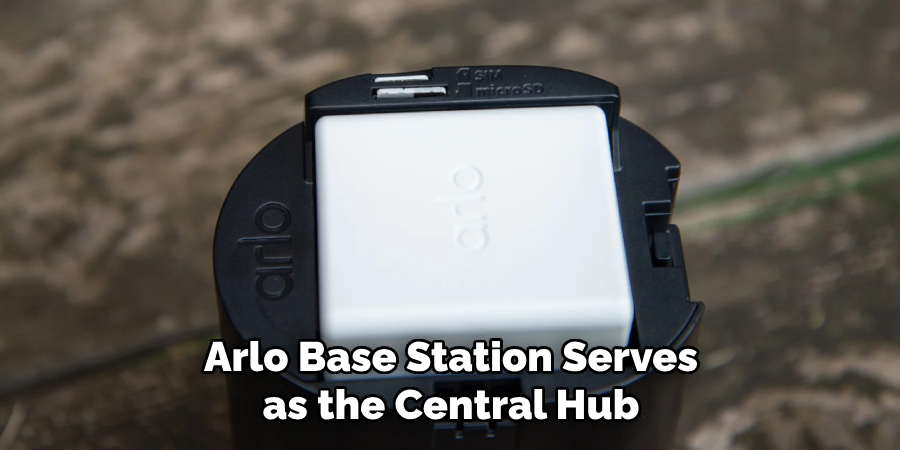
Additionally, the base station emits a siren that can be triggered manually through the app or automatically by motion or sound detection from connected cameras. It also provides local storage options for those who prefer to keep their video footage on-site.
Understanding the capabilities and functionalities of the Arlo Base Station is crucial in harnessing the full potential of your Arlo security system, ensuring comprehensive surveillance and enhanced security of your property.
Components of the Base Station
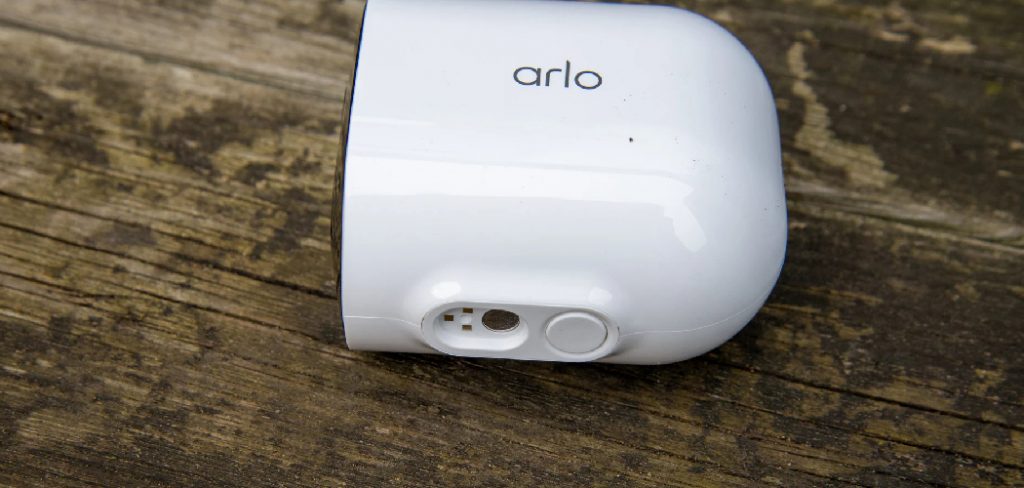
Before beginning the setup process, it’s important to familiarize yourself with the components that make up the Arlo Base Station. The base station itself is the heart of the Arlo home security system, equipped with various ports and features designed to enhance your security setup. Key components include:
- Power adapter port: For connecting the base station to a power source.
- Internet port (Ethernet): Allows the base station to connect to your home router via an Ethernet cable, facilitating internet access.
- USB ports: These ports can be used for local backup storage options, enabling you to save video recordings directly to a USB drive.
- Sync button: Used to pair your Arlo cameras and other compatible devices with the base station.
- Siren: An integrated siren that can be activated manually or automatically to deter intruders.
Understanding these components is essential for a smooth setup process and for troubleshooting any issues that might arise during or after installation.
Benefits of Using a Base Station
Utilizing a base station in your Arlo home security system provides several significant benefits that enhance both the functionality and reliability of your security measures.
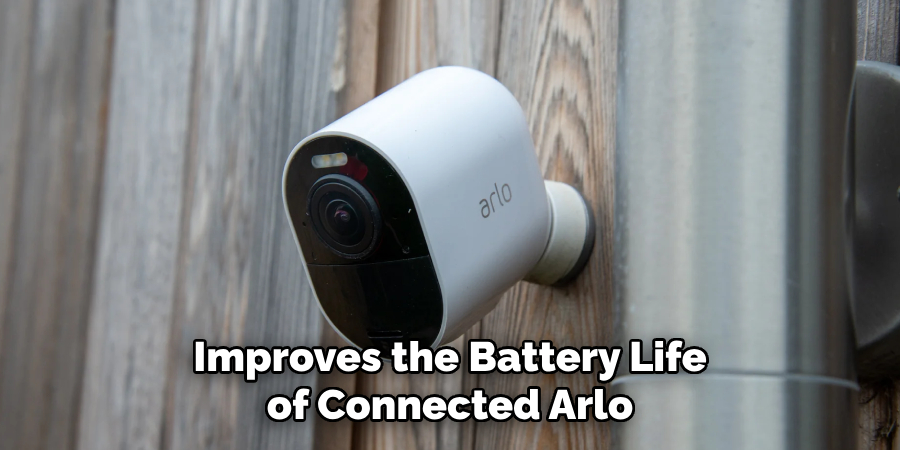
Firstly, it greatly improves the battery life of connected Arlo cameras, as these devices can connect via a low-energy connection to the base station rather than maintaining a direct and often energy-intensive connection to Wi-Fi. This not only extends the time between charges but also ensures that your cameras remain operational for longer periods, providing continuous surveillance without frequent interruptions.
Additionally, the base station offers a robust and stable internet connection to your Arlo cameras, which is crucial for maintaining high-quality live streaming and ensuring quick upload times for recorded footage to the cloud. This reliable connection is paramount for receiving timely alerts and accessing your cameras remotely in real time, giving you the ability to respond swiftly to any security threats.
The inclusion of an integrated siren within the base station further elevates your home’s security by providing a powerful deterrent to potential intruders. This siren can be triggered manually through the Arlo app or set to activate automatically in response to certain triggers, such as motion or sound detection, adding an additional layer of protection.
Lastly, the base station’s support for local backup storage via USB drives offers users more control over their video footage. This feature is particularly valuable for those who prefer to store their videos onsite for privacy reasons or to ensure access to recordings even in the event of an internet outage.
In summary, incorporating a base station into your Arlo security system not only amplifies the operational efficiency and reliability of your cameras but also provides enhanced security features and greater flexibility in managing and storing video footage.
Role and Functionality of The Base Station
The base station’s role extends beyond merely facilitating communication between Arlo cameras and the internet; it acts as the backbone of the entire security system.

This critical component not only ensures a seamless and stable connection but also significantly contributes to the overall performance and efficiency of the Arlo system. It processes and stores video footage, enables smart home integrations, and manages the battery life of connected devices, optimizing their functionality.
By serving as a smart hub, the base station allows users to connect multiple cameras across various locations, creating a comprehensive surveillance network. Additionally, its ability to connect directly to the home’s router via Ethernet provides a more reliable and secure connection compared to Wi-Fi, which is susceptible to interference and signal strength issues.
The base station’s functionality, therefore, is pivotal in leveraging the full capabilities of Arlo’s home security solution, offering users a robust and intelligent system that enhances their ability to monitor and protect their homes effectively.
Compatibility with Arlo Cameras and Accessories
The Arlo Base Station is designed to be highly compatible with a wide range of Arlo cameras and accessories, ensuring users can build a comprehensive and integrated home security system. This compatibility spans various generations and models of Arlo cameras, including the Arlo Pro series, Arlo Ultra, and even the basic Arlo wire-free cameras.
Such broad compatibility allows users to mix and match devices according to their specific security needs and preferences, whether they require advanced 4K video quality for detailed surveillance or simple motion detection capabilities for general monitoring.
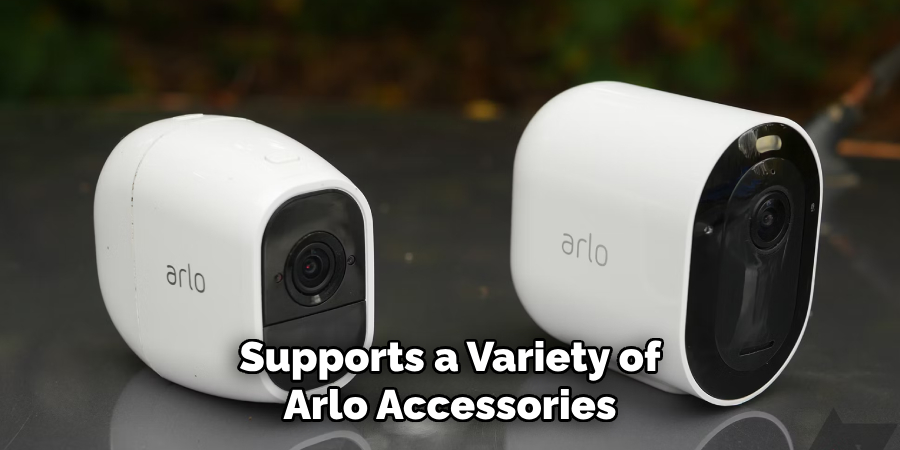
In addition to camera compatibility, the base station also supports a variety of Arlo accessories that enhance the functionality and efficiency of the security system. These accessories include solar panels for eco-friendly charging, outdoor mounts for secure camera installation, and even Arlo lights for improved visibility and motion detection in low-light conditions.
This seamless integration with both cameras and accessories underscores the base station’s role as a versatile and central component of the Arlo home security ecosystem, empowering users to customize and expand their security setups as needed.
10 Methods How to Set up Arlo Base Station
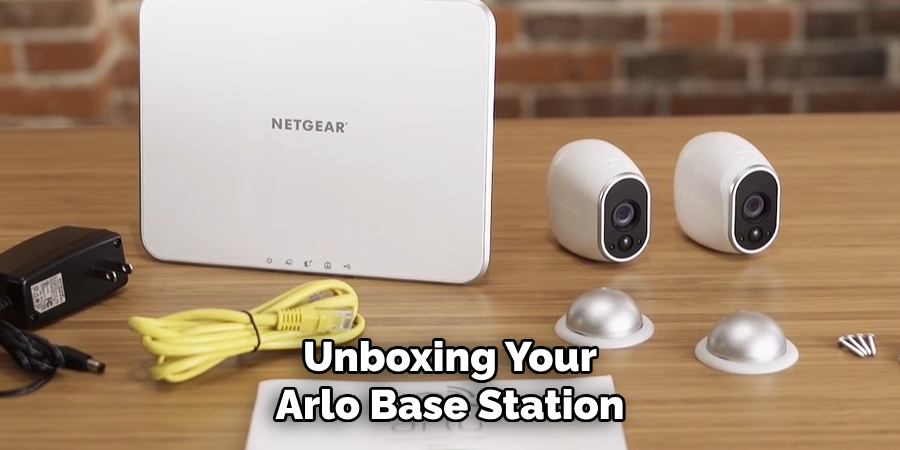
Unboxing and Initial Inspection:
Begin by unboxing your Arlo base station and carefully inspecting its contents. Ensure that all components, including the base station itself, power adapter, Ethernet cable, and any included documentation, are present and in good condition. If anything is missing or damaged, contact the manufacturer for assistance.
Once you have confirmed that all components are present and undamaged, it’s time to begin setting up your Arlo base station.
Choose a Suitable Location:
Select a suitable location to place your Arlo base station. It should be positioned centrally within your home to ensure optimal coverage for all Arlo cameras. Additionally, consider proximity to power outlets and a stable internet connection for seamless operation.
A good location for your Arlo base station is in a central area of your home with easy access to power outlets and stable internet connection. This will ensure that all Arlo cameras have sufficient coverage, as well as uninterrupted functionality.
Connect the Base Station to Power:
Use the provided power adapter to connect the Arlo base station to a power outlet. Ensure that the power adapter is securely plugged in and that the base station’s power indicator LED lights up, indicating that it is receiving power.
Once the base station is connected to power, it will go through a startup sequence. During this time, the status LED on the front of the base station will flash green and amber. Once the base station is ready for use, the status LED will turn solid green.
To ensure that your Arlo system has a stable and consistent connection, it is recommended to keep the base station connected to power at all times. However, in the event of a power outage, the base station does have a backup battery that can provide power for up to several hours.
Connect the Base Station to Your Router:
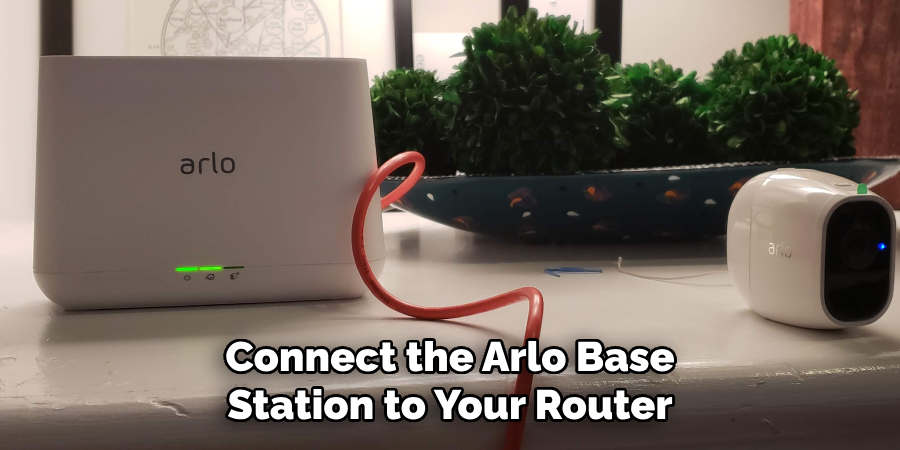
Use the provided Ethernet cable to connect the Arlo base station to your router or modem. Plug one end of the Ethernet cable into the Ethernet port on the base station and the other end into an available Ethernet port on your router or modem. The base station must be connected to your router in order for it to communicate with your Arlo cameras and the internet.
After connecting the base station to your router, make sure that the power adapter is plugged into both the base station and an electrical outlet. The power LED on the front of the base station should turn solid green within a few minutes, indicating that it has successfully connected to your router and is ready for setup.
If the power LED does not turn solid green, make sure that the Ethernet cable is securely plugged in and that both ends of the cable are functioning properly. If necessary, try using a different Ethernet cable or port on your router.
Power On the Base Station:
After connecting the base station to power and your router, power on the base station by pressing the power button or switch, if applicable. Wait for the base station to boot up and initialize, which may take a few moments.
Once the base station is powered on and connected to the internet, you can proceed with setting up your devices. Additionally, you may need to update the base station’s firmware before fully utilizing its features.
Download and Install the Arlo App:
Download the Arlo app from the App Store (for iOS devices) or Google Play Store (for Android devices) on your smartphone or tablet. Follow the prompts to install the app on your device. Once the app is installed, open it and follow the on-screen instructions to set up your Arlo account.
If you already have an Arlo account, simply log in with your credentials. If you are a new user, click on “New to Arlo? Sign Up” to create an account.
In the app, you will be prompted to scan the QR code located on the base station or camera to add it to your Arlo account. You can also manually enter the serial number if needed.
Create or Log in to Your Arlo Account:

Open the Arlo app on your smartphone or tablet and either create a new Arlo account or log in to your existing account if you already have one. Follow the on-screen instructions to complete the account setup process.
Once you have successfully created or logged in to your Arlo account, you will be able to access all of the features and settings for your Arlo devices. This includes viewing live video feeds, setting up motion detection alerts, and adjusting camera settings.
Add the Base Station to Your Arlo Account:
Once you’ve logged in to your Arlo account, follow the prompts in the Arlo app to add the base station to your account. This typically involves scanning a QR code or entering a serial number found on the base station itself. Once the base station is added, you can begin setting up your cameras.
To add the base station to your account, make sure it is plugged in and turned on. Then, open the Arlo app and select “Add Device” from the menu. Follow the on-screen instructions to connect your base station to your Wi-Fi network and complete the setup process.
Once your base station is connected to your account, you can start adding cameras to it. Simply follow the same process of selecting “Add Device” and scanning the QR code or entering the serial number for each camera. Make sure to place your cameras within range of the base station for optimal performance.
Sync Arlo Cameras with the Base Station:
After successfully adding the base station to your Arlo account, follow the instructions in the Arlo app to sync your Arlo cameras with the base station. This may involve pressing a sync button on the camera and waiting for it to connect to the base station. Once the camera is synced, it will appear on your Arlo app’s home screen.
To ensure a reliable connection between your cameras and base station, make sure they are within range of each other and there are no obstructions blocking the signal. Additionally, avoid placing the base station near large metal objects or electronic devices that may interfere with the signal.
Once all your cameras are synced, you can start customizing their settings and preferences through the Arlo app. This includes adjusting motion detection sensitivity, creating custom activity zones, and setting up recording schedules.
Test the System and Configure Settings:
Once all Arlo cameras are successfully synced with the base station, test the system to ensure that it’s functioning correctly. Use the Arlo app to view live feeds from your cameras, adjust settings such as motion detection sensitivity and recording preferences, and customize notifications to suit your preferences.
Additionally, you can also set up activity zones to specify areas where the cameras should focus on detecting motion.
After testing and configuring the settings, it’s important to regularly check the health of your system. This includes checking for firmware updates and ensuring that all cameras are properly connected to the base station. It’s also recommended to periodically clean the lenses and remove any obstructions that may affect the camera’s performance.
Conclusion
In conclusion, setting up an Arlo base station is a vital step in creating a reliable and effective home security system. By following the step-by-step guide outlined in this article, users can seamlessly integrate their base station into their Arlo ecosystem, providing them with peace of mind and enhanced protection for their property. Proper preparation, including selecting an optimal location and ensuring internet connectivity, is key to a successful setup.
Additionally, the intuitive Arlo app simplifies the process of adding the base station and pairing cameras, making it accessible for users of all technical abilities. Hopefully, this article gave you some helpful tips about how to set up arlo base station successfully, so now that you have the proper knowledge on how to get the job done, why not give it a try today?
About
Safety Fic is a distinguished figure in the world of Diy design, with a decade of expertise creating innovative and sustainable Diy solutions. His professional focus lies in merging traditional craftsmanship with modern manufacturing techniques, fostering designs that are both practical and environmentally conscious. As the author of diy, Safety Fic delves into the art and science of Safety Fic-making, inspiring artisans and industry professionals alike.
Education RMIT University
(Melbourne, Australia) Associate Degree in Design (Safety Fic) Focus on sustainable design, industry-driven projects, and practical craftsmanship. Gained hands-on experience with traditional and digital manufacturing tools, such as CAD and CNC software.
Nottingham Trent University
(United Kingdom) Bachelor’s in diyfastly.com and Product Design (Honors) Specialized in product design with a focus on blending creativity with production techniques. Participated in industry projects, working with companies like John Lewis and Vitsoe to gain real-world insights.
Publications and Impact
In diy, Safety Fic his insights on indoor design processes, materials, and strategies for efficient production. His writing bridges the gap between artisan knowledge and modern industry needs, making it a must-read for both budding designers and seasoned professionals.