

Connecting an alarm system to WiFi is a pivotal step in modernizing home security and enabling remote monitoring and control. With the advent of smart home technology, alarm systems can now leverage WiFi connectivity to provide homeowners with real-time alerts, access to live video feeds, and the ability to arm or disarm their systems remotely.
Whether you’re installing a new alarm system or upgrading an existing one, understanding how to connect your alarm system to WiFi is essential for unlocking its full potential and enhancing your home’s security.
In this comprehensive guide, we’ll explore the step-by-step process of how to connect alarm system to wifi, covering various methods, considerations, and troubleshooting tips to ensure a seamless and secure connection.
With these instructions, homeowners can harness the power of WiFi to bolster their home security and enjoy peace of mind knowing that their property is effectively protected against potential threats.
Importance of Connecting to Wi-Fi
Connecting your alarm system to Wi-Fi is not just a matter of convenience; it represents a significant upgrade in how you interact with your home security. Wi-Fi connectivity allows your alarm system to communicate with the internet, enabling a host of smart features that were previously inaccessible.
These include receiving real-time notifications on your phone or email, accessing live video surveillance from anywhere in the world, and even integrating with other smart home devices for a more cohesive and intelligent home security system.
Beyond enhancing the functionality of your alarm system, Wi-Fi connectivity also provides flexibility in system management, allowing for easier updates and maintenance. In essence, by connecting your alarm system to Wi-Fi, you significantly enhance its effectiveness, making your home more secure and your life more convenient.
Understanding Alarm System Connectivity
To effectively connect an alarm system to WiFi, it’s crucial to have a basic understanding of how alarm system connectivity works. Most modern alarm systems operate using wireless technology to communicate with various sensors and devices within your home.
This wireless technology typically relies on one of several communication standards, such as Wi-Fi, Z-Wave, Zigbee, or Bluetooth, with Wi-Fi being one of the most common due to its widespread availability and robust data transmission capabilities. Understanding your alarm system’s connectivity options is the first step in ensuring a successful connection to your home’s Wi-Fi network.
This knowledge not only aids in the setup process but also helps in troubleshooting any connectivity issues that might arise. Remember, the goal is to create a stable and secure connection that allows your alarm system to communicate effectively with your home network and the internet at large, thereby unlocking the full suite of features offered by modern home security technology.
Preparing for Connection
Before attempting to connect your alarm system to WiFi, preparation is key to ensure a smooth and successful setup. Start by gathering all necessary information and tools.
This includes your WiFi network name (SSID) and password, a compatible smartphone or computer, and access to your alarm system’s control panel or mobile app. It’s also advisable to check your home WiFi’s strength in the location of the alarm system to guarantee a reliable connection.
Weak signals can lead to intermittent connectivity issues, so you may need to consider the placement of your router or the use of WiFi extenders. Furthermore, ensure your alarm system’s firmware is updated to the latest version, as this can significantly impact connectivity and performance.
By systematically preparing for the connection process, you mitigate potential challenges and pave the way for a seamless integration of your alarm system with your home WiFi network.
Importance of Secure Network Setup
Having a secure network setup is crucial when connecting your alarm system to Wi-Fi. This forms the backbone of a resilient home security framework, safeguarding your system against unauthorized access and cyber threats.
A secure network helps protect sensitive data transmitted between your alarm system and the control center, ensuring that personal information and security details remain confidential.
Additionally, a robust network setup prevents potential hackers from disabling or manipulating your home security system. Implementing strong network security measures, such as using strong, unique passwords, enabling network encryption, and regularly updating your Wi-Fi router’s firmware, can significantly enhance the overall security of your alarm system and your home.
In essence, the integrity of your home security system is deeply intertwined with the security of your home network, highlighting the importance of a secure network setup for maintaining peace of mind and effective protection against intruders.
Gathering Necessary Equipment and Information
Before commencing the process of connecting your alarm system to WiFi, it is essential to gather all the necessary equipment and information. The required items typically include the following:
- Alarm System Control Panel or Mobile App: You’ll need access to your alarm system’s control panel or the mobile app associated with the alarm system. This is where you’ll perform the initial setup and configuration for WiFi connectivity.
- WiFi Network Details: Knowledge of your home WiFi network name (SSID) and password is crucial. Ensure you have this information on hand before starting the setup process.
- Compatible Smartphone or Computer: A smartphone or computer that’s compatible with your alarm system’s control panel or mobile app is necessary for configuring the WiFi settings.
- Internet Connection: A stable internet connection is required to connect your alarm system to the WiFi. This connection will also be used for remote monitoring and control of your alarm system.
- Power Source: Make sure your alarm system and any additional devices (such as WiFi extenders, if used) are connected to a power source and fully operational during the setup process.
Equipped with the right tools and information, you can ensure a smooth and efficient setup procedure, minimizing potential hurdles in connecting your alarm system to your home WiFi network.
9 Methods How to Connect Alarm System to Wifi
1. Check Compatibility:
Before attempting to connect your alarm system to WiFi, ensure that it is compatible with WiFi connectivity. Check the system’s specifications, user manual, or manufacturer’s website to verify if WiFi connectivity is supported. If your alarm system doesn’t support WiFi, you may need to consider alternative connectivity options or upgrade to a newer model that does.
It’s also important to check the compatibility of your WiFi network with the alarm system. Some systems may require a certain type of WiFi network or specific settings in order for it to connect successfully. Make sure to read the requirements and recommendations provided by the manufacturer before attempting to connect.
2. Access System Settings:
Access the settings menu or control panel of your alarm system to begin the WiFi connection process. Depending on the system’s interface, you may need to use a keypad, touchscreen, or mobile app to navigate to the WiFi setup section.
Once in the settings menu, look for an option to connect to a WiFi network. This may be labeled as “WiFi setup,” “Network Configuration,” or something similar. Select this option and follow any prompts that appear on the screen.
If your system requires a password for WiFi access, you will need to enter it at this time. Be sure to double check for typos or other input errors to ensure a successful connection.
Once connected, your system should display a confirmation message or indicator to show that it is now connected to the WiFi network. You may also have the option to test the connection and view its status in the settings menu.
3. Locate WiFi Setup Option:
Within the system settings menu, locate the option for WiFi setup or network configuration. This may be labeled as “WiFi Setup,” “Network Settings,” or something similar. Select this option to initiate the process of connecting your alarm system to WiFi.
Once you have selected the WiFi setup option, your alarm system may prompt you to enter a password or security key. This is typically the same password used to connect other devices to your WiFi network. If you are unsure of the password, refer to your router’s manual or contact your internet service provider for assistance.
After entering the correct password, your alarm system will attempt to connect to the WiFi network. This may take a few moments, so be patient. Once successfully connected, your alarm system will display a confirmation message and you will now be able to control and monitor your security system remotely through your smartphone or other device.
4. Enter WiFi Network Information:
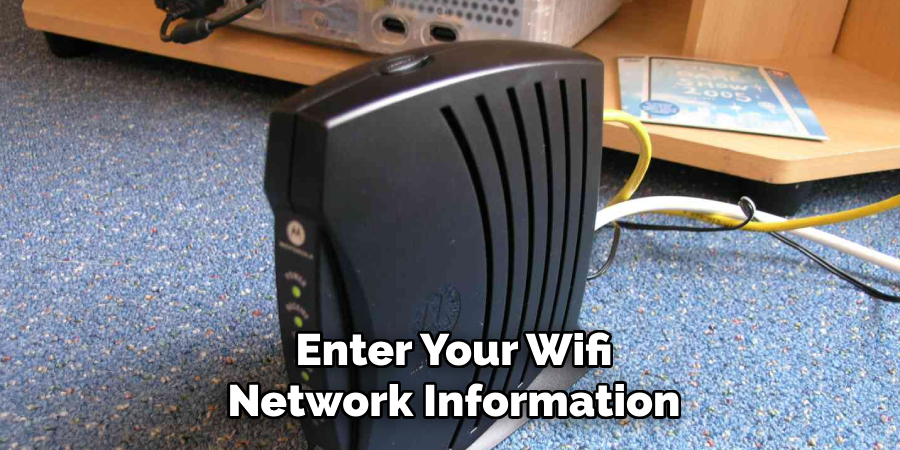
Once you’ve accessed the WiFi setup menu, you’ll be prompted to enter your WiFi network information. This typically includes the network name (SSID) and password (security key) of your WiFi network. Use the keypad, touchscreen, or mobile app to input this information accurately.
After you’ve entered your network information, you’ll have the option to save or connect to your WiFi network. It’s important to note that some devices may require additional steps, such as selecting a security protocol or enabling WPS (WiFi Protected Setup) before connecting.
If you’re not sure about your WiFi network name and password, check the router or modem documentation provided by your internet service provider. You can also contact them for assistance if needed.
Remember, it’s crucial to input accurate network information to ensure a successful connection. Also, keep in mind that some devices may have limitations such as only supporting certain WiFi bands (2.4GHz or 5GHz) or specific security protocols (WPA2 or WEP). It’s best to double-check your device’s specifications before attempting to connect to a WiFi network.
5. Connect to WiFi Network:
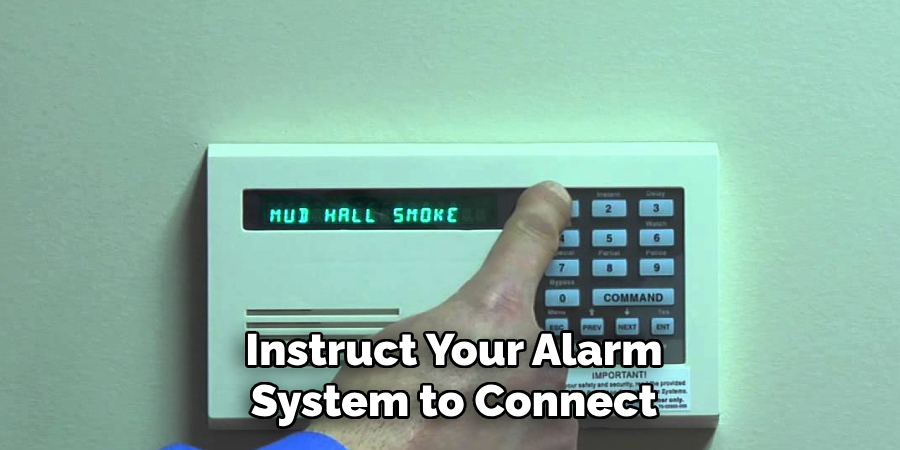
After entering the WiFi network information, instruct your alarm system to connect to the WiFi network. Depending on the system, you may need to press a “Connect” or “Save” button to initiate the connection process.
The alarm system will attempt to establish a connection to the WiFi network using the provided information. If the connection is successful, you will receive a confirmation message and your alarm system will be connected to the network. If the connection fails, double check your network information and try again.
Once your alarm system is connected to the WiFi network, it will have access to additional features and remote control capabilities. You can now receive alerts and notifications on your smartphone or other device when the alarm is triggered. You can also use your device to remotely arm or disarm the alarm system, as well as view the status of your system at any time.
It is important to periodically check the connection status of your alarm system to ensure it is still connected to the WiFi network. If you experience any issues with connection, troubleshoot by resetting your router and attempting to reconnect your alarm system. It is also recommended to change your WiFi network password regularly for added security.
6. Verify Connection Status:
Once the alarm system attempts to connect to the WiFi network, verify the connection status to ensure that it was successful. Some systems will display a confirmation message or indicator light to indicate that the connection was successful.
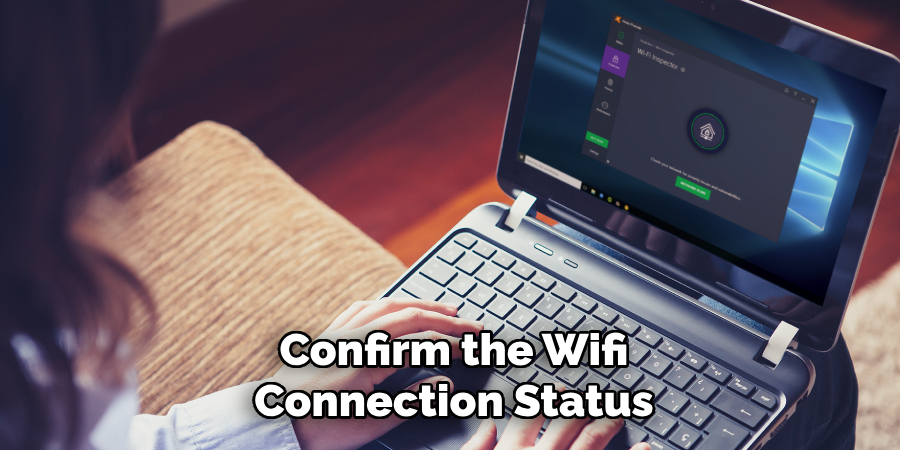
Alternatively, you can check the system settings menu to confirm the WiFi connection status. If the connection was not successful, troubleshoot the issue by checking the WiFi network settings and ensuring that the system is within range of the network. If necessary, reset the WiFi connection and try again.
Additionally, it is important to regularly check the connection status of your alarm system. With regular use and potential updates to your home network, the connection may become unstable or disconnected. By checking the status periodically, you can ensure that your alarm system is always connected to the network and able to communicate with any monitoring services.
7. Perform Connection Test:
After establishing a WiFi connection, perform a connection test to ensure that the alarm system can communicate with your WiFi network reliably. This may involve sending test signals, activating sensors, or performing system checks to verify that the connection is stable and functional.
Once the connection test is successfully completed, you can proceed with setting up your alarm system and configuring its settings. It is important to regularly perform connection tests to ensure that your alarm system is always able to communicate with your WiFi network without any issues. This will help to avoid any potential disruptions in the functionality of your alarm system.
Additionally, periodically performing connection tests can also help to identify any potential issues with your WiFi network, such as weak signal strength or interference from other devices. If any issues are detected, you can take the necessary steps to address them in order to maintain a reliable and secure connection for your alarm system.
8. Optimize WiFi Signal Strength:

If you encounter issues with WiFi connectivity or signal strength, consider optimizing the placement of your alarm system’s control panel or hub to improve WiFi reception. Position the control panel or hub in a central location within your home, away from obstructions and interference sources, to ensure a strong and reliable WiFi connection.
Additionally, you can also try to change the wireless channel of your WiFi router to reduce interference from other nearby devices. In some cases, certain channels may have less traffic and provide a better signal for your alarm system.
Furthermore, make sure that there are no metal objects or large appliances near the control panel or hub as they can block and weaken the WiFi signal. It is also important to regularly check and update your WiFi router’s firmware to ensure that it is running efficiently and able to support all of your connected devices.
9. Secure WiFi Network:
Ensure that your WiFi network is secure by using strong encryption and password protection. Enable WPA2 encryption and choose a complex, alphanumeric password to prevent unauthorized access to your network and alarm system.
Regularly update your WiFi network’s password and security settings to mitigate security risks. You can also hide your network’s SSID (Service Set Identifier) to make it less visible to potential hackers.
Additionally, consider setting up a separate guest network for visitors or devices that do not require access to your home security system. This will help keep your main network and sensitive information secure.
Conclusion
In conclusion, connecting an alarm system to Wi-Fi is a critical step in modernizing and enhancing home security. By following the comprehensive guide outlined in this article, users can successfully integrate their alarm systems with their Wi-Fi networks, unlocking a range of benefits such as remote access, real-time alerts, and seamless integration with smart home devices.
Proper preparation, including gathering necessary information and ensuring signal strength, is essential to a smooth connection process.
Regular testing and troubleshooting help ensure that the system functions optimally after the connection, providing users with confidence in their home security setup. With the alarm system connected to Wi-Fi, homeowners can enjoy the convenience and peace of mind of a modern, interconnected security solution, empowering them to protect their homes and loved ones effectively.
About
Safety Fic is a distinguished figure in the world of Diy design, with a decade of expertise creating innovative and sustainable Diy solutions. His professional focus lies in merging traditional craftsmanship with modern manufacturing techniques, fostering designs that are both practical and environmentally conscious. As the author of diy, Safety Fic delves into the art and science of Safety Fic-making, inspiring artisans and industry professionals alike.
Education RMIT University
(Melbourne, Australia) Associate Degree in Design (Safety Fic) Focus on sustainable design, industry-driven projects, and practical craftsmanship. Gained hands-on experience with traditional and digital manufacturing tools, such as CAD and CNC software.
Nottingham Trent University
(United Kingdom) Bachelor’s in diyfastly.com and Product Design (Honors) Specialized in product design with a focus on blending creativity with production techniques. Participated in industry projects, working with companies like John Lewis and Vitsoe to gain real-world insights.
Publications and Impact
In diy, Safety Fic his insights on indoor design processes, materials, and strategies for efficient production. His writing bridges the gap between artisan knowledge and modern industry needs, making it a must-read for both budding designers and seasoned professionals.