
Are you worried about the security of your truck toolbox? With valuable tools and equipment inside, it’s important to take steps to prevent theft.

Securing a truck tool box is a fundamental step for anyone looking to protect their tools and equipment while on the move. Whether you’re a professional tradesperson or a DIY enthusiast, ensuring that your tool box is safely mounted to your truck not only prevents theft but also reduces the risk of it becoming a hazard on the road.
This guide will walk you through the necessary steps on how to secure a truck tool box, covering everything from selecting the right mounting equipment to the final inspection process. With the right approach, you can safeguard your investment and have peace of mind, knowing your tools are secure wherever your work may take you.
What are the Benefits of Securing your Truck Tool Box?
Before diving into the steps on how to secure a truck toolbox, it’s important to understand why it’s necessary in the first place. Here are some key benefits of securing your truck toolbox:
- Prevents Theft: This is the most obvious benefit. A securely mounted tool box reduces the risk of someone breaking into your truck and stealing your valuable tools.
- Ensures Safety on the Road: A loose or unsecured tool box can become a hazard while driving. By properly securing it, you reduce the risk of accidents caused by shifting weight or flying debris.
- Protects Your Tools and Equipment: You want to prevent theft and protect your tools from damage during transportation. A well-secured tool box will keep your tools in place and prevent them from getting damaged or lost.
- Improves Organization: By keeping your toolbox securely mounted, you can easily access and organize your tools without having to worry about them falling out while driving.
Now that we’ve covered the benefits of securing your truck tool box, let’s dive into the steps on how to do it.
What Will You Need?
Before securing your truck toolbox, ensure you have the necessary tools and equipment. Here’s a list of items you’ll need:
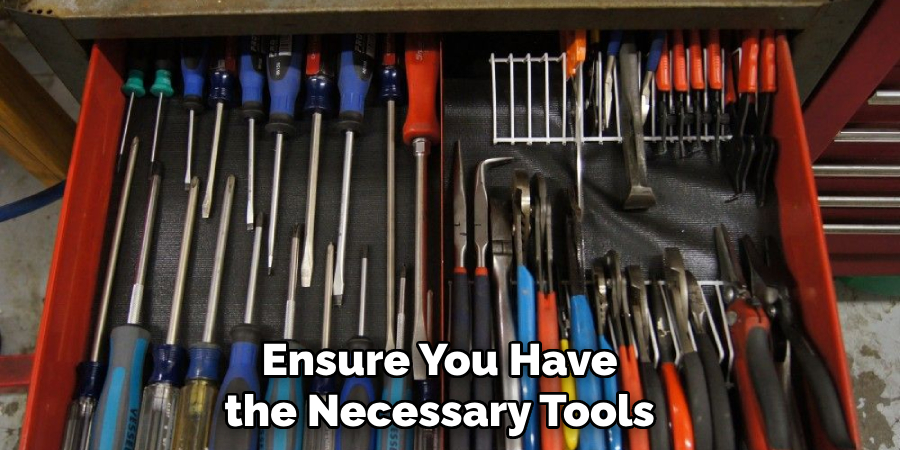
- Tape measure
- Drill and drill bits
- Wrench or socket set
- Level
- Mounting hardware (such as bolts, nuts, and washers)
- Locks (if not included with your toolbox)
- Hitch pin (if securing your toolbox to a hitch receiver)
Once you have all the necessary tools, it’s time to start securing your truck toolbox.
10 Easy Steps on How to Secure a Truck Tool Box
Step 1: Choose a Location
The first step in securing your truck toolbox is selecting the right location for it. The ideal spot is somewhere that allows easy access to your tools while keeping them out of sight and protected from weather conditions. You also want to ensure the location will not interfere with your driving or towing capabilities.
Step 2: Measure and Mark
After finding the perfect location for your toolbox, the next step is to measure the space on your truck bed where the toolbox will sit. Use a tape measure to identify the length, width, and height that the toolbox will occupy. It’s crucial to ensure that these measurements are precise, as they will determine how well the toolbox fits within the designated space.
Once you have your measurements, use a marker or a piece of chalk to mark the areas on the truck bed where the toolbox will be placed. These marks will serve as a guide for placing the mounting hardware and drilling holes, ensuring that the toolbox is aligned properly and securely attached to your truck.
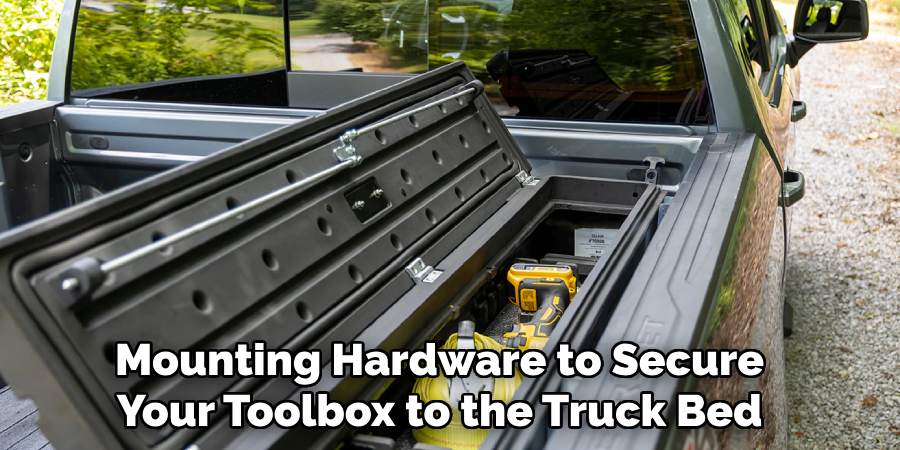
Step 3: Prepare the Mounting Hardware
With your location marked and measurements recorded, the next step involves preparing the mounting hardware to secure your toolbox to the truck bed. Begin by laying out all the bolts, nuts, washers, and any other mounting hardware provided with your toolbox or purchased separately.
It’s important to verify that you have all the necessary pieces and that they’re the correct size and type for your specific toolbox model and truck bed. If your toolbox does not come with hardware, or if you need additional pieces, select durable and weather-resistant hardware to prevent rust and ensure a long-lasting, secure fit.
Step 4: Drill the Mounting Holes
Now that your mounting hardware is ready and your toolbox location is marked, it’s time to drill the holes for mounting. Place your toolbox in the marked position on your truck bed. Drill holes through the toolbox and into the truck bed using the marks you made as a guide.
It’s crucial to ensure that the drill bit size matches the size of the bolts you’ll use for a snug fit. Drill slowly and carefully to avoid any mistakes or damage to your truck and toolbox. Once the holes are drilled, remove any metal shavings or debris to prepare for the next step.
Step 5: Secure the Tool Box
After drilling the mounting holes, it’s time to secure the toolbox to the truck bed. Place the toolbox back in its designated position over the holes. Starting from the inside of the toolbox, insert the bolts through the pre-drilled holes. Then, from beneath the truck bed, attach the washers and nuts to the bolts. Tighten each bolt manually to ensure the toolbox is aligned correctly.
Once all bolts are in place and the toolbox is aligned, use a wrench or socket set to securely fasten each bolt. Tightening the bolts evenly is important to avoid warping the tool box. Tighten the bolts to a firm fit, ensuring the toolbox is securely attached to the truck bed without causing damage to the toolbox or the truck.
Step 6: Check for Stability and Alignment
Once the tool box is securely fastened to the truck bed, it’s crucial to check its stability and alignment. Gently shake the toolbox to ensure there is no movement and that it’s firmly attached.
Use a level to check that the toolbox is sitting evenly on the truck bed, paying close attention to ensure it’s not tilted or skewed, which could affect how the doors open or how securely the tools are held inside. If adjustments are needed, loosen the bolts slightly, realign as necessary, and then retighten the bolts.
Ensuring proper alignment and stability at this stage will prevent future problems and ensure your tools are safe and accessible.
Step 7: Install Locks
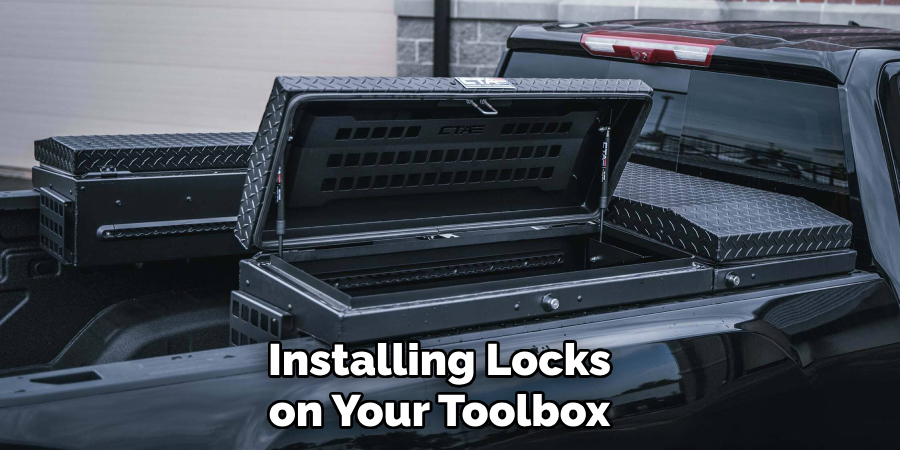
To enhance the security of your tools and equipment, the next step is installing locks on your toolbox. If your toolbox comes with locks, follow the manufacturer’s instructions for installation. If it does not come with locks, or you wish to add additional security, select durable locks designed to resist tampering or weather damage.
Position the locks according to the predetermined spots, ensuring they are easily accessible yet secure. Use your drill to make any necessary holes for the locks, then install them according to the provided instructions or your selected lock’s requirements. Testing the locks to ensure they open and close smoothly without catching or resistance is essential for reliable security.
Step 8: Attach the Hitch Pin (Optional)
For those with a toolbox designed to attach to a hitch receiver, securing it with a hitch pin adds an extra layer of security. Firstly, align the hitch receiver hole with the mounting hole on your toolbox. Once aligned, insert the hitch pin through both holes. Attach the retaining clip on the end of the hitch pin if one is provided to ensure the pin is securely in place.
This step not only prevents theft by making it more difficult to remove the toolbox, but it also stabilizes the toolbox during transport, reducing vibration and the risk of damage to your tools and equipment.
Step 9: Final Inspection and Clean-Up
After successfully installing your toolbox and ensuring all parts are tightly secured and aligned, perform a final inspection to check everything is in order. Open and close the toolbox doors to ensure they lock smoothly.
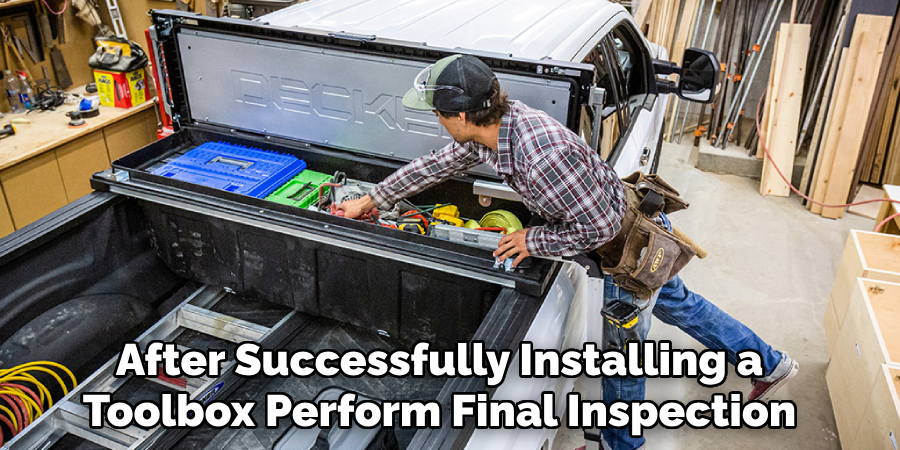
Check around the truck bed for any tools, hardware, or debris left over from the installation process and remove them to maintain a clean and safe working area. Finally, take a step back to admire your work, knowing your tools are now safely stored and organized for easy access whenever needed.
This step concludes the toolbox installation process, leaving your vehicle equipped and ready for any job.
Step 10. Maintenance
After completing the installation of your toolbox, keeping it in optimal condition to extend its lifespan and ensure your tools remain secure is essential. Regular inspections for signs of wear, such as rust or loose hardware, should be a part of your routine.
Apply a silicone-based lubricant to the locks and hinges at least twice a year to keep them functioning smoothly. Additionally, keep the interior clean and dry to prevent tool corrosion. Should you notice any damage or wear, address it immediately to prevent further issues.
By following these simple maintenance steps, you can ensure your toolbox and its contents remain in top condition and continue to serve you well for years to come.
5 Additional Tips and Tricks
- Use Heavy-Duty Locks: Invest in high-quality, heavy-duty locks that are resistant to tampering and cutting. Consider locks with hidden shackle pads to reduce exposure to bolt cutters.
- Install a Toolbox Alarm: Adding an alarm system to your toolbox can deter thieves and alert you to any unauthorized attempts to access your tools. Look for alarms that offer remote notification for added convenience.
- Apply Anti-Theft Markings: Mark your tools and the toolbox itself with identifiable markings or engravings. This not only deters theft but also helps in the recovery of your items if they are stolen.
- Secure It to the Truck Bed Properly: Ensure your toolbox is firmly bolted to the truck bed to prevent it from being carried away. Use tamper-proof screws and reinforce the mounting points for extra security.
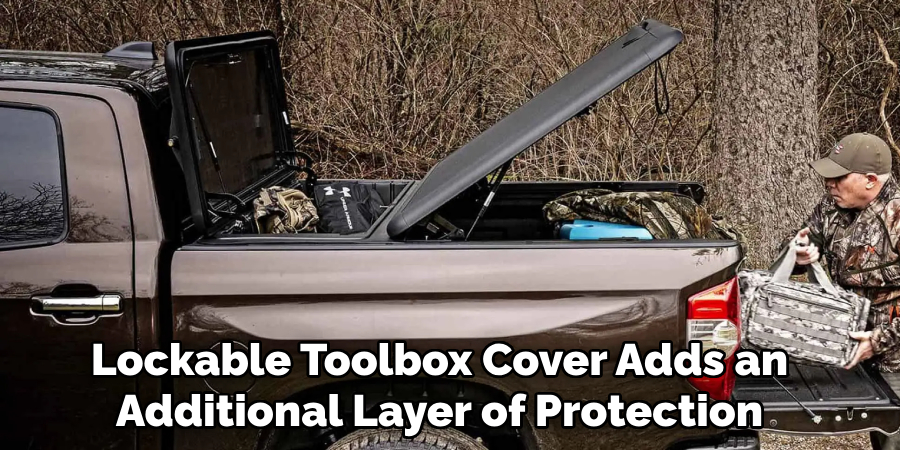
- Use a Toolbox Cover: A sturdy, lockable toolbox cover adds an additional layer of protection against theft and the elements. Choose a cover that is durable and fits snugly over your toolbox to obscure its contents from view.
With these extra measures in place, you can have peace of mind knowing that your valuable tools are safe and secure in your truck toolbox.
5 Things You Should Avoid
- Neglecting Regular Inspections: Failing to periodically check the lock, hinges, and mounting of your toolbox can lead to weaknesses that thieves can easily exploit. Regular inspections ensure that your security measures remain intact and effective.
- Using Standard Locks: Standard locks might seem convenient and cost-effective, but they are often easy to pick or break. Avoid using these and instead opt for high-security locks that provide superior protection.
- Overlooking the Importance of Visibility: While placing your toolbox in a hidden spot may seem like a smart move, it actually gives thieves more time to tamper with it unnoticed. Avoid positioning your toolbox in areas that are out of your direct line of sight.
- Ignoring Weather Resistance: Not all toolboxes are designed to withstand harsh weather conditions. Avoid choosing materials that can easily corrode or damage, compromising the toolbox’s security features and the tools inside.
- Skipping on Additional Security Features: Relying solely on the lock that comes with your toolbox is a common mistake. Avoid this by investing in extra security features like motion-sensor lights, camera surveillance, or a toolbox alarm system to enhance protection.
By steering clear of these pitfalls, you can better safeguard your truck toolbox and ensure that your valuables remain secure against threats.
How Does a Truck Tool Box Lock Work?
A truck toolbox lock works by securing the lid or door of a toolbox with a locking mechanism. A key, combination code, or electronic keypad typically operates this locking mechanism. When locked, the lock engages with a latch on the door or lid, preventing it from being opened without the proper access method.
Different types of locks may have varying levels of security and durability. However, most truck toolbox locks are designed to resist tampering and cutting, making it difficult for thieves to gain access.
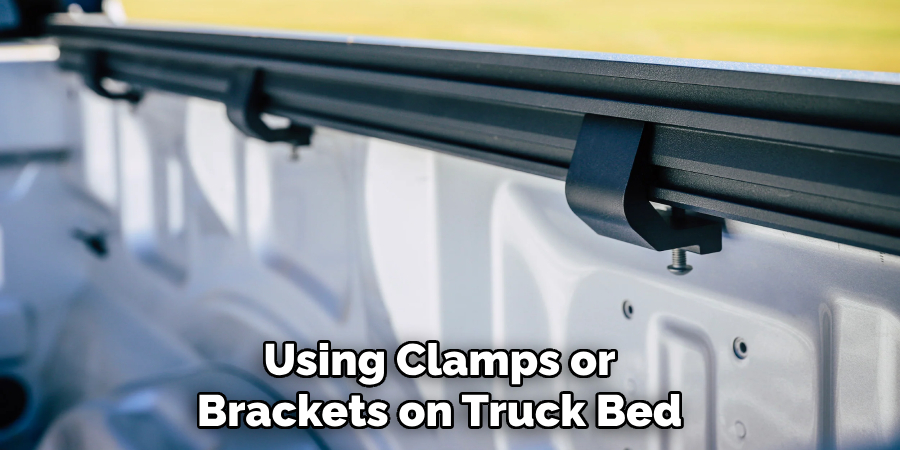
How to Attach Toolbox to Truck Without Drilling?
If you prefer not to drill into your truck bed or do not have the necessary tools to do so, there are alternative methods for attaching a toolbox to your truck without drilling. These include:
- Using Adhesive Tape: Strong adhesive tapes, such as industrial-strength Velcro or double-sided mounting tape, can be used to secure the toolbox in place. For maximum hold, make sure to clean and dry the surfaces before applying the tape.
- Using Clamps or Brackets: You can use clamps or brackets to secure the toolbox to the truck bed railings, tailgate, or bumper. This method allows for easy removal and reinstallation of the toolbox if needed.
- Using a Truck Bed Liner: A truck bed liner can act as a non-slip surface for your toolbox, preventing it from sliding around while in transit. This option is also relatively easy to remove and does not require drilling.
It’s important to note that these alternative methods may not be as secure as bolting the toolbox directly to the truck bed. If using these methods, it’s recommended to use additional security measures, such as locking straps or a toolbox cover, to further secure the toolbox.
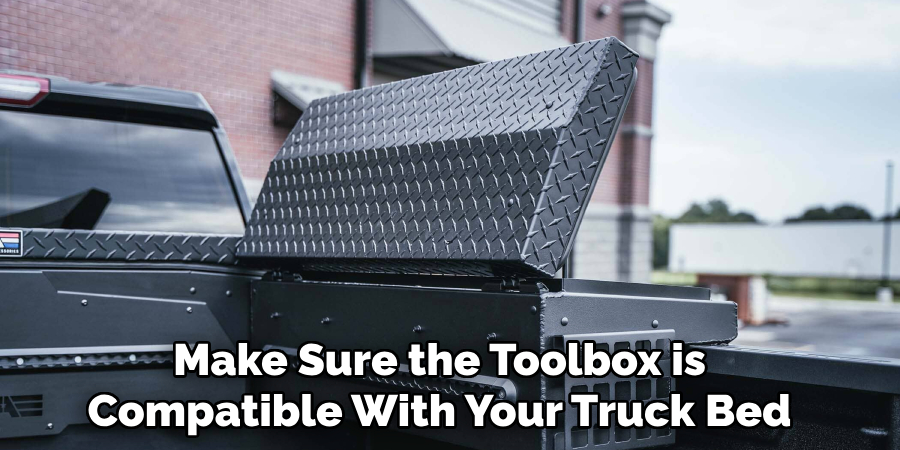
Do Truck Tool Boxes Fit All Trucks?
Not all truck toolboxes are universal and may not fit every type of truck. It’s important to consider your truck bed’s specific dimensions and design before purchasing a toolbox.
Some factors to keep in mind when choosing a toolbox for your truck include:
- Truck Bed Size: Measure your truck bed’s length, width, and depth to ensure the toolbox will fit properly.
- Truck Bed Style: Some trucks have unique bed designs, such as step-side or flared beds, which may require a special toolbox designed for that specific style.
- Toolbox Mounting Requirements: Make sure the toolbox you choose is compatible with the mounting options available on your truck. For example, if your truck has a tonneau cover, you may need a toolbox that can be mounted on top of it.
Additionally, consider the size and weight of your tools and how many you typically carry. This will help determine the size and type of toolbox that best suits your needs. It’s always a good idea to double-check compatibility with the manufacturer before purchasing to ensure a proper fit for your specific truck.
Conclusion
In conclusion, a truck toolbox is an essential accessory for any truck owner and can provide convenient storage and organization for valuable tools. However, taking necessary precautions to protect your toolbox from theft and damage is crucial.
By following the tips mentioned above on how to secure a truck toolbox, you can effectively secure your truck toolbox and avoid common mistakes that may compromise its security.
Remember to regularly inspect your toolbox, invest in high-security locks, consider visibility and weather resistance, and use additional security features for added protection. Lastly, make sure to carefully measure your truck bed and choose a compatible toolbox that meets your specific needs. Happy hauling!