
Building a good neighbor fence is a valuable investment for any property owner. Not only does it provide much-needed privacy and security, but it also adds to the aesthetic appeal of your outdoor space. A well-constructed fence can foster positive relations with your neighbors by clearly defining property boundaries and enhancing the overall look of the neighborhood.
This guide on how to build good neighbor fence will provide you with essential steps and tips on how to build a good neighbor fence that balances functionality, durability, and visual appeal.
Why Should You Build a Good Neighbor Fence?
Deciding whether to build a good neighbor fence involves several considerations. Firstly, assess your need for privacy and security. A well-built fence can serve as a barrier against intrusions and prying eyes, providing you with peace of mind and a sense of seclusion in your own yard. Secondly, consider the aesthetic enhancement a good neighbor fence can bring to your property. It has the potential to improve curb appeal and increase property value.
Additionally, think about your relationship with your neighbors. A good neighbor fence, designed to look appealing from both sides, can help avoid disputes and promote a harmonious coexistence. Lastly, evaluate any local regulations or homeowners association guidelines that may impact your ability to build a fence and the types of materials you can use. Taking these factors into account can help you decide if building a good neighbor fence is the right choice for you.
Needed Tools and Materials
Before you start building your good neighbor’s fence, make sure you have all the necessary tools and materials. Here are some of the essential items that you will need:
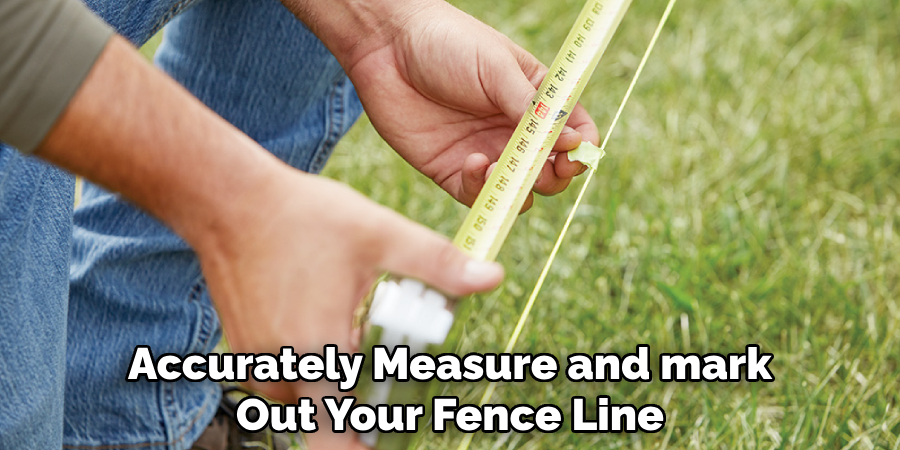
Measuring Tape:
To accurately measure and mark out the dimensions of your fence, a measuring tape is essential. Make sure it is at least 25 feet long for more extensive projects.
String and Stakes:
String and stakes can help you create a straight and even guideline for your fence. This will ensure that your fence is properly aligned and leveled.
Fence Posts:
Fence posts are the vertical supports that will hold up your fence panels. They should be made of sturdy materials such as wood, vinyl, or metal, depending on your preference.
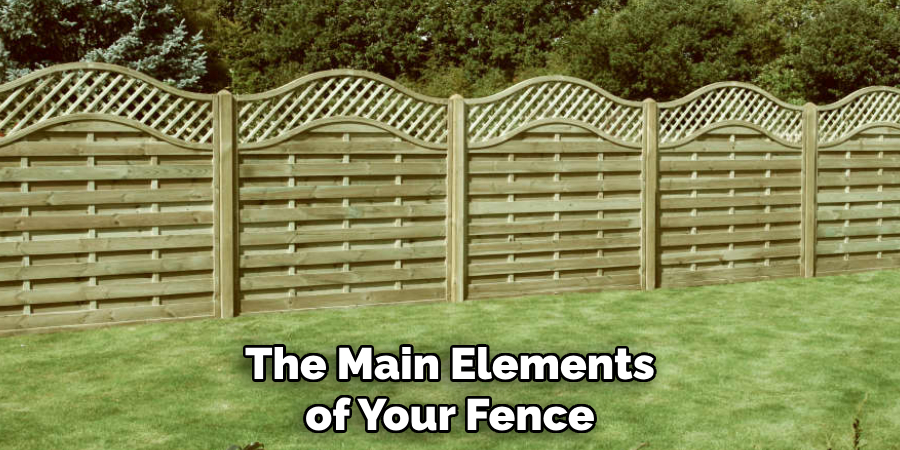
Fence Panels:
These are the main elements of your fence that will provide privacy and security. They come in various sizes, styles, and materials such as wood, vinyl, or metal.
Nails and Screws:
To secure your fence panels to the posts, you will need nails or screws. Make sure they are appropriate for outdoor use and can withstand weather conditions.
Post Hole Digger:
A post-hole digger will help you dig holes for your fence posts quickly and efficiently. You can also use a shovel if you do not have access to a post-hole digger.
Concrete Mix:
For added stability, it is recommended to set your fence posts in concrete. Make sure you choose a high-quality mix suitable for outdoor use.
Level:
A level is essential to ensure that your fence is straight and even. This will help prevent any gaps or uneven sections.
7 Step-by-step Guidelines on How to Build Good Neighbor Fence
Step 1: Determine the Property Line
Before you start building your good neighbor’s fence, it is crucial to determine the exact location of your property line. This step is essential to avoid potential disputes with your neighbors and to ensure your fence lies within your property boundaries. Start by consulting your property deed or a land survey, which typically includes detailed information about your lot lines. If you do not have access to these documents, you may need to hire a professional surveyor to help you accurately determine the boundaries.
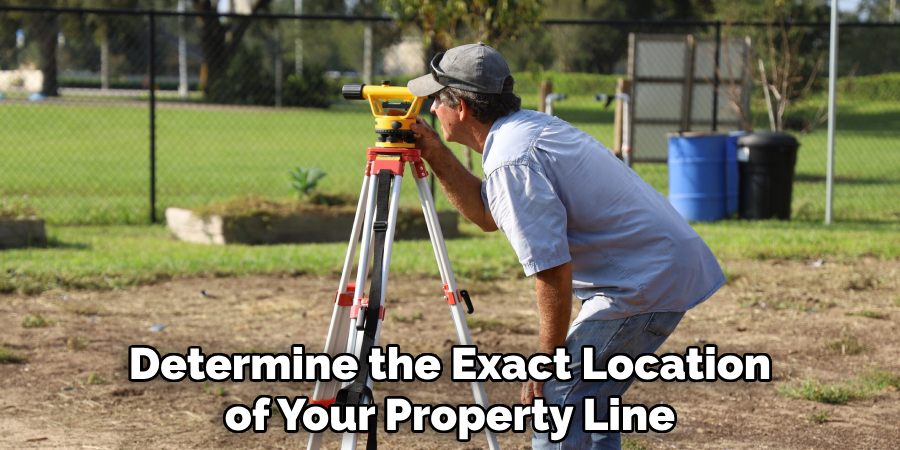
Additionally, discussing your plans with your neighbors and informing them about the upcoming construction can help foster goodwill and cooperation. With a clear understanding of your property line, you can confidently proceed with marking the perimeter for your new fence.
Step 2: Check for Any Local Regulations or HOA Guidelines
Before proceeding with your fence construction, it is critical to review any local regulations or homeowners association (HOA) guidelines that could impact your project. Begin by checking with your local municipal planning or building department to understand zoning laws, permit requirements, and height restrictions for fences in your area. Some municipalities may have specific rules about the type of materials you can use or the distance your fence must be from the street or other property lines.
In addition to local regulations, if you are part of a homeowners association, review the HOA rules and covenants. These guidelines might include stipulations on fence design, color, and height, as well as whether you need approval from the HOA before construction. Compliance with these regulations is essential to avoid fines, legal issues, or the potential need to alter or remove your fence after it is built. Once you have a clear understanding of the legal and community requirements, you are ready to move forward with your fence project, ensuring it meets all necessary regulations and standards.
Step 3: Gather Your Tools and Materials
After reviewing local regulations and HOA guidelines and obtaining the necessary permits, it’s time to gather all the tools and materials you’ll need to build your good neighbor’s fence. Refer to the ‘Needed Tools and Materials’ section of this guide to ensure you have everything on hand. Having a well-organized workspace with readily accessible tools will make the construction process more efficient and enjoyable. This preparation step will save you time and reduce interruptions, allowing you to focus on building a straight and sturdy fence.
Step 4: Measure and Mark Out Fence Line
With your tools and materials at the ready, the next step is to accurately measure and mark out your fence line. Begin by using the measuring tape to determine the length of the area where the fence will be installed. Use string and stakes to outline the fence line by placing stakes at each corner and at intervals along the straight sections. The string can then be tied between the stakes to create a visual guide for the fence line, helping to ensure it follows a straight path.
If your fence design includes gates, mark these locations clearly and make adjustments to account for the extra fittings and hardware. Double-check your measurements to confirm they match your planned layout and comply with local regulations. Once the fence line is thoroughly marked, you will have a clear and defined path to follow, making the installation process more straightforward and minimizing mistakes along the way. This careful preparation will lay the groundwork for a well-aligned and professional-looking good neighbor fence.
Step 5: Dig Post Holes
With the fence line marked out, it’s time to start digging post holes. The depth and spacing of these holes will depend on your local regulations, the height of your fence, and the type of soil in your area. In general, holes should be at least one-third the length of the fence post and spaced evenly along the string line.
Using a post hole digger or shovel, begin digging each hole carefully to ensure they are deep enough and wide enough to accommodate your posts. As you dig, check for any obstacles such as rocks or tree roots that may impede the placement of your posts. Remove any debris from the holes, and double-check that they are level and aligned with the string line. Repeat this process for each hole along the fence line.
Step 6: Set Fence Posts
Once the post holes are dug, the next step is to set your fence posts. Begin by placing a post in one of the holes, ensuring it is centered and upright. Pour concrete mix into the hole around the post, following the instructions on the mix for the correct water-to-concrete ratio. Use a level to check that the post is perfectly vertical, adjusting as necessary before the concrete begins to set. It’s often helpful to have a partner hold the post steady while you pour and level the concrete.
Fill the hole with concrete up to ground level, smoothing the surface with a trowel. Allow the concrete to cure as recommended by the manufacturer, typically 24 to 48 hours before attaching any fence panels or other elements. Continue this process for each post along the fence line, confirming each one is level and at the correct height. Properly setting the fence posts is crucial for the stability and longevity of your good neighbor’s fence, providing a strong foundation for the entire structure.
Step 7: Install Fence Panels and Add Finishing Touches
With the posts set, it’s time to install your fence panels. Depending on the design of your fence, this may involve securing each panel between two posts or attaching them directly to the posts with screws or brackets. It’s important to follow the manufacturer’s instructions carefully for proper installation. As you go, double-check that each panel is vertically aligned and level with its neighboring panels.
Once all of the fence panels are securely in place, you can add any finishing touches such as post caps, decorative elements, or paint/stain if desired. These final touches will not only enhance the appearance of your fence but also provide additional protection and durability.
With the construction process of how to build good neighbor fence complete, take a step back and admire your handiwork – you’ve successfully built a good neighbor fence that meets all legal requirements and adds value to your home! But don’t forget to regularly maintain and inspect your fence to keep it in top condition for years to come.
Maintaining Your Good Neighbor Fence
Regular maintenance is essential for keeping your good neighbor’s fence looking its best and functioning properly. Here are a few tips for maintaining your fence:
- Regularly clean your fence by washing it with a mild detergent and water, then rinsing it with a hose.
- Check for any damaged or loose panels, posts, or hardware and repair as needed.
- Keep vegetation trimmed away from the fence to prevent it from growing into or damaging the structure.
- Inspect your fence at least once a year for any signs of wear and tear, such as rotting wood or rusted metal. Address these issues promptly to prevent further damage.

By taking care of your fence on a regular basis, you can ensure it remains in good condition and continues to serve its purpose for many years to come. Happy fencing!
Conclusion
Building a good neighbor fence not only enhances the aesthetic appeal and value of your property but it also fosters positive relationships with your neighbors by clearly defining property boundaries and providing mutual privacy. By following the steps outlined in this guide on how to build good neighbor fence, you can ensure that your fence is constructed to a high standard, meets local regulations, and stands the test of time. Remember, careful planning, precise measurements, and quality materials are the cornerstones of a successful fence project. Additionally, regular maintenance will keep your fence looking great and functioning optimally for years to come.
With dedication and attention to detail, you’ll be able to enjoy the benefits of your good neighbor’s fence for many years, knowing that it adds both beauty and practicality to your outdoor space. Happy building!