

One of the most important steps for keeping your home safe is making sure that you have a proper locking system in place. Yale locks are popular and reliable options, but knowing how to program the codes for guest access can be confusing.
In this blog post on how to add guest code to yale lock, we’ll show you step-by-step how to add guest code access to any Yale lock so that visitors can unlock the door without needing a physical key! Read on to find out how simple it can be to keep your home secure with a Yale door lock.
What is Yale Lock?
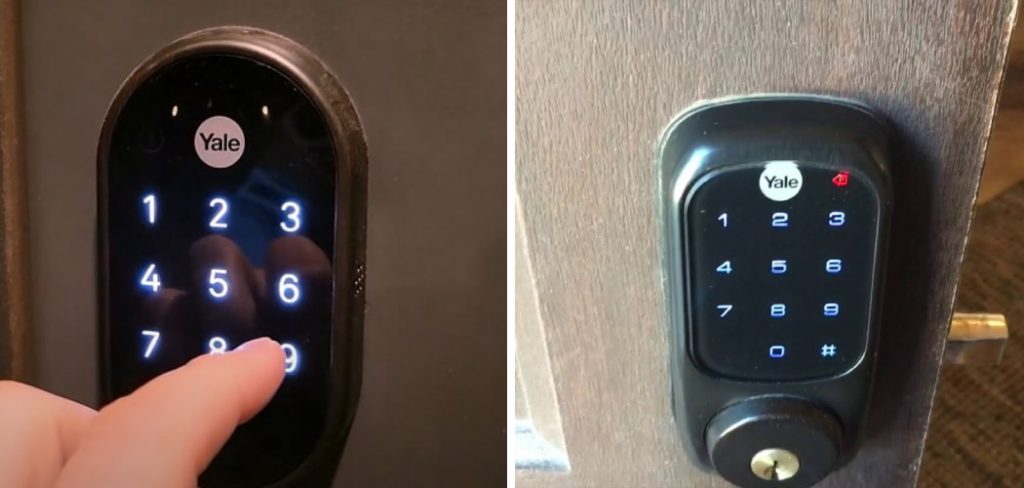
Yale Locks are one of the most popular and reliable lock manufacturers in the world. They offer a wide range of products, from padlocks to door locks, all designed with security in mind. Yale locks come with various features like keyless entry, auto-locking systems and even tamper alarms.
When it comes to door locks, Yale offers two main types: deadbolts and lever locks. Deadbolts are the most secure type of lock, but they can be tricky to install. Lever locks are easier to install and offer a good level of security as well.
Necessary Materials
Given below are the materials you will need in order to add a guest code to your Yale lock:
- A Phillips Screwdriver
- A Pencil or Pen
- The Instructions Manual of Your Particular Yale Lock Model
- A New Guest Code for Your Yale Lock
11 Step-by-step Guidelines on How to Add Guest Code to Yale Lock
Step 1: Turn Off the Power
Before you begin, make sure to turn off the power to the lock. This will ensure that any existing codes will not be lost during the programming process. It’s also important to turn off any alarms that may be connected to the lock. It’s also important to double-check your manual for any special instructions regarding power, as some locks may require you to disconnect the battery in order to reset it. You can find the specifics for your lock model in the manual.
Step 2: Unscrew the Lock from the Door

Using a Phillips screwdriver, unscrew the two screws on either side of the Yale lock. This will allow you access to the interior of the lock. You may need to use a second screwdriver to loosen the screws. It’s important to be gentle and not force the screws, as this may damage the lock. Once they are loose, carefully remove them and set aside. It’s important to keep track of where each screw goes, as they are not interchangeable.
Step 3: Remove the Case of the Lock
Once you have removed the screws, carefully remove the case of the lock and set it aside. You should now be able to see inside your Yale lock. This is where you will program your new guest code. But before you do so, make sure to read the instructions in the manual for your specific lock model. You may need to use a pen or pencil to press certain toggle switches, depending on the model.
Step 4: Find the Programming Button
The programming button should be located inside the lock near the keypad or control panel. This will look like a small hole with an LED light, and it may have a label next to it indicating that it’s for programming. It’s important to double-check this before proceeding, as the wrong button can damage your Yale lock. However, if you are unable to find this button, refer to your manual for further instructions.
Step 5: Insert a Pen or Pencil in the Programming Button
Insert a pen or pencil into the programming button. This will activate the programming mode. You may hear a beep when it’s activated. It’s important to keep the pen or pencil inserted for the duration of the programming process. You should not need to press any other buttons at this stage. It’s also important to make sure that the pen or pencil is not too long, as this can damage the lock.
Step 6: Enter Your Current Master Code
To add your new guest code, you’ll need to enter your master code first. This is the main code that you use to unlock the door. The process for entering this may vary depending on the specific model of Yale lock you have. Refer to your instructions manual to find out how to enter it. It’s important to make sure that you enter the correct code, as an incorrect one can damage your lock.

Step 7: Enter Your New Guest Code
Once you’ve entered your master code, you can now enter your new guest code. Again, the process for this may vary depending on the type of lock you have. Refer to your instruction manual for directions. But in general, you’ll need to press the numbers for the new code followed by the ‘#’ key. This will confirm that you’ve entered it correctly and complete the programming process. Make sure to keep track of your guest code so that you don’t forget it!
Step 8: Confirm Your New Code and Exit Programming Mode
Once you’ve entered your code and confirmed it, press the programming button to exit programming mode. This will save your new code and allow you to use it. This will also save the old code, so it’s important to make sure that you have your new code memorized. It’s also important to double-check that you have correctly exited programming mode, as this can cause problems if not done properly.
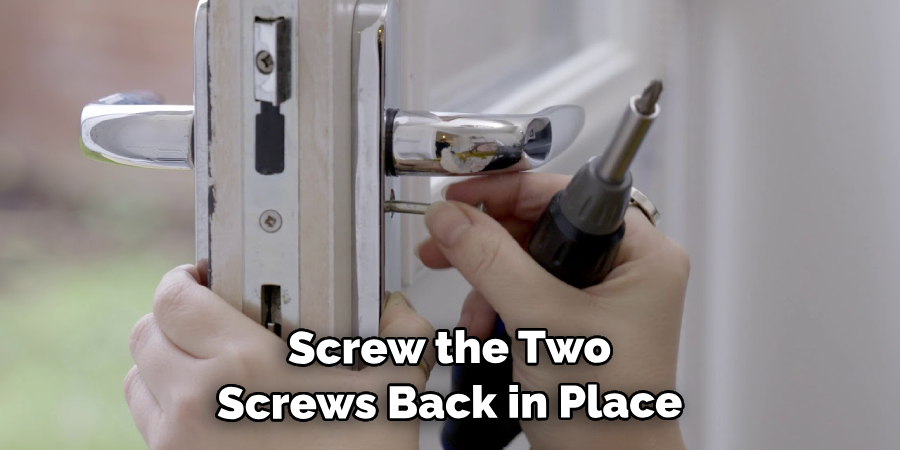
Step 9: Reassemble the Lock
Put the case of your Yale lock back on, making sure to line up the holes correctly. Then screw the two screws back in place with a Phillips screwdriver. It’s important to make sure that the screws are tight, as this will ensure a secure fit. Once everything is in place, turn the power back on to your lock and test it out with your new guest code.
Step 10: Test Your New Code
Now that your new code has been programmed, it’s time to test it out. Enter your new code into the keypad and make sure that the lock opens properly. If all goes well, you can now use your new guest code whenever you need it! But make sure to keep track of the code, as you don’t want it falling into the wrong hands. It’s also important to remember to change the code periodically, for added security.
Step 11: Change Your Code Regularly
Lastly, remember to change your guest code on a regular basis. Even though it may seem like a hassle, it’s important for keeping your home secure. Regularly changing the code will ensure that any person who has access to the old code cannot use it anymore. Always make sure to use a unique code that can’t be guessed easily. This will ensure that your Yale lock remains secure and remains one of the best locks for home security.
By following these 11 steps on how to add guest code to Yale locks, you can keep your home safe and give visitors access without needing to hand over a physical key. If you have any questions about any of the steps above, don’t hesitate to contact us or read through our Yale Lock FAQs for more information.
Frequently Asked Questions
Q: Do I Need to Use a Specific Type of Pen or Pencil?
A: Not necessarily. Any thin, non-metallic object should work. A pen or pencil is usually the most convenient option for many people. It’s important to make sure that the object you use is thin enough not to damage the programming button.
Q: Can I Program Multiple Guest Codes into My Yale Lock?
A: Yes, you can. Each Yale lock model will have a different number of codes it can store, so check your manual for specifics. You can also delete any existing codes if needed before adding new ones. It’s important to remember that the master code will override any guest codes, so make sure not to forget it.
Q: How Often Should I Change My Guest Code?
A: It’s a good idea to change your guest code every few months or even more frequently if you’re allowing multiple people access to your home. This way, you
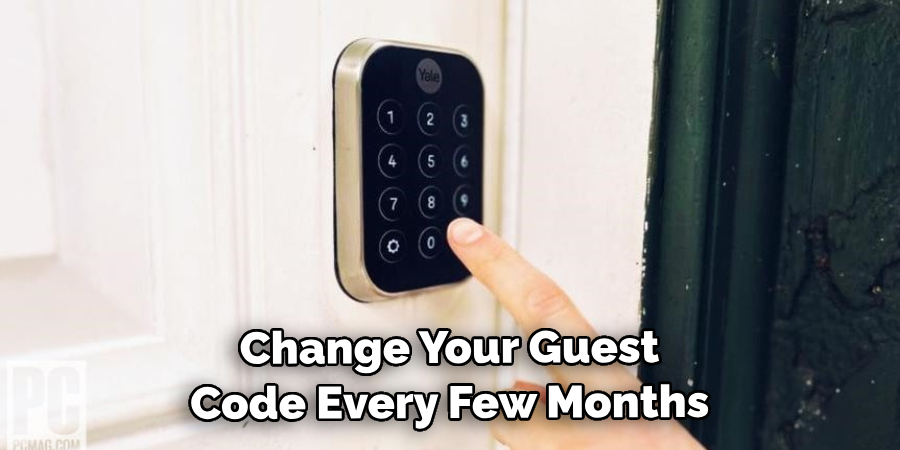
Q: How Often Should I Change My Guest Code?
A: It’s best to change your guest code every few months. This ensures that only people with the most recent code can access your home. You can also delete any existing codes if needed before adding new ones. It’s best to reset your code after any visitors leave so that you have the most updated security.
Conclusion
Taking the time to add a guest code to your Yale lock is a great way to ensure that you can have peace of mind when giving others access to your home. It ensures that those who are granted access don’t have uncontrolled access to the space, ensuring your safety and security. Additionally, adding guest codes for those accessing your property also makes it more convenient for both the owner and the user.
By taking only a few short steps on how to add guest code to yale lock, now you know how to add and manage guest codes on any Yale Lock! Make sure you’re always in control of who is entering your property by using these helpful tips. With knowledge like this, you’ll always be capable of managing access with ease and confidence.
About
Safety Fic is a distinguished figure in the world of Diy design, with a decade of expertise creating innovative and sustainable Diy solutions. His professional focus lies in merging traditional craftsmanship with modern manufacturing techniques, fostering designs that are both practical and environmentally conscious. As the author of diy, Safety Fic delves into the art and science of Safety Fic-making, inspiring artisans and industry professionals alike.
Education RMIT University
(Melbourne, Australia) Associate Degree in Design (Safety Fic) Focus on sustainable design, industry-driven projects, and practical craftsmanship. Gained hands-on experience with traditional and digital manufacturing tools, such as CAD and CNC software.
Nottingham Trent University
(United Kingdom) Bachelor’s in diyfastly.com and Product Design (Honors) Specialized in product design with a focus on blending creativity with production techniques. Participated in industry projects, working with companies like John Lewis and Vitsoe to gain real-world insights.
Publications and Impact
In diy, Safety Fic his insights on indoor design processes, materials, and strategies for efficient production. His writing bridges the gap between artisan knowledge and modern industry needs, making it a must-read for both budding designers and seasoned professionals.