

Welcome to our blog! If you’re a homeowner who is looking to make your life easier and more convenient, then you’ve come to the right place. In today’s world, technology is advancing rapidly, and it’s now possible to connect and control various aspects of your home with just a few taps on your smartphone. One such groundbreaking innovation is the integration of Myq with Vivint. If you’re wondering how to add Myq to your existing Vivint system, look no further.
In this comprehensive guide on how to add myq to vivint, we will walk you through the step-by-step process of seamlessly integrating Myq into your Vivint smart home system, allowing you to easily manage and control your garage door from anywhere, anytime. So, grab a cup of coffee, sit back, and get ready to transform your home into a truly smart and connected space.
Things to Consider Before Adding Myq to Vivint
- Ensure Your Garage Door Opener is Compatible With Myq (Visit the Compatibility Checker on Their Website)
- Make Sure You Have a Strong Wi-Fi connection in Your Garage
- Check if There Are Any Special Requirements or Additional Accessories Needed for Installation
- Familiarize Yourself With Vivint and Myq Apps for Easy Navigation and Control
11 Step-by-step Guidelines on How to Add Myq to Vivint
Step 1: Look for the App
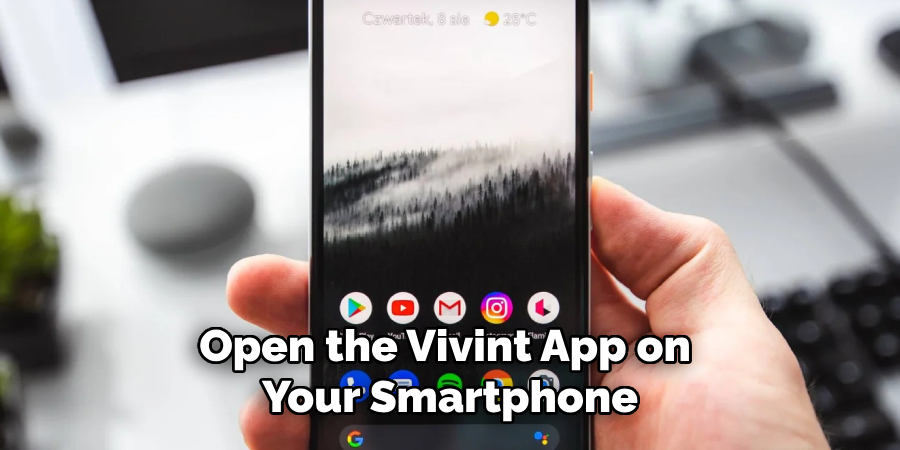
Open the Vivint app on your smartphone. After logging in, click on the “Add Devices” button. Then, choose “Myq Garage Door Controller” from the list of available devices. You will be prompted to confirm your decision, so tap “Continue” to proceed. It will take you to the next screen, where you’ll need a Myq account to proceed. If you already have an account, tap “Sign In.” Otherwise, click on “Create Account” to register.
Step 2: Register an Account
If you don’t have a Myq account, you will be taken to the registration page. Input your email and password, then click “Create Account.” An activation link will be sent to your email; open it and follow the instructions to activate your account. It will take you back to the Vivint app. You can now log in using your Myq credentials. You can also skip creating an account for now and do it later on the Myq app.
Step 3: Sign In With Your Myq Credentials
Enter your Myq email and password to log in. After successful authentication, you’ll be taken back to the Vivint app. It will then automatically start scanning for available Myq devices. This process may take a few seconds to complete. Once it’s done, you’ll see your Myq device on the screen.
Tap “Next” to proceed. If it doesn’t appear, click on “Refresh” to try again. Although rare, if the device is still not detected, double-check the compatibility of your garage door opener and Wi-Fi connection.
Step 4: Select Your Garage Door Opener
Once the Vivint app detects your Myq controller, it will prompt you to select the garage door opener corresponding to your Myq device. Choose the one that matches, then click “Next.” You can also add a name for your garage door opener to easily identify it in the future. This step is optional but recommended for convenience. It will then confirm the selection and take you to the next step.
Step 5: Connect Your Myq Device
Press and release the “Learn” button on your garage door controller. If done correctly, the LED light should flash. Wait for the app to connect your Myq device to your Vivint system. It may take a few minutes, so be patient until it displays “Connected.” Tap “Next” to proceed. It will then give you the option to test your garage door. If it opens or closes successfully, click “Next” to continue.
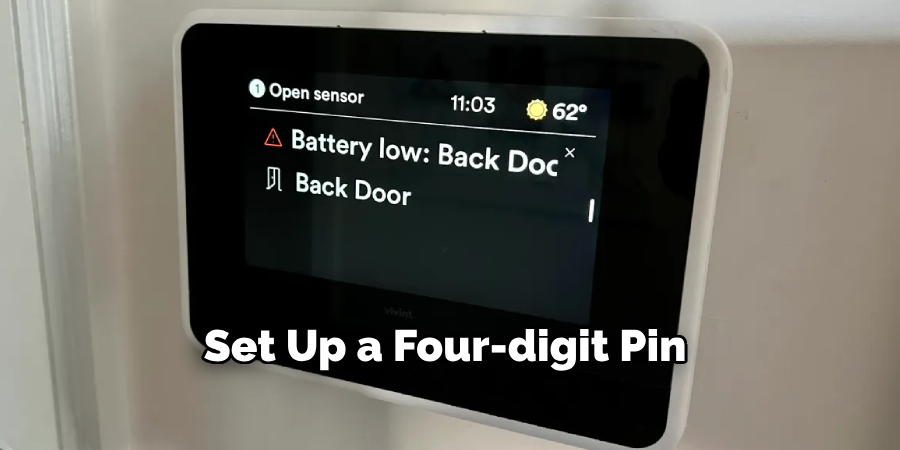
Step 6: Add a Pin
To ensure security and prevent unauthorized access, you’ll be asked to set up a four-digit PIN for Myq on Vivint. Input your desired pin, then click “Next.” Make sure to remember this pin as you’ll need it to control your garage door in the future. Otherwise, you can also use your phone’s biometric authentication (fingerprint or face ID) to access it. You can also change this option in the app’s settings later on.
Step 7: Choose a Room
Select which room your garage door opener is located in or add a new one if it’s not listed. This step is optional but recommended for easy navigation and organization of device control. Once done, click “Next.” It will then display a summary of your Myq device information. Carefully review the details, then click “Next” to proceed. It will then confirm the successful addition of your Myq device to Vivint.
Step 8: Done!
Congratulations! You have successfully integrated your Myq garage door controller into your Vivint system. Click on “Finish” to complete the process. You can now control and monitor your garage door through the Vivint app or through voice commands if you have a compatible smart home assistant. But before you start using it, there are a few extra tips to keep in mind.
Step 9: Test It Out
To ensure everything is working correctly, try opening and closing your garage door using the Vivint app. You can also check for any available updates or troubleshoot any issues that may arise. You can also add additional Myq devices to your Vivint system by following the same steps. It’s that easy! That’s how you add Myq to Vivint! It’s convenient, secure, and hassle-free. It’s a smart home essential that you never knew you needed.
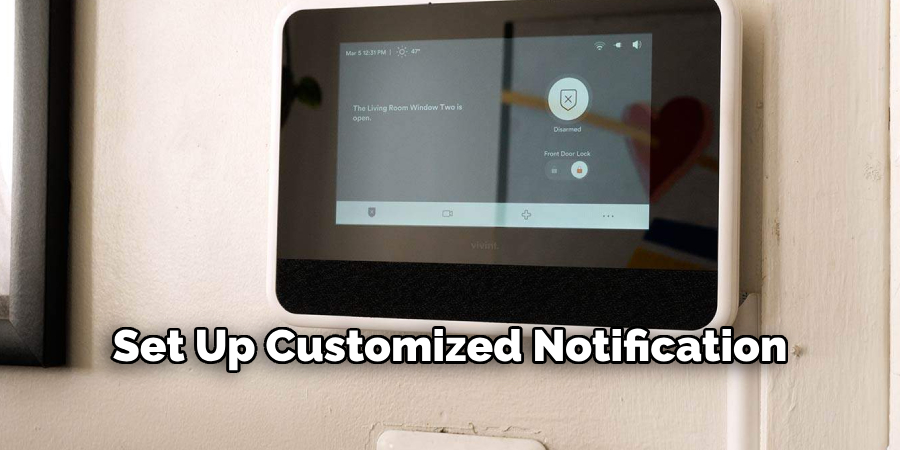
Step 10: Explore Additional Features
Apart from controlling and monitoring your garage door, you can also set up customized notifications, schedules, and automation rules for your Myq device on Vivint. You can also integrate it with other smart home devices to create a truly connected and automated living experience. It’s just one of the many benefits of adding Myq to your Vivint system. You’ll never have to worry about forgetting to close your garage door again!
Step 11: Enjoy Your Smart Home
Say goodbye to worrying whether you left your garage door open or not. With Myq on Vivint, you have complete control over your garage door no matter where you are. You can also grant access to family members, friends, and delivery personnel through the app. It’s just another way Vivint makes your life easier and more convenient. So, sit back, relax, and enjoy your smart home equipped with Myq on Vivint.
Following these steps on how to add myq to vivint, you can easily add Myq to your Vivint system and enjoy all its features and benefits. Keep in mind the things to consider before installation, and familiarize yourself with the apps for smooth navigation. With Vivint and Myq, your home becomes smarter, safer, and more connected. So go ahead and give it a try!
Do You Need to Use Professionals?
Adding Myq to Vivint is a relatively simple process that can be done by following the steps outlined above. However, if you are unsure or uncomfortable with the installation process, it’s always best to seek professional help. A certified installer can ensure proper setup and integration of your Myq device into your Vivint system without any hassle or complications.

They can also provide tips and advice on how to maximize the use of your Myq garage door controller. It may come at an additional cost, but it can save you time and effort in the long run. Plus, it gives you peace of mind knowing that your smart home is set up correctly and efficiently.
Frequently Asked Questions
Q: Can I Add Multiple Myq Devices to My Vivint System?
A: Yes, you can add multiple Myq devices to your Vivint system by following the same steps for each device. It’s a great way to have control over multiple garage doors in your home. It’s also perfect for those with vacation homes or rental properties.
Q: Is Myq Compatible with Other Smart Home Systems?
A: Yes, Myq is compatible with other smart home systems, including Amazon Alex, Google Home, and Apple HomeKit. You can control your Myq garage door opener using voice commands through these smart home assistants.
Q: Is There a Monthly Fee for Using Myq on Vivint?
A: No, there is no additional monthly fee for using Myq on Vivint. It’s already included in your Vivint subscription plan, making it a convenient and cost-effective option for your smart home.
Q: What Happens If I Change My Garage Door Opener or Controller?
A: If you change your garage door opener or controller, you’ll need to add the new device to your Vivint system again. Simply follow the same steps outlined above to integrate it with your Vivint app and enjoy seamless control
Conclusion
With MyQ, adding its full capabilities to your Vivint home automation system is simpler than ever before. Take the time to complete the upgrade and you will quickly see how convenient it can be to have greater control of your home’s settings. Plus, once you do, accessing those same settings remotely is also incredibly easy. As you become more familiar with all that MyQ offers, you’ll likely find every feature useful in some way or another, allowing even more convenience. Immediately make your life easier by taking a few minutes today to Add Myq to Vivint; you won’t regret it! Thanks for reading this article on how to add myq to vivint.
About
Safety Fic is a distinguished figure in the world of Diy design, with a decade of expertise creating innovative and sustainable Diy solutions. His professional focus lies in merging traditional craftsmanship with modern manufacturing techniques, fostering designs that are both practical and environmentally conscious. As the author of diy, Safety Fic delves into the art and science of Safety Fic-making, inspiring artisans and industry professionals alike.
Education RMIT University
(Melbourne, Australia) Associate Degree in Design (Safety Fic) Focus on sustainable design, industry-driven projects, and practical craftsmanship. Gained hands-on experience with traditional and digital manufacturing tools, such as CAD and CNC software.
Nottingham Trent University
(United Kingdom) Bachelor’s in diyfastly.com and Product Design (Honors) Specialized in product design with a focus on blending creativity with production techniques. Participated in industry projects, working with companies like John Lewis and Vitsoe to gain real-world insights.
Publications and Impact
In diy, Safety Fic his insights on indoor design processes, materials, and strategies for efficient production. His writing bridges the gap between artisan knowledge and modern industry needs, making it a must-read for both budding designers and seasoned professionals.