
Well-functioning gate hinges are essential for both security and ease of use. They ensure your gate opens and closes smoothly, providing protection and convenience. However, over time, metal gate hinges can develop issues such as sagging, misalignment, and difficulty opening or closing, compromising the gate’s functionality. These common problems necessitate timely hinge adjustments to maintain the gate’s performance.

In this guide, we will cover how to adjust metal gate hinges effectively, beginning with identifying and assessing the issues, followed by tightening and realigning the hinges, adjusting the gate height, lubricating the hinges, checking and adjusting the latch alignment, and concluding with regular maintenance tips. By following these steps, you can ensure that your gate remains in optimal condition, providing security and ease of use for years to come.
Understanding Metal Gate Hinges
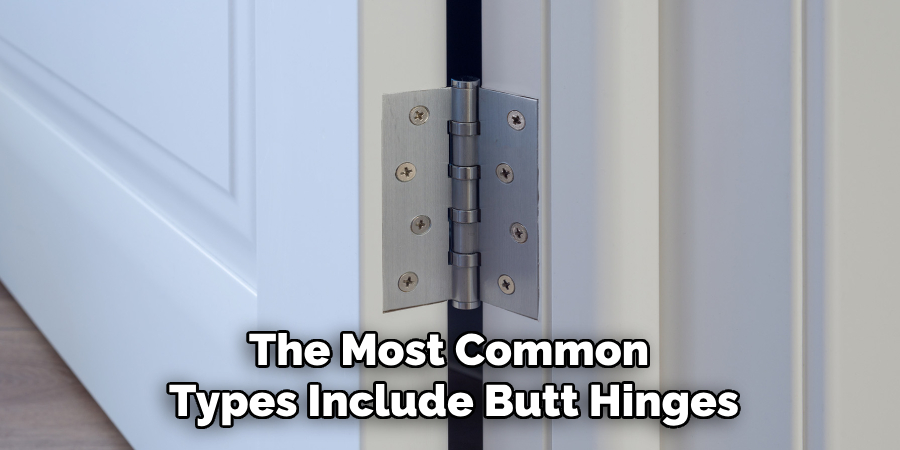
Metal gate hinges come in various types, each suited for different applications. The most common types include butt hinges, strap hinges, and T-hinges. Butt hinges are typically used for smaller gates and doors and are characterized by their rectangular shape, with the hinge pin positioned in the middle of two symmetrical leaves. Strap hinges, however, feature long, tapering leaves that provide extra support and are ideal for larger, heavier gates. T-hinges combine elements of both butt hinges and strap hinges, with one leaf forming a ‘T’ shape that offers a balance of strength and aesthetic appeal.
The core components of metal gate hinges are the hinge pin, leaf, and the screws or bolts that secure them to the gate and post. The hinge pin is the pivot around which the leaves rotate, allowing the gate to swing open or close. The leaves are the flat, typically rectangular plates that are attached to the gate and its supporting structure. Screws or bolts are used to fasten the leaves to the gate and post, ensuring a secure attachment.
Several factors can affect the performance of metal gate hinges. The weight of the gate is a primary consideration, as heavier gates require sturdier hinges to support them without sagging. Environmental conditions such as humidity, temperature fluctuations, and exposure to rain can also impact hinge performance, potentially causing rust or other forms of degradation. By understanding the types, components, and influencing factors, you can better maintain and adjust your metal gate hinges to ensure their longevity and functionality.
Tools and Materials Needed
- Adjustable wrench
- Screwdriver
- Pliers
- Level
- Shims (if needed)
- Optional:
- Lubricant (WD-40 or silicone spray)
- Wood blocks or support stand
Assessing the Issue
Before adjusting your metal gate hinges, it’s crucial to identify the common problems that can arise. These issues often include a sagging gate, misalignment with the latch, or difficulty in swinging. A sagging gate can drag on the ground, making it hard to open or close, while misalignment with the latch prevents the gate from securing correctly. Difficulty in swinging the gate can be caused by rust or debris in the hinges.
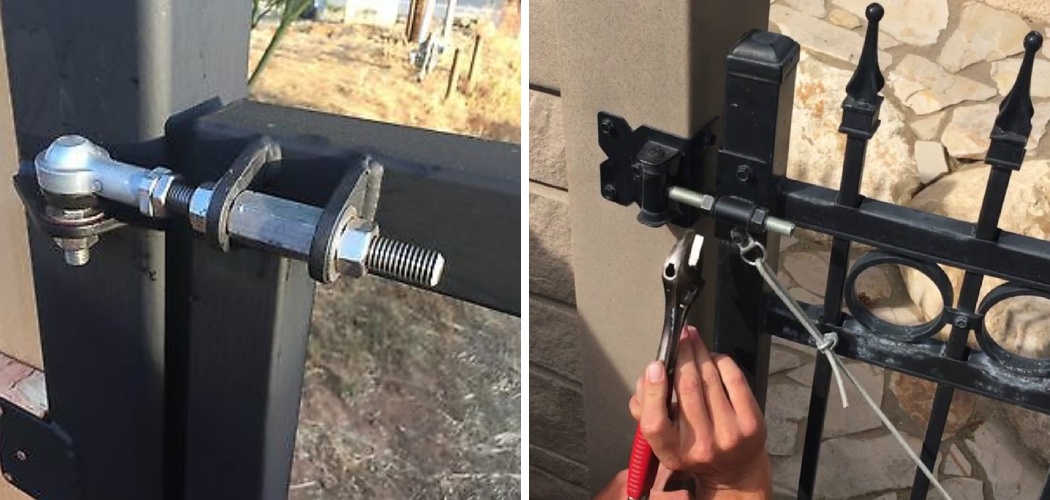
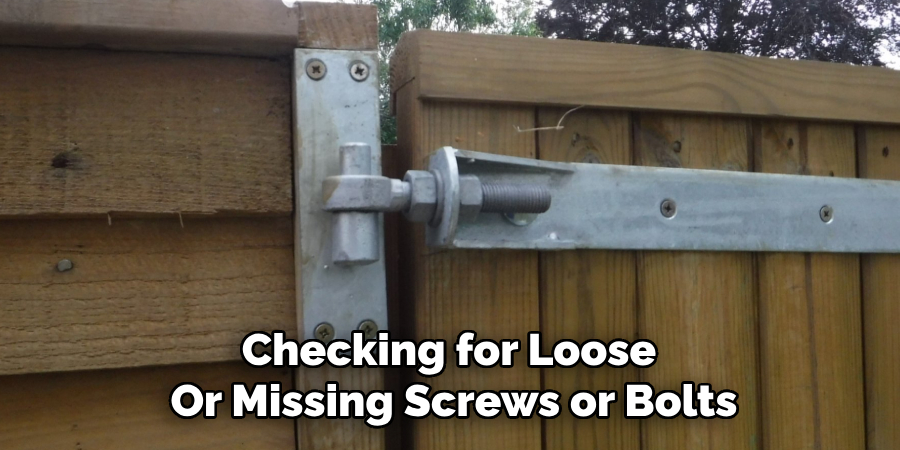
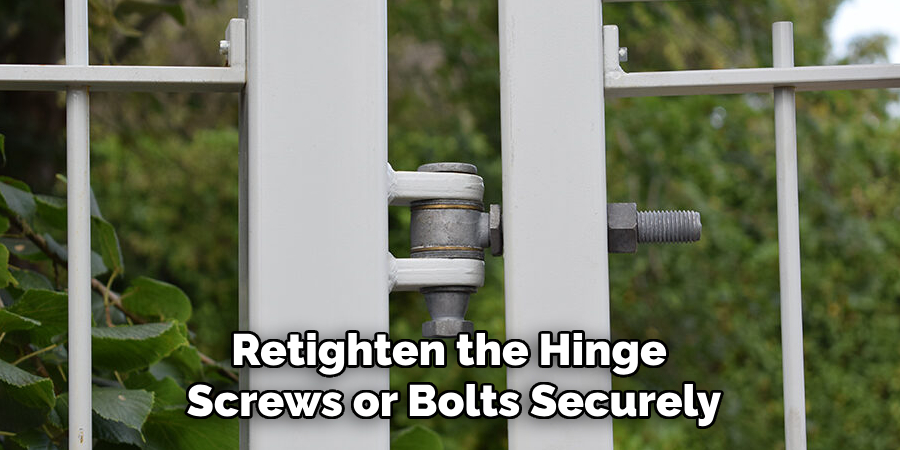
Start by checking for loose or missing screws or bolts, as these are often the culprits behind many hinge problems. Use a screwdriver or an adjustable wrench to ensure all screws and bolts are properly tightened. If any are missing, replace them with suitable hardware.
Next, inspect the gate and the post for structural issues. Look for signs of wear or damage, such as cracks in the wood or metal or loose posts that might cause the gate to lean or misalign. Ensure that the posts are firmly anchored in the ground, as a wobbly post can affect the gate’s overall functionality.
By thoroughly assessing these common issues, you can pinpoint the necessary adjustments and repairs to maintain your metal gate hinges and ensure they function smoothly.
How to Adjust Metal Gate Hinges: Tightening and Realigning Hinges
Tightening and realigning the hinges is essential to ensure your metal gate operates smoothly. Follow this step-by-step guide to achieve optimal results.
Step-by-Step Guide to Tightening Hinge Screws/Bolts
- Initial Inspection: Begin by visually inspecting the screws or bolts on each hinge. Look for any that are visibly loose or protruding.
- Tightening Screws/Bolts: Using a screwdriver or an adjustable wrench, tighten all loose screws or bolts. Start with one hinge and work your way to the other. Ensure not to overtighten as this can strip the threads or damage the hinge.
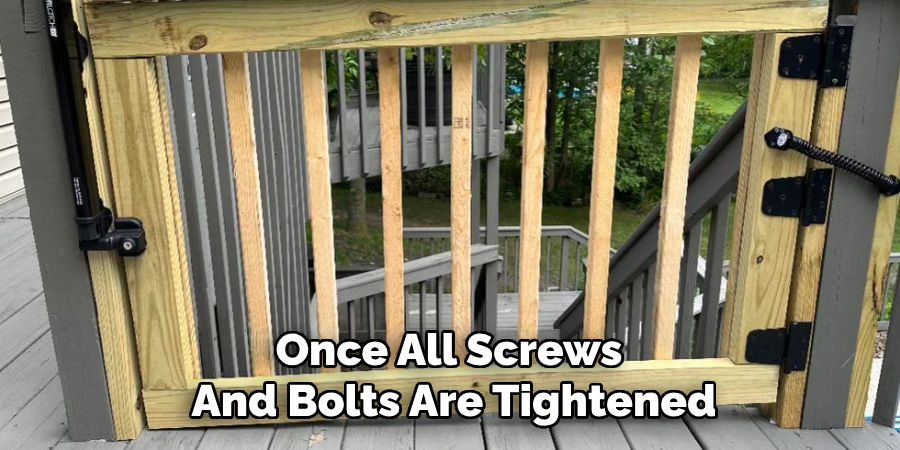
- Even Tension: Ensure that the tension is evenly distributed across all hinge points. If one hinge is tighter than another, the gate may still hang unevenly or operate with difficulty.
Realigning the Gate
- Checking for Alignment: Once all screws and bolts are tightened, use a level to check the alignment of the gate. Place the level vertically on the side of the gate; the bubble should sit exactly in the center, indicating a true vertical alignment.
- Adjusting Hinge Position: You must adjust the hinge positions if misalignment is detected. Begin by loosening the screws or bolts holding the hinge slightly—just enough to allow for minor movement.
- Repositioning: Gently shift the hinge to the correct position. Use the level to continuously check for proper alignment. Once the gate is correctly positioned, retighten the screws or bolts securely.
- Adding Shims: In some cases, adding shims can correct minor alignment issues. Insert shims into the gap behind the hinge leaf attached to the gate post. This will help tilt the gate to the correct angle. After positioning the shims, re-tighten the screws or bolts.
By following these steps, you can ensure that your gate operates smoothly and remains securely aligned, thereby extending its longevity and functionality.
How to Adjust Metal Gate Hinges: Adjusting the Height of the Gate
Adjusting its height may be necessary to ensure your gate operates without dragging or misalignment. Follow these steps to lift the gate to the desired height:
- Lifting the Gate: Position a support stand or wood blocks beneath the gate to lift it to the desired height off the ground. Ensure the support is stable and secure, keeping the gate level throughout the process.
- Loosening the Hinge Screws/Bolts: Using a screwdriver or an adjustable wrench, slightly loosen the screws or bolts on each hinge. This will allow enough movement to adjust the gate’s height. Be cautious not to loosen them too much, as the gate still needs some stability.
- Adjusting the Gate Height: With the support stand or wood blocks in place, adjust the gate to the desired height. While lifting, keep checking the gate’s alignment using a level. The bubble should sit precisely in the center for accurate vertical and horizontal leveling.
- Retightening the Hinge Screws/Bolts: Once the gate is at the correct height and properly aligned, retighten the hinge screws or bolts securely. Ensure that all screws and bolts are evenly tightened to maintain balance and stability.
By following these steps, you can effectively adjust the height of your gate, ensuring smooth operation and extending its overall durability.
Lubricating the Hinges
Proper lubrication of metal gate hinges ensures smooth operation and reduces wear and tear. Regularly applying lubricant can prevent the hinges from becoming stiff or squeaky, thus enhancing the gate’s overall functionality.
Applying Lubricant to the Hinges
- Selecting the Right Lubricant: Choose a suitable lubricant, such as WD-40 or a silicone spray designed for metal components.
- Application: Spray or apply a small amount of lubricant directly onto the hinge pin and other moving parts. Be sure to cover all areas where metal parts come into contact.
- Operation: Move the gate back and forth several times to work the lubricant into the hinge mechanism, ensuring comprehensive coverage.
Wiping Away Excess Lubricant
- Cleaning: Use a clean cloth to wipe away any excess lubricant from the surface of the hinge. This action is essential to prevent dirt and debris from sticking to the lubricant, which could cause the hinges to become clogged over time.
By following these steps, you can maintain well-lubricated gate hinges, ensuring seamless operation and extending the life of your metal gate.
Checking and Adjusting the Latch Alignment
Ensuring the latch aligns properly with the strike plate is crucial for your gate’s smooth operation and security. Misaligned latches can make locking the gate difficult or fail to stay securely closed.
Ensuring the Latch Aligns Properly with the Strike Plate
- Initial Inspection: Close the gate and examine how the latch interacts with the strike plate. Ensure the latch fits snugly into the strike plate without gaps or overhangs.
- Using a Level: Place a level vertically along the gate near the latch to check if the gate is properly aligned. A misaligned gate can cause the latch to miss the strike plate.
Adjusting the Position of the Latch or Strike Plate
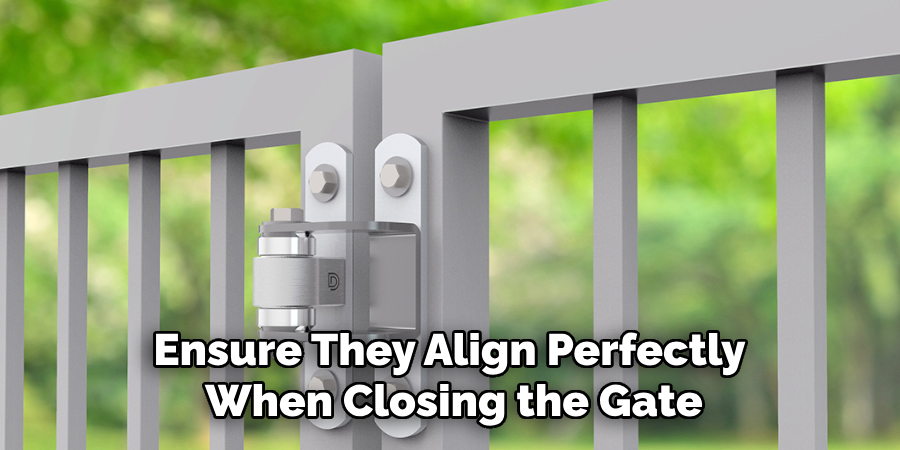
- Loosening Screws/Bolts: If misalignment is detected, use a screwdriver or an adjustable wrench to slightly loosen the screws or bolts securing the latch or strike plate.
- Repositioning: Adjust the latch or strike plate to ensure they align perfectly when closing the gate. Keep checking the alignment with a level to guarantee accuracy.
Tightening Screws/Bolts Securely After Adjustments
- Securing the Position: Once the latch and strike plate are perfectly aligned, firmly retighten the screws or bolts. Ensure they are evenly tightened to prevent future misalignments.
- Final Check: Close the gate and operate the latch to confirm that it locks smoothly and securely into the strike plate.
By following these steps, you can maintain a precisely aligned latch mechanism, ensuring your gate closes and locks seamlessly.
Regular Maintenance Tips
Regular inspection and maintenance of gate hinges are essential to prolonging the life and functionality of your gate. A routine will help identify potential issues before they develop into significant problems.
- Importance of Regular Inspection: Periodic checks allow you to detect early signs of wear and tear. Examine the hinges, screws, and bolts to ensure they are secure and free from rust or corrosion.
- Tightening Loose Screws/Bolts: Over time, the continuous opening and closing of the gate can cause screws and bolts to loosen. Use a screwdriver or an adjustable wrench to tighten any loose components, ensuring the gate stays firmly in place.
- Cleaning and Lubricating Hinges: To prevent rust and ensure smooth operation, clean the hinges regularly using a soft brush and apply a suitable lubricant like WD-40 or a silicone spray.
- Replacing Worn or Damaged Parts: Promptly replace any worn or damaged parts, such as hinges, screws, or latch components, to maintain the gate’s functionality and security.
By adhering to these maintenance tips, you can ensure that your gate remains in optimal working condition for years to come.
Troubleshooting Common Issues
Addressing common issues with your metal gate can help maintain its functionality and extend its lifespan. Here are some troubleshooting tips:
Addressing Persistent Sagging or Misalignment
- Initial Assessment: Examine the gate for signs of sagging or misalignment and determine whether the issue is with the hinges or the gate frame.
- Adjusting Hinges: Loosen the hinge screws slightly and realign the gate to the proper position using a level. Retighten the screws evenly to secure the gate in place.
Checking for and Replacing Damaged Hinges or Screws
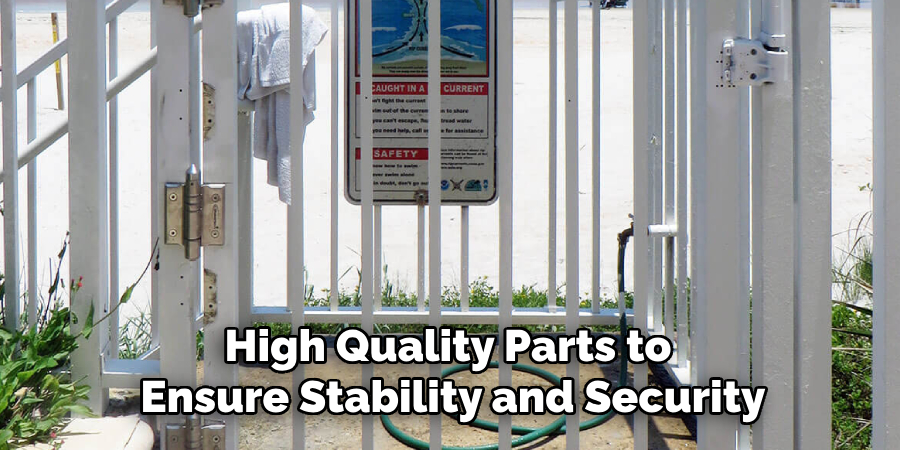
- Inspection: Check all hinges and screws for signs of wear, rust, or damage.
- Replacement: Replace any faulty components with new, high-quality parts to ensure stability and security.
Dealing with Gate Swing Issues
- Hinge Lubrication: Make sure hinges are properly lubricated to facilitate smooth swinging.
- Obstacle Removal: Clear any debris or obstructions that might impede the gate’s movement.
Consulting the Gate Manufacturer’s Manual
- Specific Instructions: For detailed troubleshooting tips and instructions tailored to your gate model, refer to the manufacturer’s manual.
By following these steps, you can effectively address common gate issues and maintain its optimal performance.
Conclusion
Properly adjusting and maintaining metal gate hinges is crucial for ensuring the longevity and functionality of your gate. By understanding how to adjust metal gate hinges correctly, you can prevent common issues such as sagging, misalignment, and difficulty in closing or locking. Regular maintenance checks are essential to identify and rectify potential problems early on, whether it involves tightening screws, cleaning and lubricating hinges, or replacing worn components.
Consistent attention to these details will not only safeguard the smooth operation of your gate but also preserve its aesthetic appeal. Taking the time to perform these routine tasks can significantly extend the lifespan of your metal gate, keeping it secure and operational for years to come. Therefore, make it a habit to regularly inspect and maintain your gate, ensuring it remains a dependable and functional part of your property.