

Are you tired of constantly adjusting and readjusting your safety Dave camera every time you use it? Fret not, because in this guide, we will teach you some helpful tips on adjusting your safety Dave camera for maximum efficiency and convenience.
Adjusting your Safety Dave camera is essential to ensure optimal performance and a clear view of your surroundings while driving or reversing. Whether you’re using it for added security or enhanced visibility, proper setup and alignment are key to making the most of its features.
This guide on how to adjust safety dave camera will walk you through the steps to adjust your Safety Dave camera, helping you achieve the best angle and clarity for a safer driving experience. Let’s dive in.
What Are the Benefits of Adjusting Your Safety Dave Camera?
Adjusting your Safety Dave camera can offer a range of benefits for your driving experience. Here are some key advantages:
- Improved Visibility: By adjusting the angle and alignment of your camera, you can have a clearer view of what’s behind or around your vehicle. This is particularly useful when reversing, as it minimizes blind spots and increases safety.
- Better Security: An adequately adjusted camera can act as an added layer of security for your vehicle. It constantly watches any activity in and around your car, giving you peace of mind.
- Enhanced Performance: When aligned correctly, the Safety Dave camera can provide better image quality and coverage. This means you can have a more accurate view of your surroundings and make better driving or parking decisions.
- Convenience: Most Safety Dave camera systems have features like infrared night vision, motion detection, and automatic recording. These add convenience to your driving experience by allowing you to easily navigate in low light conditions and automatically record any incidents that may occur.
- Financial Benefits: Installing a Safety Dave camera system can also bring financial benefits. For example, it can lower your insurance premiums by reducing the risk of accidents or theft. It may also help protect against false claims in case of an accident.
What Will You Need?
To install a Safety Dave camera system, you will need the following items:
- A Safety Dave Camera Kit: This includes the central camera unit, wiring harness, and mounting hardware.
- Vehicle-specific Adapter: Depending on your vehicle make and model, you may need an additional adapter to connect the camera to your car’s electrical system properly. Check with your supplier or consult the instruction manual for more information.
- Essential Tools: You will need basic tools such as screwdrivers, wire cutters/strippers, and pliers to install the camera.
- Power Source: The Safety Dave camera system requires a power source. This can be from your car’s battery or through a direct connection to your vehicle’s electrical system.
- Mounting the Camera: Choose a suitable location on the rear of your vehicle to mount the camera. Ensure it is securely attached and has a clear view of the area behind your car.
- Wiring: Properly route the wiring from the camera to your car’s electrical system or power source. This may involve running wires through existing channels or drilling holes in certain areas. Be careful not to damage any existing wires or components during this step.
8 Easy Steps on How to Adjust Safety Dave Camera
Step 1. Position the Camera Correctly:
Start by ensuring the camera is mounted in a location that provides a clear and unobstructed view of the area behind your vehicle. Typically, this is on or near the rear bumper or at the center of the rear window, depending on your vehicle type and the design of your Safety Dave camera system.
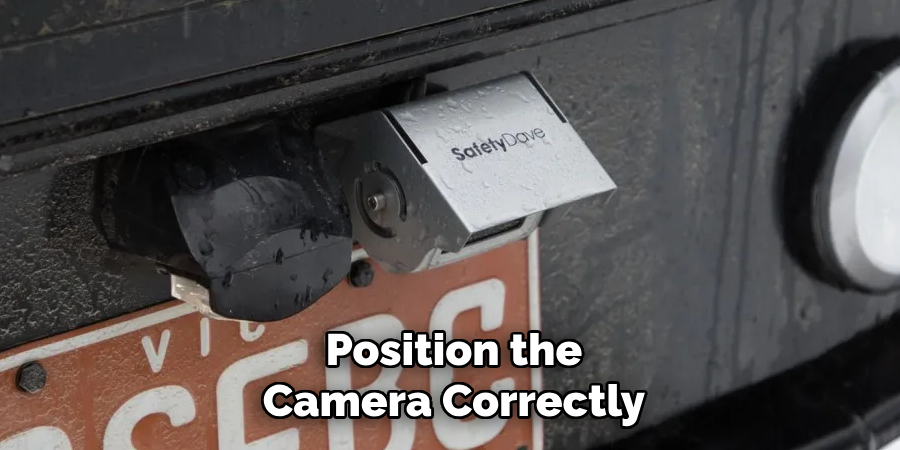
Check that the camera is aligned horizontally to avoid skewed or tilted images. Use any mounting brackets or hardware with the camera to secure it firmly and ensure it will not shift during travel or when the vehicle vibrates. You should test adjustability at this stage, as this will make fine-tuning later in the setup process easier. Additionally, ensure the camera lens is clean and dirt-free, as this can obstruct visibility.
Step 2: Connect the Camera to the Monitor
Begin by connecting the camera to the monitor using your Safety Dave camera system’s provided cables or wireless connections. If your system is wired, carefully route the cables along the vehicle to avoid obstructing controls or creating trip hazards. Use cable ties or clips to secure the wiring neatly and prevent it from becoming loose. For wireless setups, refer to the user manual to correctly pair the camera and monitor. Once connected, power the camera and monitor to confirm that the visual feed is active. If there are any issues with the connection, double-check the wiring or wireless pairing process as outlined in the instructions.
Step 3: Turn off the System
Once you have completed all necessary wiring and confirmed that the system is functioning correctly, it is important to turn it off properly. In most cases, this simply involves turning off the camera and monitor’s power source. However, if your system has a separate power switch or button, follow any specific instructions in the user manual.
Step 4: Test and Adjust as Needed
After completing the initial setup and turning off the system, the next critical step is to test and adjust your camera system to ensure optimal performance. Begin by powering the system back on and carefully reviewing the camera’s feed on the monitor. Check for clear image quality, proper focus, and appropriate framing to cover the desired area. If the image appears blurry or out of focus, manually adjust the camera lens or settings until the image sharpens.
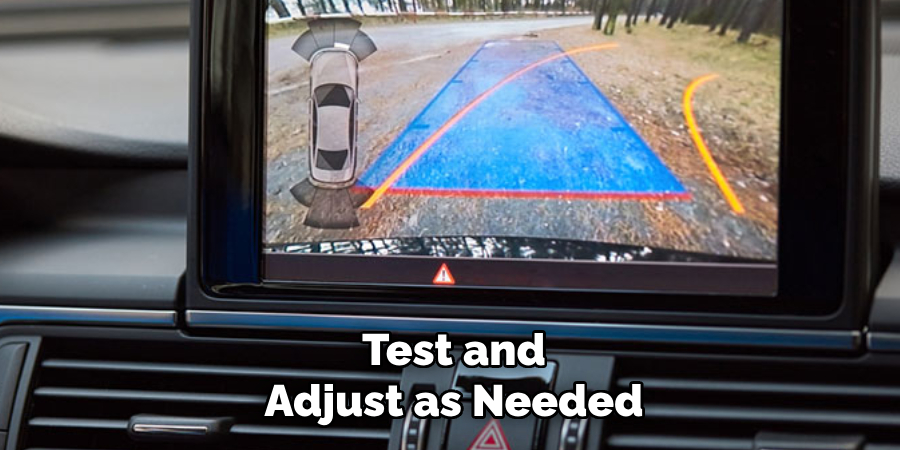
Next, evaluate the positioning and angle of the camera. Ensure there are no blind spots or obstructions that could limit visibility. If necessary, reposition the camera mount to achieve the desired coverage. Test other system functions, such as zoom, pan, tilt, and any night vision features, to verify they are working as expected. Configure the motion sensitivity settings and verify proper triggering for systems with motion detection.
Step 5: Consult the User Manual
The user manual is an essential resource that provides detailed guidance on your system’s setup, operation, and maintenance. Before proceeding, take the time to thoroughly review the manual to ensure you understand the features and capabilities of your equipment. The manual often includes specific instructions for advanced features, troubleshooting tips, and essential safety information.
For example, it may provide recommended settings for optimal performance, detailed diagrams for installation, and explanations for error codes. The manual should be your first reference point if you encounter any issues or are uncertain about a specific function. Additionally, many manufacturers provide online support or supplemental video tutorials to enhance your understanding further and assist with more technical elements.
Step 6: Secure the Camera
To properly secure the camera, ensure that it is mounted firmly in the desired location using the appropriate brackets or mounting hardware provided by the manufacturer. Verify that the camera is positioned at the correct angle to cover the intended area effectively. This may require adjustments during installation, so take your time to achieve the best alignment.
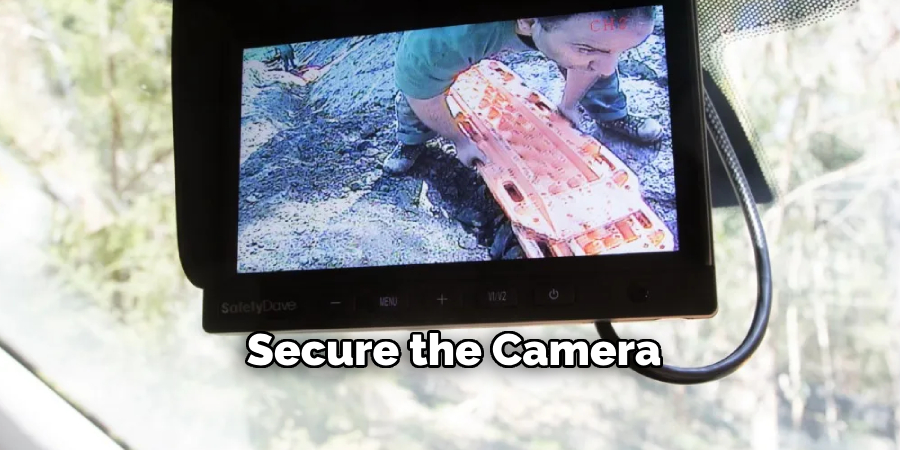
Use tools like a level or smartphone app to ensure the camera is not tilted unless required for a specific setup. If the camera is intended for outdoor use, double-check that it is weatherproof and that all cables or connections are appropriately sealed to prevent water damage. For added security, consider using tamper-proof screws or mounts to prevent unauthorized removal.
Step 7: Monitor and Maintain
Once your camera is installed and operational, regular monitoring and maintenance are essential to ensure it continues to function optimally. Begin by periodically checking the camera’s video feed to confirm it captures clear and uninterrupted footage. Look for any signs of image distortion, connectivity issues, or obstruction caused by debris, insects, or weather-related conditions.
Establish a routine maintenance schedule that includes cleaning the camera lens to remove dust, dirt, or smudges that can impair image quality. For outdoor cameras, inspect the weatherproofing to ensure that seals and connections remain intact and free from damage caused by wind, rain, or extreme temperatures. Additionally, verify that the power source, whether a direct connection or battery power, is stable and sufficient to prevent outages.
Step 8: Test the Camera Regularly
Perform regular functionality tests to ensure the camera is operating correctly. Check live video feeds to confirm no issues with image clarity, resolution, or frame rate. Test motion detection and any integrated features like night vision or two-way audio to verify their responsiveness and efficiency. These routine tests can help identify potential malfunctions early and maintain the reliability of your surveillance system.
By following these steps, you can ensure the proper maintenance and functionality of your security camera system.
5 Things You Should Avoid
- Overlooking the User Manual: One of the biggest mistakes is ignoring the user manual provided with the Safety Dave camera. The manual includes critical instructions specific to your camera model, ensuring proper adjustments and preventing potential issues.
- Forcing Camera Movements: Avoid manually forcing the camera lens or its rotational components. This can lead to mechanical damage or misalignment, ultimately affecting the camera’s performance and image quality.
- Skipping Calibration Steps: Failing to calibrate the camera during installation properly or while making adjustments can result in inaccurate angles and blind spots, reducing the effectiveness of your security system.
- Adjusting Without Powering Off: Always turn off the camera before making any significant adjustments. Attempting to reposition or handle the camera while powered on could cause electrical damage or software glitches.
- Neglecting Weatherproofing Measures: If the camera is installed outdoors, do not adjust it without checking its weatherproofing seals. Neglecting this step could expose the internal components to moisture, leading to malfunctions or a shortened device lifespan.
Conclusion
How to adjust safety Dave camera requires careful attention to detail and adherence to specific precautions to ensure its longevity and optimal performance.
Always power off the camera before making any adjustments, as this minimizes the risk of electrical damage. Verify that weatherproofing seals are intact for outdoor installations to protect the internal components from environmental elements.
By following these guidelines and carefully handling the camera, you can maintain its functionality and reliability over time. Proper maintenance and adjustments are key to achieving clear visuals and maximizing the camera’s effectiveness.