

Aligning your garage door sensors is one of the most important maintenance tasks for Liftmaster garage doors. Proper alignment ensures that your door operates safely and efficiently.

If your sensors are not aligned, it can cause problems such as miscommunication between the system’s components or an inability to open and close the door properly. Aligning garage door sensors correctly is key to maintaining and operating your Liftmaster garage door safely and efficiently.
It’s important to adjust the alignments regularly to ensure proper operation, as it can cause many problems if not done correctly. Liftmaster offers an easy-to-use alignment kit that makes adjusting your garage door sensors straightforward. The kit comes with instructions on how to adjust the sensors, as well as a gauge to ensure they are properly aligned. In this blog post, You will learn how to align garage door sensors liftmaster.
Step-by-step Instructions for How to Align Garage Door Sensors Liftmaster
Step 1: Inspect the Sensors
Look closely at the sensors mounted on either side of your garage door. Check for visible damage and ensure they are properly connected to the power source. Once you’ve inspected the sensors, it’s time to clean them with a damp cloth or soft brush. This will remove any dust or dirt blocking the sensors from working properly.
Step 2: Set Up Alignment Kit
Next, you’ll need to set up the alignment kit according to the instructions provided by Liftmaster. This typically involves a gauge and an adjustable arm that allows you to adjust the height of the sensor. Take your adjustable arm and line up the sensors to be perfectly horizontal. This will help ensure they are triggered simultaneously when the garage door is opened or closed.
Step 3: Securely Fasten Sensors
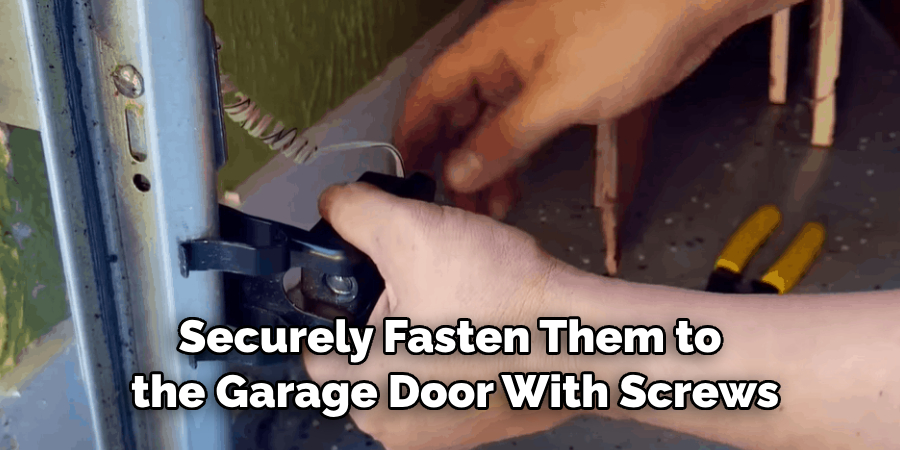
Once you’ve lined up the sensors, securely fasten them to the garage door with screws. This will allow you to adjust them without worrying about them moving out of alignment. Using the gauge provided in the alignment kit, slowly move the adjustable arm until it matches up with the measurements on the gauge. This will ensure that the sensors are properly aligned.
Step 4: Check For Proper Alignment
Once you’ve adjusted the sensors, checking for proper alignment is important. Open and close the garage door a few times to ensure it functions correctly. Once you’ve checked for proper alignment, it’s time to fasten the adjustable arm securely. Tighten any screws or bolts that may be loose and make sure everything is secure.
Step 5: Test the Sensors
Finally, it’s time to test out your new garage door sensors. Try opening and closing the doors a few times to ensure they are properly aligned. Once you’ve completed all of the above steps, it’s time to enjoy your new garage door sensors! Now that they are properly aligned, you can trust that your Liftmaster garage door will operate as it should.
Knowing how to align garage door sensors and liftmaster is important to a safe and efficient home. Not only does this help maintain the integrity of your Liftmaster garage door, but it also ensures that you’ll enjoy years of worry-free service. If you have any questions or need additional help, contact a qualified Liftmaster technician.
Tips for How to Align Garage Door Sensors Liftmaster
- Always refer to the instruction manual provided with your Liftmaster sensors before attempting any alignment methods.
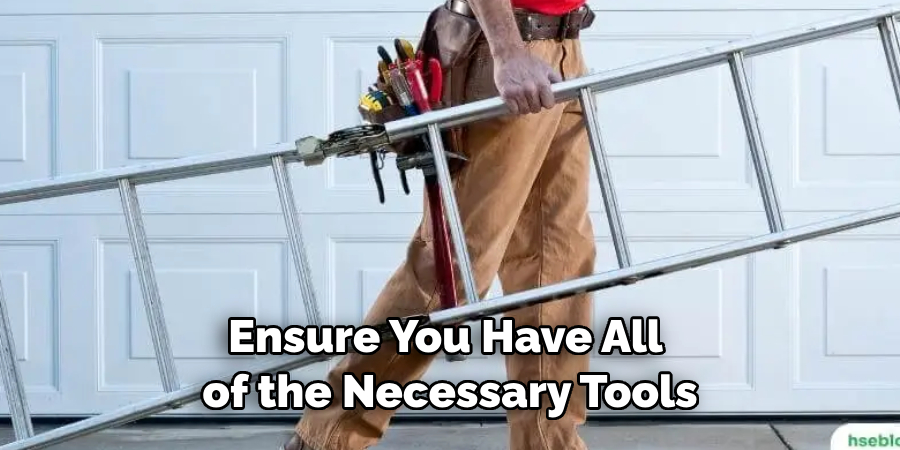
- Ensure you have all of the necessary tools, such as a ladder, and that they are in working condition before beginning your project.
- Disconnect power from your garage door opener before beginning work on the sensors or other components connected to the system.
- Ensure that your sensors are away from interfering sunlight, other high-intensity light sources, and any loose wires or cords.
- Use extreme caution when working with electricity and heights; only attempt it by consulting an expert first if you are unsure of a step or procedure.
- When finished aligning the sensors, check that they are working properly by pressing the wall button or remote control to open and close your garage door. If it doesn’t work, double-check your sensors and re-align if necessary.
Contact our customer service team at 1-800-xxxxx for advice and additional support. Our customer service team is available 24/7 to help you with any questions.
What Are the Steps for Alignment?
Aligning your Liftmaster Garage Door Sensors can be a quick and easy process, but following the steps correctly is important to ensure safety. Here are the necessary steps for alignment:
- Make sure that nothing is obstructing and blocking the sensors. This includes leaves, dirt, snow, or any other obstruction.
- Adjust the sensors so that they are level with each other and facing each other across the opening of your garage door.
- Press and hold the red “Program” button on your Liftmaster opener until it flashes quickly (usually about six seconds). This will turn off the lights on both sensors, indicating that the alignment procedure has been initiated.
- Check the lift master’s lights to make sure they are off. If they remain on, the alignment is unsuccessful and should be repeated until both sensors turn off.
- Press and release the “Program” button to complete the alignment process and turn the lights back on in both sensors.
- Test the sensors by closing and opening your garage door. If the alignment is successful, the lights on both sensors should turn off and on each time you open or close the door.

For more information on how to align your Liftmaster Garage Door Sensors, please refer to your user manual or contact a professional installer for assistance. Following these steps correctly ensures that your sensors function properly and your garage door is safe.
Are There Any Safety Hazards Involved in Alignment?
Yes, it’s important to take safety precautions when attempting to align your Liftmaster garage door sensors. Read the instructions and warnings carefully before starting any repair or adjustment. Make sure all power is disconnected from the door and the wall control unit before making any adjustments.
It’s also important to wear appropriate clothing for the job—gloves, clothing that covers your arms and legs, and safety glasses to protect yourself from potential hazards. Additionally, always keep kids and pets out of the area while you align your sensors. Following these important safety precautions, you can safely adjust and align your Liftmaster garage door sensors for optimal performance.
Are There Any Special Techniques That Should Be Used When Aligning the Sensors?
When aligning the sensors on your Liftmaster garage door opener, it’s important to ensure they are correctly aligned. If the sensors are properly aligned, your garage door opener may work more efficiently and could be at risk of malfunctioning.
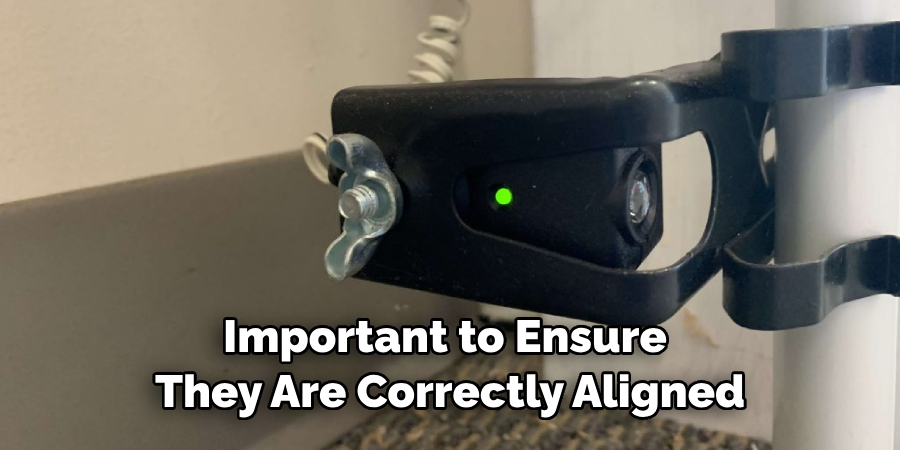
To ensure proper alignment of your Liftmaster sensors, use a level and ruler when installing the sensors. When placing each sensor, ensure it is level with the ground and at least six inches from the floor. Additionally, it’s important to ensure that each sensor points at one another in an accurate line of sight and is not blocked by any objects or debris.
Finally, once your sensors are properly aligned, use a piece of tape to mark the sensors in place. This will allow you to make any necessary adjustments as needed easily.
Is It Possible to Adjust the Sensor Sensitivity After Alignment is Complete?
Yes, it is possible to adjust the sensitivity of your Liftmaster sensors after they are properly aligned. In addition to adjusting the alignment for optimal performance, you can adjust the sensitivity settings on each sensor.
To do this, first, identify which sensor is primary and which is secondary. The primary sensor should have a red light glaring when the door opens. Then, use your Liftmaster remote to adjust the sensitivity settings. The adjustment will depend on what type of opener you have and how far the sensors are from each other.
Once the sensitivity settings are adjusted, you can test them by opening and closing your garage door using the remote control. If the doors do not open or close properly or the lights do not turn on when they are supposed to, you may need to make further adjustments.
Conclusion
In conclusion, aligning your Liftmaster garage door sensors is key to ensuring your safety and security. Although it may seem straightforward, it can be an involved task that requires attention to detail. That being said, taking the time to make sure your sensors are aligned properly will help you avoid potential issues down the line.
Contact your local Liftmaster dealer for more information on aligning your garage door sensors. They will be able to provide the necessary advice and guidance so you can rest easy knowing that your garage door is secure and working properly. This article has been beneficial for learning how to align garage door sensors liftmaster. Make Sure the preventive measures are followed chronologically.
About
Safety Fic is a distinguished figure in the world of Diy design, with a decade of expertise creating innovative and sustainable Diy solutions. His professional focus lies in merging traditional craftsmanship with modern manufacturing techniques, fostering designs that are both practical and environmentally conscious. As the author of diy, Safety Fic delves into the art and science of Safety Fic-making, inspiring artisans and industry professionals alike.
Education RMIT University
(Melbourne, Australia) Associate Degree in Design (Safety Fic) Focus on sustainable design, industry-driven projects, and practical craftsmanship. Gained hands-on experience with traditional and digital manufacturing tools, such as CAD and CNC software.
Nottingham Trent University
(United Kingdom) Bachelor’s in diyfastly.com and Product Design (Honors) Specialized in product design with a focus on blending creativity with production techniques. Participated in industry projects, working with companies like John Lewis and Vitsoe to gain real-world insights.
Publications and Impact
In diy, Safety Fic his insights on indoor design processes, materials, and strategies for efficient production. His writing bridges the gap between artisan knowledge and modern industry needs, making it a must-read for both budding designers and seasoned professionals.