

Are you looking for a way to add an extra layer of security to your home? Installing security cameras is one of the best ways to do this, and attaching them to soffits on the exterior of your house, not only provides added protection but also blends in well with your landscaping.
In this blog post, we’ll be exploring how to attach security camera to soffit, demystifying the process and helping you feel more secure in no time. So if you’re ready to learn all about camera-soffiting installations, let’s dive right in!
What’s a Soffit?
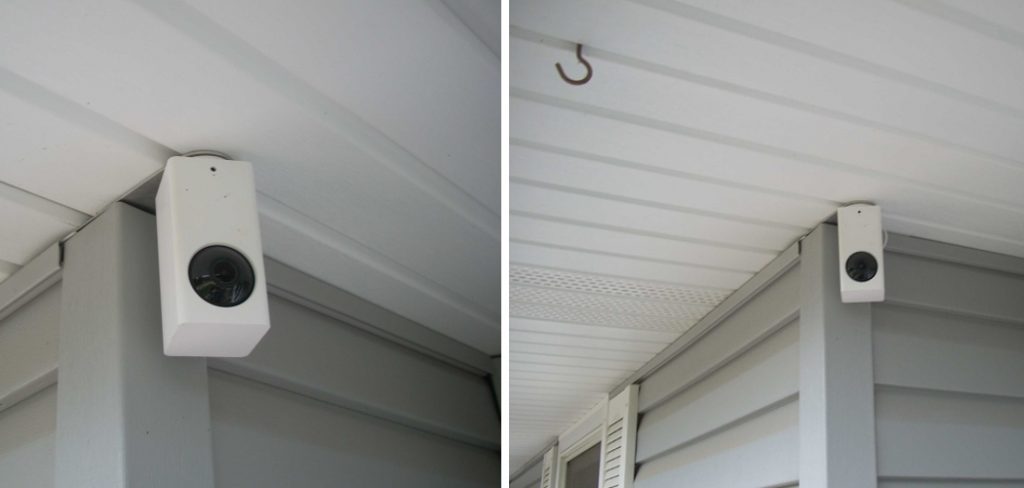
A soffit is the underside of an overhang, such as the eaves on your roof. It is not visible from the street and provides a perfect spot to install a security camera, without it being obvious to passers-by.
Step by Step Guidelines on How to Attach Security Camera to Soffit
Step 1: Measure the Soffit
Before you get started, measure the soffit to determine what kind of camera mount you’ll need. If your soffit is too large for a single camera mount, then you can use multiple mounts or choose a larger one to accommodate the size. Measuring the soffit ensures your security camera can be securely attached.
Step 2: Drill Holes for Mounting
Once you have the correct mount, it’s time to drill into the soffit in preparation for mounting. Use a drill bit that is slightly smaller than the screws and anchor bolts included with your mount, then secure them firmly into place. While drilling, make sure to wear safety glasses and earplugs.
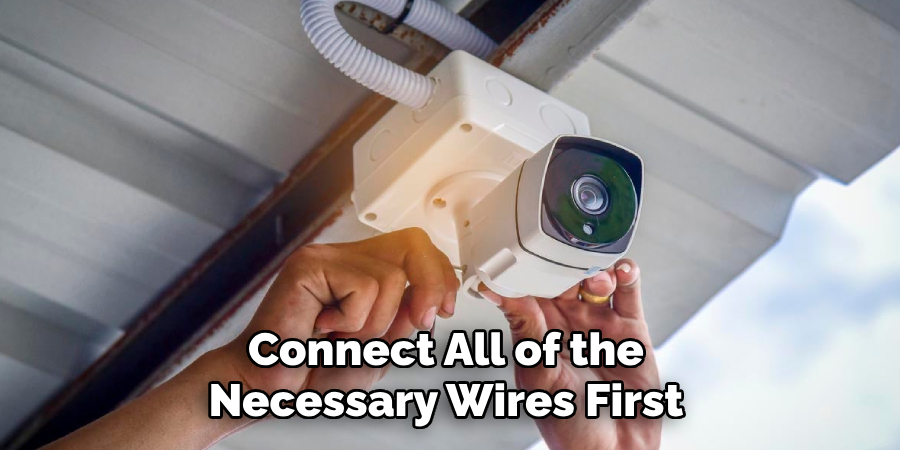
Step 3: Connect the Wires
Before you attach the security camera to the mount, connect all of the necessary wires first. This is usually a power cable and a video cable which will plug into your DVR or NVR system. It’s important to make sure these cables are securely connected before continuing with installation.
Step 4: Secure the Camera
Once all of the cables are plugged in, it’s time to secure the camera onto the mount. Use the screws and bolts included with your camera mount to do so. Make sure you use a wrench or another tool that is sturdy enough for the job so that it doesn’t come loose over time.
Step 5: Test It Out
The last, but certainly not least step is to test out your newly installed security camera. Plug in the power cable and turn on the camera. You should be able to view it from your DVR or NVR system if everything is connected correctly. If you can’t see the camera, then double-check all of the connections to make sure they are secure. Make sure there are no loose wires or any other issues as well.
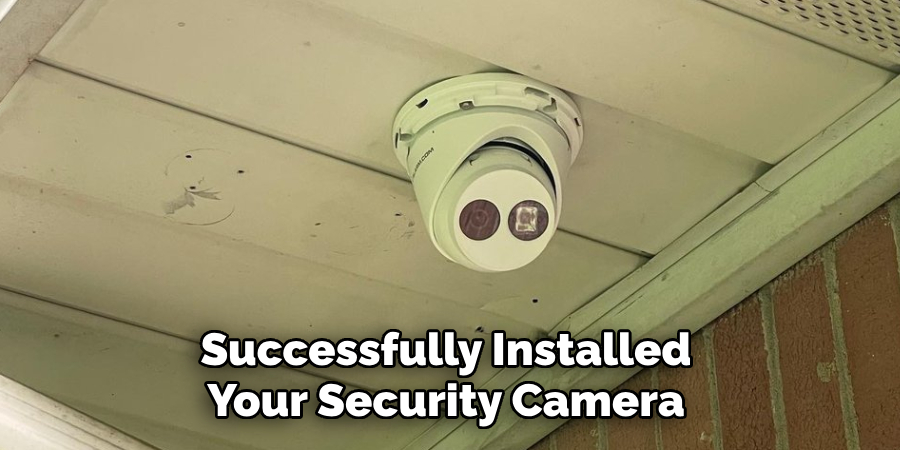
Congratulations! You have now successfully installed your security camera on the soffit. This is an effective way to boost security at your home and discourage potential intruders. With a few simple steps, you can feel more secure in no time.
Additional Tips and Tricks to Attach Security Camera to Soffit
- Be sure to use the correct screws, bolts, and anchors for your soffit surface material. Different materials will require different mounting hardware.
- Make sure to check the weight of the camera you are installing on the soffit. If it is too heavy, you may need an additional support bracket or a stronger mounting system.
- Measure twice, drill once! That’s the golden rule when installing any security camera. Measure your area carefully and mark the spots where you will be drilling holes prior to starting.
- Use a foam sealant around the hole that the camera will fit into for added protection against water damage.
- It is also recommended to use a weatherproof cover on the camera to further protect it from water damage.
- Have an extra set of hands around when installing a security camera on the soffit, as it may require multiple people to maneuver and support the camera during installation.
- Make sure your security camera is securely attached before completing the installation. You should be able to shake the soffit without feeling any wiggle in the camera mount.
- After installation, check the camera to make sure it is operating properly and adjust your settings as needed for optimal performance.
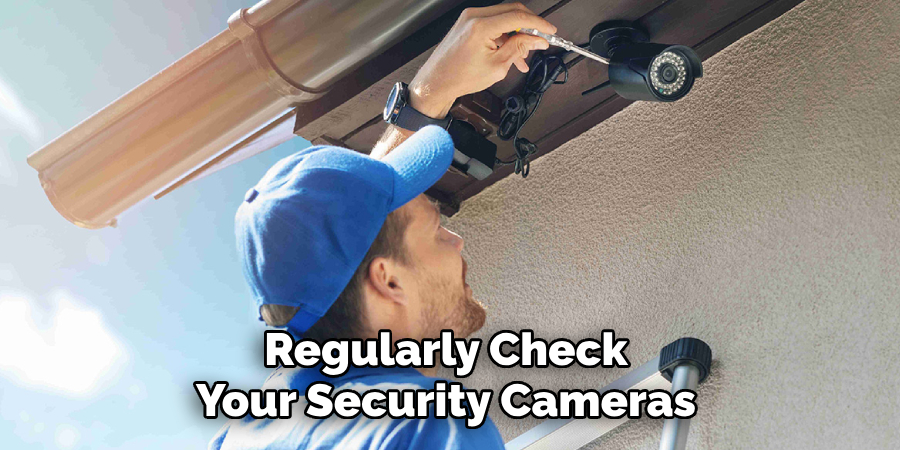
- Regularly check your security cameras for any signs of damage or tampering. A damaged or tampered with camera will greatly reduce its effectiveness in protecting your home.
Following these tips and tricks will help you ensure that your security camera is properly and securely installed onto the soffit. With a secure installation, you can rest easy knowing that your home is protected from unwanted intruders.
Things You Should Consider to Attach Security Camera to Soffit
- Before attaching a security camera to a soffit, it is important to consider the size, shape, and material of your soffit. The right type of bracket or mount should be used based on these factors.
- Make sure that the location you choose for mounting the camera is secure and out of reach from potential intruders or mechanical damage.
- Carefully measure the soffit dimensions before drilling any holes. If you are unsure about anything, consider consulting a professional to make sure that your camera is installed securely and safely.
- When selecting screws or anchors for mounting the camera, always look for corrosion-resistant materials such as stainless steel or brass. This will ensure that your security camera remains secure in all weather conditions.
- Make sure that the mounting hardware you select is compatible with your security camera and soffit. If possible, use a universal mount that can adjust to fit different sizes of security cameras.
- Once you have installed the camera and secured it with screws or anchors, test the signal connection to ensure that everything is working properly before completing the installation.
- You should also consider installing protective housing around the camera to keep it from becoming damaged by rain, snow, or other elements.
- It is important to maintain your security camera regularly to ensure that you get optimal performance and monitor any potential threats in your vicinity. Clean and tighten the screws or anchors every few months to make sure that your camera remains secure.
By following these considerations, you can easily attach a security camera to the soffit and ensure that your home or business is protected from potential threats. Make sure to take the necessary precautions when setting up your security camera to ensure that it is secure and able to provide you with optimal performance.
Frequently Asked Questions
What is the Best Way to Attach a Security Camera to a Soffit?
The best way to attach a security camera to a soffit depends on what type of system you are using and the material that the soffit is made from. For most systems, it is recommended that you use an appropriate mounting bracket or other form of fastener to securely attach the camera to the soffit.
If you are unsure of the type of material that the soffit is made from, it may be best to consult a professional for advice.
What Are The Benefits Of Attaching A Security Camera To A Soffit?
Attaching a security camera to a soffit can provide many benefits. By placing the camera in an elevated position, it is possible to capture footage of areas that would otherwise be difficult or impossible to see.
Further, the elevated placement of the camera means that it is less susceptible to vandalism or other damage from passers-by. Lastly, attaching the camera to a soffit can also make it easier to conceal wiring and provide greater stability for the camera itself.
Are There Any Drawbacks To Attaching A Security Camera To A Soffit?
The main disadvantage of attaching a security camera to a soffit is that it can be harder to conceal wiring. As the camera must be connected directly to power and networking sources, wires will need to be run across the surface of the soffit.
For this reason, it is important to ensure that the router and power source are located near the camera or that they can be easily accessed in order to minimize the amount of visible wiring. Additionally, attaching a security camera to a soffit can also make it easier for potential intruders to spot and tamper with the camera.
It is important to take appropriate steps such as camouflaging the camera or covering it with a hood to ensure its protection.
Conclusion
Now that you have all the information on how to attach security camera to soffit, it is time to take action! It may seem daunting at first but with the right materials and guidance, anyone can do this task effectively and quickly. So what are you waiting for? Get out there and make sure your home is safe and secure.
Invest in the peace of mind that comes with having a surveillance system to protect your home, and attach a security camera to your soffit with your own two hands! Thank you for reading this blog post about how to attach a security camera to your soffit. We hope this step-by-step guide was able to help you out, and we look forward to hearing about all of your successes with this project.
About
Safety Fic is a distinguished figure in the world of Diy design, with a decade of expertise creating innovative and sustainable Diy solutions. His professional focus lies in merging traditional craftsmanship with modern manufacturing techniques, fostering designs that are both practical and environmentally conscious. As the author of diy, Safety Fic delves into the art and science of Safety Fic-making, inspiring artisans and industry professionals alike.
Education RMIT University
(Melbourne, Australia) Associate Degree in Design (Safety Fic) Focus on sustainable design, industry-driven projects, and practical craftsmanship. Gained hands-on experience with traditional and digital manufacturing tools, such as CAD and CNC software.
Nottingham Trent University
(United Kingdom) Bachelor’s in diyfastly.com and Product Design (Honors) Specialized in product design with a focus on blending creativity with production techniques. Participated in industry projects, working with companies like John Lewis and Vitsoe to gain real-world insights.
Publications and Impact
In diy, Safety Fic his insights on indoor design processes, materials, and strategies for efficient production. His writing bridges the gap between artisan knowledge and modern industry needs, making it a must-read for both budding designers and seasoned professionals.