
A picture frame fence is not just a boundary for your property; it’s a statement of style and refinement that stands apart from traditional fencing options. Unlike conventional fences, the picture frame variant offers enhanced privacy and a polished look with its seamless design and trim details. This distinctive style not only boosts your home’s curb appeal but also contributes to its value, making it an investment in aesthetics and functionality.
Learning how to build a picture frame fence involves understanding the steps from planning and preparation to the final touches that bestow its unique appearance. The process includes setting sturdy posts, attaching rails and pickets, and encapsulating the structure with a decorative trim—elements that elevate the traditional fence to something extraordinary.
Planning and Preparation
Understanding your specific needs and navigating local regulations is crucial before diving into the construction of your picture frame fence. Consider the desired height of your fence, which is often driven by its intended purpose—be it for privacy, security, or purely aesthetic.
Accurately identifying and marking your property lines ensures your fence is built on your land, avoiding potential disputes with neighbors. Additionally, checking local permitting requirements is essential; many municipalities have fence height, design, and placement regulations. Engaging in this preliminary legwork sets a solid foundation for your project, saving time and future complications.
A. Choosing the Right Materials
Appropriate materials are paramount for building a durable and visually appealing picture frame fence.
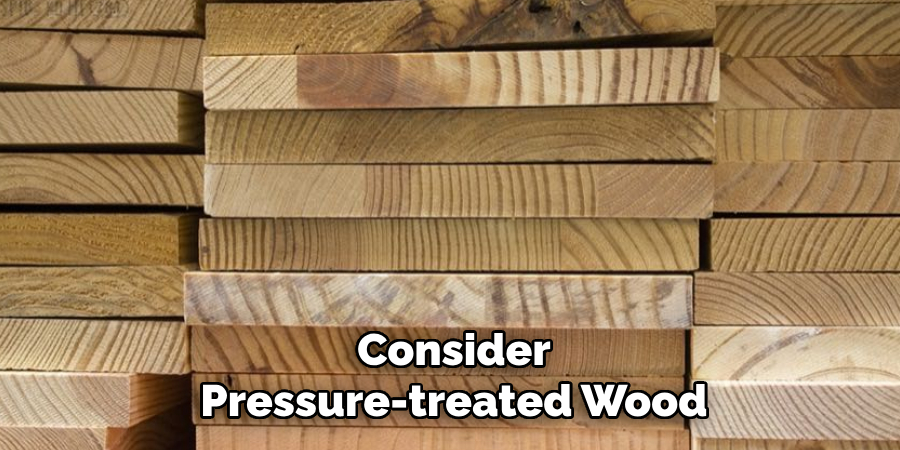
Fence Posts: The backbone of your fence, posts should be chosen with care. Options span from treated wood to vinyl and metal, each offering different aesthetic and durability characteristics. Size is also important—taller fences require longer posts for adequate anchoring. Consider pressure-treated wood for its resistance to rot and pests.
Fence Boards: The primary component of your fence’s appearance, fence boards can be found in various materials such as cedar, redwood, and composite options. The dimensions of your boards will affect the overall aesthetics; wider boards can offer a modern look, whereas narrower boards might lend a more traditional feel. Again, pressure-treated options are favorable for longevity.
Trim Boards: These elements add a distinctive “picture frame” detail to your fence. The material choice should align with that of your posts and boards for a cohesive look. Size and thickness should be considered based on the desired prominence of the trim in the overall design.
Fasteners: The choice between screws and nails may seem minor, but it significantly impacts the construction’s ease and the fence’s longevity. Screws, while typically more expensive and time-consuming to install, offer a stronger hold. Choose galvanized or stainless steel options for outdoor durability.
B. Essential Tools
A well-executed picture frame fence project requires the right tools. At a minimum, you’ll need a measuring tape for precise measurements, a level to ensure your posts and rails are perfectly horizontal or vertical, a saw for cutting materials to size, a drill for holes and driving screws, and a nail gun or screwdriver, depending on your choice of fasteners. Having these tools on hand before starting your project streamlines the building process.
C. Preparing the Work Area
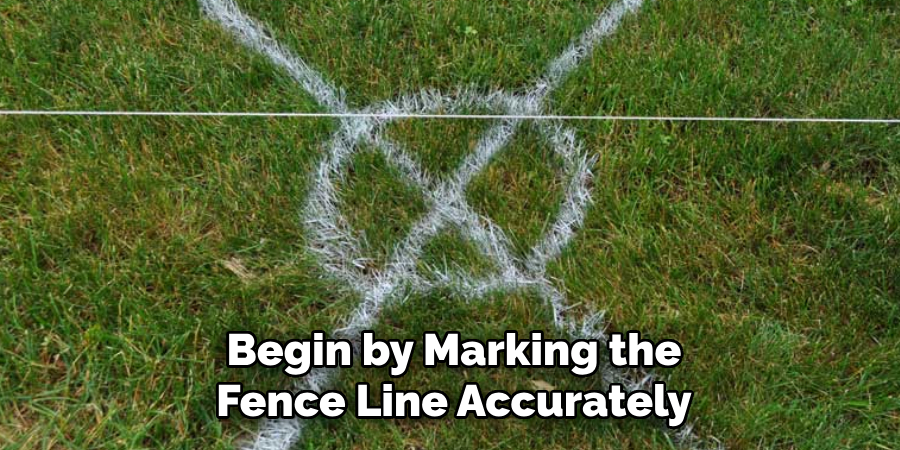
The final step in your preparation involves readying the work area for construction. Begin by marking the fence line accurately; this might involve using string and stakes to delineate the boundary. Clearing the area of debris, such as rocks, branches, or trash, ensures a smooth installation process.
Lastly, an often-overlooked but vital step is to call 811 before digging. This free service identifies and marks underground utilities, helping you avoid costly or dangerous mistakes during construction.
How to Build a Picture Frame Fence: Building the Fence Frame
A. Setting the Posts
The foundation of a sturdy picture frame fence begins with securely setting the fence posts. Generally, two prevalent methods exist to accomplish this: setting the posts directly into concrete or utilizing post anchors for added stability. When using concrete, dig a hole that is thrice the width of your post and approximately one-third to one-half the length of the post deep, ensuring it extends below the frost line to prevent shifting during freeze-thaw cycles.
After placing the post in the hole, use a level to ensure it’s perfectly vertical (plumb), and use temporary braces to keep it in place. Then, fill the hole with concrete, sloping the concrete away from the post to prevent water accumulation. Allow the concrete to cure according to the manufacturer’s instructions before proceeding with the rest of the fence construction.
For those opting for post anchors, these metal bases protect the bottom of your posts from direct exposure to soil and moisture, thus extending their lifespan. Install the anchor into concrete as per its design, ensuring it stands perfectly vertical. Attach your post to the anchor, checking for plumb as you go.
This method often allows for easier adjustments and post-replacement if necessary. Regardless of the method chosen, ensuring each post is perfectly leveled and plumbed is key to a straight and visually appealing fence line.
B. Attaching Rails
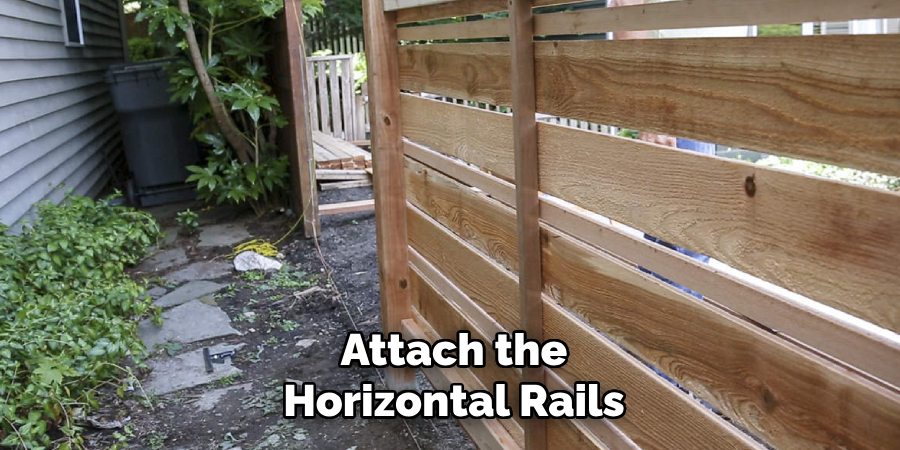
Once your posts are securely in place and have been allowed to be properly set, the next step is to attach the horizontal rails that will support your fence boards. Typically, a picture frame fence will have at least two horizontal rails: one at the top and one at the bottom. Some designs may include a middle rail for added stability, especially with taller fences.
To attach the rails, measure and mark the location on each post to ensure uniform height across your fence. Use a level to confirm that your markings align perfectly horizontally before proceeding. Secure the rails to the posts using appropriate exterior-grade fasteners, such as galvanized or stainless steel screws or nails, to resist corrosion. It’s crucial to select the right size of fastener to penetrate both the rail and the post securely without causing splitting.
Proper spacing between the rails contributes to the structural integrity of the fence and plays a vital role in achieving the desired look of your picture frame fence. Consider using a spacer block or jig during installation to maintain consistent spacing. This meticulous attention to detail will help create a well-constructed and aesthetically pleasing picture frame fence.
How to Build a Picture Frame Fence: Installing the Fence Pickets
A. Spacing Considerations
The spacing between fence pickets plays a pivotal role in balancing aesthetics and privacy. Narrower gaps provide greater privacy by obstructing views into your yard, making them ideal for backyards or areas requiring more seclusion.
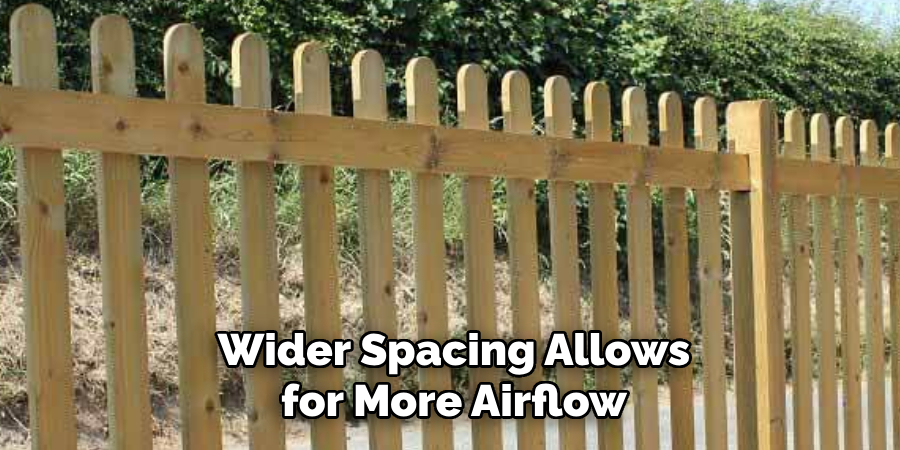
Conversely, wider spacing allows for more airflow and a glimpse of the surroundings, offering a more open and inviting appearance suitable for front yards. When deciding on picket spacing, consider the primary function of your fence. Aesthetic preferences also come into play; tighter spacing offers a sleek, uniform look, while wider gaps can contribute to a rustic charm.
B. Attaching Pickets to Rails
Once you’ve decided on the spacing, the next step is attaching the fence pickets to the rails. Whether you choose screws or nails, selecting the appropriate length to securely fasten the pickets to the rails without protruding on the other side is crucial. Galvanized or stainless steel options are recommended for their resistance to rust and corrosion.
For a more durable hold, screws are often preferred, though they require more time to install. Each picket should be secured at the top and bottom rails using a drill. Pre-drilling holes slightly smaller than the screw’s diameter can prevent the wood from splitting—a common issue that can compromise the fence’s integrity and appearance.
Nails can be faster to install, particularly with a nail gun, but do not offer the same level of grip as screws. If using nails, consider ring-shank or spiral types for better holding power.
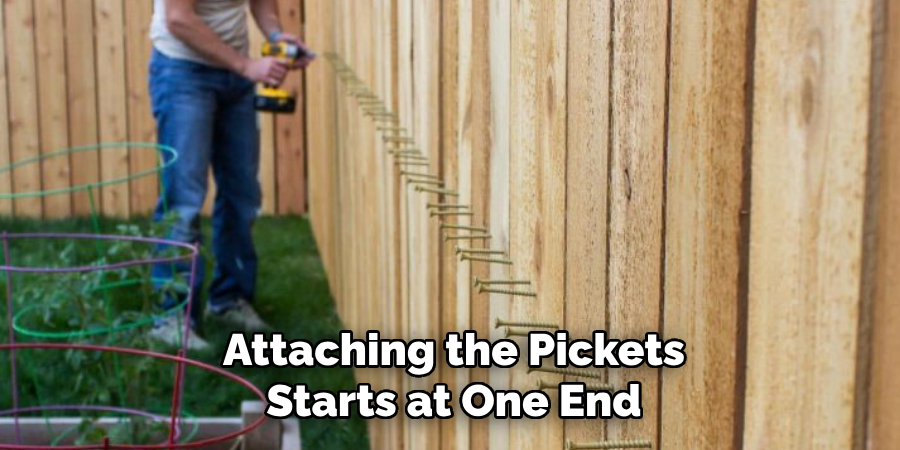
Attaching the pickets starts at one end of the fence, ensuring the first picket is plumb. A spacer or a previously determined measurement can guide the placement of subsequent pickets, maintaining consistent spacing across the fence.
This methodical approach ensures each picket is aligned both vertically and in relation to its neighbors, contributing to a professional overall appearance of your picture frame fence.
Finishing Touches: The Picture Frame Effect
A. Cutting the Trim Boards
To achieve a polished look with your picture frame fence, the next step involves measuring and cutting the trim boards that will frame your fence panels. First, measure the length of each section of your fence where the trim will be applied, ensuring accuracy to avoid gaps.
When cutting the trim boards, use a miter saw for precise cuts and consider the angles at which the boards will meet, especially in corners. A straight cut is used for simple designs, while a 45-degree miter cut will enable the trim boards to meet seamlessly at the corners, enhancing the fence’s aesthetic with a more finished and professional appearance.
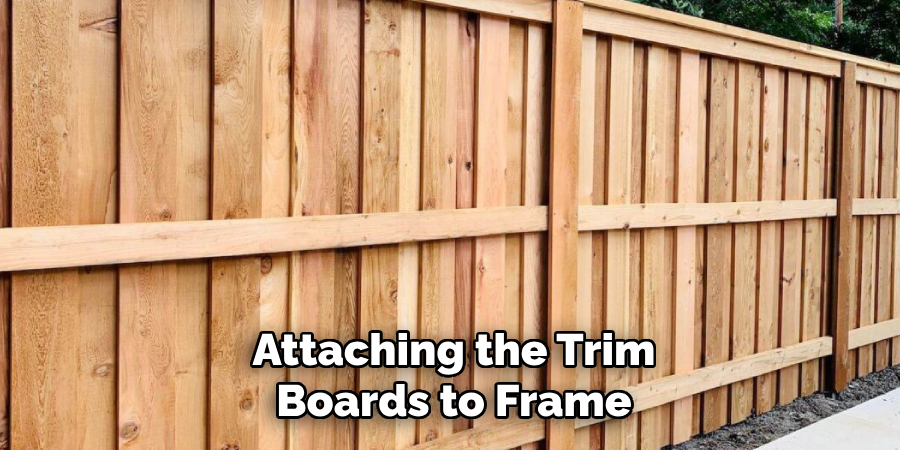
B. Attaching the Picture Frame Trim
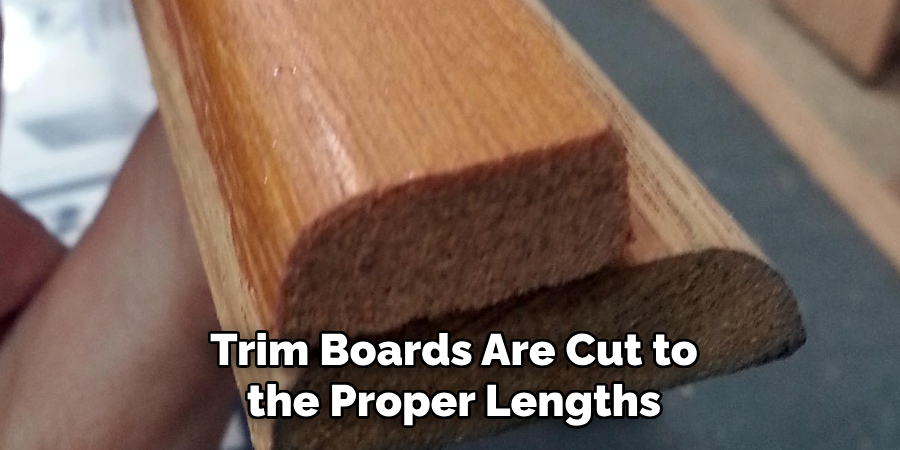
Once the trim boards are cut to the proper lengths and angles, it’s time to attach them to the top and bottom of the fence, encasing the edges of the fence pickets and rails to create the signature “picture frame” effect.
Begin by ensuring that each trim board is aligned correctly and flush against the sides of the fence pickets for a neat finish. It’s vital to use exterior-grade fasteners, such as galvanized or stainless steel screws, for attaching the trim boards. These fasteners resist corrosion and provide a secure hold in outdoor conditions.
When screwing the trim boards into place, aim to evenly space the fasteners for uniformity and to prevent the warping of the wood over time. A drill with a screw bit is the most effective tool for this job, allowing for precise control over the depth and placement of each screw. Ensure each trim board is perfectly level before securing it; this may require adjusting the boards slightly or trimming them further for a perfect fit.
Ensuring proper alignment is crucial, as this step greatly influences the overall visual appeal of the fence. Take the time to double-check the alignment and spacing before fully securing the trim boards, as these finishing touches encapsulate the entire fence within a refined, framed look that elevates its design from simple to sophisticated.
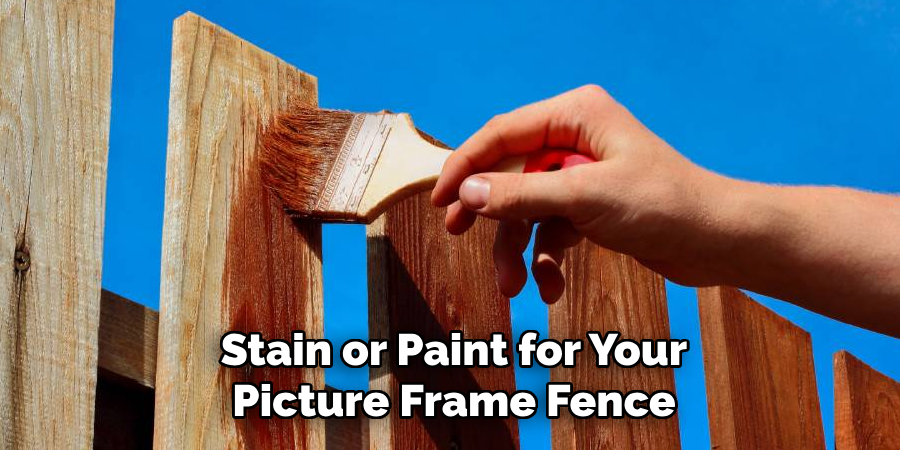
C. Painting or Staining for Protection and Aesthetics
After attaching the trim boards to frame your fence panels, the next step is to protect and enhance the appearance of your fence through painting or staining. Selecting the right type of paint or stain is crucial; opt for products specifically designed for outdoor wood projects to ensure longevity and resistance to weathering.
Before applying paint or stain, make sure the wood is clean and dry. Applying a primer can also enhance the adhesion of paint or the absorption of stain, offering a more uniform finish.
When painting or staining, use a brush, roller, or sprayer, depending on the size of your fence and the level of detail it presents. Brushes work well for trim and small areas, while rollers and sprayers can efficiently cover large sections.
If you choose to stain, remember that it will showcase the wood’s natural grain, while the paint will provide a solid color and potentially longer protection against the elements. Whichever option you select, consider applying multiple coats for the best coverage and protection, allowing adequate drying time between applications as the product manufacturer recommends.
This final step not only prolongs the life of your fence by shielding it from moisture and UV damage but also allows you to personalize your outdoor space with color or natural wood finishes. The choice between painting and staining ultimately depends on your aesthetic preference and maintenance willingness.
Remember, painted surfaces may require more frequent touch-ups, whereas stained wood offers a more natural look with potentially less upkeep. Completing your picture frame fence with a protective layer of paint or stain ensures its durability and enhances its role as a stylish boundary for your property.
Staining and Painting
A. Choosing the Right Stain or Paint
When selecting the ideal stain or paint for your picture frame fence, several factors must be taken into account. The type of wood determines which products will adhere best and last over time, as certain woods are more porous and may require specific types of stain or paint.
Desired color and finish are also crucial decisions; while stains emphasize the natural beauty of the wood grain, paints offer a wider range of colors and styles. Lastly, consider weather resistance; outdoor-specific products provide enhanced protection against moisture, UV rays, and varying temperatures, ensuring the longevity of your fence’s appearance and integrity.
B. Surface Preparation
Proper surface preparation is key to achieving a smooth, durable finish. Begin by sanding the wood to remove any rough spots, debris, and previous coatings, creating a clean and even surface. Ensure the fence is completely dry and free of dust before proceeding to the next step. This ensures maximum adhesion and a professional-looking finish.
C. Application Techniques
For the application of stain or paint, choose the method that best suits your project’s scale and the level of detail required. Brushes are perfect for precision work on trim and edges, while rollers can quickly cover large, flat areas.
Sprayers offer an efficient and even coat for extensive sections but require careful handling to avoid overspray. Regardless of the tool, always follow the manufacturer’s instructions for the best results, applying even layers and allowing sufficient drying time between coats.
Customizing Your Picture Frame Fence
A. Decorative Post Caps
Adding decorative post caps to your picture frame fence can provide a visually appealing finishing touch that not only enhances its aesthetics but also offers additional protection for your fence posts. Available in a variety of materials such as wood, copper, steel, and even glass, these caps can be chosen to match or contrast with the fence itself, depending on the desired look.
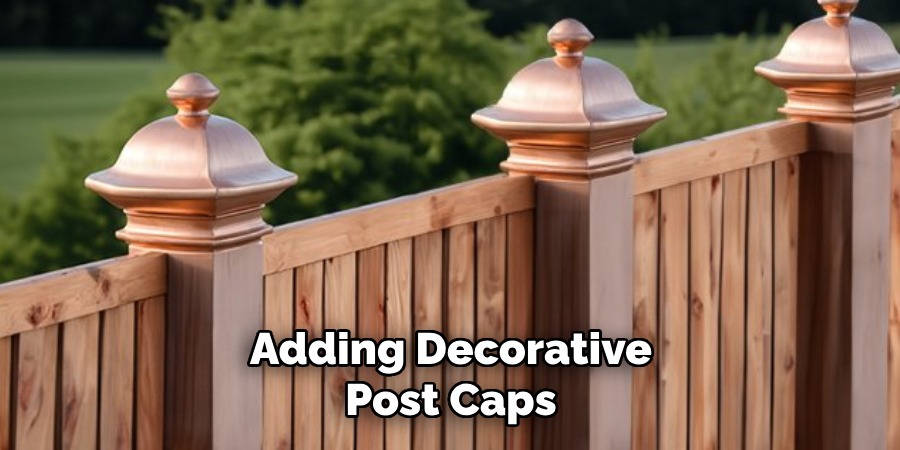
While wood caps can offer a seamless look, metal options like copper provide a striking aesthetic and age gracefully over time, developing a unique patina. Glass or solar-powered caps can introduce lighting elements, adding ambiance and functionality to your outdoor space.
B. Picket Style Variations
Consider experimenting with different picket styles to give your picture frame fence a unique character. Traditional pointed pickets can offer a classic appearance, while rounded tops provide a softer, more modern look. For a more decorative touch, lattice-topped or scalloped pickets can introduce an element of design complexity, making your fence stand out.
The choice of picket style can significantly influence the overall vibe of your property, from elegant and sophisticated to charming and whimsical, allowing you to customize your space according to your personal style and aesthetic preferences.
C. Gate Design and Construction
Integrating a gate into your picture frame fence not only enhances accessibility but also offers an opportunity to further customize your fencing project. Designing a gate that matches the fence structure and materials maintains a cohesive look while incorporating elements from the fence design, such as matching trim or decorative post caps, can unify the entire installation.
Ensure that the gate is constructed with durability in mind, using quality hinges and latches for smooth operation. This thoughtful approach allows the gate to serve as both a practical entry point and an attractive feature that complements the overall design of your picture frame fence.
D. Landscaping Enhancements
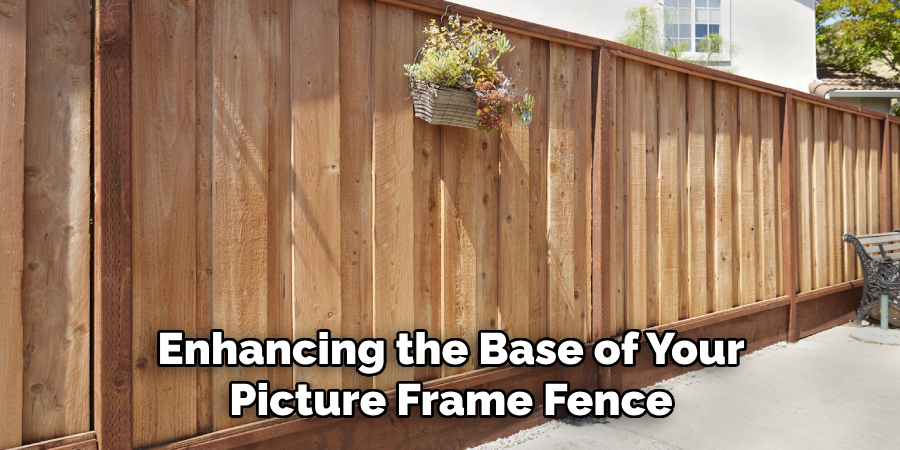
Enhancing the base of your picture frame fence with landscaping elements like plants or flowers can significantly boost its visual appeal. Consider low-maintenance shrubs or perennial flowers for a splash of color that returns year after year. Incorporating climbing plants such as ivy, clematis, or roses can add a vertical dimension to your fence, creating a living wall that evolves with the seasons.
Strategic placement of taller plants or trees can also offer privacy and shade, transforming your fenced area into a more secluded and inviting outdoor sanctuary. These landscaping enhancements embellish your fence, encourage biodiversity, and create a more harmonious integration with the natural environment.
Advanced Techniques and Design Considerations
A. Creating a Scalloped Top
To introduce a scalloped design along the top trim board of your picture frame fence, begin by sketching the desired scallop shape directly onto the wood or onto a template. A consistent design can be ensured by creating a cardboard template, which can be traced onto each section.
Utilize a jigsaw for more intricate curves or a router for smoother, more consistent scallops. When cutting, maintain a steady hand and follow your lines closely. Sand the edges upon completion for a polished finish, enhancing the overall aesthetic appeal of your fence.
B. Double Cap for a More Substantial Look
Adding a double cap layer entails fastening an additional trim board or narrow ledge on top of the primary cap along your fence. This technique not only provides a more substantial and finished appearance but also enhances durability by further shielding the fence structure from the elements.
Choose materials that complement or contrast with the main fence body for added visual interest. Ensure precise alignment and secure fastening to prevent any movement, maintaining a cohesive look across your fence line.
C. Incorporating Latticework Panels
Incorporating pre-built latticework panels into sections of your picture frame fence adds an element of openness while maintaining a degree of privacy. This approach is particularly effective for creating distinct zones within your garden or for allowing light and air to circulate more freely.
To integrate latticework, replace select solid panels with lattice sections, ensuring they fit securely within the existing frame. This not only visually lightens the fence structure but also offers an ideal backdrop for climbing plants, further enhancing the garden’s aesthetic.
D. Custom Trim Styles
Experimenting with different trim board styles, such as rounded or angled edges, allows for further customization of the picture frame effect. Utilize a router to shape the edges of trim boards for a rounded, softer look, or a table saw for creating clean, sharp angles.
These subtle modifications can significantly impact the fence’s overall appearance, enabling a truly unique design. When selecting a trim style, consider the architectural features of your home and garden to achieve a harmonious blend of structure and style.
Maintenance and Upkeep
A. Regular Inspections
It’s crucial to perform regular inspections of your picture frame fence, focusing on identifying loose fasteners, damaged wood, or signs of peeling paint or stain. Early detection of these issues can prevent further damage and ensure the longevity and appearance of your fence.
B. Cleaning
The method for cleaning your fence largely depends on its material. A gentle wood cleaner and soft brush can remove grime from wooden fences without damaging the surface. Metal and vinyl fences may benefit from power washing, though it’s important to use a setting that won’t harm the material.
C. Re-staining or Repainting
To maintain your picture frame fence’s aesthetic appeal and weather resistance, periodically re-staining or repainting is essential. This not only revitalizes the look of your fence but also adds a protective layer against the elements, preserving its integrity and appearance over time.
Conclusion
Throughout this guide, we’ve explored the essentials of how to build a picture frame fence, from planning and design to construction and maintenance. By integrating personalized gate designs, custom trim styles, and landscaping enhancements, homeowners can create a fence that is not only functional but also aesthetically pleasing.
The process of crafting a picture frame fence offers the satisfaction of creating a unique and attractive addition to your property, enhancing both its value and charm.
For those looking to undertake this rewarding project, remember that success lies in careful planning, quality materials, and attention to detail. Regular maintenance and inspections ensure your fence stands the test of time and maintains its beauty and functionality.
A plethora of resources are available online for additional information or inspiration on how to build a picture frame fence. Websites like Pinterest and Houzz offer creative ideas and visual inspiration, while DIY channels on YouTube provide step-by-step tutorials that cover everything from basic techniques to advanced customizations.
With these resources at your fingertips, the dream of building your own picture frame fence is well within reach, allowing you to transform your outdoor space into a meticulously designed personal sanctuary.