
A well-organized mudroom can greatly enhance the functionality and aesthetic of your home, serving as a transition space for the entire family. One of the best ways to keep this space tidy and efficient is by installing mudroom lockers. These lockers provide a dedicated spot for storing shoes, coats, backpacks, and other daily essentials. In this blog post we will show you how to build mudroom lockers so that it functions properly. Read on to learn more about which components and tools are needed for the job as well as detailed instructions on completing the task!
What Are Mudroom Lockers?
Mudroom lockers are a practical and stylish solution for organizing busy entryways or transition spaces in a home. They are essentially built-in storage units designed to store and organize belongings like coats, shoes, bags, and other everyday essentials. These lockers often include features such as hooks for hanging items, cubbies or shelves for smaller accessories, and benches that double as seating and additional storage space. Mudroom lockers help reduce clutter and keep the area neat while offering a designated spot for each family member’s items, making it easier to grab essentials and go. Their functional design not only enhances the efficiency of your space but can also add to the overall aesthetic of your home.
Why Build Mudroom Lockers
Building mudroom lockers can significantly improve the organization and functionality of your home. They provide a practical solution for managing the daily inflow and outflow of items such as shoes, coats, bags, and sports equipment, helping to contain clutter in one designated space. By creating a specific storage spot for each family member, mudroom lockers encourage tidiness and streamline routines, particularly during busy mornings. Additionally, they protect your flooring by keeping dirt, mud, and moisture confined to a single area, reducing wear and tear on other parts of your home. Beyond their functional advantages, mudroom lockers can be customized to match your home’s aesthetic, adding a personalized and stylish touch to your entryway.
10 Methods How to Build Mudroom Lockers
1. Plan and Design the Mudroom Lockers
Before beginning construction, it is essential to have a clear plan and design for your mudroom lockers. Consider the size of your space, the number of lockers needed, and the types of items that will be stored.
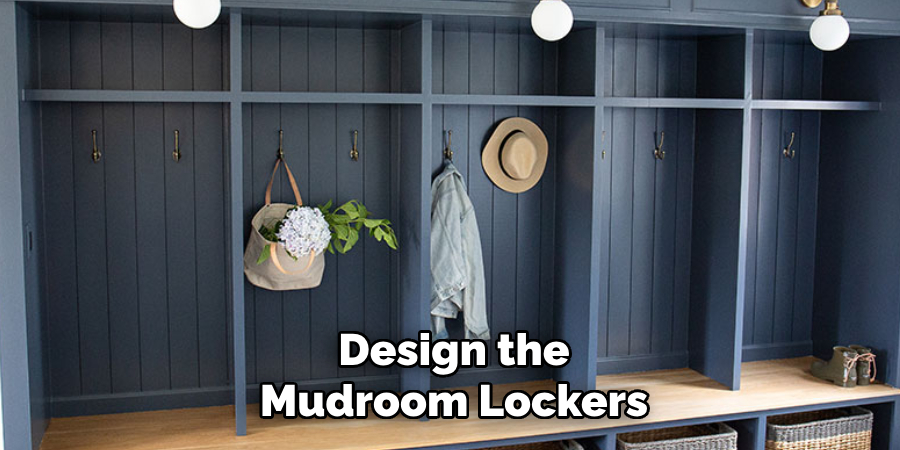
A typical design includes individual cubby spaces for each family member, hooks for coats and bags, and lower compartments for shoes or boots. Sketch your design, taking into account the available space, the height and width of each locker, and whether you want a built-in or freestanding unit. The design process is crucial to ensure you maximize the available space and create lockers that meet your specific needs.
2. Measure the Space and Gather Materials
Once you’ve settled on a design, measure the space where the lockers will be installed to ensure that the dimensions match the area. Accurate measurements will prevent the lockers from being too big or too small. Next, gather all necessary materials. You will need plywood, MDF boards, screws, nails, wood glue, wood finish or paint, a saw, a drill, a tape measure, and a level. If you plan to install hooks or cubby dividers, you’ll need additional materials such as dowels or pre-made dividers. Selecting high-quality materials ensures that the lockers are durable and will last for years.
3. Build the Framework
The first step in constructing the lockers is to build the basic framework. Start by cutting the plywood or MDF sheets to the desired dimensions for the sides, top, bottom, and back of the lockers. The frame should be sturdy enough to support the weight of items placed in the lockers. Using wood screws and wood glue, attach the pieces to form the frame, ensuring that each corner is square and the structure is level. If you’re making multiple lockers, consider adding vertical dividers within the framework to separate each cubby. Once the framework is complete, check for stability and square alignment before proceeding.
4. Add the Back Panel
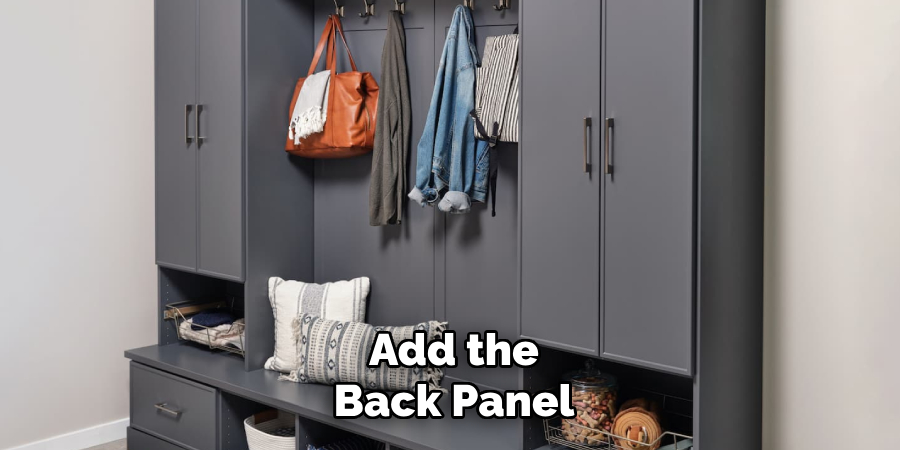
To provide additional stability and a finished look, attach a back panel to the frame of the lockers. Measure the back opening and cut a plywood or MDF sheet to fit. Secure the back panel with screws or nails, ensuring that it is flush with the sides and top of the frame. The back panel will not only help to hold the structure together but also give the lockers a more polished appearance. If the lockers will be placed against a wall, you may opt to skip this step, as the wall itself will serve as the back support.
5. Install the Dividers and Shelves
Once the framework and back panel are secure, it’s time to add the internal dividers and shelves. For each locker, install horizontal dividers to create cubbies. These dividers can be made from plywood or MDF, and they should be spaced to allow for the storage of coats, shoes, and other items.
You can make the cubbies as tall or short as you prefer, depending on the items that will be stored. Secure each divider with wood screws or nails, ensuring they are level and evenly spaced. If you’d like to add shelves inside each cubby for additional storage, install them after the dividers are in place. Shelves should be secured with brackets or screws to ensure they can support the weight of the items.
6. Install Hooks or Pegs
Hooks or pegs are essential for storing coats, bags, hats, or other hanging items. Decide where you want to place the hooks—typically, one row of hooks is placed at a height that accommodates coats and jackets, and another row can be positioned lower for children’s gear.
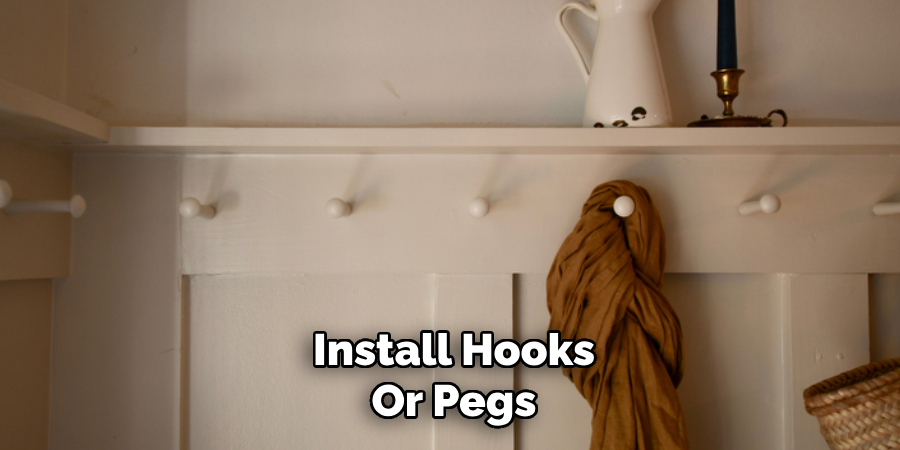
Measure and mark where you want each hook to be installed, ensuring they are spaced evenly. Using a drill, attach the hooks or pegs to the front of the locker frame. Make sure the hooks are securely fastened to avoid them coming loose with use. This will provide a functional and accessible space for hanging items.
7. Add the Bench for Sitting or Shoe Storage
Many mudroom locker systems include a bench at the bottom for sitting while putting on shoes or for additional storage. To build the bench, measure and cut a piece of plywood or MDF for the seat, ensuring it fits within the frame of the lockers. The bench can be made with a simple flat seat or with added storage space underneath. If you’re building storage into the bench, install a set of horizontal dividers or baskets underneath the seat for shoes or other items. Secure the bench to the locker frame using screws or brackets, ensuring it is sturdy and stable. The bench adds a practical element to the mudroom lockers, providing both seating and storage.
8. Sand and Finish the Lockers
After the structure is complete, it’s time to sand and finish the lockers. Use a power sander or sanding block to smooth any rough edges, corners, and surfaces. Sanding will also help to create a more polished, professional appearance. Once the lockers are smooth, apply your desired finish—whether it’s paint, stain, or a clear wood finish.
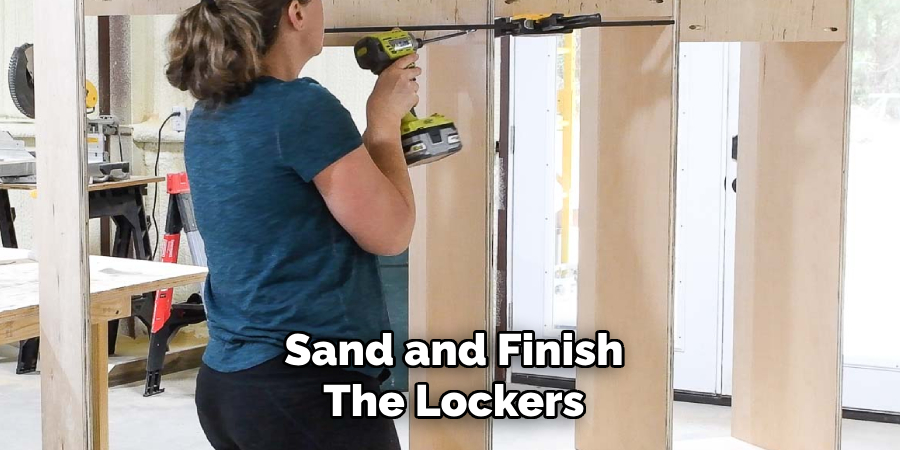
Paint or stain the lockers in a color that complements your mudroom or home décor. Applying a protective clear finish will help the lockers resist damage from moisture and wear over time. Allow the finish to dry thoroughly before moving on to the next step.
9. Install the Lockers in the Mudroom
Once the lockers are finished and the paint or stain has dried, it’s time to install them in your mudroom. If the lockers are freestanding, simply place them in the desired location. For built-in lockers, secure the frame to the wall with screws or brackets. Use a level to ensure the lockers are aligned properly and are not tilting. If you have multiple lockers, make sure they are positioned evenly and securely. For added stability, especially if the lockers will be used frequently, consider anchoring them to the wall with additional brackets or screws.
10. Add Final Touches and Personalization
The final step in building mudroom lockers is to add finishing touches and personalize the space. You can add labels or nameplates to each locker to help family members keep their items organized. Decorative elements, such as cushions on the bench or hooks in unique shapes, can add personality to the space. Additionally, consider adding a mat or rug in front of the lockers to catch dirt and debris from shoes. If you have children, adding lower hooks or cubbies for their smaller items can help keep the space organized and functional. Personalizing the lockers makes them not only a practical addition but also a stylish part of your home.
Conclusion
Building mudroom lockers is an enjoyable and rewarding project that can transform your entryway or hallway into a more organized and functional space. By carefully planning the design, gathering the right materials, and following the steps outlined above, you can create a durable and attractive locker system that meets the needs of your family. Whether you choose to add hooks, benches, or additional shelves, the end result will be a custom storage solution that enhances the functionality and aesthetics of your mudroom. Thanks for reading, and we hope this has given you some inspiration on how to build mudroom lockers!