

Are you considering canceling your medical alert service because you feel it’s no longer necessary in your life? Canceling a medical alert service may seem overwhelming, but we’re here to help. In this blog post on how to cancel medical alert, we’ll walk through the process of canceling your medical alert subscription and provide tips for avoiding common pitfalls that could lead to unwanted fees or contract obligations.
Whether you’re canceling due to changing health needs or financial reasons, we’ve got the information and advice needed to make the transition as smooth as possible. So don’t delay – read on now and discover how easy it is to cancel your medical alert!
Needed Materials
Before you begin the cancellation process, it’s important to have the following materials on hand:
- Your Medical Alert Account Information (E.g. Account Number, Username, Password)
- Contact Information for Your Medical Alert Provider (E.g. Phone Number, Email Address)
- Any Relevant Documents or Contracts Related to Your Medical Alert Service
Having these materials readily available will make the cancellation process much easier and prevent any delays or confusion along the way.
11 Step-by-step Guidelines on How to Cancel Medical Alert
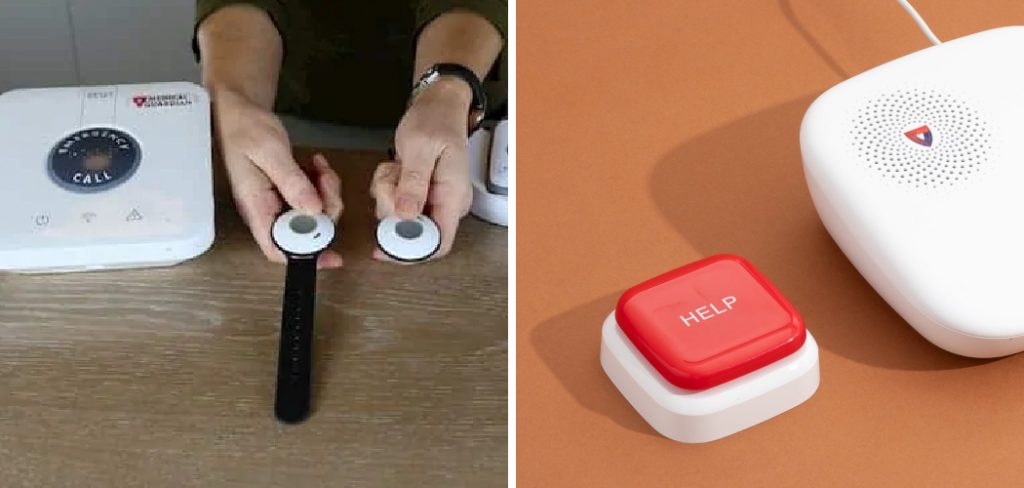
Step 1: Determine the Type of Medical Alert Service
Before canceling your medical alert, it’s essential to know what type of service you have. Are you paying for a monthly subscription or a yearly contract? Is your equipment leased or purchased? Knowing these details will help determine the steps needed to cancel and any potential fees involved. You can find this information on your billing statements or by contacting the service provider directly.
Step 2: Review Your Service Agreement
Your medical alert service agreement outlines the terms and conditions of canceling your subscription. It’s essential to review this agreement carefully, paying attention to any clauses related to termination fees or required notice periods.
Some providers may require a written notice of cancellation, so be sure to follow their guidelines. It’s also good to check if your service agreement has an automatic renewal clause, which may require you to take specific action to prevent being charged for another year of service.
Step 3: Consider Your Options
If you’re considering canceling due to financial reasons, it’s worth contacting your medical alert service provider to see if they offer any reduced pricing or discounts. They may also have different payment plans available that could help ease the burden of monthly payments.
If you’re canceling due to changing health needs, consider upgrading your service to a more advanced system instead of entirely canceling. This way, you’ll still have access to the necessary support and care in case of emergencies.
Step 4: Contact Your Medical Alert Service Provider
Once you’ve gathered all the necessary information and reviewed your options, it’s time to contact your medical alert service provider directly. Be prepared to provide them with your account details and a reason for canceling.
They may also ask for feedback on their services, so be honest about your experience and any issues you may have encountered. This information can help them improve their services for future customers. But if you’re canceling due to financial reasons, it’s essential to remain firm and not be swayed by any offers or discounts.
Step 5: Follow Cancellation Procedures
Depending on your service provider, there may be specific procedures to follow when canceling your subscription. These could include filling out a cancellation form, returning equipment, or providing written notice. Make sure to follow these procedures carefully to avoid any potential fees or issues with canceling. Otherwise, you may find yourself still being charged for the service even after requesting to cancel.
Step 6: Return Equipment
If your medical alert service included leased equipment, you’ll need to return it after canceling. Be sure to follow any instructions provided by your service provider for returning the equipment safely and on time. Failure to do so could result in additional charges. You may also need to provide proof of return, such as a tracking number, to avoid any disputes. It’s also a good idea to take photos of the equipment before returning it, so you have evidence in case of any damage.
Step 7: Cancel Automatic Payments
If you were paying for your medical alert service through automatic payments, make sure to cancel them after the cancellation is complete. This step will prevent any unexpected charges in the future and help you stay on track with your budget. You can usually cancel automatic payments through your bank or credit card provider’s online portal or by contacting them directly. But remember to only cancel after the cancellation process with your medical alert service provider is complete.
Step 8: Check for Refunds
If you paid for your medical alert service in advance, such as a yearly subscription, you may be entitled to a refund for the unused months. Make sure to check with your service provider about their refund policy and how to request a refund if applicable. Otherwise, you may be able to use the credit towards a new service or equipment if needed. But make sure to clarify this with your provider before assuming.
Step 9: Confirm Cancellation
After following all the steps above, it’s essential to confirm that your medical alert subscription has been successfully canceled. This confirmation can serve as proof in case of any misunderstandings or disputes in the future. Keep all records related to your cancellation in a safe place for future reference. You can also request a written confirmation from your service provider for extra peace of mind.
Step 10: Return Any Unused Supplies
If you have any unused supplies, such as batteries or wristbands, make sure to return them to your service provider. This step will help you avoid additional charges and ensure that the equipment can be reused for other customers if needed. You may also be able to donate these supplies to a charity or organization in need.
Step 11: Consider Alternative Options
If you’re canceling your medical alert service due to changing health needs, it’s essential to consider alternative options for emergency care. These could include personal emergency response systems, in-home monitoring devices, or home healthcare services. It’s crucial to research and compare different options to find the best fit for your needs and budget.
Following these step-by-step guidelines on how to cancel medical alert can help ensure a smooth and hassle-free cancellation of your medical alert service. Remember to plan ahead, follow procedures carefully, and keep all records for future reference. As always, prioritize your health and safety above all else. So if you ever need to reactivate your medical alert service or explore other options, it’s always better to be prepared.
Things to Keep in Mind When Canceling Your Medical Alert Service
- Gather All Necessary Information, Such as Account Details and Equipment Status.
- Review Your Service Agreement for Any Potential Fees or Notice Periods.
- Consider Alternative Options Before Canceling Entirely.
- Contact Your Service Provider Directly to Initiate the Cancellation Process.
- Follow All Procedures Carefully to Avoid Additional Charges or Issues With Cancellation.
- Cancel Automatic Payments and Check for Refunds if Applicable.
- Keep Records of Your Cancellation Confirmation and Any Communications With Your Service Provider.
- Return Leased Equipment Safely and On Time.
- Consider Donating Unused Supplies to a Charity or Organization in Need.
- Remember to Prioritize Your Health and Safety Above All Else. The process of canceling your medical alert service may seem daunting, but by following these steps and keeping these points in mind, you can successfully navigate through it. Always make sure to prioritize your health needs and explore different options before making a final decision. Stay informed and take care of yourself always. Thank you for reading! Keep safe! See you again soon!
Frequently Asked Questions
Q1: Can I Cancel My Medical Alert Service at Any Time?
A1: Most medical alert service providers allow you to cancel your subscription at any time, but it’s essential to review your service agreement for any notice periods or fees that may apply.
Q2: Do I Need to Return the Equipment?
A2: If your medical alert service includes leased equipment, you’ll need to return it after canceling. Be sure to follow any instructions provided by your service provider for returning the equipment safely and on time.
Q3: How Can I Cancel Automatic Payments?
A3: You can usually cancel automatic payments through your bank or credit card provider’s online portal or by contacting them directly. Make sure to do this after the cancellation process is complete.
Q4: Will I Get a Refund for Unused Months?
A4: If you paid for your medical alert service in advance, such as a yearly subscription, you may be entitled to a refund for the unused months. Make sure to check with your service provider about their refund policy and how to request a refund if applicable.
Conclusion
Canceling a medical alert subscription is essential to maintaining a cost-effective healthcare lifestyle and staying focused on what matters most – your health. With the provided steps, you can now move forward knowing that you have taken the necessary steps to cancel your service and free up funds for other aspects of health expenses.
You Can Check It Out To Set Time on Guardian Alarm System
About
Safety Fic is a distinguished figure in the world of Diy design, with a decade of expertise creating innovative and sustainable Diy solutions. His professional focus lies in merging traditional craftsmanship with modern manufacturing techniques, fostering designs that are both practical and environmentally conscious. As the author of diy, Safety Fic delves into the art and science of Safety Fic-making, inspiring artisans and industry professionals alike.
Education RMIT University
(Melbourne, Australia) Associate Degree in Design (Safety Fic) Focus on sustainable design, industry-driven projects, and practical craftsmanship. Gained hands-on experience with traditional and digital manufacturing tools, such as CAD and CNC software.
Nottingham Trent University
(United Kingdom) Bachelor’s in diyfastly.com and Product Design (Honors) Specialized in product design with a focus on blending creativity with production techniques. Participated in industry projects, working with companies like John Lewis and Vitsoe to gain real-world insights.
Publications and Impact
In diy, Safety Fic his insights on indoor design processes, materials, and strategies for efficient production. His writing bridges the gap between artisan knowledge and modern industry needs, making it a must-read for both budding designers and seasoned professionals.