

Carbon monoxide (CO) detectors are critical safety devices designed to alert homeowners to the presence of CO gas, a colorless, odorless, and potentially lethal substance produced by burning fuels. These devices play an indispensable role in preventing CO poisoning, ensuring the health and safety of individuals within their homes.
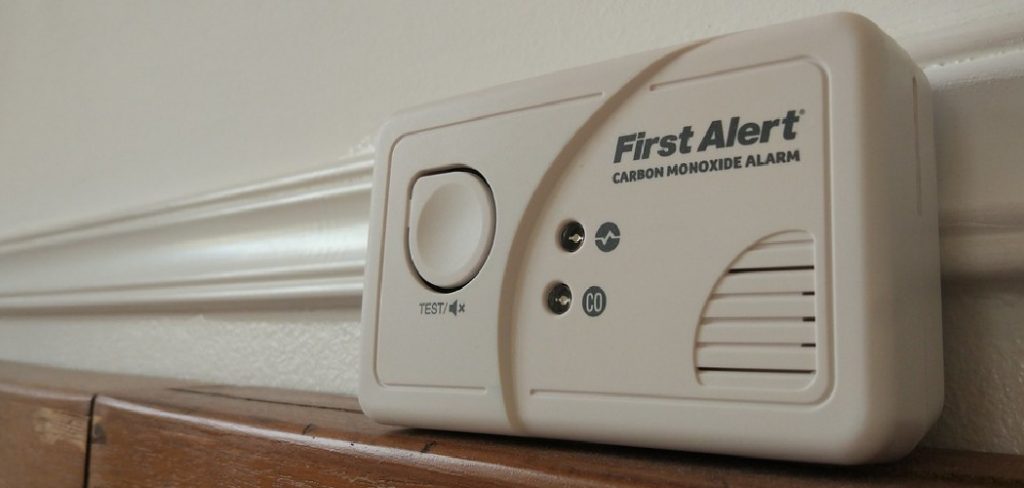
Understanding how to change battery in carbon monoxide detector is essential, as a functioning CO detector directly impacts its ability to alert residents to the dangers of carbon monoxide exposure. A depleted or malfunctioning battery can compromise the detector’s functionality, leaving households vulnerable to undetected CO levels.
Therefore, learning the procedure for battery replacement not only extends the life of the detector but also maintains a critical layer of safety within the home environment. This guide aims to provide homeowners with the knowledge necessary to keep their carbon monoxide detectors in optimal working condition through regular battery maintenance.
Types of Carbon Monoxide Detectors
Carbon monoxide detectors are essential in ensuring the safety and well-being of individuals in environments where combustion sources are present.
These detectors vary in their design, power source, and additional features, catering to different preferences and requirements. Understanding the types available is crucial for selecting the most suitable one for your home.
A. Battery-Powered Detectors
Battery-powered carbon monoxide detectors are praised for their portability and ease of installation. They do not require any wiring and can be placed anywhere in the home, making them ideal for renters or those wishing for a straightforward setup.
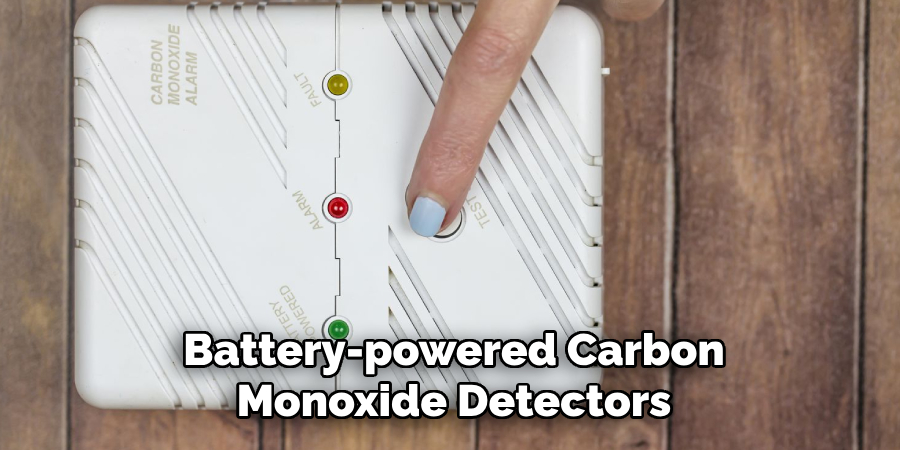
These detectors rely solely on batteries, which necessitate a regular check-up and replacement to ensure continuous protection.
B. Hardwired Detectors with Battery Backup
Hardwired carbon monoxide detectors are connected directly to the home’s electrical system, providing a constant power supply.
They often come with a battery backup to ensure functionality during power outages, combining reliability with peace of mind. Installation may require professional help or a knowledgeable DIY homeowner comfortable with electrical work.
C. Combination Smoke and CO Detectors
Combination detectors offer dual functionality, monitoring for both smoke and carbon monoxide. This integration simplifies installation and maintenance while providing comprehensive safety coverage.
Available in both battery-powered and hardwired models, these detectors are an efficient choice for homeowners looking to minimize the number of devices installed while maximizing protection against common household threats.
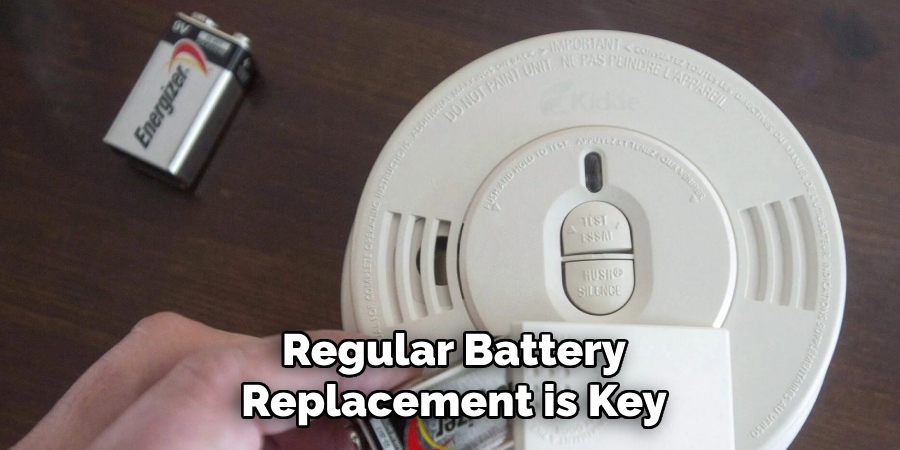
Regularly replacing the battery in your carbon monoxide detector is crucial for several reasons: ensuring that the device operates continuously, prevents false alarms, and ultimately maintains the safety of your home environment.
Importance of Changing the Battery
Changing the battery in your carbon monoxide detector is not just a maintenance task; it’s a critical safety measure that protects against the invisible dangers of CO gas. Regular battery replacement is key to ensuring that your carbon monoxide detector functions properly at all times, providing reliable protection for you and your family.
A. Ensuring Continuous Operation
One of the primary reasons for regular battery replacement is to ensure the continuous operation of the carbon monoxide detector. A detector with a dead or weak battery may fail to operate, leaving the household unprotected against CO exposure.
Continuous operation means that the device is always ready to detect CO levels, alerting residents before the gas reaches a dangerous concentration. Keeping the battery fresh ensures that this critical line of defense against carbon monoxide poisoning is always active.
B. Preventing False Alarms
A low battery in a carbon monoxide detector can often lead to false alarms, which can cause unnecessary panic and reduce trust in the device’s reliability. False alarms can also desensitize residents to the sound of the alarm, potentially leading to a dangerous situation if a real threat is ignored.
By replacing the battery regularly, homeowners can minimize the occurrence of such false alarms, ensuring that every alert is taken seriously.
C. Maintaining Home Safety
Ultimately, changing the battery in your carbon monoxide detector is essential for maintaining the safety of your home. A functioning detector acts as an early warning system, providing the opportunity to evacuate the premises and seek help before CO levels become life-threatening.
This simple act of maintenance supports a safe environment, giving residents peace of mind that their home is protected against one of the most common yet preventable household hazards.
Safety Precautions
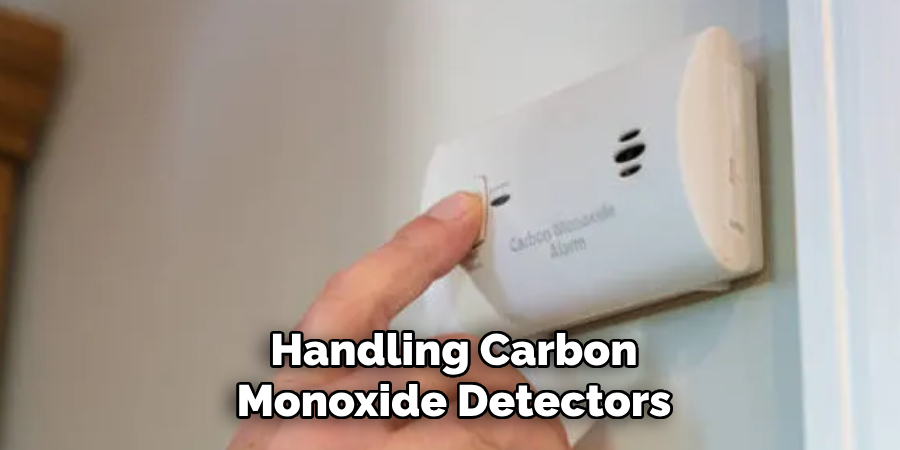
Adhering to safety precautions is paramount when handling carbon monoxide detectors and their batteries to prevent accidents and ensure the device’s optimal function. Handling these devices might seem straightforward, but taking the appropriate measures can avoid potential harm and maximize the effectiveness of your CO detector.
Importance of Safety Precautions
Safety precautions are essential when handling CO detectors and batteries to protect individuals from electrical hazards or potential damage to the device that could impair its functionality.
Since CO detectors play a critical role in home safety, ensuring their proper handling and maintenance is non-negotiable. These precautions extend the life of the device and guarantee accurate CO level monitoring.
Guidelines for Safe Battery Replacement Procedures
- Consult the User Manual: Always start by reading the manufacturer’s guide. Different models may have specific instructions or recommendations for battery replacement.
- Turn Off the Device: If possible, power down the detector before attempting to replace the battery to avoid any electrical mishaps.
- Use the Correct Battery Type: Ensure the replacement battery matches the type specified by the manufacturer to avoid damaging the detector.
- Wear Protective Gear: When handling the old battery or installing a new one, consider wearing protective gloves to prevent any potential skin irritation from battery leakage.
- Dispose of Old Batteries Properly: Don’t throw old batteries in the trash. Look for local recycling programs or facilities that accept used batteries.
- Test the Detector After Replacement: Always perform a test to ensure the detector is functioning correctly with the new battery. This can usually be done by pressing the test button on the device.
By following these safety precautions and guidelines, homeowners can safely and efficiently replace the batteries in their carbon monoxide detectors, maintaining an essential layer of protection against potential CO hazards in the home.
Assessing the Detector Type and Model
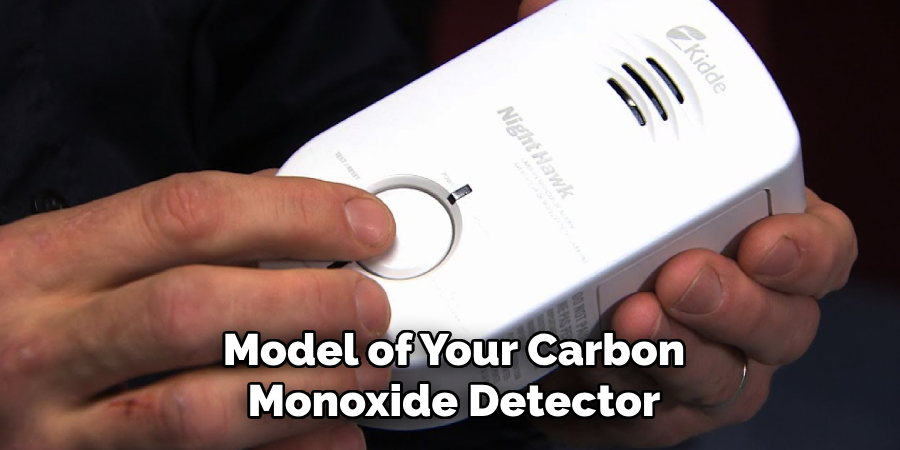
Assessing and understanding the type and model of your carbon monoxide detector is a fundamental step toward efficient maintenance and battery replacement. This knowledge ensures that you can find and follow specific instructions for your device, use the correct battery type, and handle the device safely.
A. Identifying the Brand and Model Number
The brand and model number of your CO detector are usually found on the back of the device or inside the battery compartment. Identifying this information is crucial as it allows you to seek out precise instructions and recommendations from the manufacturer. It also aids in purchasing the correct batteries and replacement parts if necessary.
B. Checking the Manufacturer’s Instructions
Once you have the brand and model number, consult the manufacturer’s instructions for your specific detector. These instructions often contain vital information on battery types, replacement schedules, and troubleshooting tips.
They may be found in the packaging, on the manufacturer’s website, or by contacting their customer service directly.
C. Understanding the Battery Compartment Location
Familiarizing yourself with the location of the battery compartment is essential for safe and efficient battery replacement. Most models have the compartment on the back side of the detector, but its exact position can vary.
Knowing where this compartment is located and how to safely access it can significantly streamline the battery replacement process and ensure that the device continues to operate effectively.
Removing the Old Battery
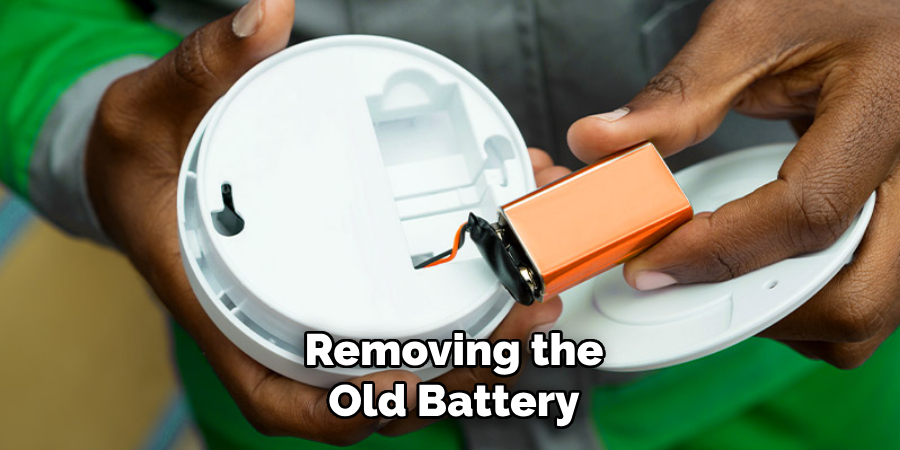
Once you’ve assessed the detector type and are familiar with the battery compartment’s location, removing the old battery is the next crucial step in ensuring your carbon monoxide detector functions correctly. While this process is generally straightforward, it should be approached with care and attention to detail.
A. Accessing the Battery Compartment
The first step in removing the old battery is to access the battery compartment. This is typically found on the back of the detector or inside a panel, which may require sliding or flipping the detector from its mounted position.
Ensure that the device is turned off or removed from its power source to prevent any electrical mishaps. Extra caution should be taken to avoid electric shock when dealing with a hardwired model.
B. Removing the Cover or Front Panel
After locating the battery compartment, carefully remove the cover or front panel. This often involves sliding the cover off, pressing a tab to release it, or unscrewing it if it’s secured with screws. Make sure to handle the cover gently to avoid breaking any tabs or locking mechanisms. Keeping the cover intact is vital for securing the battery once a new one is placed.
C. Extracting the Old Battery
With the compartment now open, gently remove the old battery. In some cases, the battery might be snugly fitted, requiring you to gently pull or pry it out, possibly with the aid of a small tool like a screwdriver. However, be careful not to use excessive force or a metal object that could cause a short circuit. Take note of the battery’s orientation before removal to ensure the new battery is inserted correctly.
Before proceeding to install the new battery, inspect the compartment for any signs of damage, such as corrosion or debris, that could affect the detector’s performance. Cleaning the compartment with a dry cloth may be necessary before installing the new battery.
How to Change Battery in Carbon Monoxide Detector: Choosing the Right Replacement Battery
Selecting the appropriate replacement battery for your carbon monoxide detector is crucial not only for ensuring the continuous operation of the device but also for maintaining the safety and security of your home. The process involves several steps, each aimed at making an informed decision.
A. Determining Battery Type and Size
The first step in choosing a replacement battery is to determine the correct type and size. This information is usually provided in the manufacturer’s instructions or can be found on the battery compartment.

It’s imperative to match the type (e.g., alkaline, lithium) and size (e.g., AA, AAA, 9V) precisely because using the wrong battery can lead to device malfunctions or damage. Additionally, the wrong battery size or type could potentially void any warranty or insurance claims if a malfunction were to occur.
B. Considering Battery Lifespan and Performance
Battery lifespan and performance are also critical factors to consider. Carbon monoxide detectors are designed to be always on, which can drain batteries more quickly than other household items.
Consequently, selecting batteries with a longer lifespan can reduce the frequency of replacements, which is especially important in devices that are hard to access or require complex steps to change the battery.
Furthermore, performance can vary significantly between brands and types, with lithium batteries often providing a longer and more reliable power supply compared to alkaline batteries in many cases.
C. Selecting High-Quality Batteries for Reliability
Ultimately, investing in high-quality batteries from reputable manufacturers can guarantee reliability. While generic or off-brand batteries may be cheaper, they often offer reduced performance and lifespan, which could compromise the effectiveness of your carbon monoxide detector.
Selecting batteries designed for high-drain devices or those specifically recommended by the detector’s manufacturer can ensure that your device functions correctly around the clock. Remember, the reliability of your carbon monoxide detector could be life-saving, and ensuring it has a dependable power source is a vital component of your home safety strategy.
How to Change Battery in Carbon Monoxide Detector: Installing the New Battery

With the correct replacement battery in hand, proceeding with its installation is the next vital step. This phase is critical for your carbon monoxide detector’s continued operation and reliability.
A. Inserting the New Battery Correctly into the Battery Compartment
Begin by carefully positioning the new battery into the compartment, ensuring its orientation matches the indications for positive (+) and negative (-) terminals, as noted before removing the old battery. This correct alignment is crucial for the device’s operation.
For detectors requiring more than one battery, replace all batteries at the same time, even if not all seem depleted. This ensures consistent performance and avoids partial battery failure, which can be misleading or result in false safety assurances.
B. Replacing the Cover or Front Panel
Once the new battery is securely in place, it’s time to replace the cover or front panel of the battery compartment. Gently align the cover with any guides or notches and press it back into position until it clicks or fits snugly, indicating that it’s securely closed.
If your model used screws to secure the cover, replace and tighten them without over-tightening to avoid damaging the screw or compartment.
Ensure that the compartment is sealed properly to prevent dust or moisture from entering, which could affect the detector’s functionality.
After the compartment is closed, it is advisable to test the detector according to the manufacturer’s instructions to ensure it is operating correctly with the new battery installed. This simple step can offer peace of mind, knowing a fully functioning carbon monoxide detector protects your household.
Testing the Detector
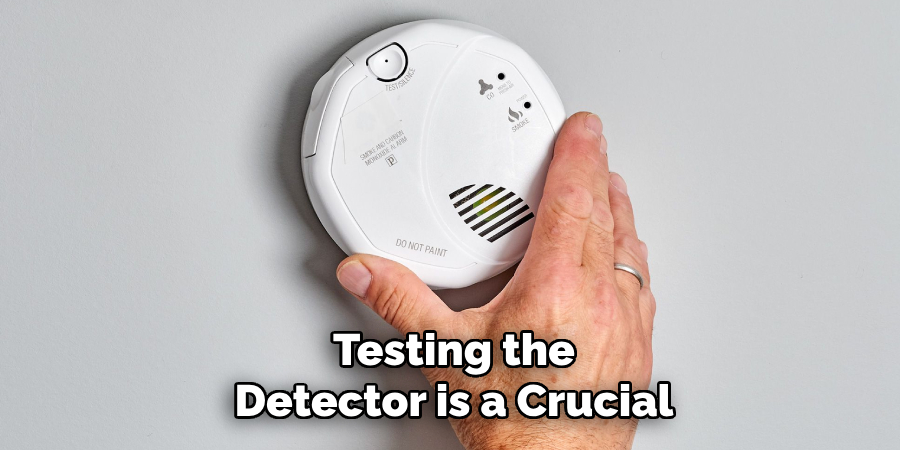
Once the new battery is installed, testing the detector is a crucial final step to confirm its proper function and ensure your safety. This procedure verifies that the detector is operational and that the alarm system is effective in alerting you to dangerous carbon monoxide levels.
A. Activating the Test Button
Most carbon monoxide detectors are equipped with a test button specifically designed for this purpose. Locate the test button on the device; it’s typically marked clearly. Press and hold the button for a few seconds until the alarm sounds.
This sound indicates that the internal circuitry is functioning as expected and that the alarm mechanism is operational. If the detector does not respond to this test, ensure the battery is correctly installed and try again. If the detector still fails to respond, it may require professional inspection or replacement.
B. Checking for Proper Functionality and Alarm Sound
Upon pressing the test button, listen carefully to the alarm sound. It should be loud and clear, indicating that the detector will be able to alert you effectively in case of an actual carbon monoxide leak.
The quality of the alarm sound can decline over time, so it’s essential to ensure it remains at an adequate volume and clarity to provide timely warnings.
C. Performing Regular Testing Procedures
Regular testing is integral to maintaining the effectiveness of your carbon monoxide detector. It’s recommended to test the detector every month to ensure its functionality.
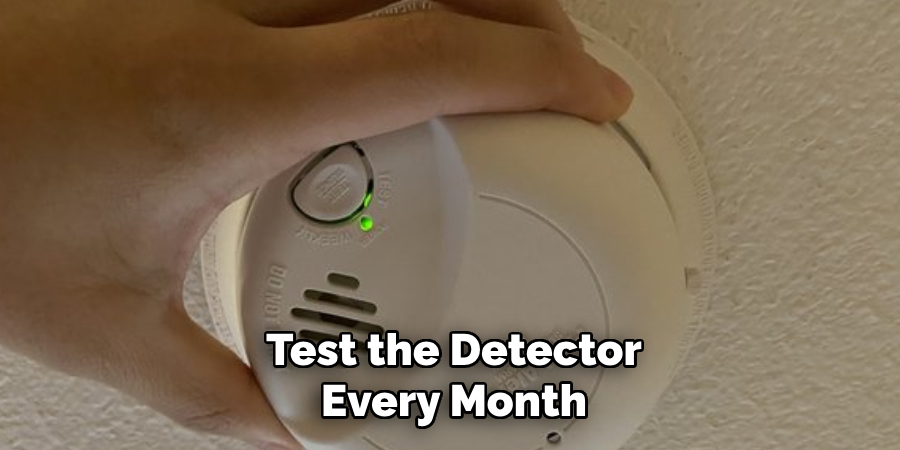
Additionally, consider performing a test after replacing the batteries or after any significant events that could impact the detector, such as moving the device to a new location. Regular testing, alongside annual professional inspections if applicable, ensures that the detector continues to provide reliable protection against carbon monoxide poisoning.
Cleaning and Maintenance
Ensuring your carbon monoxide detector is clean and well-maintained is crucial for its accurate functioning and longevity. Regular cleaning can prevent false alarms and ensure the detector accurately senses carbon monoxide levels in your home.
A. Removing Dust and Debris from Sensors
Dust and debris can accumulate on the sensor of the carbon monoxide detector over time, potentially hindering its sensitivity to carbon monoxide. To clean the sensor, first, ensure the device is turned off or removed from its power source.
Use a soft brush or a can of compressed air to gently remove dust from around the sensor and any vents or openings on the device. Avoid using water, cleaners, or solvents, as these can damage the sensor.
B. Inspecting for Signs of Wear or Damage
During each cleaning session, it’s important to inspect your carbon monoxide detector for any signs of wear or damage. Look for cracks, loose parts, or any other physical damage that could affect its performance.
Ensure that the device’s vents or openings are not obstructed by furniture, curtains, or other objects that could impede airflow. If any damage is detected, it may be necessary to replace the device to ensure continued protection.
C. Regular Testing and Calibration
In addition to monthly testing, as previously discussed, some carbon monoxide detectors may require periodic calibration to ensure accurate readings. Refer to the manufacturer’s guidelines for specific recommendations on calibration. This process often involves exposing the detector to a known concentration of carbon monoxide to verify its response.
If your device requires professional calibration, contact a qualified technician to perform this service. Remember, regular testing and maintenance are key to ensuring your carbon monoxide detector functions correctly at all times, offering peace of mind and safety for you and your family.
Troubleshooting Common Issues
Issues can be frustrating when maintaining the safety and functionality of your carbon monoxide detector. However, many common problems can be resolved with some basic troubleshooting.
Here are a few tips to help address issues related to battery replacement and detector functionality.
A. Detector Not Responding After Battery Replacement
If your detector fails to respond after installing a new battery, first ensure that the battery is properly seated and that the battery contacts are clean. Corrosion or dirt on the contacts can impede electrical connection.
If the battery and contacts are in good condition, try resetting the detector according to the manufacturer’s instructions. This can often resolve minor issues that prevent the detector from powering on.
B. False Alarms or Continuous Beeping
False alarms or a continuous beep unrelated to a carbon monoxide detection event can often be attributed to low battery power, dust accumulation on the sensor, or placement near steam or high humidity sources.
Replace the battery if it is near the end of its life, clean the sensor area gently with compressed air, and ensure the detector is placed in an optimal location as per the manufacturer’s guidelines.
C. Inconsistent Operation
Inconsistencies in detector operation, such as intermittent beeping or failure to test, can be due to battery issues or environmental factors impacting the sensor.
After ensuring the battery is fresh and correctly installed, inspect the environment for anything that might affect the detector’s operation. Relocating the device away from extreme temperatures, draughts, or pollutants can improve performance.
By familiarizing yourself with these troubleshooting steps, you can quickly address and resolve many common issues, ensuring your carbon monoxide detector continues to provide reliable protection without the immediate need for professional assistance.
Final Thoughts
The knowledge of how to change battery in carbon monoxide detector is crucial for home safety. This seemingly simple task is a lifeline for ensuring the device’s operational efficiency in detecting carbon monoxide—a dangerous, invisible threat.
Regular battery replacement and diligent maintenance not only extend the lifespan of these detectors but also reinforce the security and well-being of your household. It is essential to remember that a well-maintained carbon monoxide detector is a vigilant guardian against potential poisoning risks.
Encouraging the practice of these safety measures and remaining alert to the conditions of your home’s safety devices can significantly contribute to a safer living environment. Hence, understanding how to change the battery in your carbon monoxide detector and committing to regular upkeep routines are vital steps in protecting your home and loved ones.
About
Safety Fic is a distinguished figure in the world of Diy design, with a decade of expertise creating innovative and sustainable Diy solutions. His professional focus lies in merging traditional craftsmanship with modern manufacturing techniques, fostering designs that are both practical and environmentally conscious. As the author of diy, Safety Fic delves into the art and science of Safety Fic-making, inspiring artisans and industry professionals alike.
Education RMIT University
(Melbourne, Australia) Associate Degree in Design (Safety Fic) Focus on sustainable design, industry-driven projects, and practical craftsmanship. Gained hands-on experience with traditional and digital manufacturing tools, such as CAD and CNC software.
Nottingham Trent University
(United Kingdom) Bachelor’s in diyfastly.com and Product Design (Honors) Specialized in product design with a focus on blending creativity with production techniques. Participated in industry projects, working with companies like John Lewis and Vitsoe to gain real-world insights.
Publications and Impact
In diy, Safety Fic his insights on indoor design processes, materials, and strategies for efficient production. His writing bridges the gap between artisan knowledge and modern industry needs, making it a must-read for both budding designers and seasoned professionals.