

Changing the battery in your Liberty Safe is an essential maintenance task to ensure that your electronic lock operates smoothly and reliably. While the process might seem daunting at first, it is actually straightforward and can be completed in just a few minutes with minimal tools.
This guide on how to change battery in liberty safe will walk you through the necessary steps to replace the battery, helping you keep your safe secure and fully functional.
What is the Battery in a Liberty Safe?
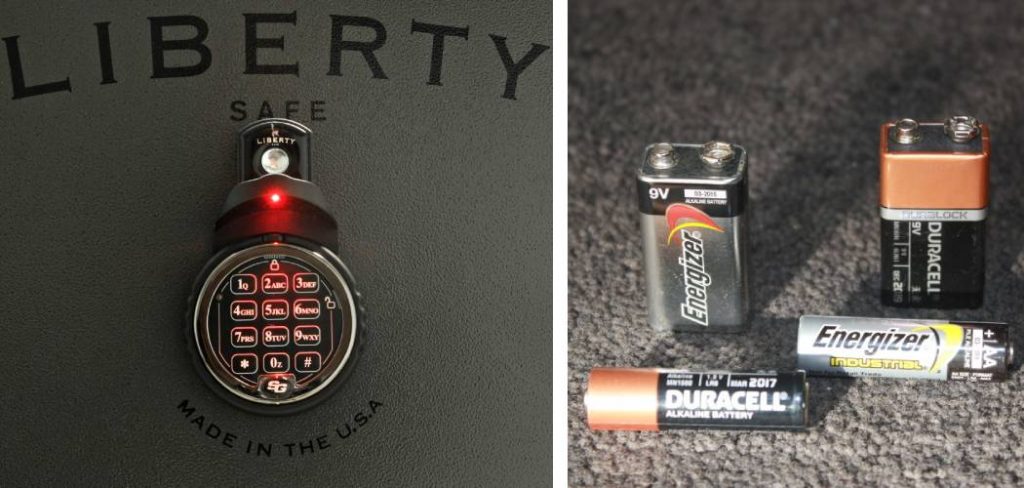
The battery in a Liberty Safe is used to power the electronic lock mechanism. This lock allows you to quickly and easily access your safe without the need for keys. The battery is typically located on the inside of the safe door, near the top or side of the lock.
The battery is essential for the safe’s proper functioning and should be regularly checked and replaced if necessary. It is recommended to replace the battery every 6-12 months, depending on usage.
Why Should You Change the Battery in Your Liberty Safe?
As mentioned earlier, the battery is crucial for the proper functioning of your safe’s electronic lock. If the battery dies or is low, you may experience issues with opening and closing your safe, or it may not open at all.
A dead battery can also leave you locked out of your safe, which can be a frustrating and potentially dangerous situation. Additionally, an old or weak battery can compromise the security of your safe by making it easier for hackers to access its contents.
Changing the battery regularly ensures that your safe remains secure and easily accessible when needed. It is a simple yet vital maintenance task that should not be overlooked.

Materials Needed
Before you begin, make sure you have the following materials ready:
New Battery
When selecting a new battery for your Liberty Safe, it is crucial to choose a high-quality, reliable brand to ensure the longevity and proper functioning of the lock. Typically, the safe uses a 9-volt alkaline battery. It is recommended to avoid using rechargeable or lithium batteries, as they may not provide consistent power output, potentially leading to lock malfunctions.
Brands such as Duracell or Energizer are often recommended for their reliability. Always check the manufacturer’s instructions or the user manual for specific battery recommendations.
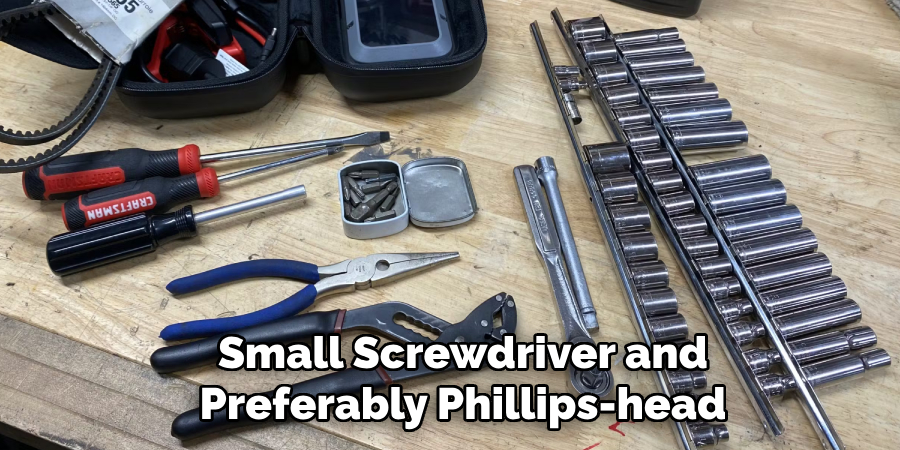
Tools
The tools required for changing the battery in a Liberty Safe are minimal and can usually be found around the house. You will need a small screwdriver, preferably a Phillips-head, to remove the battery cover.
7 Steps on How to Change Battery in Liberty Safe
Step 1: Check the Safe’s Battery Indicator
Before proceeding with the battery replacement, it’s important to check the safe’s battery indicator to determine if it’s time for a new battery. Most Liberty Safes with electronic locks are equipped with a battery indicator that will alert you when the battery is running low. This indicator is usually located on the keypad.
If the indicator light blinks or you hear a series of beeps when attempting to unlock the safe, it’s a clear sign that the battery needs to be replaced. Regularly monitoring the battery indicator can help prevent the inconvenience of being locked out due to a dead battery.
Step 2: Ensure the Safe is Unlocked
Before you commence the battery replacement, it is vital to ensure that the safe is unlocked. This step is crucial because if the battery depletes completely, you may not be able to gain access to the safe to replace it. To ensure the safe is unlocked, enter your combination on the keypad and open the door.
Leave the door open while you replace the battery, as this will prevent the safe from accidentally locking you out during the process. Double-check to make sure that the locking bolts are retracted and the door can swing freely before proceeding to the next step.
Step 3: Locate the Battery Cover
With the safe door open, the next step is to locate the battery cover. In most Liberty Safes, the battery cover is situated on the inside of the door, near the top or side of the electronic lock mechanism. It is typically a small plastic or metal panel that can be easily identified.

If you are having difficulty finding the battery cover, consult your safe’s user manual for specific guidance or look for any markings or instructions on the lock itself. Once located, proceed to the next step, which is to remove the cover and access the battery compartment.
Step 4: Remove the Old Battery
Using a screwdriver, carefully remove the screws holding the battery cover in place. Once removed, set them aside in a secure location to avoid misplacing them. Carefully lift off the battery cover to expose the old battery inside the compartment.
Most Liberty Safes use a 9-volt alkaline battery, which can be easily identified by its rectangular shape and connector on one end. Carefully remove the battery from its connector and set it aside for proper disposal. Be sure not to touch or damage any other wires or components while removing the old battery.
Step 5: Insert the New Battery
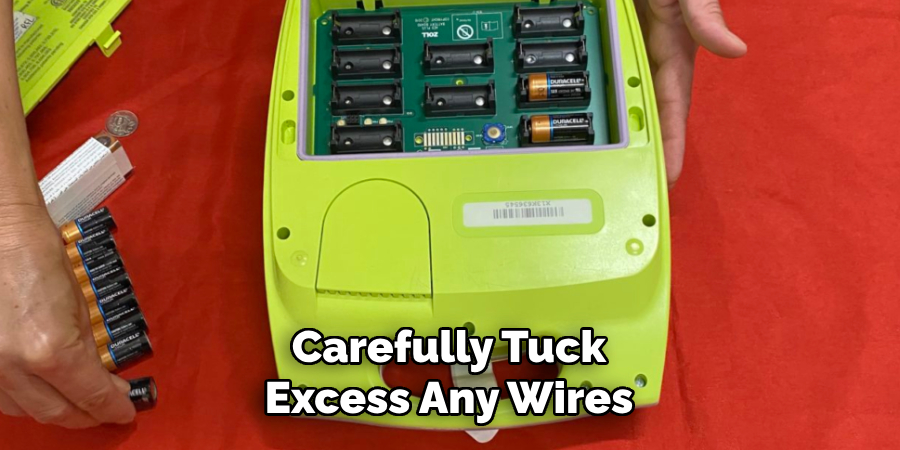
Take your new battery and insert it into the compartment, making sure that the positive (+) and negative (-) ends are correctly aligned with the connectors. Gently push the battery into place until it is securely connected.
If you are unsure which way to insert the battery, consult your safe’s user manual for specific instructions or look for any markings on the lock indicating polarity. Once inserted, carefully tuck any excess wires back into the compartment.
Step 6: Replace the Battery Cover
With the new battery in place, carefully reattach the battery cover using the screws removed earlier. Ensure that the cover is securely in place to prevent any potential damage to the battery or lock mechanism.
Although the safe should not lock while the door is open, it’s always a good idea to double-check and make sure that everything is functioning correctly before closing the door.
Step 7: Test the New Battery
After successfully replacing the battery and securing the cover, it’s time to test the new battery to ensure the electronic lock is functioning correctly. Close the safe door, but do not lock it yet. Enter your personal combination on the keypad as you normally would to verify that the keypad lights up and the lock mechanism engages smoothly.

Listen for any beeps or alerts from the keypad, indicating that the lock has accepted your combination. If the safe opens and closes without any issues, the new battery installation is successful. However, if the keypad fails to light up or the lock malfunctions, recheck the battery connections and ensure the battery is properly seated in the compartment.
By following these steps on how to change battery in liberty safe, you can maintain the security and reliable operation of your Liberty Safe. Regularly changing the battery and testing the lock will provide peace of mind, knowing that your valuables are safely protected.
Frequently Asked Questions
Q: How Long Do the Batteries in a Liberty Safe Usually Last?
A: The lifespan of the battery in a Liberty Safe can vary depending on usage and environmental factors. On average, a new 9-volt alkaline battery should last about one year before needing to be replaced. It is recommended to always keep a spare battery on hand in case of emergencies.
Q: Can I Use Any Type of Battery in My Liberty Safe?
A: Liberty Safes are designed to use only 9-volt alkaline batteries. Other types of batteries, such as lithium or rechargeable ones, may not provide sufficient power and can potentially damage the lock mechanism.
Q: What Happens if I Forget to Replace the Battery?
A: If the battery depletes completely without being replaced, you may be locked out of your safe until the battery is changed. Additionally, a dead battery can cause malfunctions or damage to the lock mechanism, resulting in costly repairs and potential loss of access to your safe’s contents. It is important to regularly check and replace the battery as needed.
Q: Can I Change the Battery While the Safe is Locked?
A: No, it is not recommended to attempt changing the battery while the safe is locked. If you forget to replace the battery and find yourself locked out, contact a professional locksmith for assistance in opening the safe and replacing the battery safely.
Conclusion
Changing the battery in a Liberty Safe is a simple task that can be easily completed with minimal tools and time. Regularly checking and replacing the battery when necessary will help ensure that your safe’s electronic lock remains functional and reliable.
Remember to always consult the manufacturer’s instructions or user manual for specific battery recommendations, and dispose of old batteries properly. With these tips on how to change battery in liberty safe, you can confidently change the battery in your Liberty Safe and continue to enjoy its secure protection for years to come.
About
Safety Fic is a distinguished figure in the world of Diy design, with a decade of expertise creating innovative and sustainable Diy solutions. His professional focus lies in merging traditional craftsmanship with modern manufacturing techniques, fostering designs that are both practical and environmentally conscious. As the author of diy, Safety Fic delves into the art and science of Safety Fic-making, inspiring artisans and industry professionals alike.
Education RMIT University
(Melbourne, Australia) Associate Degree in Design (Safety Fic) Focus on sustainable design, industry-driven projects, and practical craftsmanship. Gained hands-on experience with traditional and digital manufacturing tools, such as CAD and CNC software.
Nottingham Trent University
(United Kingdom) Bachelor’s in diyfastly.com and Product Design (Honors) Specialized in product design with a focus on blending creativity with production techniques. Participated in industry projects, working with companies like John Lewis and Vitsoe to gain real-world insights.
Publications and Impact
In diy, Safety Fic his insights on indoor design processes, materials, and strategies for efficient production. His writing bridges the gap between artisan knowledge and modern industry needs, making it a must-read for both budding designers and seasoned professionals.