

Are you having trouble replacing the battery on your Vivint door lock? Don’t worry, it’s easy. Here are some steps to help you get started.
It is more frustrating than having a door lock that isn’t functioning properly. Whether your Vivint Door Lock is no longer responding or the battery needs to be changed, it can damper your day. But fear not! Fixing this issue and getting back up and running doesn’t have to be difficult. Additionally, you won’t need any special tools to complete this task.
In this blog post, we’ll discuss how to change battery on Vivint door lock so you can easily unlock those doors—all without any help from an expert!
What Will You Need?
To get started, you’ll need a few essential items. These include:
- Phillips head screwdriver
- New 9V battery
- A small flathead screwdriver (optional)
Before you begin the battery replacement process, unplug the door lock from any power sources. This is an important safety measure that will help to avoid any potentially dangerous situations.
10 Easy Steps on How to Change Battery on Vivint Door Lock
Step 1: Removing the Lock Cover
The first step is to remove the lock cover; you’ll need a Phillips head screwdriver for this. To start, locate and unscrew the two screws on the side of the door lock—typically located near the bottom of the unit. Once these screws are removed, you’ll be able to slide the cover off of the lock.
Step 2: Removing the Battery Plate
The second step is to remove the battery plate. You can do this by unscrewing the four screws that hold it in place—these should have been exposed once you removed the cover. Once these screws are out, carefully pull the battery plate away from the lock. Be careful, as small wires connect the battery plate to the lock.
Step 3: Disconnecting the Wiring
The third step is to disconnect the wiring from the old battery. You’ll need a small flathead screwdriver or something similar to do this. Carefully pry open and remove the terminal connectors that connect the wiring to the old battery. Once disconnected, you can safely remove and dispose of the old battery properly.

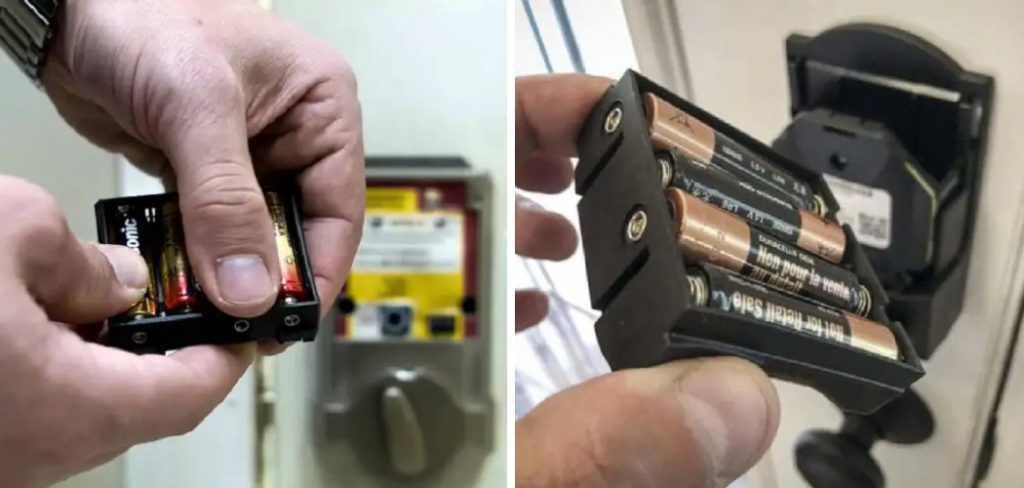
Step 4: Inserting the New Battery
The fourth step involves the placement of the new battery. Take your new 9V battery and connect the terminal connectors you removed earlier. Make sure to match the positive and negative terminals correctly. Once the battery is wired in, place it back in its compartment. Be mindful of the wiring and ensure it doesn’t get pinched or damaged when installing the new battery.
Step 5: Reattaching the Battery Plate
Once the new battery is securely placed and connected, the next step is to reattach the battery plate. Align the plate back to its rightful place and gently slide it over the battery. Secure it back by tightening the four screws you initially unscrewed. While doing so, ensure the wires are not overly bent or pinched, which could lead to damage or disconnection.
Step 6: Reattaching the Lock Cover
After reattaching the battery plate, the next step is to replace the lock cover. Slide the cover back onto the lock, aligning it correctly with the holes for the screws. Once it’s in the right place, take your Phillips head screwdriver and reinsert the two screws you removed at the beginning. Tighten these screws securely but do not over-tighten, as this could damage the cover or the threading on the screws. With this, you’ve successfully replaced the battery in your Vivint door lock.
Step 7: Testing the Lock
Now that the battery has been replaced and everything has been put back together, it’s important to check if the door lock is functioning correctly. Use your Vivint app or manually input your code on the lock’s key panel to ensure it locks and unlocks efficiently. If the lock doesn’t respond, double-check your battery connection and make sure the battery is appropriately installed. If you’re still having issues, it might be time to contact Vivint’s customer support for further assistance.

Step 8: Resetting the Lock
Resetting your Vivint door lock may not be necessary, but it’s a good idea to do so after changing the battery. To reset, press and hold the lock button on the inside part of the lock until you hear a beep. This signifies that your lock has been successfully reset. Remember, resetting your lock will default your codes, so immediately set a new access code using your Vivint app.
Step 9: Setting a New Access Code
After resetting your door lock, you must set a new access code. Open your Vivint app and navigate to the settings menu. Select ‘Add New Code’ and enter your desired code, ensuring it’s something you can easily remember but hard for others to guess. After entering it, confirm and save the changes.
Step 10: Maintaining Your Lock
To ensure the longevity of your Vivint door lock, it’s important to maintain it properly. Regularly check the battery level through your Vivint app and replace the battery when it’s low. Also, clean the lock’s keypad and handle with a soft, damp cloth to keep it free from dust and grime. Lastly, avoid using oil-based lubricants on the lock as they can collect dust and eventually jam the lock mechanism.

Now, you have successfully learned how to change the battery on your Vivint door lock and ensure its efficient functioning. Remember, if you encounter any issues or difficulties, Vivint’s customer support is always ready to assist you.
5 Additional Tips and Tricks
- Keep a spare battery on hand. It’s best to have an extra battery at the ready in case your original battery runs out of power. That way, you will only be stuck with a functioning door lock.
- Familiarize yourself with the correct type and size of vacuum cleaner batteries for your Vivint Door Lock model. Different models require different replacement batteries, so make sure you know which kind you need.
- Use the proper tools for the job. It’s important to use the right tools when disassembling and reassembling your door lock system. Make sure you have all of the necessary screwdrivers, wrenches, and other small tools on hand before starting your repair work.
- Make sure your door lock is completely powered down before attempting to change the battery. This will ensure that any residual power stored in the circuitry isn’t discharged when you open up the system.
- Take your time. Changing a door lock battery may seem like an easy task, but it actually requires an attention to detail and precision in order to be done correctly. Don’t rush through the process, and take your time to make sure everything is securely in place. Doing so will help to ensure a properly functioning door lock for years to come.
With these tips and tricks in mind, you should be able to confidently change the battery on your Vivint Door Lock with ease! If you need any additional advice or guidance, feel free to contact a qualified professional for assistance.
5 Things You Should Avoid
- Don’t attempt to change the battery if you are not familiar with the specific model of Vivint Door Lock you have. It is important to know the correct size and type of replacement battery for your particular door lock system.
- Never use any tools other than those specifically recommended by Vivint for disassembling or reassembling your door lock. Improper tools can damage the internal components of your lock, rendering it useless.
- Do not use any force when handling small parts or components. Even a seemingly harmless tug or pull could cause significant damage to delicate parts within your door lock system.
- Don’t rush through the process of changing the battery. Take your time to make sure everything is properly attached and working correctly.
- Avoid tampering with other parts or components within your Vivint Door Lock system. If the door lock isn’t functioning, it could be a malfunctioning component rather than an empty battery, so be sure to contact a professional if you’re unsure of what’s causing the issue.

With these tips in mind, you should be able to safely and effectively change the battery on your Vivint Door Lock.
Conclusion
How to change battery on Vivint door lock is an easy process with the right tools. Not only will you save time and money, but you’ll also be able to increase your home’s security if the battery gets too low. With this guide and a few basic tools, anyone can change out a Vivint Door Lock’s battery Post-haste!
Replacing your door lock batteries should now feel like second nature – it won’t take much time or effort anymore. Knowing how to replace the battery will also give you peace of mind knowing that your home is much safer than it was before.
Safeguarding against mechanical problems is worth the extra attention these door locks demand. It pays off in so many ways in terms of convenience, safety, and overall security of all who reside in your home!
About
Safety Fic is a distinguished figure in the world of Diy design, with a decade of expertise creating innovative and sustainable Diy solutions. His professional focus lies in merging traditional craftsmanship with modern manufacturing techniques, fostering designs that are both practical and environmentally conscious. As the author of diy, Safety Fic delves into the art and science of Safety Fic-making, inspiring artisans and industry professionals alike.
Education RMIT University
(Melbourne, Australia) Associate Degree in Design (Safety Fic) Focus on sustainable design, industry-driven projects, and practical craftsmanship. Gained hands-on experience with traditional and digital manufacturing tools, such as CAD and CNC software.
Nottingham Trent University
(United Kingdom) Bachelor’s in diyfastly.com and Product Design (Honors) Specialized in product design with a focus on blending creativity with production techniques. Participated in industry projects, working with companies like John Lewis and Vitsoe to gain real-world insights.
Publications and Impact
In diy, Safety Fic his insights on indoor design processes, materials, and strategies for efficient production. His writing bridges the gap between artisan knowledge and modern industry needs, making it a must-read for both budding designers and seasoned professionals.