

Welcome! If your Nest cameras or sensors have been acting strangely lately, their batteries may be running low. Running low on battery power can cause connection issues, delays in motion detection alerts, and other odd behavior from your Nest devices.
In this post, I’ll walk you through the easy steps to check your Nest sensor battery levels on your phone or computer from the Nest app. With just a few taps or clicks, you can see the remaining battery percentage for any devices using batteries in your system. Knowing the battery status is key to keeping your Nest security system running smoothly.
Let’s dive into how to check nest sensor battery so you can stay informed on potential replacements and avoid any unexpected downtime from low power.
What Will You Need?
Before we begin, make sure you have the following:
- A smartphone or computer with the Nest app
- A stable internet connection
- Your Nest account login information
Once you have these items, let’s get started!
10 Easy Steps on How to Check Nest Sensor Battery
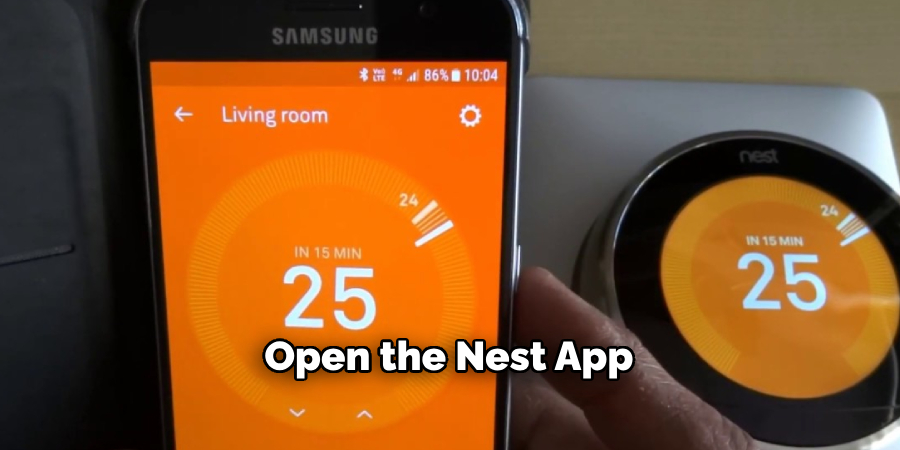
Step 1. Check the Nest App
The first step to checking your Nest Sensor battery is to open the Nest app on your smartphone or tablet. Once you have opened the app, you can view a dashboard showing all your connected devices. On this dashboard, you should be able to see an icon for your Nest Sensor and its current battery level. If the battery level is low, it may be time to replace it.
Step 2. Check the LED Light
Another way to check your Nest Sensor battery is by looking at the LED light on the device itself. The LED light will flash green when it has enough charge and red when it needs to be recharged or replaced. It’s important to note that if your Nest Sensor has been inactive for a while, it may take several minutes for the LED light to begin flashing when you press the test button.
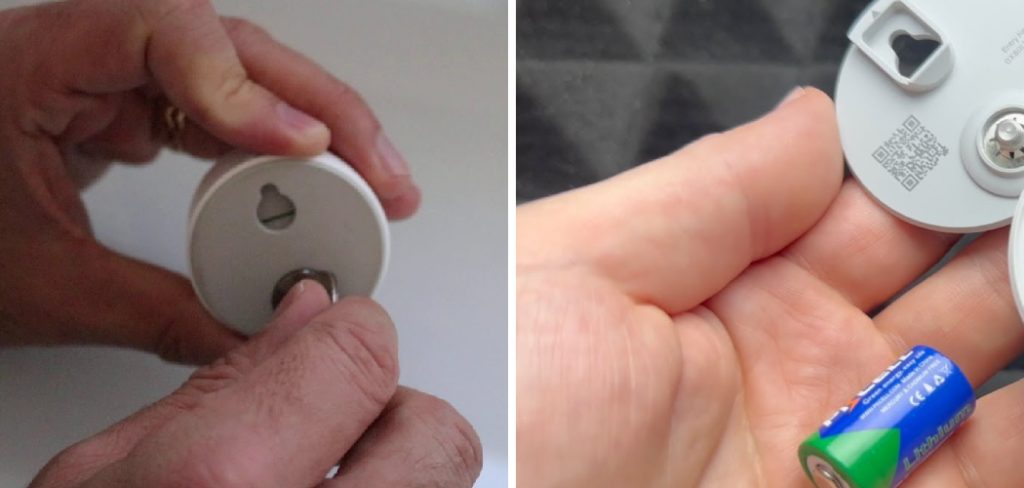
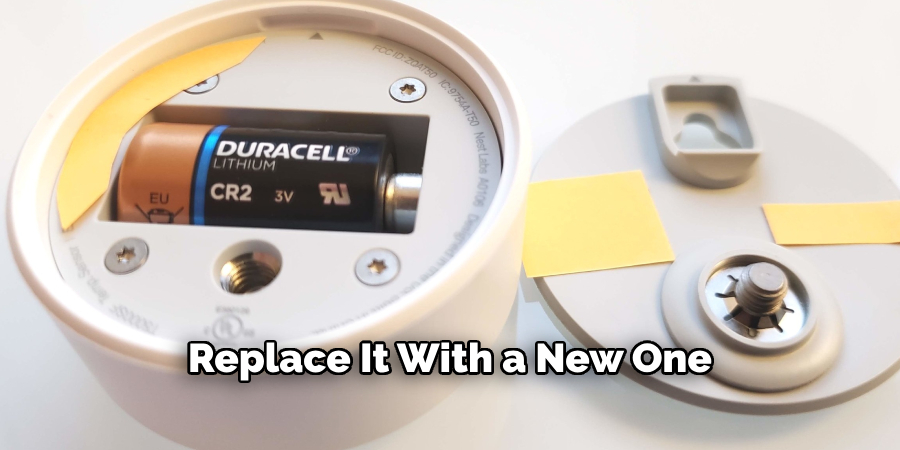
Step 3. Replace the Battery
If your Nest Sensor’s battery is low or dead, you must replace it with a new one. You can purchase replacement batteries from most electronics stores or online retailers like Amazon. When replacing the battery in your Nest Sensor, make sure you are using a compatible model and follow all safety instructions provided by the manufacturer.
Step 4. Reset the Sensor
After replacing the battery, you should reset your Nest Sensor to ensure it functions correctly. To do this, press and hold the test button on your device until the LED light flashes green. This indicates that your Nest Sensor has been reset and is ready for use. Remember to check the battery level in the Nest app once more to confirm that the new battery is working correctly.
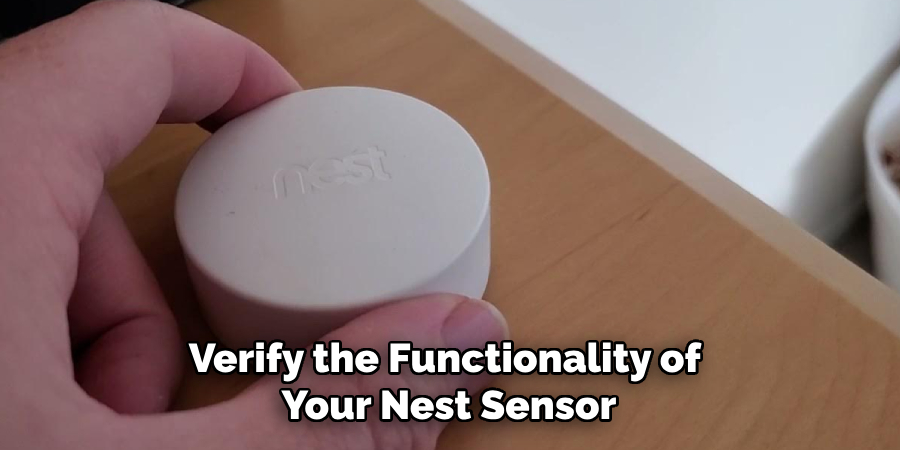
Step 5. Verify Nest Sensor Functionality
Now that you’ve replaced the battery and reset the sensor, it’s time to verify the functionality of your Nest Sensor. Trigger the sensor by opening or closing the door or window it’s attached to or by walking past it if it’s a motion sensor. Check the Nest app to confirm that the sensor’s status updates correctly. If the sensor is still acting up, it might be a hardware issue, and you should contact Nest support for further assistance.
Step 6. Regular Maintenance
To ensure the longevity of your Nest Sensor, regular maintenance is essential. Check the battery level in your app periodically to avoid unexpected power loss. Cleaning your sensor with a soft, dry cloth can also help prevent dust buildup, which could affect the device’s performance. Always remember that proper care and maintenance can help extend the life of your Nest Sensor and keep your home safety system operating efficiently.
Step 7. Reach Out to Nest Support
If you’re still experiencing issues with your Nest sensor after checking and replacing the battery, it may be necessary to contact Nest Support. They’ll be able to provide professional assistance and potentially identify any hidden issues with your device. To contact Nest Support, visit their official website and navigate to the ‘Contact Us’ section. Remember to have your device model and other relevant information on hand to expedite troubleshooting.
Step 8. Keep Nest App Updated
Ensure that your Nest app is constantly updated to the latest version. Regular updates not only provide new features and improvements but also fix any bugs that might be affecting the functionality of your sensors. You can check for updates in your device’s app store. If an update is available, install it and then check your sensor’s functionality. Remember, an up-to-date app ensures the most accurate readings from your Nest devices.
Step 9. Consider Battery Quality
When replacing your Nest Sensor batteries, always opt for high-quality ones. Cheap, lower-quality batteries may not provide the necessary power, could drain faster, and might even damage your device over time. Investing in high-quality batteries may provide a longer lifespan for your sensors, ensuring that your Nest devices are always ready to work when needed.
Step 10. Periodic Device Check
Even if your Nest device is not showing any signs of low battery, it’s a good idea to check your device status regularly. These periodic checks can help you catch any potential issues before they become more significant problems. Monitoring the health of your devices can save you time money, and maintain the integrity of your home security system.
By following these ten easy steps to check the nest sensor battery, you can keep your home security system running smoothly and avoid any unexpected downtime.
5 Additional Tips and Tricks
- Timely Battery Replacement: Replace your Nest sensor batteries annually or as soon as you receive a low-battery notification to ensure optimal performance.
- Check Battery Level Regularly: Make it a habit to review your Nest sensor’s battery level frequently. This can be done on the Nest app under the ‘Settings’ tab.
- Use Quality Batteries: Using high-quality, long-lasting batteries for your Nest sensor is recommended. This not only ensures longer life but also better functionality.
- Proper Installation: Ensure that the batteries are properly installed. Incorrect insertion of the battery might lead to functionality issues.
- Keep Software Updated: Regular firmware and software updates are necessary as they may optimize battery performance. Make sure your Nest device is updated to the latest version.
5 Things You Should Avoid
- Ignoring Battery Warnings: Never ignore low-battery notifications from your Nest sensor. Paying the batteries may lead to sensor failure.
- Using Cheap Batteries: Avoid using cheap, low-quality batteries. These batteries may not provide reliable performance and must be replaced more frequently.
- Ignoring Software Updates: Do not ignore software updates. Updates often include battery performance improvements, and ignoring them may lead to sub-optimal device performance.
- Overlooking Installation: Avoid rushing the battery installation process. Only properly placed batteries will power your device effectively and may cause further issues.
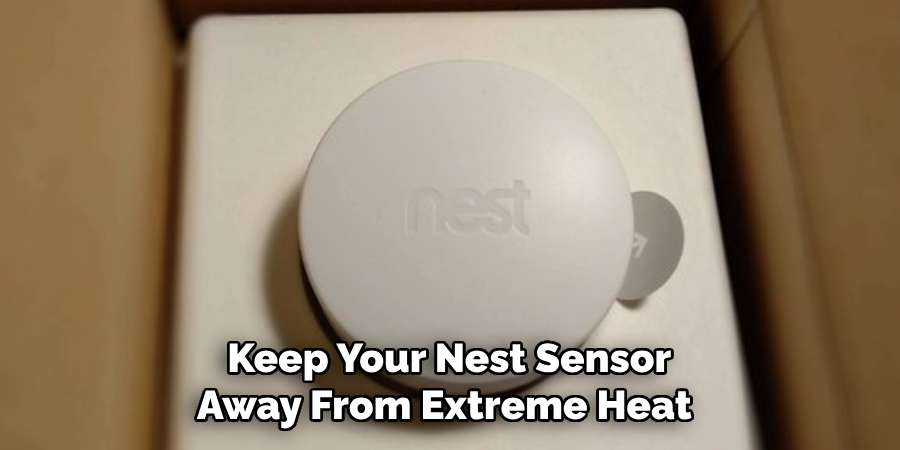
- Exposure to Extreme Conditions: Keep your Nest sensor away from extreme heat or cold, as such conditions can negatively impact the battery lifespan.
By avoiding these common mistakes and following the additional tips and tricks, you can ensure that your Nest sensor’s battery life is optimized for maximum efficiency.
What Happens When Nest Battery Dies?
When your Nest sensor’s battery dies, it will no longer be able to detect and report changes in temperature or humidity. This means that your Nest device will not be able to function correctly and may impact the performance of other connected devices.
However, there is no need to worry, as your Nest sensor will continue to work with its last saved settings until the battery is replaced. Once the storm is replaced, your Nest device will resume its normal functioning.
It is important to note that a dead battery in your Nest sensor does not affect the performance or functionality of other connected devices, such as thermostats or cameras. These devices have their independent power sources and will continue to function normally.
Conclusion
In conclusion, monitoring your Nest sensor battery levels is essential to smart home automation. Not only will it help you ensure your home remains secure, but you won’t worry about its life expectancy when you’re out. If you haven’t done so already, follow the steps outlined in this post and keep a keen eye on your battery level regularly. Whether you have a single or multiple sensors, having full knowledge of how they are running can save a lot of headaches down the line!
Hopefully, the article on how to check nest sensor battery levels has been informative and helpful. Remember, by taking the time to maintain your Nest sensors properly, you can ensure they continue to function at their best for a long time.
As a final thought, why not take proactive maintenance one step further and replace batteries every 3–4 months – depending on usage – to guarantee peace of mind and reliable performance?
About
Safety Fic is a distinguished figure in the world of Diy design, with a decade of expertise creating innovative and sustainable Diy solutions. His professional focus lies in merging traditional craftsmanship with modern manufacturing techniques, fostering designs that are both practical and environmentally conscious. As the author of diy, Safety Fic delves into the art and science of Safety Fic-making, inspiring artisans and industry professionals alike.
Education RMIT University
(Melbourne, Australia) Associate Degree in Design (Safety Fic) Focus on sustainable design, industry-driven projects, and practical craftsmanship. Gained hands-on experience with traditional and digital manufacturing tools, such as CAD and CNC software.
Nottingham Trent University
(United Kingdom) Bachelor’s in diyfastly.com and Product Design (Honors) Specialized in product design with a focus on blending creativity with production techniques. Participated in industry projects, working with companies like John Lewis and Vitsoe to gain real-world insights.
Publications and Impact
In diy, Safety Fic his insights on indoor design processes, materials, and strategies for efficient production. His writing bridges the gap between artisan knowledge and modern industry needs, making it a must-read for both budding designers and seasoned professionals.