

Are you experiencing engine problems? One of the possible causes could be a dirty camshaft sensor.
The camshaft sensor plays a critical role in your vehicle’s engine performance by monitoring the position and speed of the camshaft. Over time, this essential component can accumulate dirt, grime, and oil, which may impede its functionality and lead to poor engine performance or reduced fuel efficiency. Cleaning the camshaft sensor is a relatively simple maintenance task that can help restore its accuracy and prolong its lifespan. Replacing a faulty camshaft sensor at home with the right tools and a little know-how saves you time and money on costly repairs.
In this guide on how to clean camshaft sensor, we will walk you through the steps to safely and effectively clean the camshaft sensor, ensuring optimal performance and preventing potential engine problems.
What Are the Benefits of Cleaning Your Camshaft Sensor?
Cleaning your camshaft sensor offers a range of benefits, including:
- Improved Fuel Efficiency: A dirty camshaft sensor can cause inaccurate readings to be sent to the engine control unit (ECU), resulting in incorrect fuel injection and wastage of fuel.
- Enhanced Performance: A clean camshaft sensor allows for more precise timing and fuel delivery, leading to smoother engine operation and increased power and torque.
- Prevention of Engine Issues: Dirt buildup on the camshaft sensor can cause faulty readings or failure to send any readings. This can lead to issues such as stalling, rough idling, or even complete engine failure.
- Cost Savings: Regularly cleaning the camshaft sensor can prevent costly repairs or replacements in the future. Maintaining this small but crucial component can save you from potential expenses and headaches.
- Improved Fuel Efficiency: A clean camshaft sensor allows for more accurate fuel delivery, resulting in better fuel efficiency. This saves you money on gas and reduces your carbon footprint by reducing harmful emissions.
- Extend Engine Lifespan: A dirty camshaft sensor can cause other components to work harder to compensate for the faulty readings, leading to increased wear and tear on your engine. By keeping it clean, you are helping prolong your engine’s lifespan and ensuring its optimal performance.
What Will You Need?
- Camshaft Sensor Cleaner: This can be found at most auto parts stores. Make sure to choose one that is specifically designed for cleaning camshaft sensors.
- Lint-Free Cloth or Cotton Swabs: These will be used to wipe down the sensor.
- Screwdriver or Wrench: You may need a tool to remove it from its housing depending on where your camshaft sensor is located.
8 Easy Steps on How to Clean Camshaft Sensor
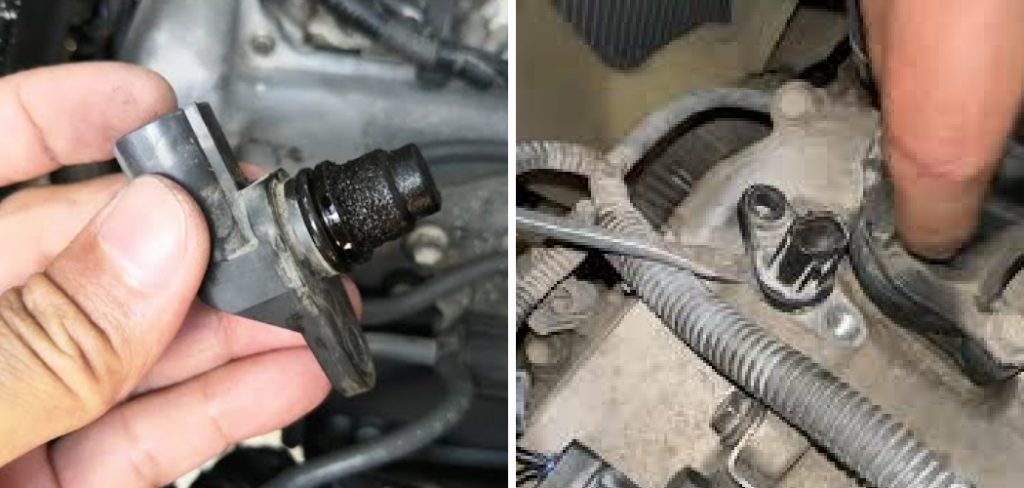
Step 1. Locate the Camshaft Sensor:
To start, you’ll need to identify where the camshaft sensor is located in your vehicle. This can vary depending on the make and model of your car. Refer to your vehicle’s owner manual to find the exact location. Typically, the camshaft sensor is positioned near the engine block, often near the camshaft itself, or sometimes near the cylinder head.

Look for a small, plug-like component, typically connected to wires. Take your time locating it accurately, as this will help you avoid unnecessarily removing or disturbing other nearby parts. If unsure, a quick online search specific to your car’s model or consulting a professional can be helpful.
Step 2: Disconnect the Sensor’s Electrical Connector
Once you have located the camshaft sensor, the next step is to disconnect its electrical connector. Carefully examine the connector to identify the release tab or clip holding it in place. Press or depress the tab and gently pull the connector away from the sensor, depending on its design. Avoid pulling on the wires directly, as this can cause damage. If the connector feels stuck, wiggle it slightly while maintaining steady pressure on the release tab. Ensure the connector is fully detached before removing the sensor itself.
Step 3: Removing the Sensor
Once the electrical connector is disconnected, you can focus on removing the sensor. Most sensors are held in place by bolts or clips, so you must use either a screwdriver or a socket wrench to loosen them. Keep track of any bolts or clips you remove, as they will be needed when installing the new sensor.
If the sensor is in a tight space, using a universal joint adapter for your tools may be easier. This will allow for more flexibility and ease of access while removing the sensor.
As you remove the last bolt or clip holding the sensor in place, be prepared to catch it as it comes loose. Some sensors may have a bit of resistance due to gaskets or seals, so be gentle when removing them to avoid any damage.
Step 4: Install the New Sensor
Once you have successfully removed the old sensor, it is time to install the new one. Begin by carefully placing the new sensor in its designated location.
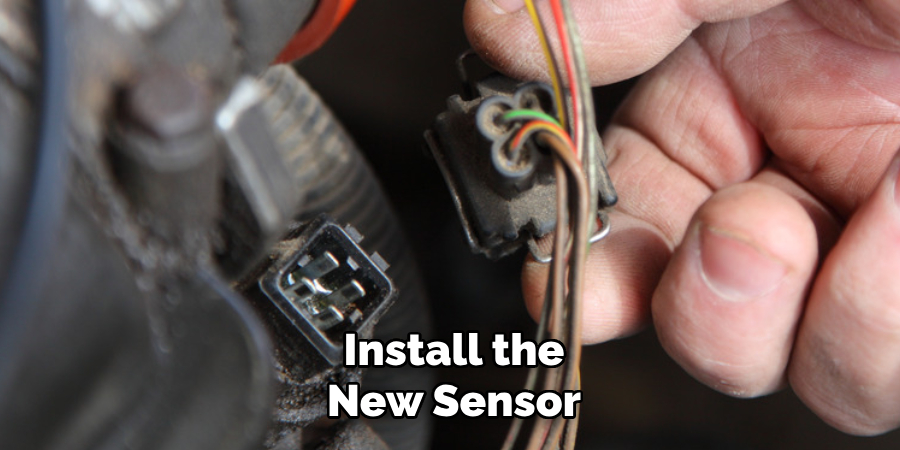
Ensure that any gaskets or seals are correctly aligned and in good condition before securing the sensor. If there are any damaged components, replace them before proceeding with the installation.
Next, use your tools to tighten bolts or clips holding the sensor. Be careful not to overtighten as this could cause damage to the sensor or its surrounding components.
Step 5: Reconnect Wiring and Test
With the sensor securely installed, the next step is reconnecting any disconnected wiring during removal. Ensure that all electrical connectors are properly seated and locked into place. Double-check each connection for a snug fit to avoid loose wires, which could result in malfunctions or faulty readings. If the connectors are dirty or corroded, clean them carefully using an appropriate electrical contact cleaner before reconnection.

Once all wires are reconnected, it’s essential to test the sensor to verify its functionality. Power up the system and observe for any warning lights, error messages, or unusual behavior. If possible, use diagnostic tools or software to confirm that the sensor functions within its specified range.
Step 6: Final Inspection and Reassembly
After verifying the sensor’s functionality, perform a final setup inspection. Ensure that all wires are securely connected and that there are no loose components. Double-check for any leftover tools or debris in the work area to prevent future complications. Once satisfied, proceed to reassemble any coverings, panels, or housings removed during the process. Make sure all screws, clips, and fasteners are firmly secured to maintain the integrity of the system. This step completes the maintenance or replacement procedure, ensuring the system is ready for regular operation.
Step 7: Perform Final Checks
Before powering on the system or using any tools, it is vital to perform final checks to ensure everything is in proper working order. This step can help prevent potential hazards or malfunctions if there are any mistakes or oversights.
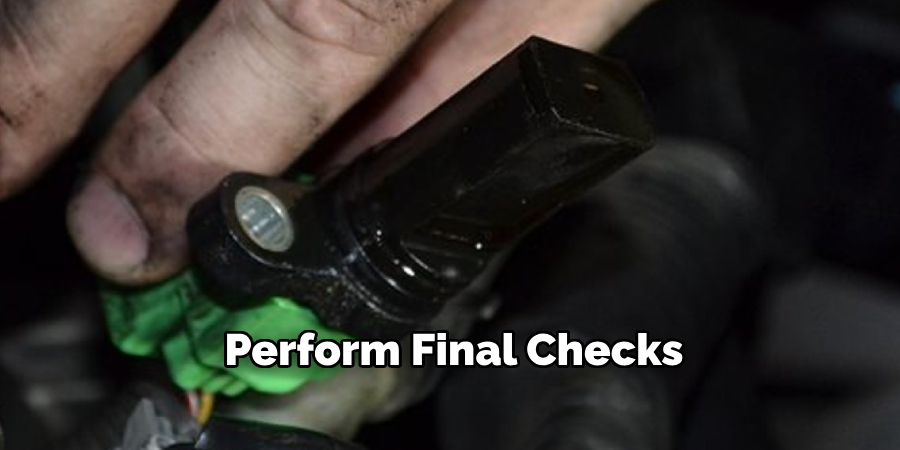
Firstly, check for any exposed wires or parts that may have been left uncovered during reassembly. These areas should be covered and secured to prevent accidents or damage to the system.
Next, test all system functions to ensure they are operating correctly. This includes turning it on and off, checking for proper connectivity, and testing any moving parts.
Step 8: Keep Detailed Records and Documentation
Keeping detailed records and documentation is crucial for the maintenance of any system. This includes recording the dates of inspections, repairs, and replacements, as well as any issues or malfunctions that were identified.
A thorough record of the system’s history can help troubleshoot future problems and identify patterns or recurring issues. It also serves as evidence for warranty claims or insurance purposes.
Additionally, having detailed documentation allows for better communication between technicians working on the system. They can easily refer to previous records to understand the system’s configuration and any past repairs that have been done.
By following good documentation practices, you can save time and money in the long run by avoiding repeated diagnostic tests and repairs.
5 Things You Should Avoid
- Using Harsh Chemicals
Avoid using abrasive or highly corrosive chemicals, as they can damage the delicate components of the sensor and compromise its functionality.
- Applying Excessive Force
Never use excessive force when removing or cleaning the sensor, as this can lead to physical damage or misalignment, which may result in inaccurate readings.
- Skipping Protective Measures
Ensure that you disconnect the battery and take appropriate precautions to prevent electrical damage. Skipping this step could result in short circuits or harm to other engine components.
- Failing to Use Proper Tools
Avoid using makeshift or incorrect tools when working with the camshaft sensor. This can cause scratches, bends, or other damage to the sensor and its connections.
- Neglecting to Check for Contaminants
Do not overlook inspecting the surrounding area for oil, dirt, or debris before reinstalling the sensor. Allowing contaminants to remain can lead to poor performance or sensor failure over time.
Conclusion
How to clean camshaft sensor is a crucial maintenance step to ensure the proper functioning of your vehicle.
You can effectively maintain its performance by following a systematic approach, including disconnecting the battery, carefully removing the sensor, and using the appropriate cleaning tools and solutions. Always prioritize cleanliness and avoid overlooking surrounding contaminants to prevent long-term issues.
With proper care, you can extend the sensor’s life and improve your engine’s overall reliability.
About
Safety Fic is a distinguished figure in the world of Diy design, with a decade of expertise creating innovative and sustainable Diy solutions. His professional focus lies in merging traditional craftsmanship with modern manufacturing techniques, fostering designs that are both practical and environmentally conscious. As the author of diy, Safety Fic delves into the art and science of Safety Fic-making, inspiring artisans and industry professionals alike.
Education RMIT University
(Melbourne, Australia) Associate Degree in Design (Safety Fic) Focus on sustainable design, industry-driven projects, and practical craftsmanship. Gained hands-on experience with traditional and digital manufacturing tools, such as CAD and CNC software.
Nottingham Trent University
(United Kingdom) Bachelor’s in diyfastly.com and Product Design (Honors) Specialized in product design with a focus on blending creativity with production techniques. Participated in industry projects, working with companies like John Lewis and Vitsoe to gain real-world insights.
Publications and Impact
In diy, Safety Fic his insights on indoor design processes, materials, and strategies for efficient production. His writing bridges the gap between artisan knowledge and modern industry needs, making it a must-read for both budding designers and seasoned professionals.