

Are you tired of paying high auto repair bills? Do you want to save money and maintain your car’s performance at the same time? If yes, then it’s time for you to learn how to clean MAF sensor with alcohol.
Cleaning the MAF sensor with alcohol is a simple yet crucial maintenance task to ensure your vehicle’s engine operates efficiently. Over time, dirt, debris, and grime can accumulate on the sensor, leading to inaccurate readings and affecting your car’s performance. Using alcohol to clean the MAF sensor is an effective and inexpensive way to restore it to proper working condition.
By following a few straightforward steps, you can clean the sensor safely without causing damage, ultimately improving fuel efficiency and engine performance.
What Are the Benefits of Cleaning Your MAF Sensor?
Cleaning your MAF sensor can benefit your vehicle’s engine and overall performance. Some of the main advantages include the following:
- Improved Fuel Efficiency: A clean MAF sensor ensures the correct amount of air enters the engine, leading to a more accurate air-fuel ratio and better fuel efficiency.
- Enhanced Engine Performance: With an accurately functioning MAF sensor, your car’s engine will receive the right amount of air for combustion, resulting in smoother acceleration and better performance.
- Longer Lifespan for Your Vehicle: Regularly cleaning your MAF sensor can help prevent damage caused by debris buildup, ensuring that your car’s engine runs smoothly for longer.
- Cost Savings: Maintaining a clean and functioning MAF sensor can save money on costly repairs in the long run. A damaged or faulty MAF sensor can lead to engine misfires and other issues that may require expensive repairs.
- Reduced Emissions: A clean MAF sensor can also reduce harmful emissions from your vehicle. As it accurately measures air intake, it allows for optimal fuel combustion, resulting in lower levels of pollutants being released into the environment.
What Will You Need?
To properly clean your MAF sensor, you will need the following materials:
- Mass Air Flow Sensor Cleaner: This specialized cleaner is designed to clean MAF sensors. It is essential to use this type of cleaner as it won’t damage the delicate components of the sensor.
- Screwdriver or Torx Bit: Depending on your vehicle’s make and model, you may need either a screwdriver or a torx bit to remove the MAF sensor from its housing.
- Latex Gloves: To protect your hands from any chemicals and dirt that may be present on the sensor.
- Clean Cloth or Paper Towels: These will wipe down the sensor and any surrounding components.
- Safety Glasses: It is always a good idea to wear safety glasses when working with any type of chemicals.
- Compressed Air: This can remove any loose debris or dirt from the sensor.
- New MAF Sensor: In some cases, replacing the old MAF sensor may be necessary if it is damaged or malfunctioning.
8 Easy Steps on How to Clean MAF Sensor With Alcohol
Step 1. Gather Your Materials:
To clean your MAF sensor effectively, you must ensure you have all the necessary materials ready before you start. Gather a clean, lint-free cloth, isopropyl alcohol, a pair of safety glasses, compressed air, and a replacement MAF sensor in case the old one is beyond cleaning or damaged.
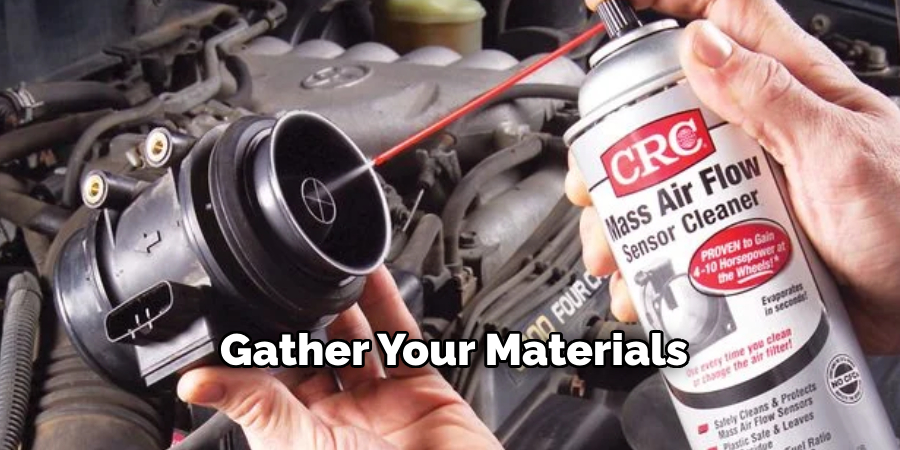
These materials will help you complete the process smoothly without interruptions. Remember to work in a well-ventilated area to avoid inhaling any fumes from the alcohol or compressed air, and ensure your vehicle is powered off entirely for your safety. Taking the time to prepare properly will make the cleaning process much more efficient.
Step 2: Locate the MAF Sensor
To begin the cleaning process, locate the mass air flow (MAF) sensor in your vehicle. Typically, the MAF sensor is positioned between the air filter and the throttle body in the air intake system. Refer to your vehicle’s manual if you’re unsure of its location. Once located, carefully detach the electrical connector by pressing the release tab and gently pulling it away from the sensor. Be cautious not to damage the wiring or connectors during this step.
Step 3: Remove the MAF Sensor
After disconnecting the electrical connector, you must remove the MAF sensor from its housing. Using a screwdriver or the appropriate tool, carefully unscrew or detach any clamps or fasteners securing the sensor in place. Handle the sensor cautiously to avoid causing any damage, as it is a delicate and essential component. Place the removed sensor on a soft surface to prevent contamination or scratches.
Step 4: Clean the MAF Sensor
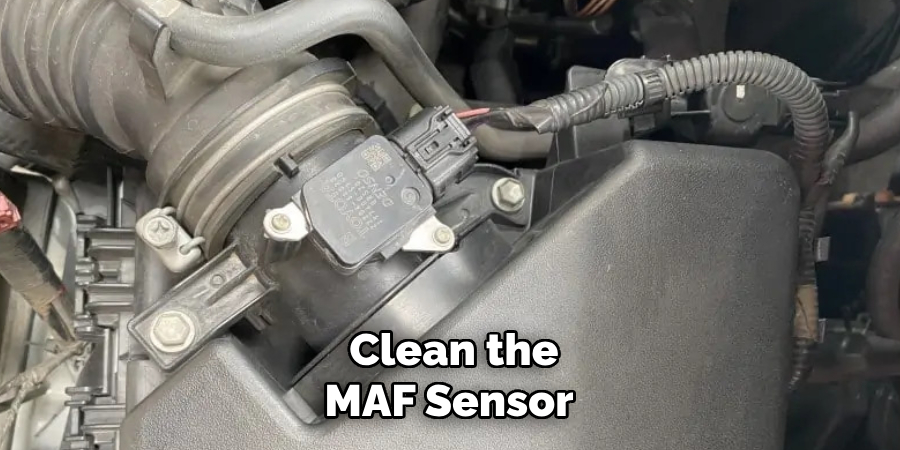
Once the MAF sensor is removed, use a specialized MAF sensor cleaner to clean the component. Spray the cleaner onto the sensor’s wires or filaments, removing all debris and buildup. Avoid using other cleaning agents or touching the sensor, as this may cause damage. Allow the sensor to air dry completely before proceeding to reinstallation.
Step 5: Reinstall the MAF Sensor
After the MAF sensor has fully dried, carefully place it back into its original housing. Ensure that the sensor is aligned correctly with its mounting points to avoid improper installation, which could lead to performance issues. Secure the sensor in place using the screws or fasteners that were removed earlier, tightening them to the appropriate specification without over-tightening, as this could damage the sensor or its housing. Once the sensor is securely in place, reconnect the electrical connector, ensuring it clicks firmly into position to establish a proper connection. Double-check all connections and the mounting to ensure everything is secure. Finally, reassemble and tighten any additional components, such as the air intake duct or cover that were removed earlier.
Step 6: Test the Vehicle
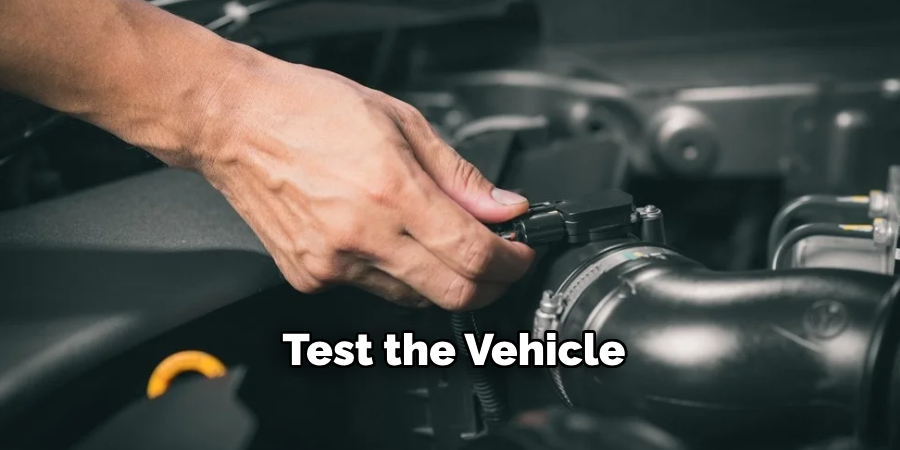
After reinstalling the MAF sensor, start the vehicle’s engine and idle for a few minutes. Observe the engine’s performance to ensure it is running smoothly without hesitation or unusual noises. If you have a diagnostic tool, use it to scan for any potential errors related to the MAF sensor. This final step ensures that the sensor is functioning correctly and that the installation process was successful.
Step 7: Perform a Road Test
Take the vehicle for a short drive to confirm everything is functioning as expected. Pay attention to the engine’s performance during acceleration and deceleration and while maintaining a constant speed. Ensure there are no signs of stalling, hesitation, or poor fuel efficiency. Consider rechecking the installation or consulting a professional mechanic if any issues persist.
Step 8: Final Inspection
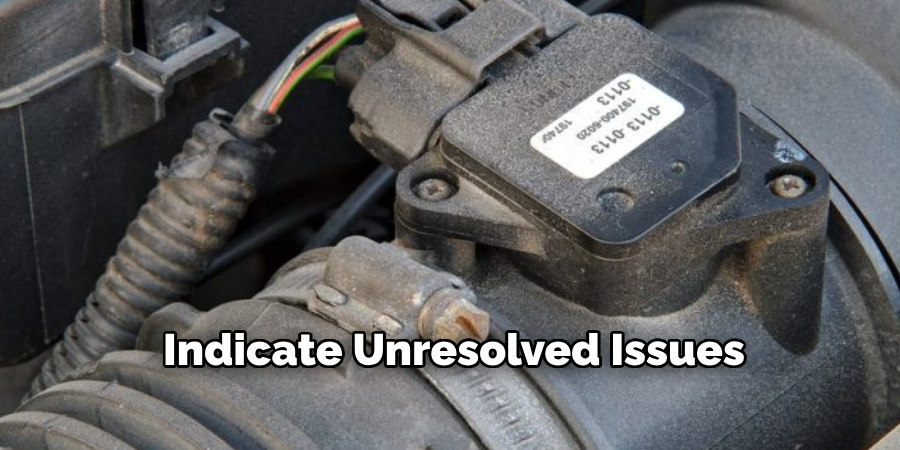
After completing the road test, inspect thoroughly to ensure everything is in proper working order. Begin by visually examining the engine and surrounding components to confirm that all hoses, connectors, and screws are securely in place. Check for any signs of leaks, loose fasteners, or unusual wear. Additionally, verify that the engine’s operating temperature is within the normal range and that there are no warning lights illuminated on the dashboard. Use a diagnostic tool if necessary to scan for any error codes that may indicate unresolved issues. Taking the time for a final inspection helps ensure the reliability and safety of your vehicle moving forward.
By following these maintenance steps and performing regular checks, you can extend the lifespan of your vehicle and avoid costly repairs in the future.
5 Things You Should Avoid
- Using the Wrong Type of Alcohol: Always use isopropyl alcohol with a high purity level (at least 90%) to clean the MAF sensor. Other alcohol or cleaning agents may leave a residue that can damage the sensor.
- Directly Spraying Alcohol on the Sensor: Avoid spraying alcohol directly onto the MAF sensor, as the force of the spray can damage the sensitive components. Instead, use a soft cloth or gently apply the alcohol with a cotton swab.
- Handling the Sensor Roughly: The MAF sensor is delicate, and rough handling can cause permanent damage. Always handle the sensor carefully and avoid dropping it or applying unnecessary pressure.
- Skipping Safety Precautions: Failing to disconnect the battery or adequately turn off the vehicle before cleaning the MAF sensor can lead to electrical damage or injury. Ensure the engine is completely off and the sensor is removed safely.
- Skipping Drying Time: After cleaning, do not reinstall the MAF sensor before it has thoroughly dried. Moisture can affect its functionality and lead to inaccurate readings. Allow ample time for the alcohol to evaporate completely.
By avoiding these common mistakes, you can ensure a thorough and effective cleaning of your MAF sensor.
Conclusion
How to clean MAF sensor with alcohol is a straightforward process that can significantly improve your vehicle’s performance and fuel efficiency.
By following the steps carefully and avoiding common mistakes, you can ensure accurate readings and maintain the functionality of your sensor. Always prioritize safety during the cleaning process and allow the sensor to dry completely before reinstalling it. Regular maintenance of your MAF sensor not only prevents potential issues but also keeps your engine running smoothly, enhancing your overall driving experience.
Hopefully, the article on cleaning and maintaining your MAF sensor has provided you with valuable information to keep your vehicle running at its best.
About
Safety Fic is a distinguished figure in the world of Diy design, with a decade of expertise creating innovative and sustainable Diy solutions. His professional focus lies in merging traditional craftsmanship with modern manufacturing techniques, fostering designs that are both practical and environmentally conscious. As the author of diy, Safety Fic delves into the art and science of Safety Fic-making, inspiring artisans and industry professionals alike.
Education RMIT University
(Melbourne, Australia) Associate Degree in Design (Safety Fic) Focus on sustainable design, industry-driven projects, and practical craftsmanship. Gained hands-on experience with traditional and digital manufacturing tools, such as CAD and CNC software.
Nottingham Trent University
(United Kingdom) Bachelor’s in diyfastly.com and Product Design (Honors) Specialized in product design with a focus on blending creativity with production techniques. Participated in industry projects, working with companies like John Lewis and Vitsoe to gain real-world insights.
Publications and Impact
In diy, Safety Fic his insights on indoor design processes, materials, and strategies for efficient production. His writing bridges the gap between artisan knowledge and modern industry needs, making it a must-read for both budding designers and seasoned professionals.