

Are you looking for a way to make your home more energy efficient and secure simultaneously? Installing solar panels with a Ring Spotlight Camera can help you accomplish that goal.
Whether you are new to the concept of solar power or have some experience with it, this guide will walk you through connecting a solar panel to your Ring Spotlight Camera.
With this guide, not only will you learn how to connect solar panel to ring spotlight camera, but you will also gain an understanding of the benefits they can provide. In addition, we’ll explore some troubleshooting tips if an issue arises when connecting everything. So whether you’re interested in green living or improved security, connecting your Ring Spotlight Camera with solar panel technology is just what the doctor ordered!
What are the Benefits of Connecting Solar Panel to Ring Spotlight Camera?
While the main motivation for installing a solar panel may be to save money on your energy bills, there are other benefits to consider when connecting it to your Ring Spotlight Camera. First and foremost, using solar power reduces our reliance on traditional fossil fuels, helping the environment by reducing pollution and conserving natural resources.
In addition, connecting your Ring Spotlight Camera to a solar panel can increase its battery life and provide uninterrupted surveillance even during power outages.
Additionally, by using a solar panel, you can potentially save money in the long run as you generate your energy instead of relying solely on your utility company. Plus, with advancements in technology, solar panels are becoming more affordable and efficient than ever before.
What Will You Need?
To connect a solar panel to your Ring Spotlight Camera, you will need the following equipment:
- Solar panel
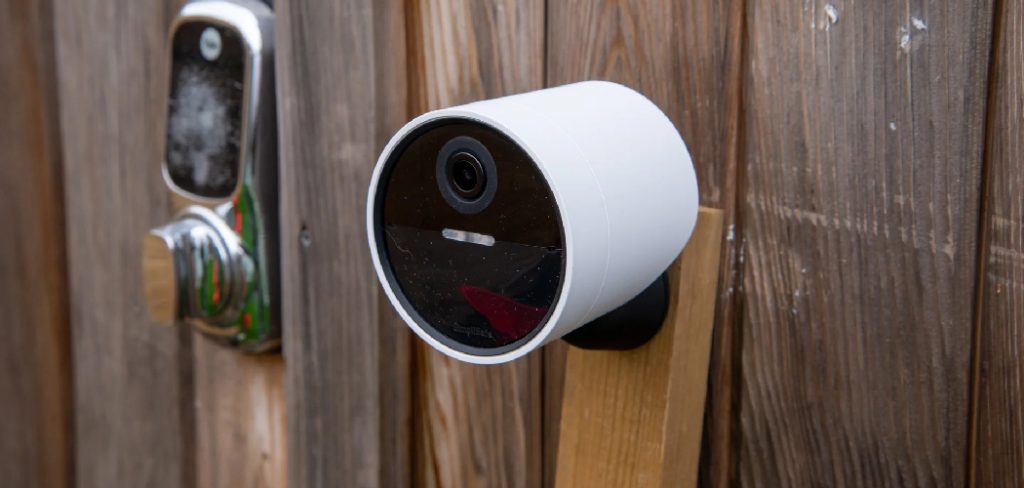
- Ring Spotlight Camera
- Mounting bracket (if not included with solar panel)
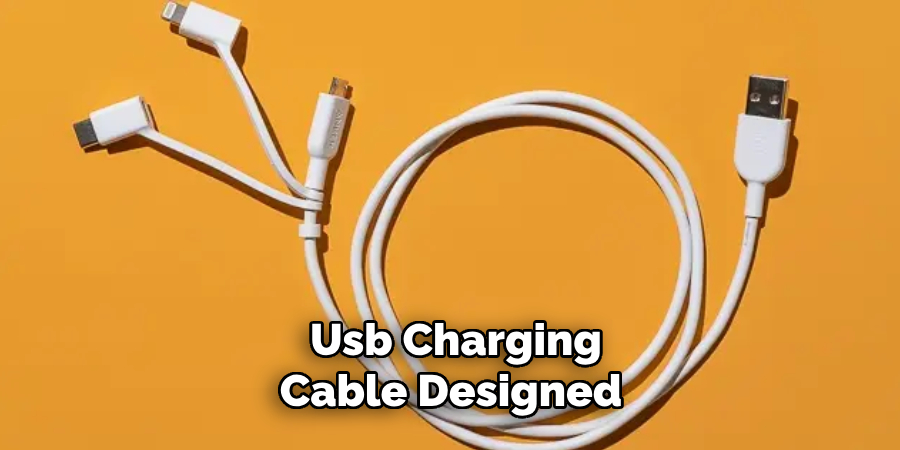
- USB charging cable
Once you have gathered these items, you are ready to start connecting your solar panel to your Ring Spotlight Camera.
8 Easy Steps on How to Connect Solar Panel to Ring Spotlight Camera
Step 1. Choose the Right Solar Panel
Firstly, ensure that the solar panel you have chosen is compatible with your Ring Spotlight Camera. The solar panel should come with a USB charging cable designed specifically for use with your camera model.
Once you have confirmed compatibility, choose a location for the panel where it will receive maximum sunlight exposure throughout the day.
Step 2. Mount the Solar Panel
If your solar panel does not have a mounting bracket, you can purchase one separately or create one using basic materials such as wood or metal. Mount the bracket on a wall or other sturdy surface, ensuring the panel is facing the right direction for optimal sunlight exposure. Be careful not to damage the panel during installation.
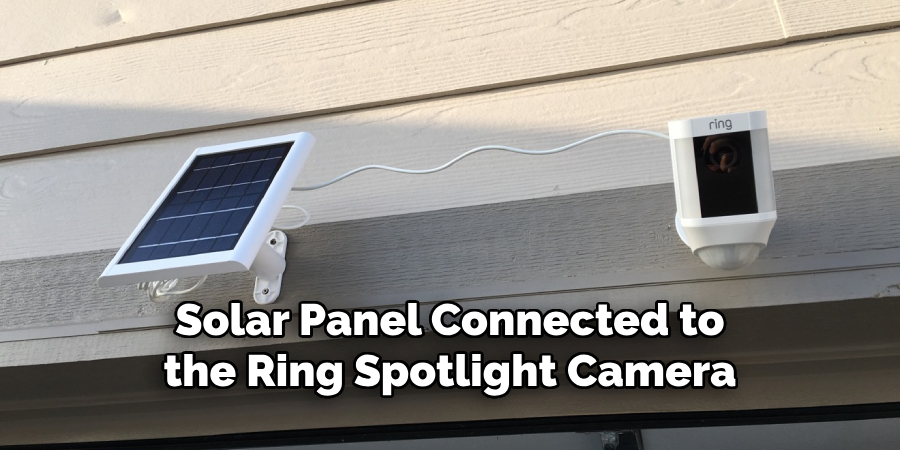
Step 3. Connect the Solar Panel to the Ring Spotlight Camera
Locate the USB charging cable that came with your solar panel. Plug one end of the cable into the solar panel and the other end into the Ring Spotlight Camera. Ensure the connections are secure. This will allow the solar panel to charge your Ring Spotlight Camera, providing a continuous power source. Always follow the manufacturer’s instructions to ensure the process is carried out correctly and safely.
Step 4. Secure the Cable
The next step is to secure the USB charging cable. Ensure it’s not loosely hanging, as it can be a potential tripping hazard or be damaged by environmental factors. Use cable clips or wraps to secure it along the wall or any other safe surface. Try to keep the cable out of sight as much as possible to maintain a neat appearance and avoid attracting unwanted attention to your camera setup.
Step 5. Test the Connection
After finishing the physical installation, it’s time to test the connection. Check your Ring Spotlight Camera’s battery status through your Ring app. If the solar panel is successfully charging your camera, you should see a solar panel icon showing that it’s getting power from the solar panel.
If the icon does not appear or you receive a low battery notification, double-check your connections and make sure the solar panel is receiving enough sunlight. Remember, it may take a few hours on a sunny day for the solar panel to fully charge the camera’s battery.

Step 6. Monitor the Performance
Over the next few days, monitor the battery level of your Ring Spotlight Camera to ensure the solar panel is providing sufficient power. Remember, the efficiency of solar panels can be affected by weather conditions and the amount of direct sunlight they receive.
If you notice your camera’s battery level dropping significantly, consider adjusting the placement of the solar panel to a more sunlit location. If the battery level continues to decline, there may be an issue with the solar panel or the connecting cable, requiring further troubleshooting or potential replacement.
Step 7. Regular Maintenance
To ensure the long-term effectiveness of your solar panel, it’s essential to carry out regular maintenance. This includes cleaning the solar panel to remove dust and debris that can obstruct sunlight, thereby reducing its efficiency. Use a soft cloth and soapy water to gently clean the panel’s surface, being careful to avoid causing any damage.
Additionally, check the cable connections periodically to ensure they are secure and in good condition. By taking these steps, you can maximize the lifespan and performance of your solar panel and continue to enjoy the benefits of an eco-friendly, efficient power source for your Ring Spotlight Camera.
Step 8. Troubleshooting Common Issues
If you’re facing any issues with your solar panel connected to the Ring Spotlight Camera, don’t panic. First, check if the USB cable is connected correctly and not damaged. Ensure the solar panel is not shaded and gets enough sunlight throughout the day.
If the battery level drops, try resetting your camera and reconnecting the solar panel. If all else fails, it might be time to contact Ring’s customer support for professional assistance.
By following these eight easy steps, you can effectively connect your solar panel to your Ring Spotlight Camera and enjoy the many benefits it provides.
5 Additional Tips and Tricks
- Correct Placement: Ensure the solar panel is placed where it can get maximum sunlight exposure. Trees or buildings should not overshadow it.
- Angle Adjustment: The panel should be tilted at an angle optimal for sunlight exposure. The angle would change with the changing seasons.
- Regular Cleaning: Dust and debris can reduce the efficiency of the solar panel. It’s necessary to clean it with a soft cloth regularly.
- Connection Check: Ensure the solar panel is securely connected to the Ring Spotlight Camera. The connections should be tight to prevent any power loss.
- Keep an Eye on the Battery Level: Keep track of the battery level on your Ring app. If you notice a sudden drop in power, check the connections and clean the panel if necessary.
These tips will not only help you connect your solar panel to your Ring Spotlight Camera but also ensure its optimal performance.
5 Things You Should Avoid
- Avoid Shaded Areas: When installing your solar panel, avoid shaded areas. Even small shadows can significantly reduce the efficiency of the panel.
- Avoid Over-Tightening Connections: While ensuring the connections are secure is vital, over-tightening can damage the panel or the camera.
- Avoid Harsh Cleaning Materials: When cleaning the solar panel, avoid using harsh chemicals or abrasive materials as they might scratch the surface and hamper the panel’s efficiency.
- Avoid Ignoring Weather Changes: Be mindful of changes in weather conditions. Extreme weather, such as heavy snow or hail, may damage the panel or affect its performance.
- Avoid Neglecting Regular Maintenance: Pay attention to regular maintenance of your solar panel and Ring Spotlight Camera. Routine checks will help you detect any problems early and extend the life of your devices.
By following these tips, you can ensure a smooth and efficient connection between your solar panel and Ring Spotlight Camera.
Why is My Solar Spotlight Not Working?
There could be various reasons why your solar spotlight is not working. Here are a few common issues and their possible solutions:
- Loose Connections: Check if the connections between the solar panel and camera are secure. If they appear loose, tighten them.
- Dirty Panel: Dust and debris can accumulate on the panel over time, reducing efficiency. Clean it regularly to ensure maximum sunlight exposure.
- Dead Battery: If the battery level is too low or has wholly drained, try charging it using a USB cable connected to a power source.
- Faulty Solar Panel: In rare cases, the solar panel might be faulty—contact Ring customer support for further assistance in case of a defective product.
These troubleshooting steps can help you identify and resolve any issues with your solar spotlight. If the problem persists, contact Ring customer support for further assistance.

Conclusion
How to connect solar panel to ring spotlight camera can be an enriching experience, both for the environment and for your wallet. In addition to saving energy, you will be able to conveniently monitor your property from any device while reducing the time spent on charging the batteries.
With proper consideration of the environmental conditions and individual requirements, it is easy to achieve this goal. So take the plunge and try it out – who knows how much money or energy you could save? And don’t forget: always consult a professional electrician before fastening any wires or appliances to ensure a safe connection.
With these tips, go forth and create a truly eco-friendly home!
About
Safety Fic is a distinguished figure in the world of Diy design, with a decade of expertise creating innovative and sustainable Diy solutions. His professional focus lies in merging traditional craftsmanship with modern manufacturing techniques, fostering designs that are both practical and environmentally conscious. As the author of diy, Safety Fic delves into the art and science of Safety Fic-making, inspiring artisans and industry professionals alike.
Education RMIT University
(Melbourne, Australia) Associate Degree in Design (Safety Fic) Focus on sustainable design, industry-driven projects, and practical craftsmanship. Gained hands-on experience with traditional and digital manufacturing tools, such as CAD and CNC software.
Nottingham Trent University
(United Kingdom) Bachelor’s in diyfastly.com and Product Design (Honors) Specialized in product design with a focus on blending creativity with production techniques. Participated in industry projects, working with companies like John Lewis and Vitsoe to gain real-world insights.
Publications and Impact
In diy, Safety Fic his insights on indoor design processes, materials, and strategies for efficient production. His writing bridges the gap between artisan knowledge and modern industry needs, making it a must-read for both budding designers and seasoned professionals.