

Cutting safety glass for custom applications requires precision, the right tools, and knowledge of the glass’s unique properties. Safety glass, designed to minimize injury when broken, is commonly used in automotive, architectural, and industrial settings. Unlike regular glass, it often features a layered construction, such as laminated or tempered glass, which makes the cutting process more complex.
This guide will provide step-by-step instructions on how to cut safety glass for custom use.
Importance of Cutting Safety Glass
Cutting safety glass is a critical skill for several reasons. First and foremost, it allows for the customization of glass to fit specific requirements, whether for vehicle windows, building designs, or specialized industrial applications. Properly cutting safety glass ensures that the structural integrity of the material is maintained, preserving its protective features.
Additionally, precise cutting minimizes waste, saving both material and costs. Safety glass is designed to protect individuals from injury, and improper handling or cutting can compromise its effectiveness, putting lives at risk. Understanding the importance of cutting safety glass correctly helps maintain its durability and functionality while achieving the desired application.
Understanding Safety Glass Types
Before cutting safety glass, it is essential to understand the different types available, as each requires specific tools and techniques. The two most common types of safety glass are laminated and tempered glass. Laminated glass consists of two or more layers of glass bonded together with a plastic interlayer, making it durable and shatter-resistant. When broken, the interlayer holds the shards in place, reducing the risk of injury.
Tempered glass, on the other hand, is heat-treated to increase its strength. It breaks into small, less hazardous pieces when shattered, making it ideal for applications where high impact resistance is needed. Both types have unique properties that influence how they can be cut, and identifying the type of safety glass you are working with is the first step to ensuring a successful and safe cutting process.
10 Methods How to Cut Safety Glass for Custom Use
1. Understand the Type of Safety Glass
Before cutting, identify whether you are working with tempered or laminated safety glass. Tempered glass cannot be cut once it has been treated, as it will shatter upon attempting to modify it. Laminated glass, on the other hand, consists of layers of glass bonded with a plastic interlayer and can be cut with the right tools and techniques.

Understanding the type of glass ensures you approach the task appropriately and avoid unnecessary damage.
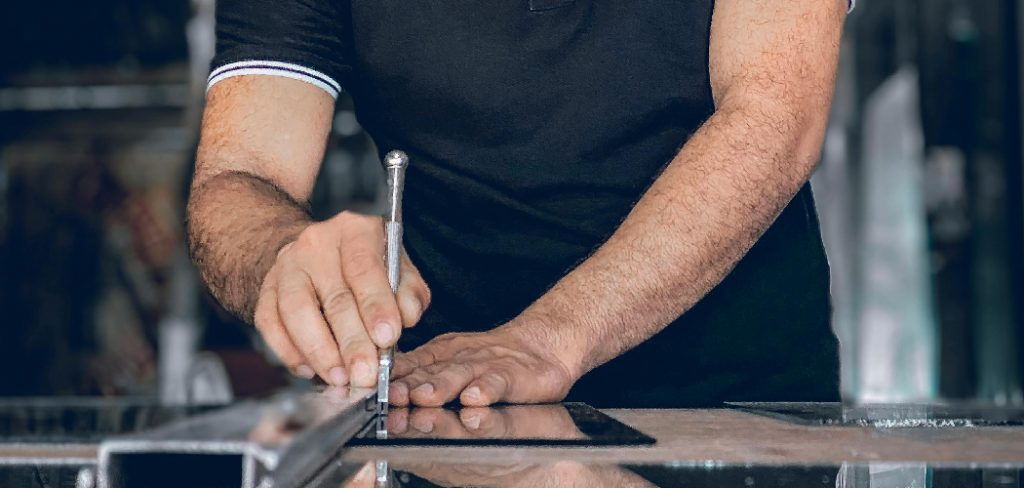
2. Use the Right Tools
For laminated safety glass, specialized tools such as a glass cutter, utility knife, and straightedge are essential. A diamond-tipped glass cutter provides the precision needed to score the glass surface, while a utility knife is used to cut through the interlayer. Ensure all tools are in good condition and designed for glass cutting to achieve clean, accurate results.
3. Prepare the Workspace
Set up a clean, stable work surface free of debris that could scratch the glass. Use a non-slip mat or rubber padding to stabilize the glass and prevent movement during cutting. Adequate lighting and a comfortable working height are also essential for precision and safety. Proper workspace preparation minimizes the risk of errors and accidents.
4. Measure and Mark the Cutting Line
Accurate measurements are critical when cutting safety glass for custom use. Use a measuring tape and a grease pencil or marker to outline the desired cut on the glass surface. Double-check your measurements to ensure accuracy, as even slight errors can compromise the final result. A straightedge or ruler can help you achieve straight, clean lines.
5. Score the Glass Surface
Using a diamond-tipped glass cutter, score the glass along the marked line. Apply even pressure as you move the cutter across the glass surface, ensuring a continuous, unbroken score line. Avoid pressing too hard, as this can cause uneven cuts or damage the glass. For curved cuts, use a template or guide to maintain accuracy.
6. Cut Through the Interlayer
For laminated glass, use a utility knife to carefully cut through the plastic interlayer along the scored line. Apply steady pressure and follow the score line precisely to avoid uneven edges. In some cases, applying heat with a heat gun can soften the interlayer, making it easier to cut. This step requires patience and attention to detail.
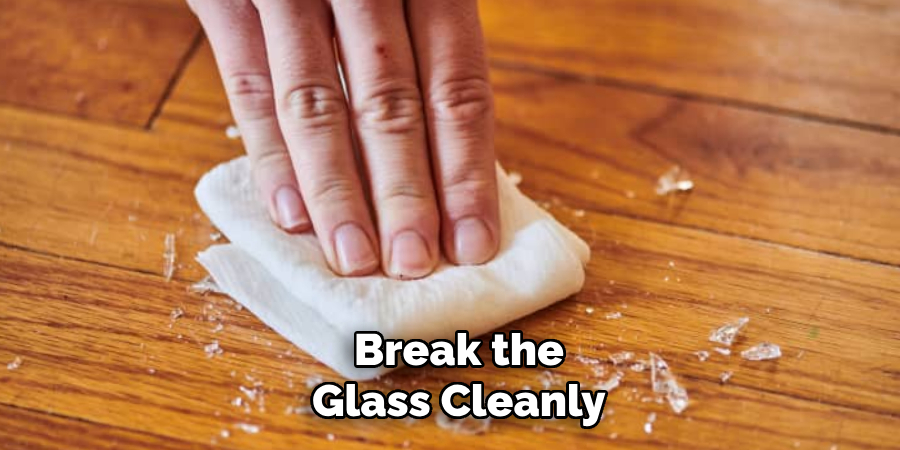
7. Snap the Glass Along the Score Line
After scoring and cutting the interlayer, gently snap the glass along the score line. Place the glass over a flat edge with the score line aligned to the edge, then apply downward pressure on both sides to break the glass cleanly. For larger pieces, use specialized glass-breaking pliers to apply even pressure and achieve a precise break.
8. Smooth the Edges
Once the glass is cut, the edges may be sharp or uneven. Use a glass file, sandpaper, or a rotary tool with a grinding attachment to smooth the edges. Wear gloves and safety goggles during this step to protect yourself from glass shards. Smoothing the edges ensures a polished finish and reduces the risk of injury.
9. Apply Safety Film
To enhance the durability and safety of the cut glass, consider applying a protective safety film to the surface. This film helps hold the glass together in case of breakage and provides additional scratch resistance. Ensure the glass surface is clean and dry before applying the film for optimal adhesion.
10. Test Fit and Make Adjustments
Before final installation, test fit the cut glass in its intended location to ensure it meets your specifications. If adjustments are needed, use the appropriate tools to make minor modifications. Take your time to achieve a perfect fit, as rushing this step can lead to errors or damage.
Maintenance and Upkeep
Proper maintenance and upkeep of safety glass ensure its longevity, functionality, and appearance. Regular cleaning with a non-abrasive glass cleaner and a soft cloth helps prevent the buildup of dirt, grime, or scratches. Avoid using harsh chemicals or abrasive materials, as these can damage the surface or weaken the integrity of the glass. For laminated glass, inspect the edges periodically to check for signs of moisture intrusion or delamination,
as these issues can compromise its strength. Tempered glass requires visual inspections for chips or cracks that could expand under stress.
If the glass is used in high-traffic or outdoor areas, consider applying a protective coating or adhesive safety film to guard against weathering or impact damage. Ensure the film remains intact and replace it if it begins to peel or deteriorate. Additionally, any hardware or structural supports attached to the safety glass should be checked for stability and wear over time.
Regular upkeep not only maintains the glass’s aesthetic qualities but also ensures it continues to provide the safety and durability required for its intended application.

Tips for Achieving the Best Results
Choose High-Quality Tools and Materials
Using professional-grade tools and high-quality safety glass improves the precision and outcome of your work. Cheaper alternatives may compromise accuracy, durability, and safety.
Work Slowly and Carefully
Rushing the process can lead to mistakes, uneven cuts, or damage to the glass. Take your time during each step to ensure accuracy and minimize errors.
Maintain a Clean Workspace
Keep your workspace organized and free of debris to avoid scratches or contamination on the glass surface. A stable and clean environment ensures the best results.
Practice on Scrap Glass First
If you’re cutting safety glass for the first time, practice on leftover or scrap pieces to familiarize yourself with the tools and techniques. This can build confidence and skill before working on your actual project.
Use Proper Safety Gear
Always wear safety goggles, gloves, and long sleeves to protect yourself from glass shards or accidental cuts. A dust mask is also helpful when sanding or grinding edges.
Double-Check Measurements and Layouts
Before scoring or cutting, review your measurements and marked lines thoroughly. Small errors in this early step can impact the entire project.
Pay Attention to Environmental Conditions
Factors such as temperature and humidity can affect the cutting process, especially when applying heat or working with adhesive safety films. Optimal conditions promote better results.
Inspect the Glass Before Beginning
Examine the safety glass for pre-existing cracks, chips, or defects that could worsen during cutting. Starting with undamaged glass ensures a better final product.
Following these tips will help you achieve the best possible results when working with safety glass, ensuring both a polished finish and structural integrity.

Conclusion
Working with safety glass requires precision, patience, and the right tools to achieve professional results. By following the outlined steps and maintaining proper safety precautions, you can cut and handle safety glass effectively while preserving its structural integrity. Remember that preparation, attention to detail, and regular maintenance are critical to ensuring the longevity and reliability of the glass for its intended purpose.
Thanks for reading, and we hope this has given you some inspiration on how to cut safety glass for custom use!
About
Safety Fic is a distinguished figure in the world of Diy design, with a decade of expertise creating innovative and sustainable Diy solutions. His professional focus lies in merging traditional craftsmanship with modern manufacturing techniques, fostering designs that are both practical and environmentally conscious. As the author of diy, Safety Fic delves into the art and science of Safety Fic-making, inspiring artisans and industry professionals alike.
Education RMIT University
(Melbourne, Australia) Associate Degree in Design (Safety Fic) Focus on sustainable design, industry-driven projects, and practical craftsmanship. Gained hands-on experience with traditional and digital manufacturing tools, such as CAD and CNC software.
Nottingham Trent University
(United Kingdom) Bachelor’s in diyfastly.com and Product Design (Honors) Specialized in product design with a focus on blending creativity with production techniques. Participated in industry projects, working with companies like John Lewis and Vitsoe to gain real-world insights.
Publications and Impact
In diy, Safety Fic his insights on indoor design processes, materials, and strategies for efficient production. His writing bridges the gap between artisan knowledge and modern industry needs, making it a must-read for both budding designers and seasoned professionals.