

Drilling holes for cam lock connectors is a fundamental skill for anyone involved in furniture assembly, cabinetry, or DIY woodworking projects. Cam lock connectors are ingenious hardware components that provide a quick and secure way to join pieces of wood, particleboard, or other materials. However, for them to work effectively, precision is key when it comes to drilling holes to accommodate these connectors.
In this comprehensive guide, we will explore the essential steps and techniques required how to drill holes for cam lock connectors. Whether you’re a seasoned woodworker or a novice looking to enhance your DIY capabilities, mastering this skill will empower you to create sturdy and well-constructed furniture and cabinets with ease. Join us as we delve into the art of hole drilling for cam lock connectors and unlock the secrets to achieving seamless and professional-looking assemblies.
What Cam Lock Connectors Are and How They Work
Cam lock connectors are mechanical fasteners used to securely connect two pieces of material together, such as wood, metal, or plastic. The connector consists of two parts: an internal cam and a pin that fit into each other.
The cam is inserted into the end of one piece of material and then the pin is inserted into the opposite end. When pressure is applied, the cam and pin rotate in opposite directions, locking the two pieces of material together.
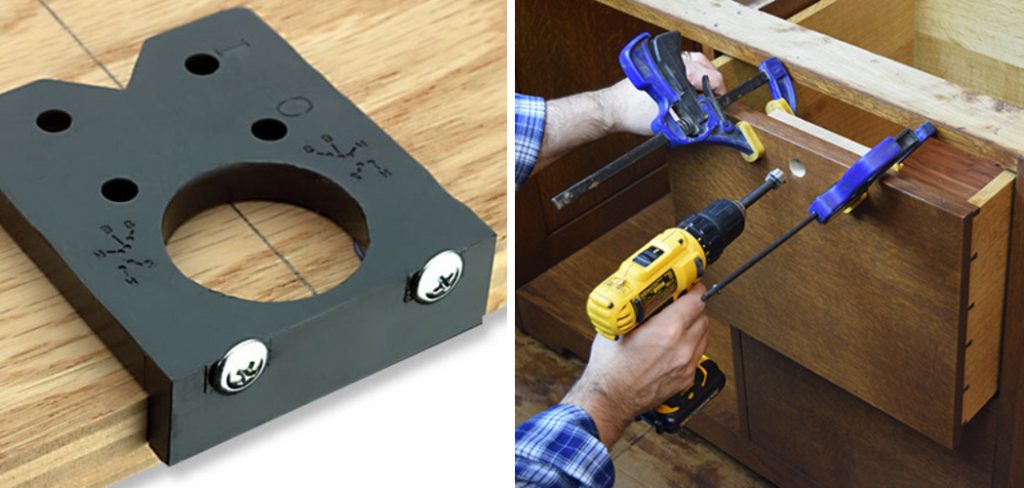
Drilling holes for cam lock connectors is an easy process that requires only basic tools. The first step is to select the appropriate size drill bit and ensure it fits securely into your drill. Once you have chosen the size of drill bit, you should mark the hole locations on both the male and female connectors. When marking the hole locations, make sure they are aligned correctly so that the connector can be inserted quickly and easily.
Once you have marked both pieces of material, use a drill to create the holes. It is important to ensure that the drill bit is level when drilling each hole. This will help prevent any misalignment or damage to the connector during installation. To finish, insert the cam and pin into the holes on both pieces of material and apply pressure to lock them in place.
The process of drilling for cam lock connectors is quick and easy, allowing you to securely join two pieces of material in just a few minutes. With this knowledge, you can now confidently install cam locks for any project!
The Importance of a Clean and Organized Workspace
When drilling holes for cam lock connectors, it is important to have a clean and organized workspace. This will ensure that the drill bit does not become jammed with debris, resulting in a poor end result. Additionally, make sure to properly set up your project with the correct measurements before beginning; this will save time and avoid any further costly mistakes.
Furthermore, use a jig or template to ensure that the holes will be drilled in a straight line, as this is essential for proper installation. Finally, always wear eye protection when drilling and use a drill bit with a cutting angle appropriate for the material being drilled.
This will help prevent overdrilling and other damage to both the project and your tools. By following these simple steps, you can ensure that your cam lock connector installation will be successful.
In addition to having a clean and organized workspace, it is also important to use the right tools for the job. A conventional hand drill should never be used for drilling holes in metal or other hard materials; instead, a power drill should be used with an appropriate bit designed specifically for that material. If you are unsure of which drill bit to use, consult your local hardware store or the manufacturer of your lock system for advice.
Having a well-maintained workspace and the right tools will not only make drilling holes for cam lock connectors easier, but it will also ensure that they are installed correctly and securely. With a bit of careful preparation beforehand, you can be confident that your project will be a success.
10 Steps How to Drill Holes for Cam Lock Connectors
Step 1: Gather Your Tools and Materials
Before embarking on your drilling project, it’s essential to assemble all the necessary tools and materials. This step ensures that you have everything readily available, creeklining the process. Here’s a detailed list of what you’ll need:
Drill: Choose a suitable drill for the task. A corded or cordless drill with adjustable speed and torque settings is highly recommended.
Forstner Drill Bits: Forstner bits are specifically designed for creating clean, flat-bottomed holes. Select the appropriate size that matches the cam lock connectors you intend to use.
Clamps: Secure your workpiece firmly to prevent it from shifting during drilling.
Safety Gear: Always prioritize safety. Wear safety glasses or goggles to protect your eyes from any debris or dust generated during drilling.
Measuring Tools: Accurate measurements are critical for precise hole placement. Use a tape measure, combination square, or a ruler to measure and mark hole locations.
Marking Tool: Choose a pencil or a marking tool with fine, visible lines for precise hole marking.

Workbench or Stable Surface: Ensure you have a sturdy and stable work surface to support your project.
Step 2: Measure and Mark Hole Locations
Begin by meticulously measuring and marking the locations where you plan to drill the holes for your cam lock connectors. Accurate measurements are key to achieving a symmetrical and secure assembly. Utilize your measuring tools to ensure precise hole placement, taking care to maintain even spacing and alignment as required.
Step 3: Determine Hole Depth
Cam lock connectors typically require holes of a specific depth to function optimally. It’s essential to consult the manufacturer’s instructions for your specific cam lock connectors to ascertain the appropriate depth requirement. Once you’ve determined the depth, set the depth stop on your drill to match.
Step 4: Secure the Workpiece
To ensure both accuracy and safety, securely clamp your workpiece to your workbench or a stable surface. This prevents any unwanted movement or shifting during the drilling process, which can lead to inaccuracies and potential safety hazards.
Step 5: Select the Right Forstner Bit
Select a Forstner drill bit that corresponds to the size of the holes needed for your cam lock connectors. It’s crucial to use a sharp and clean bit to ensure that your holes are clean and precise.
Step 6: Set the Drill Speed
Before commencing drilling, adjust the speed of your drill to match the type of material you are working with. For most wood applications, a medium drill speed is suitable. However, when dealing with denser materials such as hardwood, it may be necessary to reduce the drill speed to prevent overheating and wood burning.
Step 7: Position the Forstner Bit
With the drill turned off, insert the Forstner bit into the drill chuck and tighten it securely. Position the tip of the bit precisely over the marked hole location on your workpiece.
Step 8: Start Drilling Slowly
Before drilling the hole, it’s essential to start slowly. This initial slow rotation helps create a small guide hole and prevents the Forstner bit from wandering off-center when you begin drilling.
Step 9: Begin Drilling
Once you’ve created the guide hole, gradually increase the speed of your drill and apply steady, even pressure. Keep the drill as straight as possible to ensure that the hole is drilled accurately and perpendicularly to the surface.
Step 10: Check Hole Depth and Clean Up
As you drill, periodically stop and check the depth of the hole using a depth gauge or a piece of tape wrapped around the drill bit. When the hole reaches the required depth, stop drilling. Withdraw the drill slowly to avoid splintering the wood around the hole.
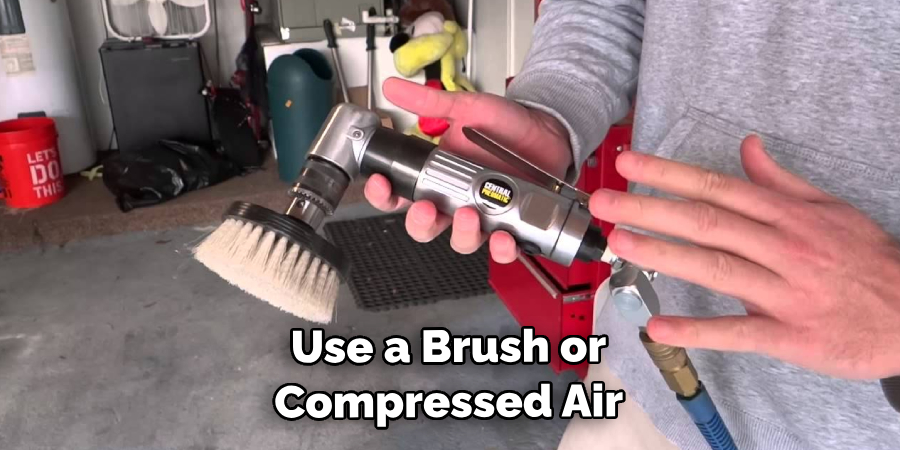
After completing the holes for your cam lock connectors, remove any wood shavings or debris from the workpiece. You can use a brush or compressed air to clean out the holes thoroughly.
Step 11: Test Fit the Cam Lock Connectors
Before assembling your project, it’s a good practice to test fit the cam lock connectors to ensure they fit snugly and securely into the holes you’ve drilled. If needed, make any adjustments or corrections to the holes to ensure a proper fit.
Conclusion
In conclusion, drilling holes for cam lock connectors can be a challenge for beginners, but it’s an easily learned technique with the right tools and good practice. If you have questions, don’t be afraid to ask a professional. Remember that accuracy is key when drilling for cam screws and holes – any mistake could mean disaster.
Keep in mind these simple steps before running your drill and you’ll have all the necessary knowledge on how to drill holes successfully for cam locks. With patience and practice, it will become second nature! So no matter what project you’re working on now or in the future, you know exactly how to drill holes for cam lock connectors quickly and accurately as can be.
About
Safety Fic is a distinguished figure in the world of Diy design, with a decade of expertise creating innovative and sustainable Diy solutions. His professional focus lies in merging traditional craftsmanship with modern manufacturing techniques, fostering designs that are both practical and environmentally conscious. As the author of diy, Safety Fic delves into the art and science of Safety Fic-making, inspiring artisans and industry professionals alike.
Education RMIT University
(Melbourne, Australia) Associate Degree in Design (Safety Fic) Focus on sustainable design, industry-driven projects, and practical craftsmanship. Gained hands-on experience with traditional and digital manufacturing tools, such as CAD and CNC software.
Nottingham Trent University
(United Kingdom) Bachelor’s in diyfastly.com and Product Design (Honors) Specialized in product design with a focus on blending creativity with production techniques. Participated in industry projects, working with companies like John Lewis and Vitsoe to gain real-world insights.
Publications and Impact
In diy, Safety Fic his insights on indoor design processes, materials, and strategies for efficient production. His writing bridges the gap between artisan knowledge and modern industry needs, making it a must-read for both budding designers and seasoned professionals.