

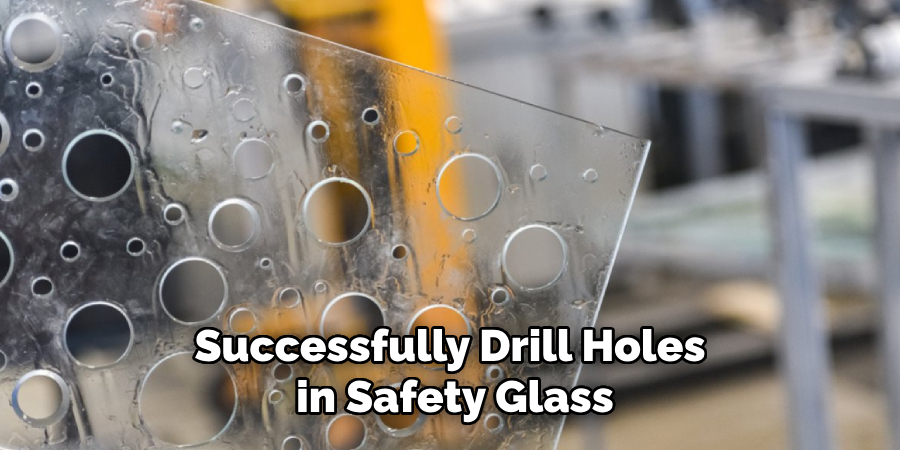
Drilling holes in safety glass can be a challenging task due to its unique composition, which includes a layer of plastic sandwiched between two sheets of glass. This design provides durability and protection but also makes it prone to cracking or shattering if not handled correctly. Whether you’re a professional or a DIY enthusiast, understanding the proper techniques and tools is essential to ensure a clean, safe, and precise outcome.

This guide on How to drill holes in safety glass will walk you through the essential steps and precautions needed to achieve success when working with safety glass.
Why is Safety Glass Challenging to Drill?
Safety glass, also known as tempered or laminated glass, is designed to be resistant to impact and breakage. Its composition makes it stronger than regular glass but also trickier to work with. The plastic layer between the two sheets of glass adds an extra layer of difficulty when drilling as it can melt and cause the drill bit to bind or break.
Moreover, safety glass tends to shatter into small pieces rather than large shards, making it difficult to control and risking injury if precautions are not taken.
Tools Needed for Drilling Holes in Safety Glass
To successfully drill holes in safety glass, you’ll need the following tools:
- A Power Drill With Adjustable Speed Settings
- Diamond-tipped Drill Bits Specially Designed for Glass or Tile
- Duct Tape or Masking Tape
- Safety Glasses and Gloves
- A Spray Bottle With Water
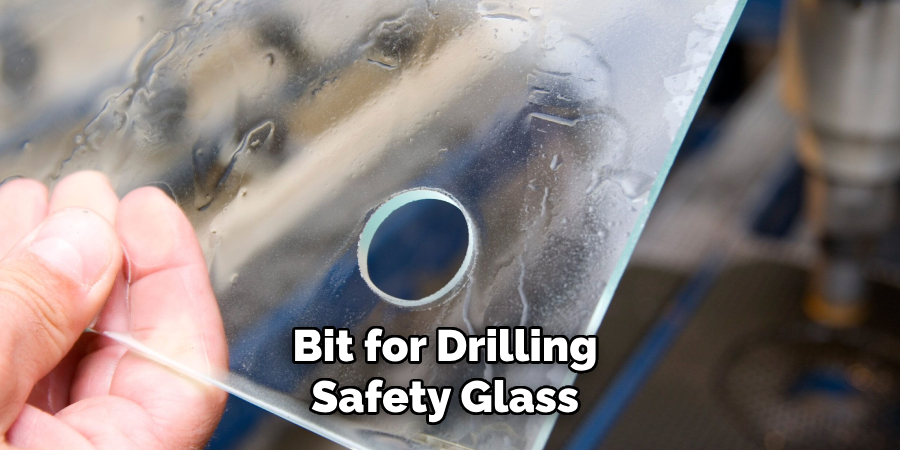
It’s crucial to use a diamond-tipped drill bit as it is specifically designed to withstand the heat and pressure created when drilling through safety glass. Regular drill bits will not be effective and may even break, causing injury.
8 Steps on How to Drill Holes in Safety Glass
Step 1: Measure and Mark the Desired Hole Location
Begin by measuring and marking the precise location where you want the hole to be drilled. Use a tape measure and ensure the dimensions are accurate to avoid errors that could weaken the glass. Once you’ve determined the spot, place a small piece of duct tape or masking tape over the area.
This will help prevent the drill bit from slipping and provide added stability during the drilling process. Use a marker to make a clear, visible dot on the tape at the exact point where the hole will be drilled. Double-check your measurements before proceeding to the next step.
Step 2: Wear Protective Gear
Before beginning the drilling process, ensure you are wearing the appropriate protective gear. Safety glasses are essential to shield your eyes from any glass shards or debris that might be generated during drilling. Additionally, wear sturdy gloves to protect your hands from sharp edges and possible cuts.
If possible, consider wearing a dust mask to avoid inhaling any fine particles created during the process. Proper protective gear is crucial for minimizing the risk of injury and ensuring a safe working environment.
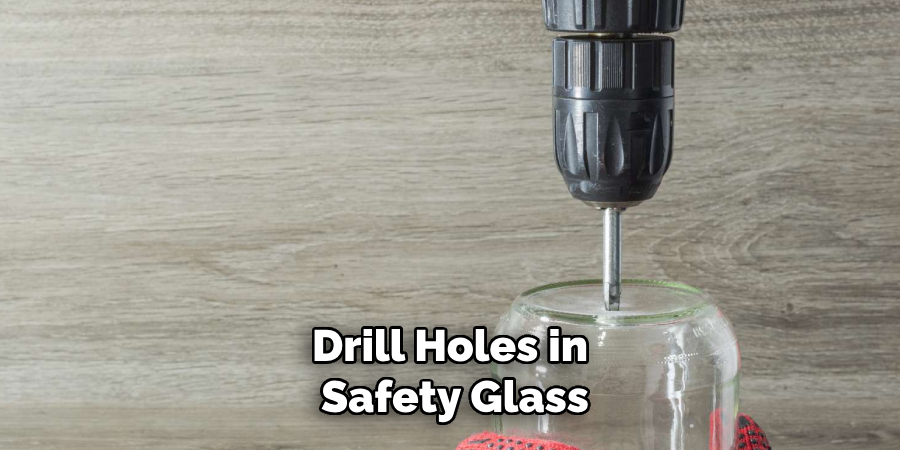
Step 3: Set Up the Drill
Attach a diamond-tipped drill bit to your power drill, ensuring it is securely tightened. Set the drill to the lowest speed setting, as high-speed drilling can generate heat and increase the risk of cracking or shattering the safety glass. If your drill has an adjustable torque setting, choose a moderate setting to maintain greater control during the drilling process.
Position the drill perpendicular to the marked spot on the glass to ensure a clean and accurate hole. Keep a spray bottle of water nearby to cool the surface while drilling, as this helps prevent heat buildup and reduces the risk of damaging the glass. Double-check that all your tools are ready and functioning properly before proceeding to drill.
Step 4: Start Drilling
Apply light pressure and begin drilling at a low speed. Allow the drill bit to make gentle contact with the glass, then increase the pressure gradually as you continue to drill. It’s essential to maintain consistent pressure and speed throughout the process to prevent any sudden movements that could cause the glass to crack or shatter.
Remember to keep spraying water on the surface while drilling to prevent heat buildup and lubricate the area. This will also help clear away any debris or shards created during drilling.
Step 5: Monitor Your Progress
Stay aware of your progress by frequently checking on how deep you have drilled into the glass. You can do this by stopping and lifting the drill slightly to see the hole’s depth. If necessary, you can reposition the drill bit or adjust your drilling technique for better results. Continue drilling until you have reached the desired depth.
The time it takes to drill through safety glass will vary depending on the size of the hole and the thickness of the glass. Be patient and avoid rushing through this step as haste can lead to mistakes and accidents.

Step 6: Clear Away Any Debris
Once you have drilled through the safety glass, remove any remaining debris or shards from the surface. Use a cloth or brush to gently wipe away any loose particles, then spray water over the area to clear away any stubborn pieces.
If necessary, you can also use a small file or sandpaper to smooth out any rough edges around the hole. This will help prevent injuries and ensure a clean finish.
Step 7: Remove the Tape and Clean the Glass
Once you have cleared away all debris, carefully remove the tape covering the hole. If any adhesive residue remains, use a glass cleaner or rubbing alcohol to wipe it off.
Next, clean the entire surface of the safety glass to remove any remaining dust or particles. This will ensure that your finished project looks professional and free of any imperfections.
Step 8: Repeat for Additional Holes
If you need to drill multiple holes in safety glass, repeat the above steps for each hole. Remember to measure and mark each spot accurately and take breaks in between drilling to avoid overheating the drill bit or surface.
Following these steps on How to drill holes in safety glass will help you successfully drill holes in safety glass without any accidents or damage. However, if you’re uncomfortable with the process or do not have the necessary tools, it’s best to seek professional assistance for your project. Safety should always be a top priority when working with potentially hazardous materials like safety glass. So, it is crucial to follow all safety precautions and use the right tools and techniques to ensure a safe and successful outcome. Happy drilling!
Additional Tips
- If possible, use a drill press instead of a hand-held power drill for increased accuracy and stability.
- Use plenty of water while drilling to prevent heat buildup and reduce the risk of damaging the glass.
- Take breaks in between drilling to avoid overheating the drill bit or surface.
- Practice on a scrap piece of safety glass before attempting to drill on your final project. This will help you become more comfortable with the process and avoid mistakes. – Always follow the manufacturer’s instructions and recommended guidelines when using any tools or equipment.
- In case of any accidents or injuries, seek medical attention immediately.
- Dispose of safety glass scraps and debris properly to avoid any potential harm to yourself or others. – Be patient and take your time to ensure a clean and accurate hole in the safety glass. Rushing can lead to mistakes and accidents.
- When choosing a diamond-tipped drill bit, opt for one specifically designed for drilling glass or tile as it will provide the best results.
- If possible, have a helper hold the safety glass steady while you drill to ensure better control and accuracy.
- After completing your project, store all tools and equipment safely to avoid any accidents or damage.
Frequently Asked Questions
Q1: Can I Use a Regular Drill Bit to Drill Holes in Safety Glass?
A: No, it is not recommended to use a regular drill bit for drilling safety glass as it can easily crack or shatter the glass. It is best to use a diamond-tipped drill bit specifically designed for drilling glass or tile.
Q2: What Is the Best Way to Prevent Glass From Cracking While Drilling?
A: The best way to prevent glass from cracking while drilling is by using plenty of water to cool the surface and lubricate the area. It’s also essential to maintain consistent pressure and speed while drilling and avoid sudden movements that could cause damage.
Q3: How Long Does It Take to Drill a Hole in Safety Glass?
A: The time it takes to drill a hole in safety glass can vary depending on factors such as the size of the hole, the thickness of the glass, and the type of drill bit used. On average, it can take anywhere from 5-15 minutes per hole. It’s important to take breaks in between drilling to avoid overheating the drill bit or surface and ensure better accuracy.
Conclusion
Drilling holes in safety glass can seem like a daunting task, but with the right preparation, tools, and techniques, it becomes a manageable and safe process. By following the detailed steps on How to drill holes in safety glass outlined in this guide and adhering to key safety precautions, you can achieve precise and professional results. Always prioritize patience and accuracy, ensuring that every action is deliberate and controlled. If in doubt, don’t hesitate to consult a professional for assistance.
With careful planning and execution, your project involving safety glass will be completed successfully and safely.