

Have you ever needed to open a tubular lock but need help knowing where to begin? Drilling out an internal combination lock can be a challenging process. Fortunately, with the right tools and instructions, it is fairly simple.
Whether you are attempting to open a locker, safe, or other locked container with a tubular lock, here are a few steps to do it.
In this blog post, we’ll share our step-by-step guide detailing how to drill out a tubular lock safely and quickly. We’ll go over what type of drill bits should be used for different types of locks and help you identify which way the bit needs to travel to unlock your particular lock model. By the end of this article, you’ll have all the information necessary to get through any seemingly impenetrable tubular locks easily!
What Will You Need?
Before you begin, be sure to gather the necessary supplies. You’ll need the following:
- A drill
- 3/16-inch or 5/16-inch high speed steel (HSS) drills (depending on the size of the lock barrel)
- Safety goggles
- Work gloves
- An adjustable wrench and a flathead screwdriver (optional)
- A lubricant, such as WD-40
Once you have all the necessary supplies ready, it’s time to start drilling.
10 Easy Steps on How to Drill Out a Tubular Lock
Step 1. Safety first:
Always remember to put on your safety goggles and work gloves before you start drilling. This will protect your eyes from flying metal fragments and your hands from any accidental slippage of tools. If you have long hair, it’s also a good idea to tie it back out of the way.

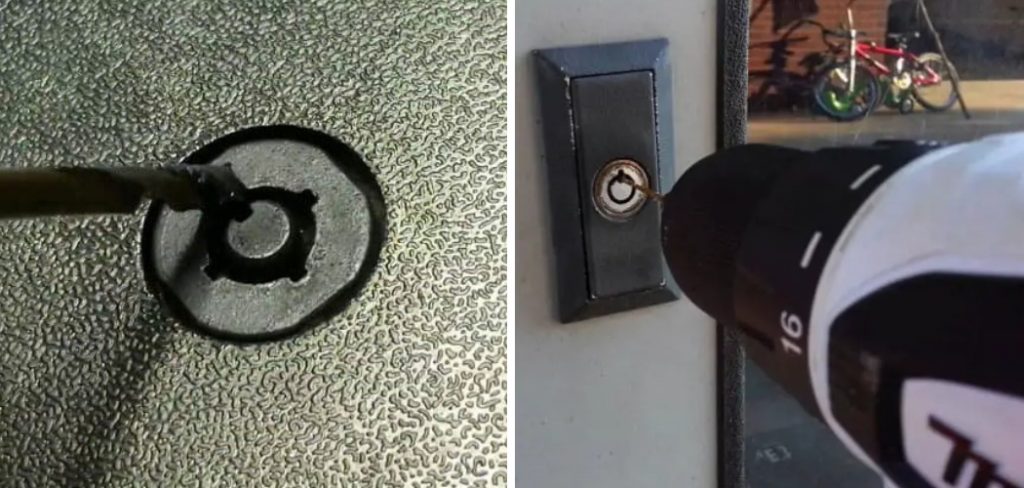
Step 2. Locate the drill point:
Using your adjustable wrench or flathead screwdriver, loosen the screws on both sides of the lock and remove them. This will expose the tubular lock mechanism and reveal where to place your drill bit. Try to find the center of the lock, as this is usually where you should start drilling.
Step 3. Lubricate the Lock:
Before you begin drilling, it’s crucial to lubricate the lock. Apply a small amount of WD-40 (or your preferred lubricant) directly into the lock hole. This step may seem insignificant, but it is essential as it reduces friction between the drill bit and the lock, smoother the drilling process, and prevents the drill bit from overheating.
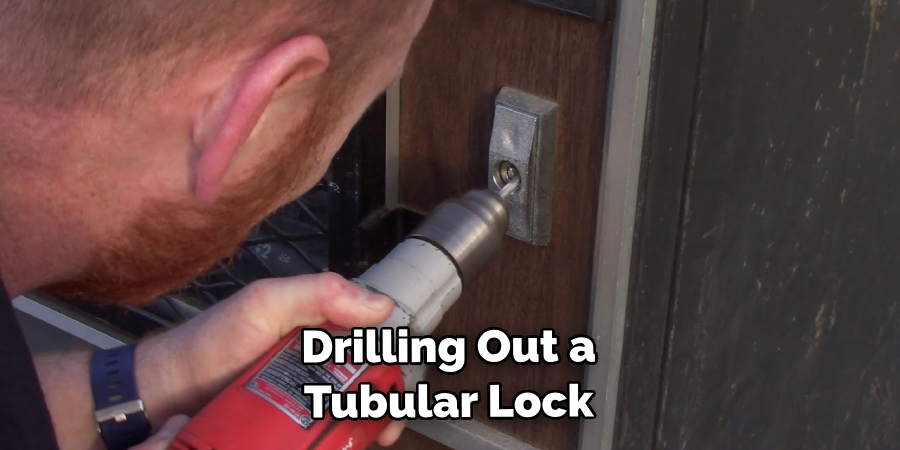
Step 4. Begin Drilling:
Now that you’ve prepared your lock, it’s time to start drilling. Place your chosen drill bit into the drill. Make sure it is securely tightened. Position the drill bit at the center point you identified earlier on the lock. Holding the drill firmly, begin slowly and increase your speed gradually. The idea is to apply consistent pressure, but not so much that you risk breaking the bit. If the drill bit gets stuck, reverse the drill a bit to loosen it and continue drilling. Remember, patience is key in this step. It may take a few minutes to drill through the lock completely.
Step 5. Clean the Drilling Area:
After successfully drilling through the lock, it’s important to clean any metal shavings or debris that may have accumulated during the process. Use a can of compressed air to blow out the lock and surrounding area. Be mindful not to touch shavings, as they can be sharp and potentially harmful. If using compressed air isn’t an option, consider using a small brush. Be sure to handle the drilled lock carefully, as the edges may be sharp from the drilling process.

Step 6. Test the Mechanism:
Now that the lock has been drilled through, you should be able to move the locking mechanism. Use a flathead screwdriver to manipulate the mechanism inside the lock. In most cases, it should turn quite easily. If there is any resistance, you may need to clear more debris or drill a bit more. Once the mechanism moves freely, your lock should be open. Remember to handle with caution as the internal components may be sharp from the drilling process.
Step 7. Replace the Lock:
Having successfully drilled and opened your lock, it’s important to remember that it is now damaged and must be replaced to ensure security. Be sure to measure the old lock carefully or take it with you when purchasing a replacement. This will help ensure that the new lock fits correctly. Once you have the new lock, follow the manufacturer’s instructions to install it. Be sure to test the new lock a few times to confirm it’s working properly before you close up and lock your container.
Step 8. Dispose of the Drilled Lock Responsibly:
Remember to dispose of the old one responsibly once you have replaced your drilled lock with a new one. The metal components of the lock can often be recycled, so consider taking it to a local recycling center. Alternatively, if the lock is thoroughly damaged and can’t be recycled, ensure that you dispose of it in a way that complies with local waste disposal regulations. Be mindful of safety when disposing of the lock, as the drilled parts may be sharp.
Step 9. Clean Up Your Work Area:
After completing the drilling procedure and replacing the lock, cleaning up your work area is important. Be sure to collect all tools and store them safely. Remember to sweep or vacuum the area to remove any lingering metal shavings or debris from the drilling process. Safety should be a priority, even after the job is done. This step not only ensures a safe environment but also helps to keep your tools in good condition for future use.
Step 10. Review and Reflect:
After you’ve tidied up your workspace, take a moment to review the process and reflect on your work. This step is vital to improving your skills and getting better at handling similar tasks in the future. Think about what you did well and what could have been done differently. Was there a point where you struggled or felt unsure? How could you approach it better next time?
Drilling out a tubular lock can be a complex task, but you can handle such challenges more smoothly with practice and reflection. Remember always to follow safety protocols throughout every step of the process. Your safety is paramount, so never rush or skip steps to save time. Patience, preparation, and careful execution will always yield the best results.
By following these steps, you should be able to drill out a tubular lock with ease. Remember to take your safety precautions seriously and follow the manufacturer’s instructions when installing a new lock. With enough practice, you’ll soon become an expert in drilling locks!
5 Additional Tips and Tricks
- It’s always best to use the highest quality drill bit you can find when drilling into a tubular lock. This will help reduce the time spent drilling and minimize damage to the lock.
- To get around an especially strong or thick lock case, try using a step-drill bit that offers different cutting diameter levels on one bit.
- When drilling out a tubular lock, it’s important to consider the size of the key pin and adjust your drill bit accordingly.
- If you’re having trouble drilling out the lock, try using a Steelman Hammer Drill. This powerful tool is designed to provide extra torque when drilling into tough materials such as metal. It can help to break up the internal components of a tubular lock more quickly and efficiently.
- Lastly, practicing safety whenever possible when attempting to drill out a tubular lock is important.
With these tips in mind, you can be sure that your lock-drilling project will go off without a hitch!
5 Things You Should Avoid
- One of the most important things to remember when drilling out a tubular lock is to avoid over-drilling or drilling for too long. Over-drilling can damage the lock’s internal components, making it more difficult (or even impossible) to open.
- Another thing you should avoid is using a drill bit that is too small for your job. Smaller drill bits will not be able to penetrate the lock, wasting time and energy effectively.
- Attempting to drill out a tubular lock without the proper safety equipment is also a big no-no. Ensure you have all the necessary gear (safety goggles, gloves, dust mask) before starting your project.
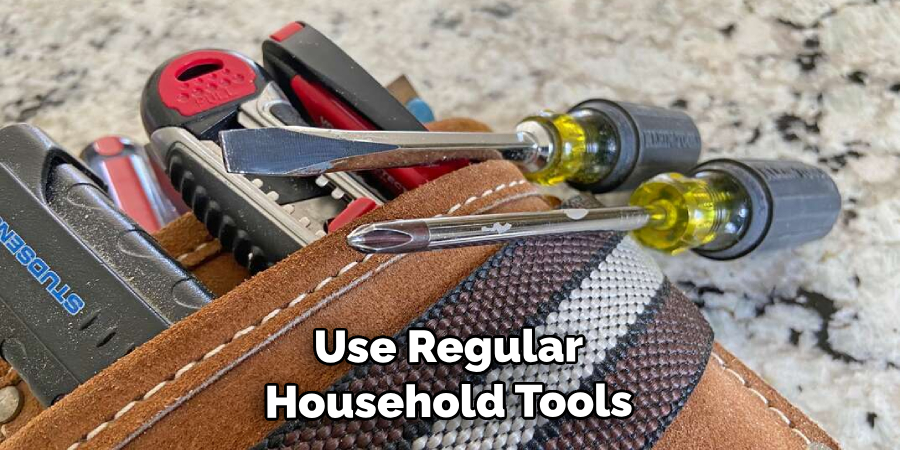
- Trying to use regular household tools such as a screwdriver or needle nose pliers to open the lock should also be avoided. While these may be able to open some locks, they will provide a different precision and accuracy than a drill bit would.
- Last but not least, never try to force open a tubular lock with excessive force. Doing so can cause permanent damage to the lock, making it impossible to open.
By following the tips and tricks outlined above, you can be sure that you will have a successful experience with drilling out a tubular lock!
Conclusion
In conclusion, drilling out a tubular lock seems intimidating, but with the right tool and know-how, it can be done easily. Take the time to gather all the necessary materials and tools, then watch a tutorial or two. That way, you’ll be fully prepared with a new understanding of how to drill out your lock properly.
Who knows—you may even find yourself in a situation one day where you must devise a quick solution that requires these same techniques. So why not give it a try today? You have nothing to lose by trying it out once before you need it.
Hopefully, this guide has helped you understand the basics of how to drill out a tubular lock. Remember always to practice safety first and remember these tips for an efficient and successful experience. Now get out there and drill away!
About
Safety Fic is a distinguished figure in the world of Diy design, with a decade of expertise creating innovative and sustainable Diy solutions. His professional focus lies in merging traditional craftsmanship with modern manufacturing techniques, fostering designs that are both practical and environmentally conscious. As the author of diy, Safety Fic delves into the art and science of Safety Fic-making, inspiring artisans and industry professionals alike.
Education RMIT University
(Melbourne, Australia) Associate Degree in Design (Safety Fic) Focus on sustainable design, industry-driven projects, and practical craftsmanship. Gained hands-on experience with traditional and digital manufacturing tools, such as CAD and CNC software.
Nottingham Trent University
(United Kingdom) Bachelor’s in diyfastly.com and Product Design (Honors) Specialized in product design with a focus on blending creativity with production techniques. Participated in industry projects, working with companies like John Lewis and Vitsoe to gain real-world insights.
Publications and Impact
In diy, Safety Fic his insights on indoor design processes, materials, and strategies for efficient production. His writing bridges the gap between artisan knowledge and modern industry needs, making it a must-read for both budding designers and seasoned professionals.